


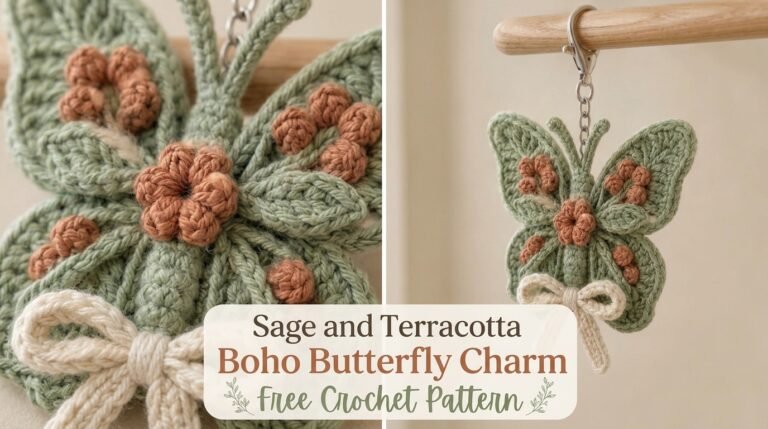
Bag charms turn ordinary totes into personality statements, and this honeybee garden butterfly charm delivers pure whimsy without the fuss. Picture tiny layered blooms cascading into a leafy branch that hints at a butterfly’s soft flutter through a sunlit garden. You can whip one up in under an hour once the petal rhythm clicks, then clip it to keys, bags, or even a gift package for instant charm overload.
Why You’ll Love This Crochet Flower Charm Pattern
This little project checks every box for busy crafters who still want something that looks fancy. The finished piece hangs about five inches from clasp to branch tip—big enough to notice, small enough that it never overwhelms your bag.
Stitch-wise it stays beginner-friendly. If single crochet and double crochet already live in your muscle memory, you’re set. The petals form with a simple round technique, and the puffy centers use an easy bobble that I’ll break down so nobody has to guess.

Every piece stays pocket-sized, which means you can stash the whole thing in a project pouch and sneak stitches during lunch or while the credits roll. Scrap yarn works perfectly here too—each color needs only a handful of yards.
Materials Needed for Your Crochet Keychain
Grab these and you’re ready to roll.
Yarn:
- Light pink worsted weight (about 15 yards) for the large flower petals
- Pale yellow worsted weight (about 5 yards) for the large flower center
- White worsted weight (about 10 yards) for the small flower petals
- Yellow or soft pink worsted weight (about 3 yards) for the small flower center
- Dark brown worsted weight (about 8 yards) for the branch
- Sage green worsted weight (about 5 yards) for the leaves
Cotton or cotton-blend yarn gives the cleanest stitch definition for these tiny details. A lightly textured yarn looks especially nice up close.
Tools:
- 3.5 mm (E/4) crochet hook
- Tapestry needle
- Small gold swivel lobster clasp (around 1.5 inches)
- Three small gold jump rings (6–8 mm)
- Jewelry pliers (optional but handy)
- Scissors
- Stitch marker (optional)
That’s the entire shopping list. No exotic supplies required.
Abbreviations and Stitch Definitions
Here’s every stitch you’ll meet so nothing feels mysterious.
- Ch = Chain. Yarn over, pull through the loop on your hook.
- Sl st = Slip stitch. Insert hook, yarn over, pull through both the stitch and the loop on the hook in one go.
- Sc = Single crochet. Insert hook, yarn over, pull up a loop, yarn over, pull through both loops.
- Hdc = Half double crochet. Yarn over, insert hook, yarn over, pull up a loop, yarn over, pull through all three loops.
- Dc = Double crochet. Yarn over, insert hook, yarn over, pull up a loop, yarn over, pull through two, yarn over, pull through the last two.
- Bobble = Work five half-finished double crochets into the same stitch, then yarn over and pull through all loops at once. Creates that cute puffy center.
- Magic ring = Adjustable starting loop that closes tight. Prefer the chain-4 ring method? That works too.
Practice the bobble once on a scrap and you’ll never forget it.
Large Pink Flower Pattern (Make 1)
This top flower sets the garden mood with five soft petals and a textured center that catches the light like a tiny honeycomb.

Flower Center (Yellow)
Round 1: With pale yellow, make a magic ring. Ch 1 (does not count as a stitch), work 6 sc into the ring. Pull tight. Sl st to first sc. (6 sts)
Round 2: Ch 1. Work one bobble in every stitch around. For each bobble: yarn over, insert hook, yarn over, pull up a loop, yarn over, pull through two—repeat that sequence four more times in the same stitch so you have six loops on the hook, then yarn over and pull through all six. Ch 1 to lock it. Six bobbles total. Sl st to first bobble. Fasten off, leave a 6-inch tail for sewing.
Flower Petals (Pink)
Round 1: With light pink, magic ring. Ch 1, 5 sc into the ring. Pull closed. Sl st to first sc. (5 sts)
Round 2: Ch 1, 2 sc in each stitch around. Sl st to first sc. (10 sts)
Round 3 (Petals): In the first stitch work (sl st, ch 2, 2 dc, ch 2, sl st). Skip the next stitch. Repeat that petal sequence in every other stitch until you have five petals. Sl st to the first slip stitch to join. Fasten off and weave the end.
If the petals cup too much, bump up half a hook size. They should rest almost flat with just a gentle curve.
Assembly
Center the yellow bobble piece on the pink flower. Use the yellow tail to sew it down with small stitches around the edge. Weave every end securely so nothing works loose later.
Small White Flower Pattern (Make 1)
This smaller bloom sits just below the pink one and keeps the same construction, only scaled down for that cascading garden look.
Flower Center (Yellow or Pink)
Round 1: Magic ring with your chosen center color. Ch 1, 5 sc into the ring. Pull closed. Sl st to first sc. (5 sts)
Round 2: Ch 1, work one bobble in each stitch around using the same bobble method. Sl st to first bobble. Fasten off, leave a tail for sewing.
Flower Petals (White)
Round 1: With white, magic ring. Ch 1, 5 sc into the ring. Pull closed. Sl st to first sc. (5 sts)
Round 2: In every stitch work (sl st, ch 2, 1 dc, ch 2, sl st). Five petals total. Sl st to the first slip stitch. Fasten off and weave the end.
Assembly
Sew the center onto the white flower exactly as you did for the large one. Keep the stitches small and even.
Branch and Leaves Pattern
The branch gives the whole charm that organic garden feel—basically a firm cord with two tiny leaves that angle outward like a butterfly just landed.
Branch (Brown)
Row 1: With dark brown, ch 15. Starting in the second chain from the hook, slip stitch in each chain across. (14 slip stitches). Fasten off, leave a 4-inch tail. The branch should feel firm yet still a little flexible.
Leaves (Sage Green)
Make two. Ch 6. Starting in the second chain from the hook: sl st, sc, hdc, sc, sl st. One pointed leaf done. Fasten off, leave a tail for attaching.
Want slightly bigger leaves? Chain 7 and work sl st, sc, hdc, dc, hdc, sl st instead.
Attaching the Leaves
Thread a tapestry needle with the leaf tails. Sew one leaf to each side of the branch about one-third of the way up from the bottom. Angle them outward so they look like they grew there naturally.
Finishing and Assembly
Time to turn the separate pieces into one cascading charm.
Step 1: Lay everything out—large pink flower, small white flower, branch with leaves, clasp, and jump rings.
Step 2: Open one jump ring with pliers (twist, never pull apart). Thread it through a top stitch of the large pink flower and through the clasp loop. Close the ring.
Step 3: Use the second jump ring to join the bottom of the large flower to the top of the small white flower.
Step 4: Connect the bottom of the white flower to the top of the branch with the last jump ring.
No jump rings on hand? Chain 5 or 6 with matching yarn, form a small loop, and sew the ends firmly to each piece. Works just as well and stays soft.
Customization Ideas for Your Flower Charm
Once the basic construction feels familiar, play around.
- Swap the pink and white for classic daisy yellow-and-white or go bold with coral and turquoise.
- Add a third smaller flower for a longer cascade.
- Replace the bobble centers with tiny beads or buttons for extra sparkle.
- Make a single flower plus branch if you want something that finishes even faster.
- Shift the palette for seasons—warm oranges and burgundies for fall, soft pastels for spring, reds and greens for the holidays.
Variegated yarn in the petals creates a natural ombre that looks especially garden-like.
Tips for Crochet Beginners
Tiny projects forgive almost nothing, so a few habits help a lot.
Keep tension even but not death-grip tight. If your hook refuses to slide into the next stitch, loosen up. The magic ring can feel awkward at first—chain 4 and slip-stitch into a ring instead and nobody will ever know. Blocking isn’t required, yet a light steam or damp-and-pin session can coax curly petals into better shape. Count stitches at the end of every round, especially the petal rounds, so the spacing stays even.

IMO the first one always teaches you more than any written tip. The second one usually looks twice as polished.
You Might Also Like
- Lemon Citrus Summer Charm Bracelet Free Crochet Pattern
- Winter White Camellia Crochet Bracelet Free Pattern
- Mint Green Woven Bag on Vanity Free Pattern
- Classic Black and Gold Luxe Braided Clutch Free Crochet Pattern
FAQ’s
How long does this honeybee garden butterfly charm actually take?
Most people finish the first one in 45–75 minutes. Once the petal sequence becomes muscle memory, later versions drop closer to 40 minutes.
Can I use cotton yarn only?
Yes—and it’s ideal. Cotton holds its shape and shows every stitch clearly. Acrylic works in a pinch but can look a little fuzzier on the tiny petals.
What if my petals cup or curl?
Go up half a hook size or block them gently. A light spritz of water and a few minutes under a heavy book usually settles them.
Do I really need jump rings?
No. Yarn loops made from short chains work fine and keep the whole charm soft and washable.
Is this pattern safe for gifts that might get chewed by toddlers?
Skip the metal hardware and sew the pieces together with yarn only. Still cute, fully soft, and safer for little hands.
Can I sell the finished charms?
Absolutely. The pattern is free for personal or commercial finished-item use. Just don’t resell the written instructions themselves.
Final Thoughts
This honeybee garden butterfly charm proves that simple stitches can still look like they came from a fancy boutique. The layered blooms, the puffy centers, and that little branch with leaves all team up to create something sweet and gift-worthy. Make one, then another in different colors, because once friends see it they start asking for their own. Tag your finished versions wherever you share them—seeing the color combos people invent is half the fun. Now grab that scrap yarn and start the first petal. Your bag (and your keys) will thank you.



Leave a Reply
You must be logged in to post a comment.