


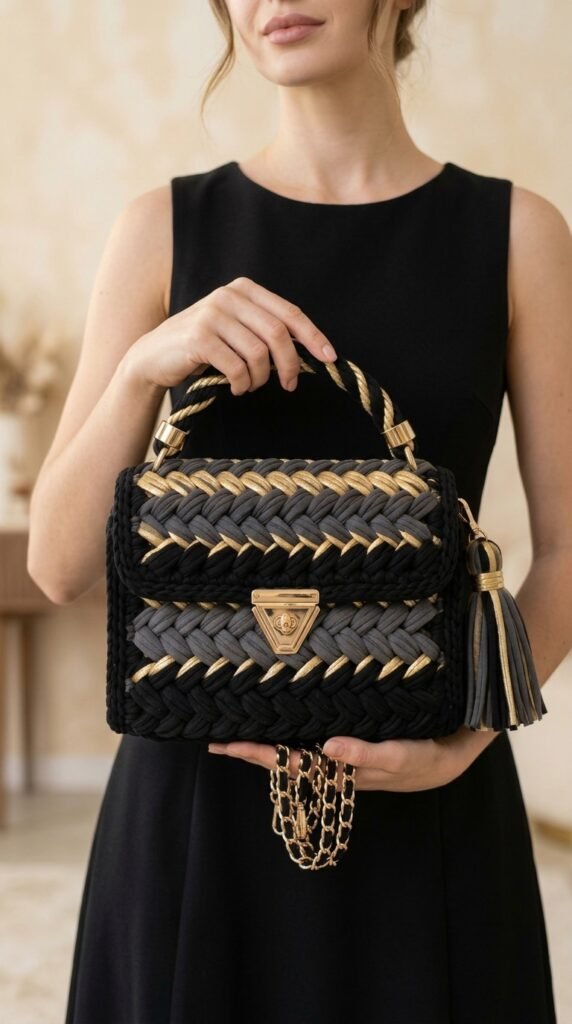
Ready to crochet a clutch that looks like it walked straight out of a high-end boutique? This classic black and gold luxe braided clutch delivers serious designer energy with zero designer markup. The braided texture, metallic shimmer, and structured shape make it the kind of bag you reach for when you want to feel put-together without trying too hard. Grab your t-shirt yarn and let’s make something that turns heads.
About This Luxe Braided Clutch Crochet Pattern
This structured beauty relies on thick t-shirt yarn (trapillo or ribbon yarn to some of us) for that dense, almost leather-like fabric. The diagonal braided look comes from a clever herringbone slip stitch combo that tricks the eye into thinking you spent hours weaving. Black, charcoal, and metallic gold stripes do the rest of the heavy lifting.
You work the body in continuous rounds around a solid base, then add a flap and hardware for that polished finish. Intermediate skill level is the sweet spot—basic stitches plus steady tension get you there. Color changes stay simple because you’re striping, not juggling intarsia nightmares.
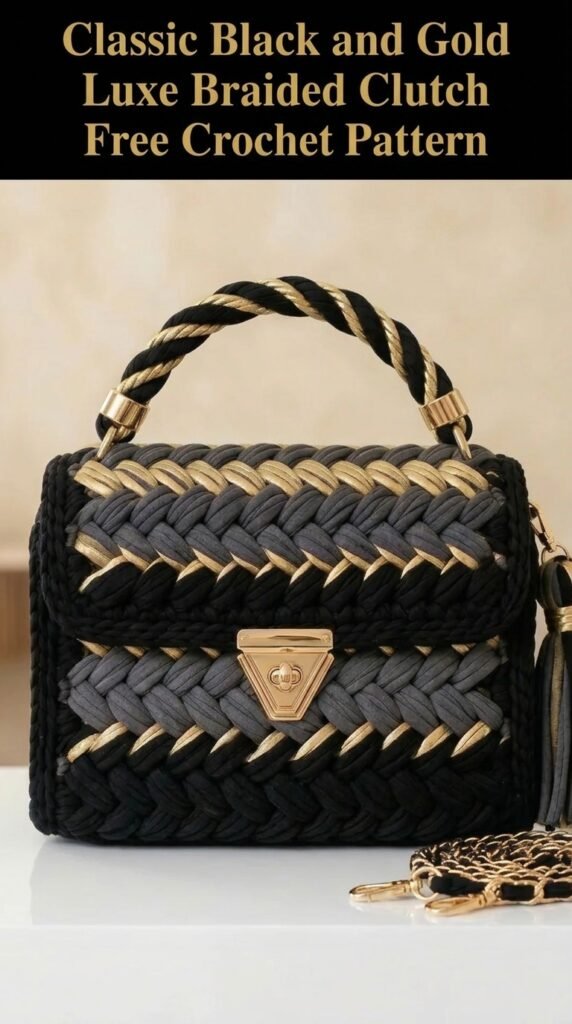
IMO, the best part is how quickly it looks expensive once the gold hits the fabric. One finished clutch and you’ll wonder why you ever paid retail for accessories.
Materials Needed for Your Braided Clutch
Yarn
Stock up on t-shirt yarn or ribbon yarn roughly 7-8 mm wide when flat. You’ll need:
- Black: about 200 yards
- Charcoal grey: about 150 yards
- Metallic gold or champagne: about 100 yards
Hoooked Zpagetti, Tek-Tek, or similar brands work great. Consistency matters more than brand name—grab what feels good in your hands.
Hook
A 10 mm (US N/P-15) hook handles the bulk perfectly. Go smaller if your fabric feels too loose. Gauge is your friend here.
Notions
These finishing pieces elevate the whole project:
- Rectangular bag base insert, roughly 7 by 3.5 inches
- Gold-tone push-lock clasp about 1.5 inches
- Two gold D-rings, 0.75 inch
- Two gold bag-handle connectors
- Gold chain strap with leather weave, around 45 inches
- Grey leather or faux-leather tassel with gold hardware
- Tapestry needle, stitch markers, and scissors
Pro tip: lay everything out before you start so nothing goes missing mid-project. Nothing kills the vibe faster than hunting for a D-ring at 11 p.m.
Gauge
Aim for 10 stitches and 8 rows in 4 inches using the herringbone slip stitch. Dense fabric equals structure. If your swatch feels floppy, drop a hook size. T-shirt yarn forgives a little, but gauge still decides whether your clutch holds its shape or sags like last week’s leftovers.
Finished Dimensions
Expect roughly 8 inches wide, 6 inches tall (without handle), and 3.5 inches deep. Perfect evening size—holds your phone, cards, lip balm, and maybe one emergency chocolate. Nothing more, nothing less.
Abbreviations and Stitch Definitions
Keep these handy so you never have to pause mid-row:
- ch – chain
- sl st – slip stitch
- sc – single crochet
- hbss – herringbone slip stitch (the texture hero)
- st(s) – stitch(es)
- rep – repeat
- RS – right side
- WS – wrong side
Once the abbreviations click, the pattern flows. Promise.
Special Technique: Herringbone Slip Stitch
This stitch creates the braided magic. Here’s the move:
- Insert hook into the next stitch.
- Yarn over and pull through the stitch.
- Before finishing, slide the hook under the back bump of the stitch you just made.
- Pull the yarn through everything on the hook in one smooth motion.
It feels weird for the first ten stitches. Then your hands suddenly get it. Take it slow on row one. After that, the rhythm turns almost meditative. Can’t nail the full herringbone? Work regular slip stitches through the back loop only. You’ll still get gorgeous texture—just a slightly different vibe.
Pattern Instructions
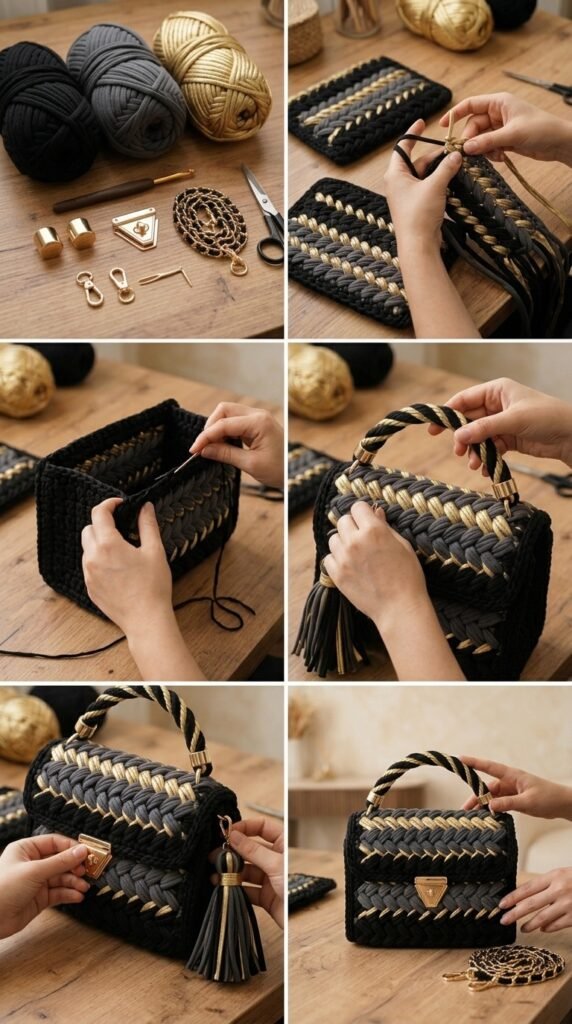
The Base
Start with black yarn.
Row 1: Chain 21. Single crochet in the second chain from the hook and across (20 sc).
Rows 2–10: Chain 1, turn, single crochet in each stitch across.
Fasten off. You now have a solid rectangle roughly 7 by 3.5 inches. Using a premade insert? Just work a slip-stitch border around it and attach your yarn to the holes. Either way works.
The Body
Join black yarn with a slip stitch at any corner of the base, right side facing. Chain 1.
Round 1: Work 20 sc along the long edge, 3 sc in the corner, 10 sc along the short edge, 3 sc in the corner, repeat around. Join with slip stitch to the first sc (72 sc total). Mark the first stitch and keep moving it up.
Round 2: Chain 1. Work herringbone slip stitch in the back loops only all the way around. Join.
Rounds 3–4: Repeat Round 2 in black.
Round 5: Switch to gold. Herringbone slip stitch around.
Round 6: Gold again.
Round 7: Switch to charcoal grey.
Rounds 8–9: Grey.
Round 10: Gold.
Round 11: Gold.
Round 12: Black.
Rounds 13–14: Black.
Round 15: Gold.
Round 16: Gold.
Round 17: Grey.
Rounds 18–20: Grey. Fasten off and weave in ends.
Those color bands create the luxe striped look while the herringbone does the braided illusion. Keep tension even and the fabric stays firm.
The Flap
Join black yarn on one long edge of the opening, starting about five stitches in from the corner. Chain 1.
Row 1: Herringbone slip stitch in the same stitch and the next 29 stitches (30 hbss).
Rows 2–3: Chain 1, turn, hbss across.
Row 4: Switch to gold, hbss across.
Row 5: Switch to grey, hbss across.
Rows 6–7: Grey.
Row 8: Gold.
Row 9: Black.
Rows 10–12: Black.
Edging: Chain 1 (do not turn). Single crochet down the side of the flap, 3 sc in the corner, across the bottom, 3 sc in the other corner, and up the remaining side. Fasten off.
The flap should sit neatly over the opening once the clasp goes on.
The Handle
Make two long chains of 80 stitches—one black, one gold. Fasten off both.
Hold them together, secure one end, and twist tightly. Fold the twisted rope in half so it twists back on itself. Secure the ends. Attach handle connectors to each side. Done. Instant statement handle.
Assembly and Finishing
Installing Hardware
- Mark the center of the bag front about two inches down from the top edge for the push-lock clasp.
- Make a small slit, push the prongs through, and secure inside.
- Align the matching piece on the flap and install the same way.
- Attach D-rings to the sides where the chain strap will connect.
- Clip the chain strap onto the D-rings.
- Secure the twisted handle with the connectors at the top corners.
- Add the tassel to one D-ring or the clasp for that final flourish.
Hardware turns “cute handmade bag” into “where did you buy that?”
Weaving in Ends
T-shirt yarn is bulky, so weave each end through at least three inches of stitches on the wrong side before trimming. The dense fabric locks everything in place.
Blocking (Optional)
No traditional wet blocking needed. A light steam from a few inches away relaxes any uneven stitches. Keep the iron or steamer away from direct contact—heat can melt or flatten the yarn.
Customization Ideas
Color swaps keep this pattern fresh. Navy and silver feel winter-ready. Blush and rose gold lean feminine and soft. Want bigger? Add stitches to the base chain (every five stitches roughly equals one extra inch of width) and work extra rounds for height.
Skip the metal hardware entirely if you prefer a softer look. Chain a simple button loop at the flap tip and sew on a bold decorative button instead. Instant change of personality.
Troubleshooting Tips
Uneven stitches? T-shirt yarn varies in width. Keep tension steady and embrace the handmade texture—perfection is overrated.
Floppy bag? Your gauge ran loose. Drop a hook size next time or spray the finished piece with fabric stiffener.
Messy color changes? Always finish the last stitch of the old color by yarning over with the new color. Clean joins every time.
Flap won’t lie flat? Pin it into shape and give it a gentle steam. The clasp weight helps too once installed.
Why This Pattern Works
Simple stitches plus smart design equal a bag that looks far more complicated than it is. The herringbone slip stitch creates the braided texture without any actual braiding. Strategic color placement makes the diagonals pop. Quality hardware finishes the story.
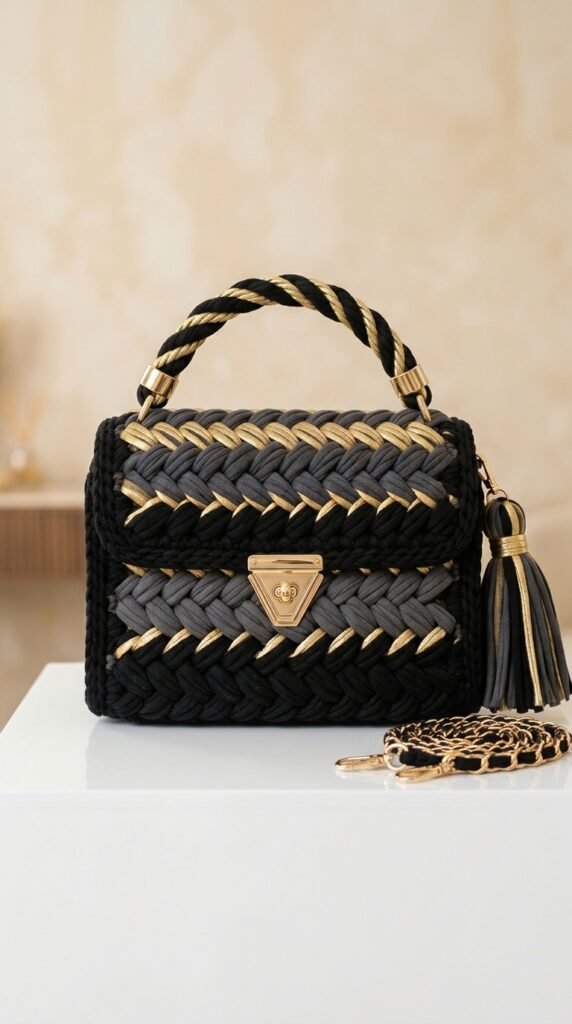
You don’t need decades of experience. You need patience, decent materials, and a willingness to trust the process. The first few rounds feel awkward. By the color changes you’ll be flying. That’s the beauty of a well-thought-out pattern.
You Might Also Like
- Forest Green Woodland Moon Purse with Antique Gold Free Crochet Pattern
- Classic Black Round Evening Bag Free Crochet Pattern
- Charcoal Gray Modern Tassel Crossbody Free Crochet Pattern
- Classic Black Woven Crossbody Free Crochet Pattern
FAQ’s
Can a confident beginner handle this pattern?
Yes, if you’re solid with single crochet, slip stitch, and basic color changes. The herringbone takes a little practice, but the rest is straightforward. Take the special stitch slow and you’ll be fine.
What if I can’t find metallic gold t-shirt yarn?
Champagne, bronze, or even a strong mustard yellow works. The contrast against black and charcoal is what matters most. Test a small swatch first so the shimmer still reads luxe.
Do I really need the bag base insert?
It helps a lot with structure, but you can crochet a dense single-crochet rectangle instead. Just make sure it’s firm enough to hold the shape.
How do I clean the finished clutch?
Spot clean with a damp cloth and mild soap. T-shirt yarn doesn’t love full immersion. Air dry flat and reshape while damp if needed.
Can I make the chain strap removable?
Absolutely. Use lobster clasps or similar connectors instead of permanent D-ring attachments. Then you can switch between the twisted handle and the chain depending on the outfit.
Is the finished bag sturdy enough for daily use?
With proper gauge and a solid base, yes. It’s built for evenings out more than grocery runs, but it holds up well to regular wear when treated with a little care.
Final Thoughts
There you have it—your roadmap to a black and gold braided clutch that looks like pure luxury. The stitches are satisfying, the result is impressive, and the compliments will keep coming. Grab that yarn, trust the process, and make something you’ll actually want to carry. Once you finish one, you’ll already be planning the next color combo. Happy crocheting!



Leave a Reply
You must be logged in to post a comment.