Classic Black Round Evening Bag Free Crochet Pattern
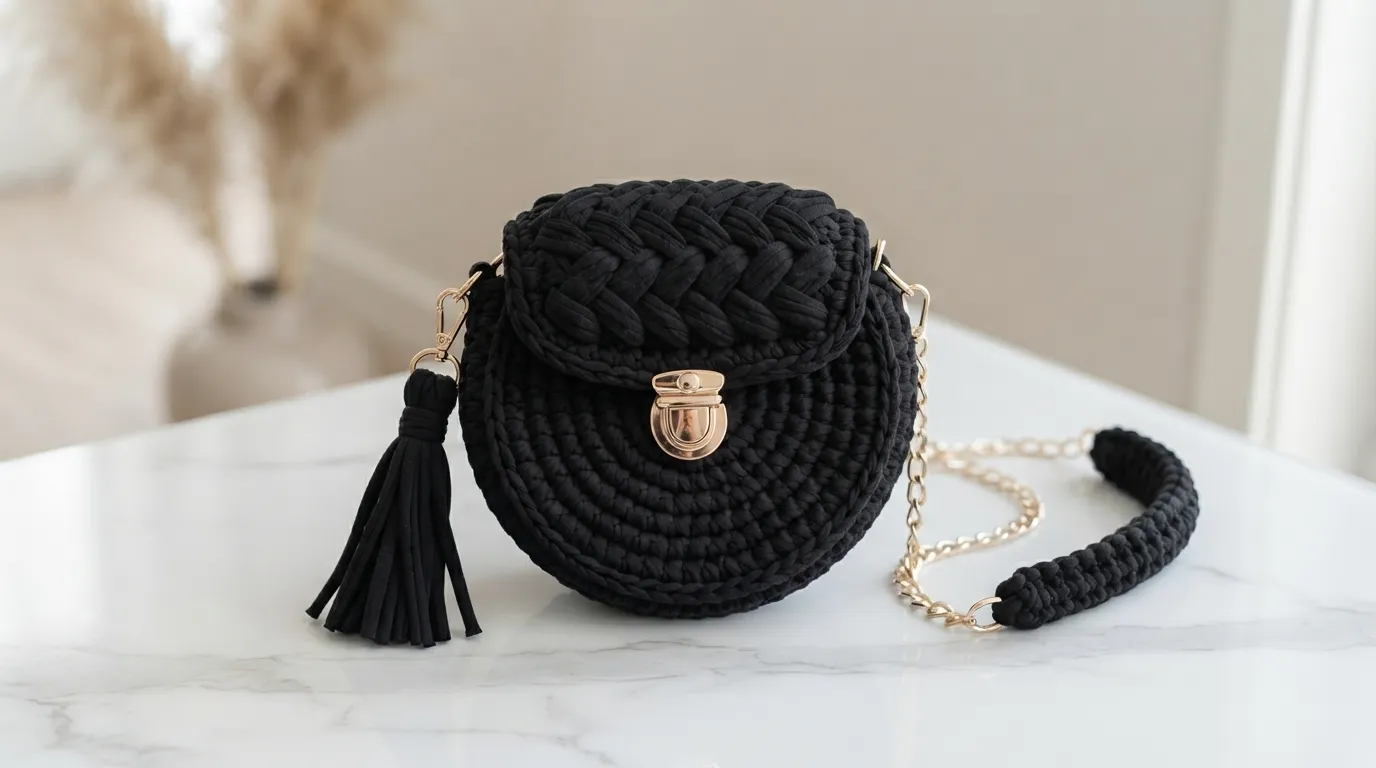
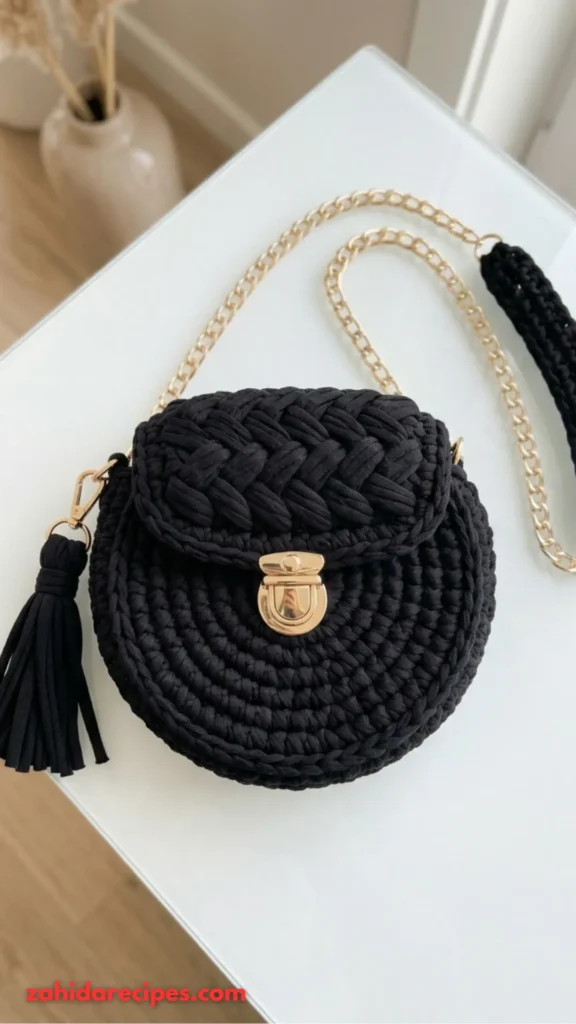
There’s something magic about making your own accessories. This classic black round evening bag is proof. It looks like it came from a fancy boutique, but you made it with your own two hands. And the best part? You can finish it in a weekend.
I made mine, clipped on a gold chain strap, and suddenly felt like I needed somewhere fancy to go. This bag has that effect. Let me show you exactly how to make one too.
Why This Crochet Bag Pattern Actually Works
So many crochet bags look, well, homemade. This one doesn’t. And here’s why.
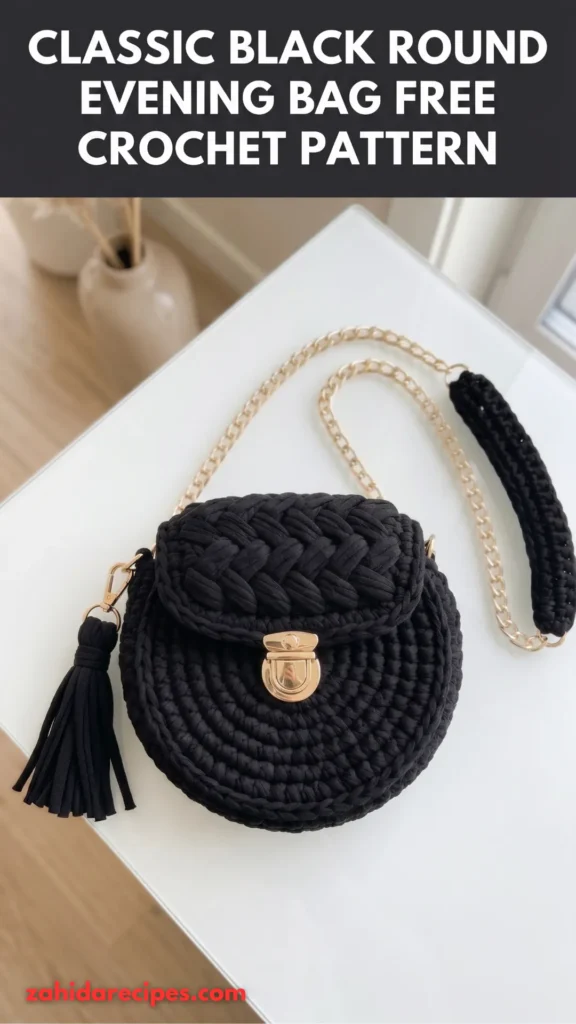
The body uses something called a waistcoat stitch. It’s also known as center post single crochet. This stitch creates a tight, structured fabric that looks almost like knitting. No holes for your lipstick to fall through. No floppy sides.
Then there’s the flap. It uses a herringbone half double crochet that gives a gorgeous braided texture. It screams designer. Your friends will ask where you bought it. You get to smile and say, “I made it.”
The yarn choice matters too. We’re using t-shirt yarn (also called trapillo or jersey yarn). It’s thick, it holds its shape, and it works up fast. No stiffening needed. No lining required unless you want one.
Add some gold hardware and you’ve got a bag that rivals anything in a store window.
Gather Your Supplies First
Don’t skip this part. Trust me, nothing kills the crochet vibe faster than getting halfway through and realizing you’re missing a clasp.
Here’s what you need:
Yarn:
- T-shirt yarn (trapillo or jersey yarn) in black — approximately 100-120 meters
Hook:
- 8.0mm crochet hook
Hardware:
- 1 push lock clasp (gold tone looks stunning with black)
- 1 gold chain strap with lobster claw clips
- 2 D-rings
- 1 lobster claw clasp for the tassel
- Small screwdriver (usually comes with the clasp)
Tools:
- Tapestry needle
- Stitch markers (get the bright ones — you’ll thank me later)
- Scissors
- Measuring tape
Optional:
- Fabric for lining
- Sewing needle and thread
Stitches You Need to Know
Before we dive in, let’s go over the stitches. Read through these carefully. They’ll make the pattern make sense.
Chain (ch)
The foundation stitch. Yarn over, pull through loop. Easy.
Slip Stitch (sl st)
Insert hook, yarn over, pull through both loops at once. Used for joining rounds.
Single Crochet (sc)
Insert hook into stitch, yarn over, pull up a loop (2 loops on hook), yarn over, pull through both loops.
Waistcoat Stitch (ws)
This is the star of the show. It’s a single crochet worked into the center V of the stitch below, not under the top two loops. Insert your hook between the two vertical posts (the “legs”) of the stitch below. This creates that tight, knit-like fabric.
Herringbone Half Double Crochet (hhdc)
Yarn over, insert hook into stitch, yarn over and pull through first loop on hook, yarn over and pull through remaining 2 loops. This creates a distinctive braided look.
Increase (inc)
Work 2 stitches into the same stitch.
Gauge Information (Don’t Skip This)
With t-shirt yarn and an 8.0mm hook, your gauge will determine the final size. The finished bag measures approximately 18cm (7 inches) in diameter and 6cm (2.5 inches) deep.
Your tension may vary. If your circle is way bigger or smaller after the base, adjust your hook size. Simple as that.
Step-by-Step Crochet Pattern
Alright, let’s make this bag. Grab your hook and let’s go.
Part 1: The Circular Base
We start with a magic ring. If magic rings make you want to cry, just chain 4 and join with a slip stitch to form a ring instead.
Round 1: Make a magic ring. Ch 1 (does not count as a stitch throughout). Work 6 sc into the ring. Pull ring closed. Join with sl st to first sc. (6 sts)
Round 2: Ch 1. Work 2 sc in each st around. Join with sl st. (12 sts)
Round 3: Ch 1. 1 sc in first st, 2 sc in next st. Repeat from * around. Join with sl st. (18 sts)
Round 4: Ch 1. 1 sc in next 2 sts, 2 sc in next st. Repeat from * around. Join with sl st. (24 sts)
Round 5: Ch 1. 1 sc in next 3 sts, 2 sc in next st. Repeat from * around. Join with sl st. (30 sts)
Round 6: Ch 1. 1 sc in next 4 sts, 2 sc in next st. Repeat from * around. Join with sl st. (36 sts)
Round 7: Ch 1. 1 sc in next 5 sts, 2 sc in next st. Repeat from * around. Join with sl st. (42 sts)
At this point, your circle should lay flat and measure approximately 14-16cm across. If it’s cupping or ruffling, adjust your tension or hook size.
Part 2: Building the Sides
Now we stop increasing and start building the walls. This is where the waistcoat stitch comes in.
Round 8: Working in the back loop only (this creates a defined edge at the base), work 1 sc in each st around. Do not join. Place stitch marker in first st and move it up each round. (42 sts)
Rounds 9-14: Switch to waistcoat stitch. Insert hook into the center V of each stitch below (between the two legs, not under the top loops). Work 1 ws in each st around. Continue moving your stitch marker. (42 sts each round)
After Round 14, your bag sides should measure approximately 6cm tall. Work additional rounds if you want a deeper bag.
Tip: The waistcoat stitch feels awkward at first. Take your time finding that center V. After a few stitches, it becomes second nature.
Part 3: Creating the Flap Opening
We need to create the opening and start shaping the flap. Count carefully here. Use stitch markers liberally.
Round 15: Work 21 ws (halfway around the bag). Ch 1, turn your work.
Row 16: Skip first st. Work 1 ws in each of the next 20 sts. Ch 1, turn. (20 sts)
This creates the back portion of the bag. The front half stays open for the flap to cover.
Part 4: The Herringbone Flap
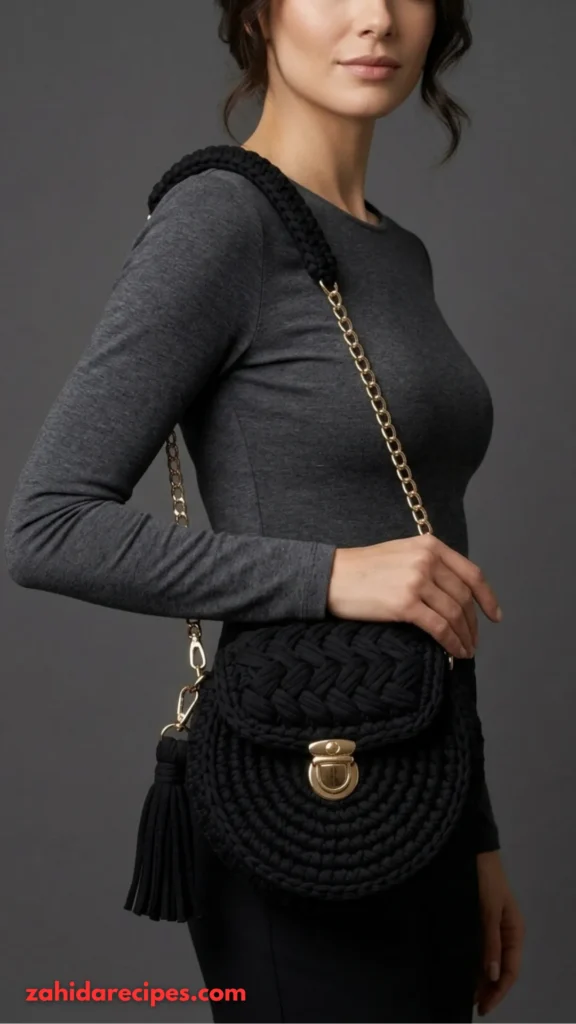
Now we work rows back and forth to create the decorative flap. The herringbone stitch gives this section its beautiful braided look.
Row 17: Work 1 hhdc in each st across. Ch 1, turn. (20 sts)
Row 18: Skip first st. Work 1 hhdc in each st to last st. Skip last st. Ch 1, turn. (18 sts)
Row 19: Work 1 hhdc in each st across. Ch 1, turn. (18 sts)
Row 20: Skip first st. Work 1 hhdc in each st to last st. Skip last st. Ch 1, turn. (16 sts)
Row 21: Work 1 hhdc in each st across. Ch 1, turn. (16 sts)
Row 22: Skip first st. Work 1 hhdc in each st to last st. Skip last st. Ch 1, turn. (14 sts)
Row 23: Work 1 hhdc in each st across. Ch 1, turn. (14 sts)
Row 24: Skip first st. Work 1 hhdc in each st to last st. Skip last st. (12 sts)
Fasten off and weave in ends.
Part 5: Flap Edging
To create a polished edge around the flap, join yarn at the corner where the flap meets the bag body. Work sl st evenly along the side of the flap, across the bottom curved edge, and up the other side. This creates a neat border and prevents stretching.
Fasten off and weave in ends.
Part 6: The Chain Strap Tab (Make 2)
These small tabs connect the chain strap to your bag using D-rings.
Row 1: Ch 8. Sc in 2nd ch from hook and each ch across. Ch 1, turn. (7 sts)
Rows 2-4: Sc in each st across. Ch 1, turn. (7 sts)
After Row 4, fold the tab in half over a D-ring. Using your tapestry needle, sew the ends together to secure the D-ring inside.
Attach one tab to each side of the bag at the point where the sides meet the flap. Sew securely using matching yarn.
Part 7: The Tassel
Cut 15-20 strips of t-shirt yarn, each approximately 25cm long. Fold them in half. Take a small piece of yarn and wrap it tightly around the folded bundle, about 2cm from the top, creating the tassel head. Secure with a knot.
Attach a lobster claw clasp to the top loop of the tassel. This lets you clip it onto one of the D-rings.
Part 8: Hardware Installation
Push Lock Clasp:
Position the push lock on the front center of the bag body, approximately 2cm below where the flap will rest. Use a small screwdriver to attach the back plate through the crochet fabric. Most push locks come with washers and screws.
Attach the corresponding latch portion to the flap, ensuring it aligns perfectly with the lock below. Test the closure several times before fully tightening.
Chain Strap:
Clip the chain strap to both D-rings using the attached lobster claws (most pre-made chain straps include these). If your chain doesn’t have clips, use additional jump rings and lobster claws.
Part 9: Optional Lining
For a truly professional finish, consider adding a fabric lining. Cut a circle of fabric slightly smaller than your bag base. Cut a rectangle to line the sides. Hand sew these pieces together, then whip stitch the lining to the inside of your bag along the top edge.
A lining protects the inside of your bag, hides any visible stitching, and prevents small items from poking through the crochet fabric.
Tips That Will Save Your Sanity
Working with t-shirt yarn: This yarn can be inconsistent in thickness. If you notice a thin section, try to position it at the base of your bag where it will be less visible.
Maintaining tension: T-shirt yarn stretches. Keep your tension firm and consistent, especially during the side rounds. If your bag seems floppy, try a smaller hook.
Counting stitches: With waistcoat stitch, counting can be tricky. Use multiple stitch markers and count frequently.
Blocking: You can gently steam block your finished bag to even out stitches. Hold your iron several inches away and let the steam relax the fabric.
Customization Ideas to Make It Yours
This crochet pattern works beautifully in countless variations. Here are some ideas:
- Color swap: Try navy, deep burgundy, or emerald green for a pop of color.
- Different hardware: Silver, rose gold, or antique brass change the whole vibe.
- Add beads: Sew small beads onto the flap for extra sparkle.
- Chain options: Try a shorter strap for a shoulder bag or a longer one for crossbody wear.
- Tassel variations: Use contrasting colors or add a bead at the top of the tassel.
You Might Also Like:
- Charcoal Gray Modern Tassel Crossbody Free Crochet Pattern
- Burgundy Wine Bobble Spiral Clutch Free Crochet Pattern
- Sage Green Earthy Tassel Bag Free Crochet Pattern
Final Thoughts
I absolutely love how this project turns out every time. The combination of the structured waistcoat stitch body, the decorative herringbone flap, and those gorgeous gold accents creates something truly special.
This bag proves that handmade accessories can look every bit as polished as store-bought pieces. Actually, I think they look better because they carry the story of your creativity and effort.
Thank you so much for choosing this pattern for your next project. I genuinely appreciate you being here and trusting me to guide you through the process.
When you finish your bag, I would absolutely love to see it. Tag me on Instagram or share a photo in our Facebook community. Seeing your creations is honestly the best part of sharing these patterns.
Happy crocheting, friend. You’ve got this.