

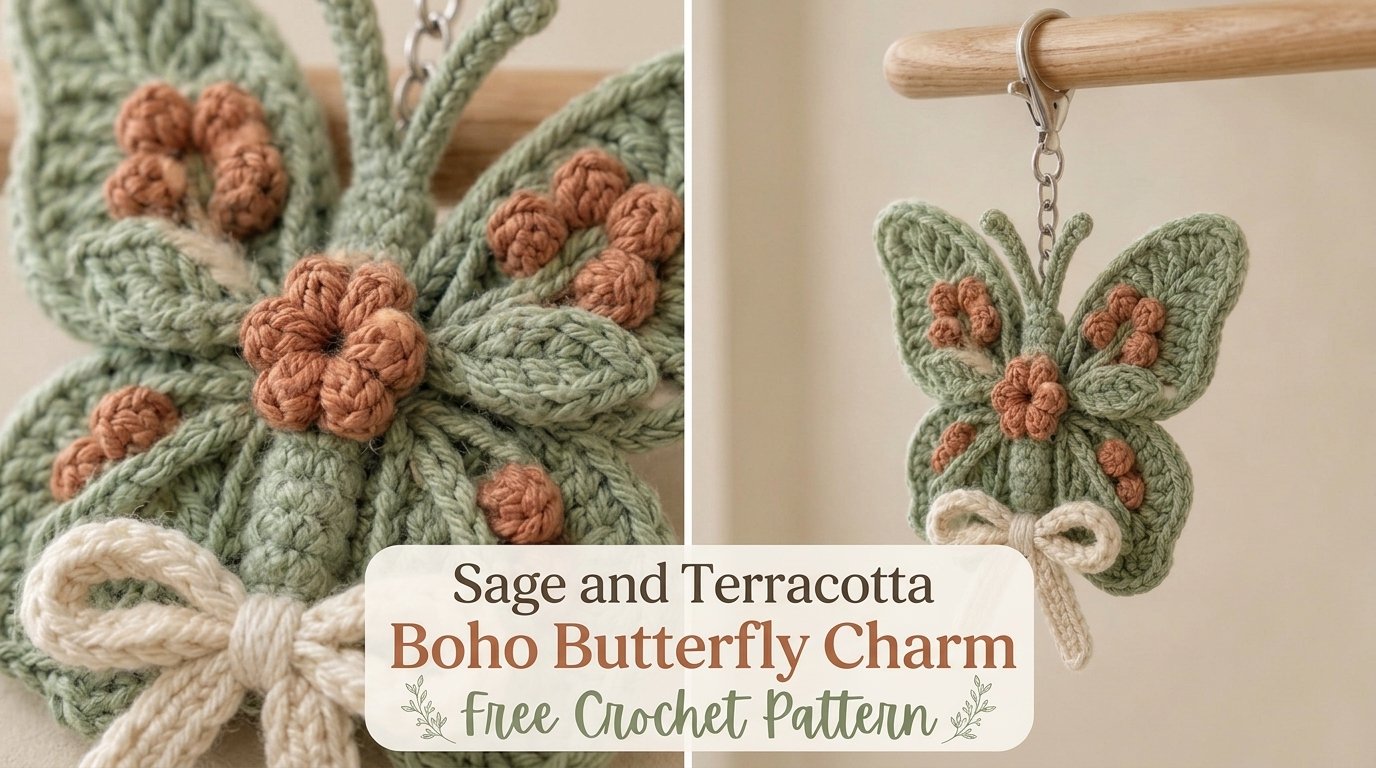
I was sitting on the porch last autumn with a cup of chai and a nearly empty skein of sage green yarn when the idea landed. A single butterfly had been resting on the terracotta pot of my rosemary plant all morning, wings slowly opening and closing in the late light. The soft green of its body against the warm clay color of the pot stuck with me. That quiet moment turned into this little charm.
I wanted something small enough to hang from a bag, pin to a jacket, or use as a gift-topper, yet detailed enough to feel special. Soft sage for the wings, rich terracotta for the body and antennae, a touch of texture so the wings look layered and a little wild. The result is this boho butterfly charm — free, complete, and ready for your hook.
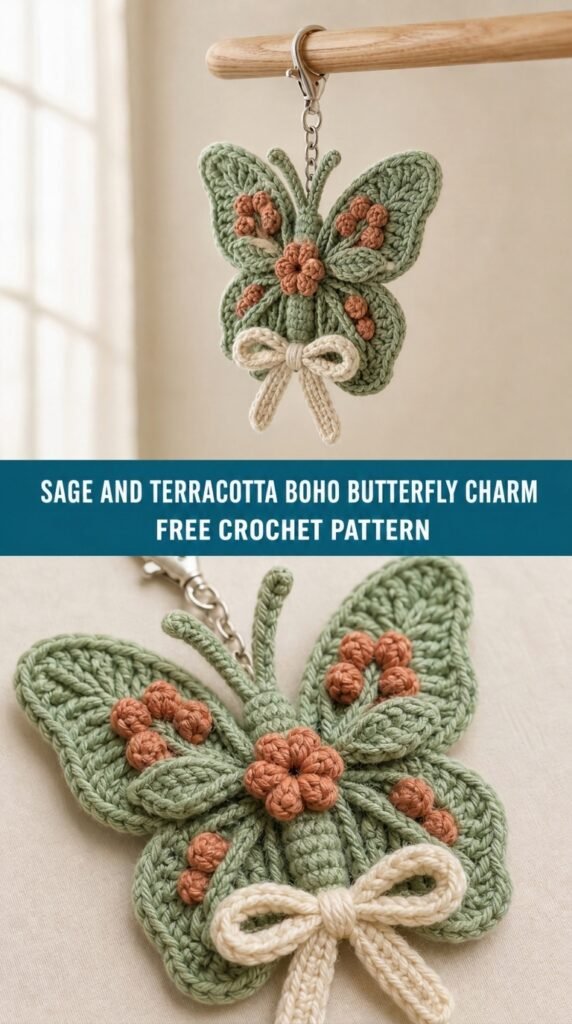
This pattern is written for the intermediate crocheter who is comfortable with working in the round, changing colors cleanly, and following a few short-row shaping techniques. The finished charm measures approximately 3.5 inches (9 cm) across the wings and 2.75 inches (7 cm) from top of antennae to bottom of body when blocked. It has a soft drape and a slightly dimensional feel thanks to the layered wing construction.
About This Pattern
The butterfly is worked in three main pieces: two upper wings, two lower wings, and a body that joins everything together. The wings are made in continuous rounds with short rows that create the natural scalloped edges. The body is a small oval worked in the round and then seamed to the wings. Tiny antennae are added last with simple chain stitches and optional beads.
Skill level sits solidly in the intermediate range. You will use single crochet, half double crochet, double crochet, front-post stitches for texture, and a bit of short-row shaping. Nothing is overly complex, but the color changes and shaping require attention. If you can follow a motif pattern with confidence, you will be fine.
Finished size after blocking:
- Wingspan: 3.5″ (9 cm)
- Body length including antennae: 2.75″ (7 cm)
The piece is lightweight and flexible, perfect for attaching to a bag strap, keychain, or even a hair clip.
Materials You’ll Need
Yarn
- Color A (Sage): approximately 25 yards (23 m) of DK weight yarn (light worsted / #3). I used a soft cotton-blend in a muted sage green.
- Color B (Terracotta): approximately 18 yards (16 m) of the same DK weight in a warm terracotta or burnt orange.
- Allow 15% extra for gauge variation and tails.
Hooks
- 3.5 mm (E-4) for the wings and body (main hook)
- 3.0 mm (C-2 or D-3) for the antennae and any tighter edging if desired
Notions
- Tapestry needle
- Stitch markers (at least 4)
- Scissors
- Optional: two small wooden or glass beads for the antennae tips (2–3 mm)
- Blocking pins and a foam board or towel
- Optional: small jump ring or keychain hardware if you plan to turn it into a bag charm
Abbreviations and Terminology (US Terms)
- ch – chain: yarn over, pull through loop on hook
- sc – single crochet: insert hook, yarn over, pull up loop, yarn over, pull through both loops
- hdc – half double crochet: yarn over, insert hook, yarn over, pull up loop, yarn over, pull through all three loops
- dc – double crochet: yarn over, insert hook, yarn over, pull up loop, yarn over, pull through two loops, yarn over, pull through remaining two loops
- fpdc – front post double crochet: yarn over, insert hook from front to back around the post of the indicated stitch, yarn over, pull up loop, complete as a regular dc
- sl st – slip stitch: insert hook, yarn over, pull through stitch and loop on hook
- st(s) – stitch(es)
- sp – space
- rep – repeat
- rnd – round
- RS – right side
- WS – wrong side
Turning chains do not count as a stitch unless a step explicitly says they do. Work into both loops unless the pattern states otherwise.
Gauge
Work a small practice circle in Color A:
Ch 4, join with sl st to form a ring.
Rnd 1: Ch 1, 8 sc in ring, join with sl st to first sc. (8 sc)
Rnd 2: Ch 1, 2 sc in each st around, join. (16 sc)
Your circle should measure approximately 1.25″ (3.2 cm) across after light blocking. If it is larger, go down a hook size. If smaller, go up a hook size. Exact gauge is not critical for a charm, but staying close keeps the wings from becoming too stiff or too floppy.
Main Pattern Instructions
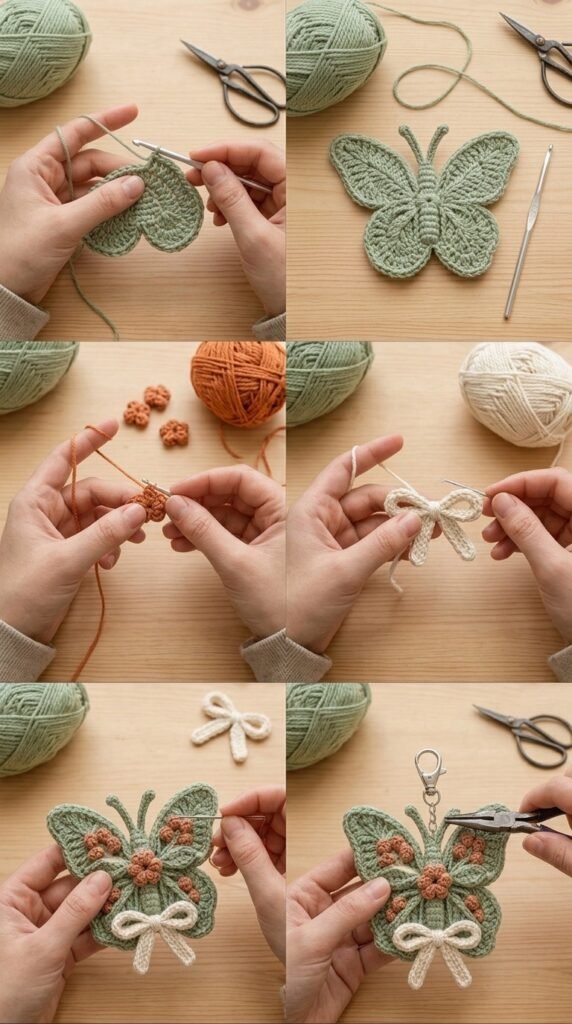
Upper Wings (Make 2)
Begin with Color A (Sage) and the 3.5 mm hook.
Rnd 1: Ch 4, join with sl st to form a ring. Ch 1, work 8 sc into the ring. Join with sl st to first sc. (8 sc)
Rnd 2: Ch 1, 2 sc in each st around. Join. (16 sc)
Rnd 3: Ch 1, *sc in next st, 2 sc in next st; rep from * around. Join. (24 sc)
Rnd 4 (short-row shaping begins): Ch 1, sc in next 4 sts, hdc in next 2 sts, dc in next 4 sts, hdc in next 2 sts, sc in next 4 sts. Leave remaining 8 sts unworked. Turn. (16 sts)
Row 5: Ch 1, sc in next 3 sts, hdc in next 2 sts, dc in next 6 sts, hdc in next 2 sts, sc in next 3 sts. Turn. (16 sts)
Row 6: Ch 1, sc in next 2 sts, hdc in next 2 sts, dc in next 8 sts, hdc in next 2 sts, sc in next 2 sts. Turn. (16 sts)
Row 7: Ch 1, sc in next 2 sts, hdc in next 3 sts, dc in next 6 sts, hdc in next 3 sts, sc in next 2 sts. Turn. (16 sts)
Row 8: Ch 1, sc in each st across. Do not turn. (16 sc)
Continue working around the entire piece to close the wing:
Rnd 9: Working into the unworked stitches of Rnd 3 and the side edges of the short rows, sc evenly around the entire wing shape until you reach the starting point of Row 4. You should have approximately 32–34 sc total around. Join with sl st to first sc of this round. Fasten off Color A, leaving a 6-inch tail.
Make the second upper wing exactly the same way. Set both aside.
Lower Wings (Make 2)
Still with Color A and 3.5 mm hook.
Rnd 1: Ch 4, join with sl st to form a ring. Ch 1, 6 sc into the ring. Join. (6 sc)
Rnd 2: Ch 1, 2 sc in each st around. Join. (12 sc)
Rnd 3: Ch 1, *sc in next st, 2 sc in next st; rep from * around. Join. (18 sc)
Rnd 4 (short rows): Ch 1, sc in next 3 sts, hdc in next 2 sts, dc in next 4 sts, hdc in next 2 sts, sc in next 3 sts. Leave remaining 4 sts unworked. Turn. (14 sts)
Row 5: Ch 1, sc in next 2 sts, hdc in next 2 sts, dc in next 6 sts, hdc in next 2 sts, sc in next 2 sts. Turn. (14 sts)
Row 6: Ch 1, sc in next 2 sts, hdc in next 3 sts, dc in next 4 sts, hdc in next 3 sts, sc in next 2 sts. Turn. (14 sts)
Row 7: Ch 1, sc in each st across. Do not turn. (14 sc)
Rnd 8: Sc evenly around the entire lower wing shape, working into the remaining stitches of Rnd 3 and the side edges of the short rows. Aim for 24–26 sc total. Join with sl st to first sc. Fasten off Color A, leaving a 6-inch tail.
Make the second lower wing identically.
Body
With Color B (Terracotta) and 3.5 mm hook.
Rnd 1: Ch 6. Sc in 2nd ch from hook and in each ch across. Work 3 sc in last ch, then continue around the opposite side of the foundation chain: sc in each of the next 4 sts, 2 sc in the last st. Join with sl st to first sc. (14 sc)
Rnd 2: Ch 1, 2 sc in first st, sc in next 4 sts, 2 sc in next 3 sts, sc in next 4 sts, 2 sc in last 2 sts. Join. (20 sc)
Rnd 3: Ch 1, sc in next 6 sts, hdc in next 2 sts, dc in next 4 sts, hdc in next 2 sts, sc in next 6 sts. Join. (20 sts)
Rnd 4: Ch 1, sc in each st around. Join. Fasten off, leaving a long tail (about 18 inches / 45 cm) for sewing.
Special Techniques / Additional Elements
Antennae
With Color B and the 3.0 mm hook, attach yarn with a slip stitch at the top center of the body (the slightly pointed end).
Antenna 1: Ch 8. Sl st in 2nd ch from hook and in each of the next 3 ch. Ch 4, sl st in 2nd ch from hook and in next 2 ch. Sl st back down the remaining chains to the base. Fasten off.
Antenna 2: Attach yarn again in the same starting point and repeat the exact sequence for the second antenna. Weave in ends securely.
If using beads, slide one small bead onto each antenna tip before working the final slip stitches, then secure it in place.
Optional Surface Texture on Wings
For extra boho texture, use Color B and a tapestry needle to work a few straight stitches or small French knots near the center of each upper wing after assembly. Keep them sparse so they do not overpower the sage color.
Assembly and Finishing
Lay the two upper wings side by side with the straight short-row edges facing the center. Place the two lower wings below them, slightly overlapping the upper wings by about ¼ inch (0.5 cm). The body should sit centered over the joining area.
Using the long terracotta tail from the body and a tapestry needle, sew the body firmly to the center of the wings. Take small, even stitches that go through all layers so the wings stay securely attached. Weave the remaining Color A tails into the wrong side of the wings to further secure the joins.
Position the antennae so they curve gently outward. Secure any remaining ends on the back of the body.
If you want a hanging loop, chain 10 with Color B at the top of the body between the antennae, join with a slip stitch, and fasten off.
Blocking and Care
Wet-block the finished charm for the best shape. Fill a small bowl with lukewarm water and a drop of mild soap. Submerge the butterfly for 5–10 minutes. Gently squeeze out excess water (do not wring). Pin the wings open on a foam board or towel, shaping the scalloped edges and gently stretching the antennae into natural curves. Allow to dry completely (usually 12–24 hours depending on humidity).
Care: Hand wash in cool water with mild detergent. Do not wring or twist. Reshape and dry flat. Never hang the wet charm, as the wings can stretch out of shape. Avoid machine washing or drying.
Fit and Troubleshooting Tips
If the wings cup or curl too much after assembly, your tension may be tighter than the sample. Go up half a hook size for the wings only and block more aggressively.
If the lower wings look too small next to the upper ones, add one extra round of sc around each lower wing before fastening off.
The body should sit flat and centered. If it twists, unpin and resew with the RS of the body facing out.
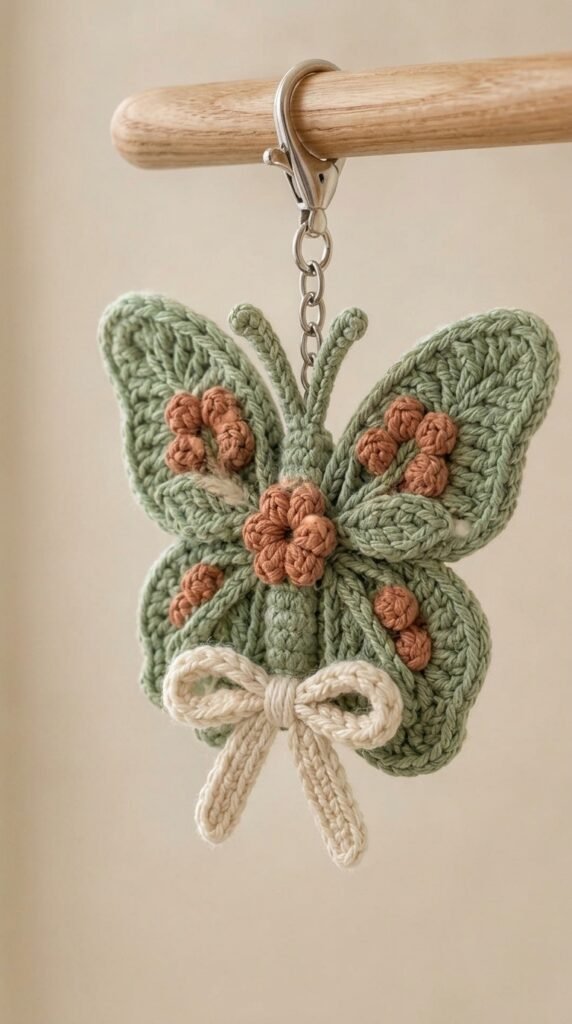
Heavy beads can pull the antennae downward. Choose very light beads or skip them entirely for a softer look.
You Might Also Like
- Winter White Camellia Crochet Bracelet Free Pattern
- Honeybee Garden Butterfly Charm Free Crochet Pattern
- Honeybee Daisy Meadow Charm Bracelet Free Crochet Pattern
- Midnight Garden Gothic Rose Crochet Bracelet Pattern
FAQ’s
Can I use a different yarn weight?
Yes. Sport or light DK works well and keeps the charm delicate. Worsted weight will make a larger, sturdier piece (closer to 4.5–5 inches across). Adjust your hook size up or down to maintain a soft fabric that isn’t stiff.
How long does this project take?
Most makers finish one butterfly in 2–3 hours once the short-row technique clicks. The first one usually takes a little longer while you get comfortable with the shaping.
Is this suitable for beginners?
It is written for intermediate crocheters. If you are comfortable with single, half-double, and double crochet, working in the round, and reading short-row instructions, you can manage it. Absolute beginners may find the short-row wing shaping frustrating.
Can I make the butterfly larger or smaller?
To enlarge, go up a hook size and/or use a heavier yarn. To miniaturize, drop to a 2.75–3.0 mm hook and sport-weight yarn. The proportions stay attractive either way.
What if I don’t have terracotta yarn?
Any warm earthy tone works—rust, burnt sienna, deep coral, or even a soft mustard. The contrast between the sage wings and a warmer body color is what gives the charm its boho feel.
Do I have to use beads on the antennae?
No. The antennae look complete without them. Beads simply add a tiny bit of weight and sparkle if you like that effect.
How do I attach it to a bag or keychain?
Sew a small jump ring or split ring through the top of the body between the antennae, or crochet a short chain loop as described in the assembly section. A lobster clasp also works well for bag charms.
Can I sell the finished charms?
Yes. You may sell finished items made from this pattern. Please credit the design as a free pattern from this site and do not sell or distribute the written pattern itself.
Final Thoughts
There is something quietly satisfying about finishing a small, detailed piece like this. You start with two colors of yarn and end up with a little creature that looks ready to take flight. I keep one pinned to my favorite canvas tote and another hanging from a plant pot indoors. Both still make me smile when the light hits the sage and terracotta just right.
I hope this butterfly finds a good home with you. If you make one, I would love to see how you use it — leave a comment, share a photo, or pin it with a note. Happy stitching, and may your next project bring the same quiet joy this one brought me.




Leave a Reply
You must be logged in to post a comment.