

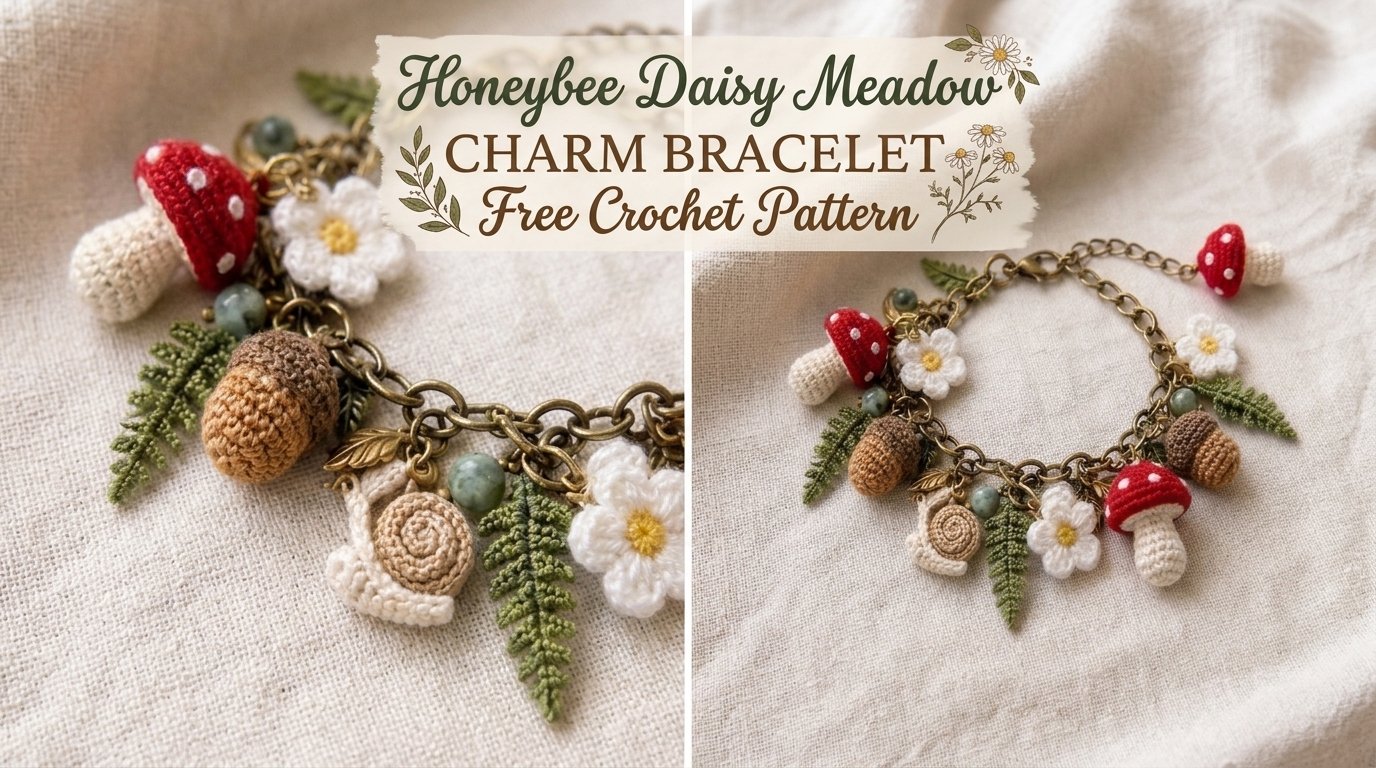
I still remember the afternoon that started this whole design. I was sitting on the back porch with a cup of tea, watching a fat little honeybee tumble from one wild daisy to the next. The meadow behind our house had exploded overnight after a warm rain, and the air smelled like honey and crushed grass. I kept thinking how lovely it would be to wear a tiny piece of that meadow on my wrist every day.
That evening I pulled out my leftover cotton yarns in soft yellows, creamy whites, and a warm honey-gold. I wanted something small and delicate that still felt special—something that could be finished in an evening yet look like it came from a carefully tended garden. After a few false starts with stiff motifs and floppy bands, the Honeybee Daisy Meadow Charm Bracelet finally came together. It is a light, flexible cotton bracelet band dotted with little raised daisies and a pair of striped honeybee charms that dangle just enough to catch the light when you move.

This free crochet pattern walks you through every step so you can make your own wearable meadow.
About This Pattern
The Honeybee Daisy Meadow Charm Bracelet is worked in three main parts: a simple textured bracelet band, a set of tiny daisy motifs, and two honeybee charms. Everything is crocheted with fine cotton yarn so the finished piece stays soft against the skin and holds its shape after light blocking.
The band is a narrow strip of half-double crochet worked in the back loop only, which creates gentle ridges that look a bit like freshly turned earth. The daisies are small round motifs with a raised center and layered petals. The bees are worked in the round with short stripes and tiny embroidered wings. Once the pieces are finished, the motifs are sewn onto the band in a scattered meadow arrangement and the bees are attached with short lengths of chain so they can swing slightly.
Skill level: Intermediate. You should be comfortable with working in the round, changing colors cleanly, and sewing small pieces together. The stitches themselves are not difficult, but the small scale requires neat tension and patience.
Finished size: Bracelet band measures approximately 6¾ inches (17 cm) long and ¾ inch (2 cm) wide before adding the clasp. With the clasp and dangling bees, the total wearable length is about 7½–8 inches (19–20 cm). The design fits most adult wrists; notes for adjusting length are included later.
The finished bracelet has a soft, flexible drape. It is not stiff or heavy, so it sits comfortably for all-day wear.
Materials You’ll Need
Yarn
All yardages are approximate. Allow 15% extra for gauge variation and tails.
- Color A (Soft Yellow): 25 yards / 23 meters of fingering-weight cotton (used for daisy petals and bee bodies)
- Color B (Creamy White): 30 yards / 27 meters of the same yarn (bracelet band and daisy centers)
- Color C (Honey Gold): 15 yards / 14 meters (bee stripes and optional accent on band)
- Color D (Warm Brown or Black): 8 yards / 7 meters (bee heads, antennae, and optional embroidery)
I used a mercerized fingering-weight cotton that has a gentle sheen. Any smooth fingering or light sport cotton will work as long as the motifs stay firm and the band remains flexible.
Hooks
- 2.75 mm (C) hook for the bracelet band and daisy motifs
- 2.25 mm (B) hook for the honeybee charms (tighter tension helps the bees hold their shape)
Notions
- Tapestry needle
- Two small stitch markers
- One 12–14 mm button or lobster clasp with jump rings
- Optional: tiny glass seed beads for daisy centers
- Blocking mat and rust-proof pins
- Sharp scissors
Abbreviations and Terminology
All instructions use US crochet terminology.
- ch – chain: yarn over, pull through loop on hook
- sc – single crochet: insert hook, yarn over, pull up loop, yarn over, pull through both loops
- hdc – half double crochet: yarn over, insert hook, yarn over, pull up loop, yarn over, pull through all three loops
- dc – double crochet: yarn over, insert hook, yarn over, pull up loop, yarn over, pull through two loops, yarn over, pull through remaining two loops
- tr – treble crochet: yarn over twice, insert hook, yarn over, pull up loop, (yarn over, pull through two loops) three times
- sl st – slip stitch: insert hook, yarn over, pull through both the stitch and the loop on the hook
- blo – back loop only: work the stitch into the back loop of the previous row, leaving the front loop free
- inc – increase: work two stitches into the same stitch
- dec – decrease: work two stitches together
- FO – fasten off
- RS – right side
- WS – wrong side
Notes
- Turning chains do not count as a stitch unless a step explicitly says they do.
- When changing colors, complete the last yarn-over of the previous stitch with the new color for cleaner joins.
- Weave in ends as you go whenever possible; the motifs are small and ends can become bulky if left until the end.
Gauge
Work a small swatch in the band stitch pattern to check tension.
Using Color B and the 2.75 mm hook, chain 12.
Row 1: Hdc in 3rd ch from hook and in each ch across. Turn. (10 hdc)
Row 2: Ch 2, hdc blo in each stitch across. Turn.
Repeat Row 2 until the piece measures 2 inches (5 cm).
Your swatch should measure approximately 1¾ inches (4.5 cm) wide and 2 inches (5 cm) tall.
If the swatch is wider, go down a hook size. If it is narrower, go up a hook size. Matching gauge is important so the finished bracelet sits comfortably and the motifs proportion correctly to the band.
Main Pattern Instructions

Bracelet Band
With Color B and 2.75 mm hook, ch 42 (or adjust for wrist size—see Fit section later).
Row 1 (RS): Hdc in 3rd ch from hook and in each ch across. Turn. (40 hdc)
Row 2: Ch 2 (does not count as a stitch), hdc blo in each stitch across. Turn.
Rows 3–6: Repeat Row 2.
At the end of Row 6 the band should measure roughly ¾ inch (2 cm) wide and 6¾ inches (17 cm) long. Fasten off, leaving a 12-inch (30 cm) tail for sewing the clasp later.
Optional accent stripe: On Row 4 only, switch to Color C for the entire row, then return to Color B for Rows 5–6. This creates a thin golden line running through the middle of the band.
Daisy Motifs (Make 5)
Each daisy is worked in the round and measures about 1 inch (2.5 cm) across when finished.
Round 1 (Center): With Color B and 2.75 mm hook, make a magic ring. Ch 1, work 8 sc into the ring. Join with sl st to first sc. (8 sc)
Round 2: Ch 1, 2 sc in each stitch around. Join. (16 sc)
Round 3 (Petals): Change to Color A. *Ch 3, dc in same stitch, ch 3, sl st in same stitch, sl st in next stitch; repeat from * around. You will have 8 petals. Fasten off, leaving a long tail for sewing.
Gently tug each petal open so they sit flat and slightly cupped. If you prefer a fuller look, work Round 3 as ch 4, tr in same stitch, ch 4, sl st in same stitch, sl st in next stitch.
Optional bead: Before fastening off the center, slip a tiny seed bead onto the yarn and work the last sc of Round 1 over the bead so it sits in the middle of the daisy.
Honeybee Charms (Make 2)
The bees are worked tightly with the smaller 2.25 mm hook so they stay firm.
Body
With Color A, make a magic ring.
Round 1: Ch 1, 6 sc into ring. Join. (6 sc)
Round 2: Ch 1, 2 sc in each stitch. Join. (12 sc)
Rounds 3–4: Ch 1, sc in each stitch. Join.
Change to Color C.
Rounds 5–6: Ch 1, sc in each stitch. Join.
Change back to Color A.
Round 7: Ch 1, sc in each stitch. Join.
Round 8: Ch 1, (sc, dec) around. Join. (8 sc)
Stuff the body very lightly with a tiny bit of yarn scrap or fiberfill.
Round 9: Ch 1, dec around. Join. (4 sc)
Fasten off, leaving a tail. Thread the tail through the remaining stitches and pull tight to close.
Head
With Color D, make a magic ring.
Round 1: Ch 1, 6 sc into ring. Join. (6 sc)
Round 2: Ch 1, sc in each stitch. Join.
Fasten off, leaving a long tail. Sew the head to one end of the body.
Antennae
With Color D, insert hook under a stitch on top of the head, pull up a loop, ch 4, sl st in 2nd ch from hook, sl st in next 2 ch, then secure with a sl st back into the same head stitch. Repeat for the second antenna a short distance away.
Wings (optional but recommended)
With Color B, ch 6.
Row 1: Sc in 2nd ch from hook, hdc in next, dc in next, hdc in next, sc in last. Fasten off.
Make a second identical wing. Sew both wings to the top of the body, slightly overlapping, with the rounded ends pointing outward.
Special Techniques / Additional Elements
Surface Chain Detail (Optional)
If you want a thin “path” winding through the meadow, use Color C and a surface slip-stitch chain. Starting near one end of the band, work a gentle S-curve of surface chains along the length of the band, weaving between the places where the daisies will sit. Keep the tension loose so the band does not pucker.
Embroidered Bee Details
With a short length of Color D, add two tiny French knots or straight stitches for eyes on each bee head. A single short stitch of Color A on the lower body can suggest a little pollen pouch if you like that extra touch.
Assembly and Finishing
Lay the bracelet band flat with the right side facing up. Arrange the five daisy motifs along the band in a scattered pattern—slightly overlapping is fine and looks more natural. Leave about ½ inch (1.25 cm) clear at each end for the clasp and for the bees to dangle freely.
Using the long tails left on the daisies, sew each motif firmly to the band with small stitches around the center and a few tacking stitches under the petals. Weave in all ends on the wrong side.
Attach the two honeybee charms: cut two lengths of Color B chain, each about ¾ inch (2 cm) long. Sew one end of each chain to the underside of a bee and the other end to the band, spacing the bees near opposite ends of the bracelet so they hang freely when the bracelet is worn.
Sew the button or clasp to one end of the band. On the opposite end, create a small chain loop or sew a corresponding jump ring so the bracelet closes securely. Try the bracelet on and adjust the loop length if needed before securing the final stitches.
Blocking and Care
Light blocking makes a noticeable difference with these small motifs.
Pin the bracelet band flat on a blocking mat, stretching it gently to its finished length. Arrange the daisy petals so they open evenly and the bees hang free. Mist lightly with water or steam from a distance—do not press the iron directly onto the motifs. Allow the piece to dry completely before removing the pins.
Care instructions:
Hand wash gently in cool water with a mild soap. Do not wring or twist. Roll in a towel to remove excess water, then reshape and dry flat. Never hang the bracelet while wet, as the weight of the water can stretch the band. Store flat or loosely coiled to protect the raised petals and bee wings.
Fit and Troubleshooting Tips
Adjusting length:
The band is written for a 6¾-inch (17 cm) base. For a smaller wrist, chain fewer stitches in multiples of 2 and reduce the number of rows if needed. For a larger wrist, add chains in multiples of 2. Always try the band around your wrist before attaching motifs so you can fine-tune the length.
Cupping or ruffling motifs:
If a daisy cups too much, your tension may be tighter than the sample. Go up half a hook size for the petals only. If the petals look floppy, go down a size or work the petals with a tighter hand.
Bees looking lumpy:
Stuff very sparingly. A few strands of yarn scrap are usually enough. Over-stuffing makes the bees stiff and hard to sew.
Band twisting:
Working in the back loop only creates a natural ridge, but if the whole band begins to spiral, check that you are not accidentally twisting the piece between rows. Lay it flat after every two rows.

Motifs shifting after wear:
If the daisies or bees feel loose after a few wears, reinforce the attachment points with a few extra stitches on the wrong side.
You Might Also Like
- Midnight Garden Gothic Rose Crochet Bracelet Pattern
- Honeybee Garden Butterfly Charm Free Crochet Pattern
- Lemon Citrus Summer Charm Bracelet Free Crochet Pattern
- Winter White Camellia Crochet Bracelet Free Pattern
FAQ’s
Can I use a different weight of yarn?
Yes, but the size and drape will change. Sport-weight yarn will make a slightly larger, softer bracelet. Lace-weight will create a more delicate piece. Always check your gauge and adjust the starting chain so the band still fits comfortably around your wrist.
How long does this project take?
Most makers finish the entire bracelet in 3–5 hours, depending on experience with small motifs. The band works up quickly; the bees and daisies take the most time because of the color changes and finishing details.
Is this pattern suitable for beginners?
It is written for intermediate crocheters. If you are new to working in the round or changing colors, practice the daisy and bee on scrap yarn first. The band itself is beginner-friendly.
Can I sell the finished bracelets?
Yes. You may sell finished items made from this pattern. Please credit the design as the Honeybee Daisy Meadow Charm Bracelet and link back to the original pattern when possible. Do not sell or distribute the written pattern itself.
How do I make the bracelet longer or shorter?
Adjust the starting chain in multiples of 2. Try the band around your wrist before sewing on the motifs so you can fine-tune the length. Remember to leave a little extra at each end for the clasp.
My daisies look uneven. What should I do?
Check that you are working the same number of stitches into each petal base. After finishing, gently stretch and shape each petal with your fingers while the motif is still slightly damp from blocking. This usually evens them out.
Can I add more bees or daisies?
Absolutely. Extra daisies create a fuller meadow look. Additional bees can be attached along the band or even used as matching earrings if you make a few more.
What is the best way to attach the clasp?
A small button and chain loop is simple and secure. A lobster clasp with jump rings gives a more polished jewelry finish. Sew both ends firmly and reinforce with a few extra stitches on the wrong side.
Final Thoughts
There is something quietly joyful about finishing a piece that carries a little story with it. Every time I glance down at my own Honeybee Daisy Meadow Charm Bracelet I remember that sunny afternoon and the busy bees that started it all. I hope when you wear yours you feel a bit of that same meadow warmth.
If you make this bracelet, I would love to see how your meadow turned out. Leave a comment, share a photo, or tag your finished piece so others can find a little inspiration too. Happy stitching, and may your days be full of small, bright things.



Leave a Reply
You must be logged in to post a comment.