

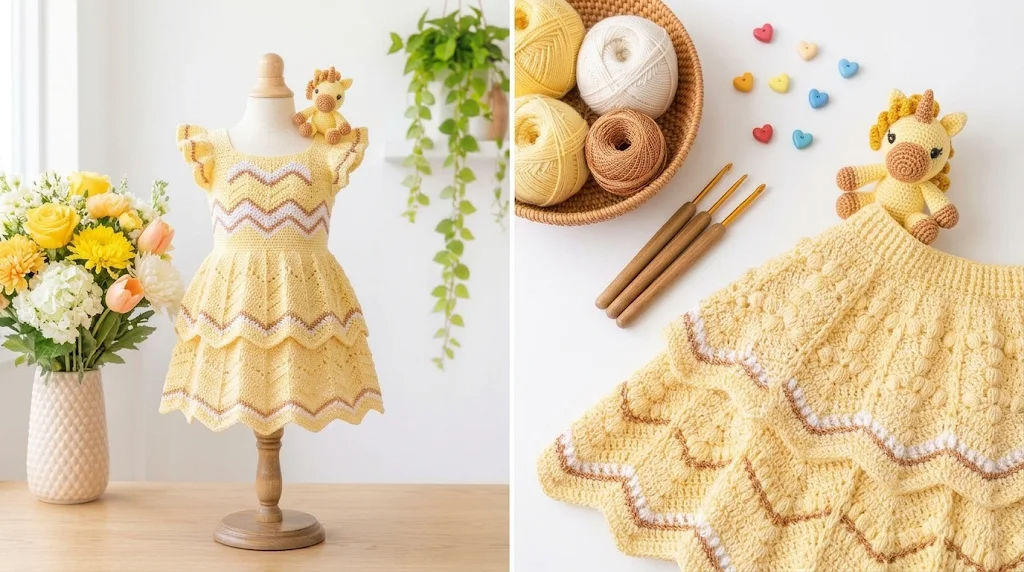
There is something special about a crochet dress that feels like sunshine. I wanted to create a design that looked cheerful, feminine, and comfortable without becoming overly complicated. That inspiration led me to this Sunshine Meadow Peplum Dress, a sweet handmade garment with a fitted upper section, a gently flared waist, and a pretty decorative hem.
I imagined warm summer afternoons, little garden gatherings, and those days when you want to wear something handmade that feels a little more special than everyday clothing. Soft yellow yarn gives this dress its sunny personality, while the textured stitches add beautiful detail without making the fabric too heavy.
This Sunshine Meadow Peplum Dress Free Crochet Pattern combines simple shaping with decorative stitchwork. The finished dress has a fitted bodice, adjustable shoulder straps, and a flowing peplum skirt that creates a lovely feminine silhouette.

About This Sunshine Meadow Peplum Dress Pattern
This dress is worked from the top down, beginning with the bodice. The upper section is crocheted in joined rounds, with shaping for the bust and waist. Once the bodice reaches the desired length, increases create the flared peplum.
The skirt features a repeating shell-inspired stitch pattern. These small decorative fans give the lower section a soft, meadow-like texture.
Skill Level: Intermediate
You should be comfortable with single crochet, double crochet, increases, decreases, and working in joined rounds.
Finished Size: Small, Medium, Large, and Extra Large.
| Size | Bust | Waist | Peplum Length |
| S | 32–34 in | 26–28 in | 9 in |
| M | 36–38 in | 30–32 in | 9.5 in |
| L | 40–42 in | 34–36 in | 10 in |
| XL | 44–46 in | 38–40 in | 10.5 in |
The dress is designed with approximately 1–2 inches of positive ease around the bust. For a closer fit, choose the smaller size if your measurements fall between sizes.
Materials You’ll Need
Yarn
Choose a soft, breathable cotton or cotton-blend yarn for comfortable summer wear.
- Color A – Sunshine Yellow: Approximately 550 (650, 750, 850) yards of DK-weight yarn for the bodice and peplum.
- Color B – Soft Cream: Approximately 80 (90, 100, 110) yards for decorative edging and floral details.
- Color C – Leaf Green: Approximately 25 yards for optional embroidered leaf accents.
Allow 15% extra yarn for gauge variation, longer straps, or additional edging.
Crochet Hooks
- 4.0 mm crochet hook for the main dress.
- 3.5 mm crochet hook for straps and neckline edging.
- 4.5 mm crochet hook for a slightly softer peplum drape, if needed.
Notions
- Tapestry needle
- Stitch markers
- Measuring tape
- Scissors
- Blocking mats and rust-resistant pins
- Small amount of matching sewing thread, if desired
Abbreviations and Terminology
This pattern uses US crochet terminology.
- ch: Chain. Yarn over and pull through the loop.
- sl st: Slip stitch. Insert hook, yarn over, and pull through both loops.
- sc: Single crochet. Insert hook, yarn over, pull up a loop, yarn over, and pull through both loops.
- hdc: Half double crochet. Yarn over, insert hook, pull up a loop, yarn over, and pull through all three loops.
- dc: Double crochet. Yarn over, insert hook, pull up a loop, yarn over and pull through two loops twice.
- sk: Skip the indicated stitch.
- sp: Space.
- st(s): Stitch(es).
- inc: Increase by working two stitches into one stitch.
- dec: Decrease by working two stitches together.
- rep: Repeat.
- BLO: Back loop only.
- RS: Right side.
- WS: Wrong side.
Important: Turning chains do not count as stitches unless a step explicitly says otherwise. Join rounds with a slip stitch unless instructed differently.
Gauge
Gauge is important because this dress needs enough structure to stay comfortable while allowing the peplum to drape naturally.
Using the 4.0 mm hook:
- 18 sc = 4 inches.
- 12 rows of sc = 4 inches.
Make a small practice swatch and measure it after lightly blocking.
If your swatch has too many stitches across 4 inches, move up one hook size. If it has too few stitches, move down one hook size.
Check your gauge before beginning the bodice. A small difference can noticeably change the finished bust measurement.
Main Pattern Instructions

1. Bodice Foundation
The bodice is worked in joined rounds from the upper edge downward.
Choose the starting chain for your size:
- Small: ch 144
- Medium: ch 162
- Large: ch 180
- Extra Large: ch 198
Make sure the chain is not twisted.
Round 1: Join with a sl st to the first chain. Ch 1, sc in each ch around. Join with a sl st to the first sc.
Count: 144 (162, 180, 198) sc.
Round 2: Ch 1, sc in each st around. Join.
Round 3: Ch 1, hdc in each st around. Join.
Rounds 4–8: Repeat Round 3.
The upper bodice should now have a smooth, flexible texture. Try it on or compare it with your bust measurement before continuing.
2. Shaping the Bodice
The next section creates gentle waist shaping.
Place stitch markers at four evenly spaced positions around the body. These markers will help you distribute decreases evenly.
Round 9: Ch 1, sc in each st until 2 sts before the first marker, sc2tog, sc in marked st, move marker, sc2tog after the marked st. Repeat around, working the decreases evenly at all four marked positions.
Round 10: Ch 1, hdc in each st around. Join.
Round 11: Repeat Round 9.
Rounds 12–16: Ch 1, hdc in each st around. Join.
For consistent shaping, distribute the decreases evenly rather than placing them all in one area.
The waist section should feel gently fitted without pulling or creating uncomfortable tension.
3. Preparing the Peplum Waist
The peplum begins with a round of increases.
This is where the dress develops its characteristic flared shape.
Round 17: Ch 2, dc in each st around, working 2 dc in every fourth stitch. Join.
Round 18: Ch 2, dc in each st around. Join.
Round 19: Ch 2, dc in each st around, working 2 dc in every fifth stitch. Join.
Rounds 20–21: Ch 2, dc in each st around. Join.
The increased stitches provide additional fabric for the peplum. The skirt should begin to fall outward rather than cling to the waist.
If you prefer a fuller peplum, add another increase round before starting the decorative pattern.
4. Sunshine Meadow Shell Peplum
The decorative peplum uses repeating shell groups.
For this section, the stitch repeat is worked over 6 stitches.
Round 22: Ch 1, sc in the first st, *sk 2 sts, work 5 dc in the next st, sk 2 sts, sc in the next st.* Repeat from * around. Join with a sl st.
Round 23: Sl st into the center dc of the first shell. Ch 3, work 4 dc into the same center stitch, sc into the next sc between shells, *work 5 dc into the center dc of the next shell, sc into the next sc.* Repeat around. Join.
Round 24: Ch 1, sc into the center dc of each shell, ch 2, sc into the next center dc. Continue around, placing a small chain space between shell groups.
Round 25: Ch 2, work 5 dc into each chain space, sc into the next sc. Repeat around.
Rounds 26–31: Repeat Rounds 23–25 twice.
The repeating shells create a soft scalloped texture that makes the peplum look fuller and more decorative.
If your stitch count does not divide evenly into the six-stitch repeat, adjust the final shell spacing slightly rather than forcing extra stitches into the last repeat.
5. Creating the Decorative Hem
A neat border helps the peplum maintain its shape.
Join Color B at any shell edge.
Round 32: Ch 1, sc evenly around the hem, working 3 sc into the center stitch of each shell tip.
Round 33: Ch 1, *sc in the next 2 sts, ch 3, sl st into the first chain, sk 1 st.* Repeat around.
This creates small picot details along the edge.
Fasten off and weave in the ends securely.
Special Techniques and Additional Elements
6. Adjustable Shoulder Straps
The straps provide support while keeping the dress delicate and summery.
Use Color A and the 3.5 mm hook.
Make two straps.
Foundation: Ch 9.
Row 1: Sc in the second ch from hook and across. Turn. (8 sc)
Rows 2–35: Ch 1, sc in each st across. Turn.
Adjust the length to suit your preferred neckline and shoulder placement.
Fasten off, leaving a long sewing tail.
Attaching the Straps
Lay the dress flat with the front facing upward.
Position the straps evenly on the front bodice, approximately 3–4 inches apart at the neckline, adjusting for the selected size.
Sew the front ends securely to the upper edge.
Try on the dress and check the strap length before sewing the back ends.
For additional support, sew a small length of matching elastic inside each strap.
7. Cream Decorative Flowers
The optional flower details add a cheerful garden-inspired touch.
Using Color B, make three small flowers.
Round 1: Make a magic ring. Ch 1, work 6 sc into the ring. Join.
Round 2: *Ch 3, work 2 dc into the next st, ch 3, sl st into the following st.* Repeat around to create three petals.
Fasten off and leave a sewing tail.
Optional Green Leaves
Using Color C, ch 6.
Work sl st in the second ch from hook, sc in the next ch, hdc in the next ch, dc in the next ch, and 3 sc in the final ch.
Working along the opposite side of the chain, dc, hdc, sc, and sl st.
Fasten off.
Sew the leaves beneath the flowers.
Assembly and Finishing
Although the dress is primarily worked in one piece, the finishing details make a noticeable difference.
- Lay the dress flat and check that the side seams and waist shaping look even.
- Weave in every loose yarn end using a tapestry needle.
- Sew the shoulder straps firmly into place.
- Attach the flowers to one side of the bodice or near the peplum waist.
- Position the leaves so they look naturally connected to the flowers.
- Check the hem for uneven shell spacing.
- Try the dress on and make any final strap adjustments.
I recommend placing the flower arrangement slightly off-center. It creates a charming handmade appearance without making the front of the dress look crowded.
For a more minimal style, leave the bodice plain and use only the cream hem edging.
Blocking and Care
Blocking helps the peplum open up and allows the decorative shells to sit evenly.
For cotton yarn, use gentle wet blocking.
- Fill a basin with cool or lukewarm water.
- Add a small amount of gentle wool wash or suitable fabric detergent.
- Submerge the dress and allow it to soak for approximately 10 minutes.
- Remove it carefully without twisting or wringing.
- Roll it inside a clean towel to remove excess water.
- Lay it flat on blocking mats.
- Arrange the peplum shells and picot edging evenly.
- Allow the dress to dry completely.
Avoid hanging the dress while wet because the weight of the cotton may stretch the bodice and straps.
Care recommendations:
- Hand wash in cool water.
- Avoid harsh bleach.
- Dry flat in the shade.
- Store folded rather than hanging.
- Avoid excessive heat when ironing.
Always follow the care instructions on your chosen yarn label.
Fit and Troubleshooting Tips
The bodice feels too tight: Your gauge may be smaller than the pattern gauge. Try a larger hook or make the next size.
The peplum curls inward: Check that you have completed the increase rounds correctly. Additional increases may be needed for a fuller flare.
The peplum looks wavy: Too many increases or loose tension may be causing excess fabric. Check your stitch count and hook size.
The straps slide off the shoulders: Shorten the straps slightly and reposition them closer to the neckline.
The shell pattern looks uneven: Make sure each shell contains five double crochet stitches and that the single crochet anchors are placed consistently.
The dress feels too heavy: Consider using a lighter cotton blend and avoid adding too many decorative flowers.
You want a longer peplum: Repeat the shell pattern for additional rounds, remembering to purchase extra yarn.
Final Thoughts
The Sunshine Meadow Peplum Dress is a lovely project for anyone who enjoys creating feminine crochet clothing with a little extra texture. Its fitted bodice, cheerful yellow color, decorative flowers, and flared shell peplum come together in a design that feels fresh and timeless.
I especially love how the shell stitches create movement around the waist. Even a simple outfit becomes something special when you add handmade details and thoughtful shaping.
You can experiment with soft peach, lavender, buttercream, mint green, or classic ivory to create your own version. The flower embellishments are optional, so you can keep the dress simple or make it wonderfully playful.
I hope you enjoy making this Sunshine Meadow Peplum Dress Free Crochet Pattern. Take your time with the shaping, check your measurements as you work, and enjoy watching the dress grow one stitch at a time.
If you make your own version, share your finished dress in the comments or on Pinterest. I’d love to see the colors and little details you choose!



Leave a Reply
You must be logged in to post a comment.