

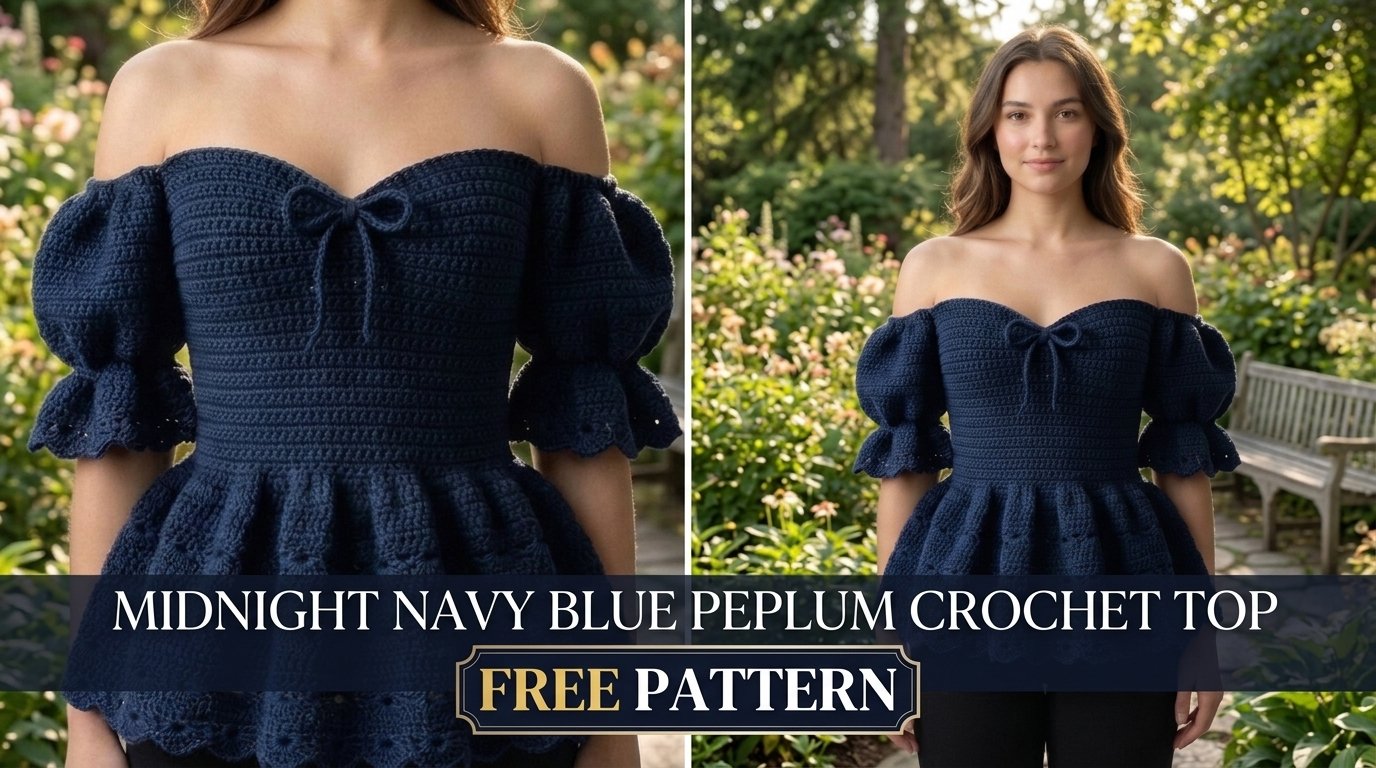
Craving a crochet top that actually turns heads? This midnight navy blue peplum number delivers sweetheart curves, off-shoulder puff sleeves, and a flared hem that moves when you do. It looks polished enough for date night yet stays comfortable enough for weekend brunch. Grab your hook—this one’s worth every stitch.
Why You Will Love This Crochet Top Pattern
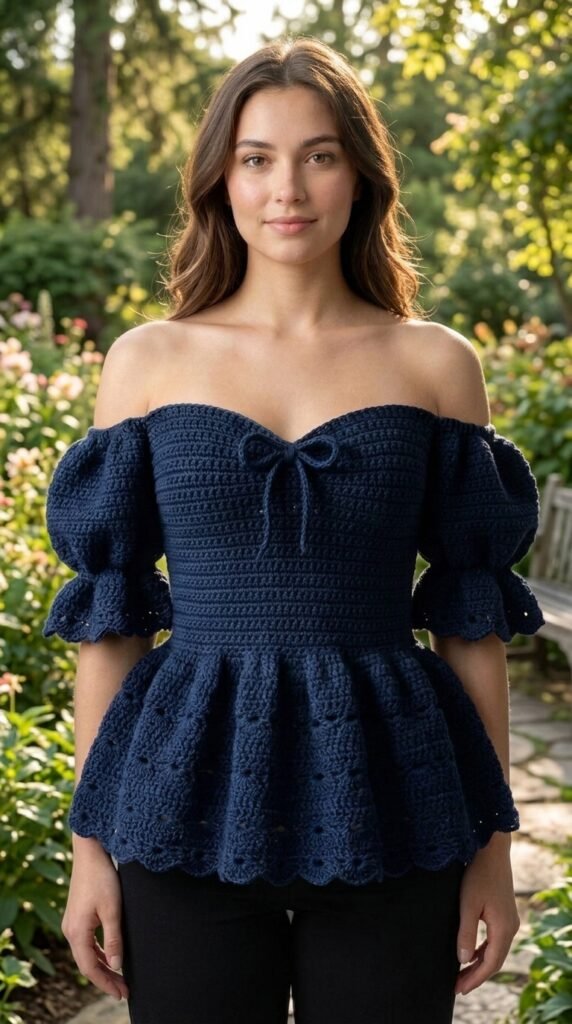
This top hits that sweet spot between romantic and wearable. The structured bodice hugs just enough while the peplum flares out with serious drama. Off-shoulder puffs add volume without weighing you down, and the deep navy works with almost everything in your closet.
What really sells it? Modular construction. You build the bodice, sleeves, and peplum as separate pieces, then join them. Need a longer torso? Add rows. Want bigger sleeves? Bump the increases. Fitting becomes way less stressful than fighting one giant shaped piece.

The stitch pattern looks fancy but stays beginner-friendly once you lock into the rhythm. Subtle ribbing on the bodice, simple eyelets on the peplum, scallops everywhere for that finished touch. Ready to make something that feels elevated without the headache?
Materials Needed
Keep your supply list tight and practical.
- Yarn: Worsted-weight cotton or cotton blend in midnight navy. Plan on 650–850 yards depending on size. Cotton gives the structure this silhouette needs—look for good stitch definition.
- Hooks: 4.0 mm for the bodice and sleeves, 4.5 mm for the peplum. Two sizes help you control the different sections.
- Notions: Tapestry needle, 8+ stitch markers, about a yard of ¼-inch elastic for the sleeves, measuring tape, scissors.
Gauge sits at roughly 16 stitches and 18 rows in single crochet over 4 inches with the smaller hook. Swatch it. A floppy bodice ruins the whole vibe.
Skill Level
Intermediate. You should already feel comfortable working in rows and rounds, making basic increases and decreases, and seaming pieces. If you’ve finished one fitted garment before, you’re good to go.
New to wearables? Practice the bodice section first. Get the tension dialed in before you commit to the full project. No shame in that—better safe than frogging later.
Abbreviations and Stitch Definitions
Quick reference so nothing slows you down mid-row.
- ch – chain
- sl st – slip stitch
- sc – single crochet
- hdc – half double crochet
- dc – double crochet
- inc – increase (two stitches in one)
- dec – decrease (two stitches together)
- sk – skip
- BLO – back loop only
Working in the back loop creates that subtle horizontal texture on the bodice. It’s simple and effective.

Size and Measurements
Written for Small with Medium, Large, and XL notes in parentheses.
- Finished Bust: 32 (36, 40, 44) inches
- Bodice Length: about 10–11.5 inches from top edge to waist
- Peplum Length: roughly 7 inches from the waistband
The bodice has minimal stretch, so choose a size with 1–2 inches of positive ease. The peplum flares enough to fit most hips once it’s attached. Measure yourself and pick accordingly—no one likes a top that fights back.
The Bodice Panel (Make 2)
Front and back panels start the same way. You work them flat, then shape the front for that sweetheart neckline.
Foundation and Body
Chain enough stitches for your size and work single crochet across the foundation. Then alternate rows of half double crochet and single crochet in the back loop only. Keep going until the piece hits the right length before the waistband.
That alternating rhythm builds soft horizontal texture. It looks intentional without demanding complicated stitches.
<meta render_generated_image with prompt is Hyper-detailed 8K resolution close-up of hands crocheting the textured bodice panel of a midnight navy blue peplum top, alternating single and half double crochet in back loop only on fine navy cotton yarn, soft natural window light, realistic stitch definition and yarn texture, professional craft photography on wooden table>
Waistband
Switch to tighter single crochet for about an inch. Pull the yarn a little firmer than usual so the waist cinches nicely. For the back panel, stop here and fasten off.
This short band gives the peplum a clean place to attach later and helps the top sit at the right spot on your torso.
Front Panel Sweetheart Shaping
Continue only on the front. Work one side of the neckline by leaving the center stitches unworked, then decrease gradually to form a soft cup shape. Fasten off, rejoin on the other side, and mirror the decreases.
The center dip creates that classic sweetheart curve. Keep the decreases even so both sides match. Try it against yourself before you seam—fit matters here.
The Puff Sleeves (Make 2)
These sit off the shoulder and balloon out just enough for romance without the costume vibe.
Sleeve Body
Start with a chain joined into a ring. Work a few rounds of single crochet, then increase gradually while switching to half double crochet for more volume. After the fullest point, decrease back down so the sleeve gathers nicely at the lower edge.
The increases and decreases create that soft puff shape. Keep the rounds even and use markers so you never lose your place.
<meta render_generated_image with prompt is Hyper-detailed 8K resolution image of a completed midnight navy blue crochet puff sleeve with gentle balloon shape and scalloped edge, fine cotton yarn texture visible, soft studio lighting, realistic stitch details, professional product photography against neutral background>
Scallop Edging
Finish the lower edge with a simple shell border—single crochet, skip, five double crochets, skip, repeat. It mirrors the peplum hem and ties the whole design together.
Elastic Channel
You’ll thread elastic through the top round later so the sleeves stay put without digging in. Leave that step until assembly.
The Peplum Skirt
This is where the drama happens. Work from the waistband down in continuous rounds, adding increases so it flares out beautifully.
Join the front and back panels at the waist with the larger hook. Single crochet evenly around the entire bottom edge, then increase every few rounds. Keep the stitch count a multiple that works for the later eyelet pattern.
<meta render_generated_image with prompt is Hyper-detailed 8K resolution overhead view of the peplum section of a midnight navy blue crochet top being worked in the round, showing gradual flare and open eyelet rows in navy yarn, soft diffused lighting, realistic lace-like texture, professional craft flat-lay photography>
Eyelet Section
Introduce simple chain spaces for decorative holes. Work a round of single crochet with skips and chains, then fill those spaces on the next round. Repeat once more for a second band of eyelets.
These little windows add interest without weakening the fabric. They also lighten the overall look so the peplum doesn’t feel heavy.
Scallop Hem
End with the same shell border you used on the sleeves. It gives the hem a soft, finished edge that moves when you walk.
Assembly Instructions
Time to turn the pieces into an actual top.
Seaming the Bodice
Place front and back right sides together. Whipstitch the side seams from the waistband up, leaving armhole openings of the right depth. Keep the seams neat—they’ll show a little under the sleeves.
Attaching Sleeves
Pin each sleeve into an armhole, matching the underarm. Distribute any fullness evenly and whipstitch in place. The puff should sit comfortably off the shoulder once the elastic goes in.
Finishing the Neckline
Join yarn at the center back and single crochet evenly around the entire top edge, including the sweetheart curves. Work a few extra stitches at the points so the curves stay smooth.
Adding the Bow
Chain a long cord, slip stitch back along it, and thread it through the center of the sweetheart dip. Tie a simple bow. It’s optional but adds a sweet finishing detail.
Sleeve Elastic
Cut two pieces of elastic a bit shorter than your upper arm. Thread them through the top round of each sleeve, overlap the ends, and stitch securely. This keeps the sleeves exactly where you want them.
<meta render_generated_image with prompt is Hyper-detailed 8K resolution close-up of the finished midnight navy blue peplum crochet top being assembled, hands attaching a puff sleeve to the bodice armhole with tapestry needle, soft natural light, realistic yarn and stitch details, professional step-by-step craft photography>
Styling Your Peplum Top
Navy plays well with almost everything. Pair it with white pants for clean contrast or high-waisted jeans for casual days. A midi skirt and heels push it into date-night territory. The structured bodice photographs beautifully, so it’s a solid choice for events where you want to look put-together without trying too hard.

Hand wash in cool water and lay flat to dry. Cotton holds its shape when you treat it right. Fold it instead of hanging so the shoulders stay happy.
Customization Ideas
Want a longer peplum? Keep adding rounds before the eyelets. Prefer strapless? Skip the sleeves and add elastic at the top edge. White, blush, or forest green all look stunning in this construction. For extra support, sew a simple tube lining inside the bodice.
IMO, the best version is the one that fits your body and your style. Don’t be afraid to tweak.
You Might Also Like
- Lavender Cottage Babydoll Dress Free Crochet Pattern
- Monochrome Cream Bell Sleeve Crochet Dress Free Pattern
- Lilac Starflower Lace Dress Crochet Pattern
- Ivory Pearl Lace Dress Crochet Pattern
FAQ’s
How long does this top usually take?
Most makers finish it in a week of evening sessions. The bodice goes fastest once the texture rhythm clicks. Sleeves and peplum take a bit more focus, but nothing feels endless.
Can I use acrylic yarn instead of cotton?
You can, but cotton or a cotton blend holds the structure better. Acrylic tends to stretch more and can look less crisp on a fitted bodice. If you go acrylic, size down slightly and block carefully.
Do the sleeves stay up without constant adjusting?
Yes—once you add the elastic channel. The elastic keeps them in place without cutting off circulation. Measure your arm and cut the elastic a little shorter for a secure but comfortable fit.
Is the peplum too full for everyday wear?
Not really. The flare is dramatic but still balanced. If you prefer less volume, reduce the increase rounds. You’ll still get movement without the full statement.
What if my gauge is off?
Swatch and adjust your hook size before you start the actual pieces. A looser gauge makes the bodice floppy; a tighter one can feel restrictive. Get it right early and the rest falls into place.
Final Thoughts
There you have it—a midnight navy blue peplum crochet top that feels special the moment you put it on. From the sweetheart neckline to those soft puff sleeves and the flared hem, every section works together. Pick up your navy yarn, start those first chains, and enjoy the process. You’re going to look amazing in this one.


Leave a Reply
You must be logged in to post a comment.