

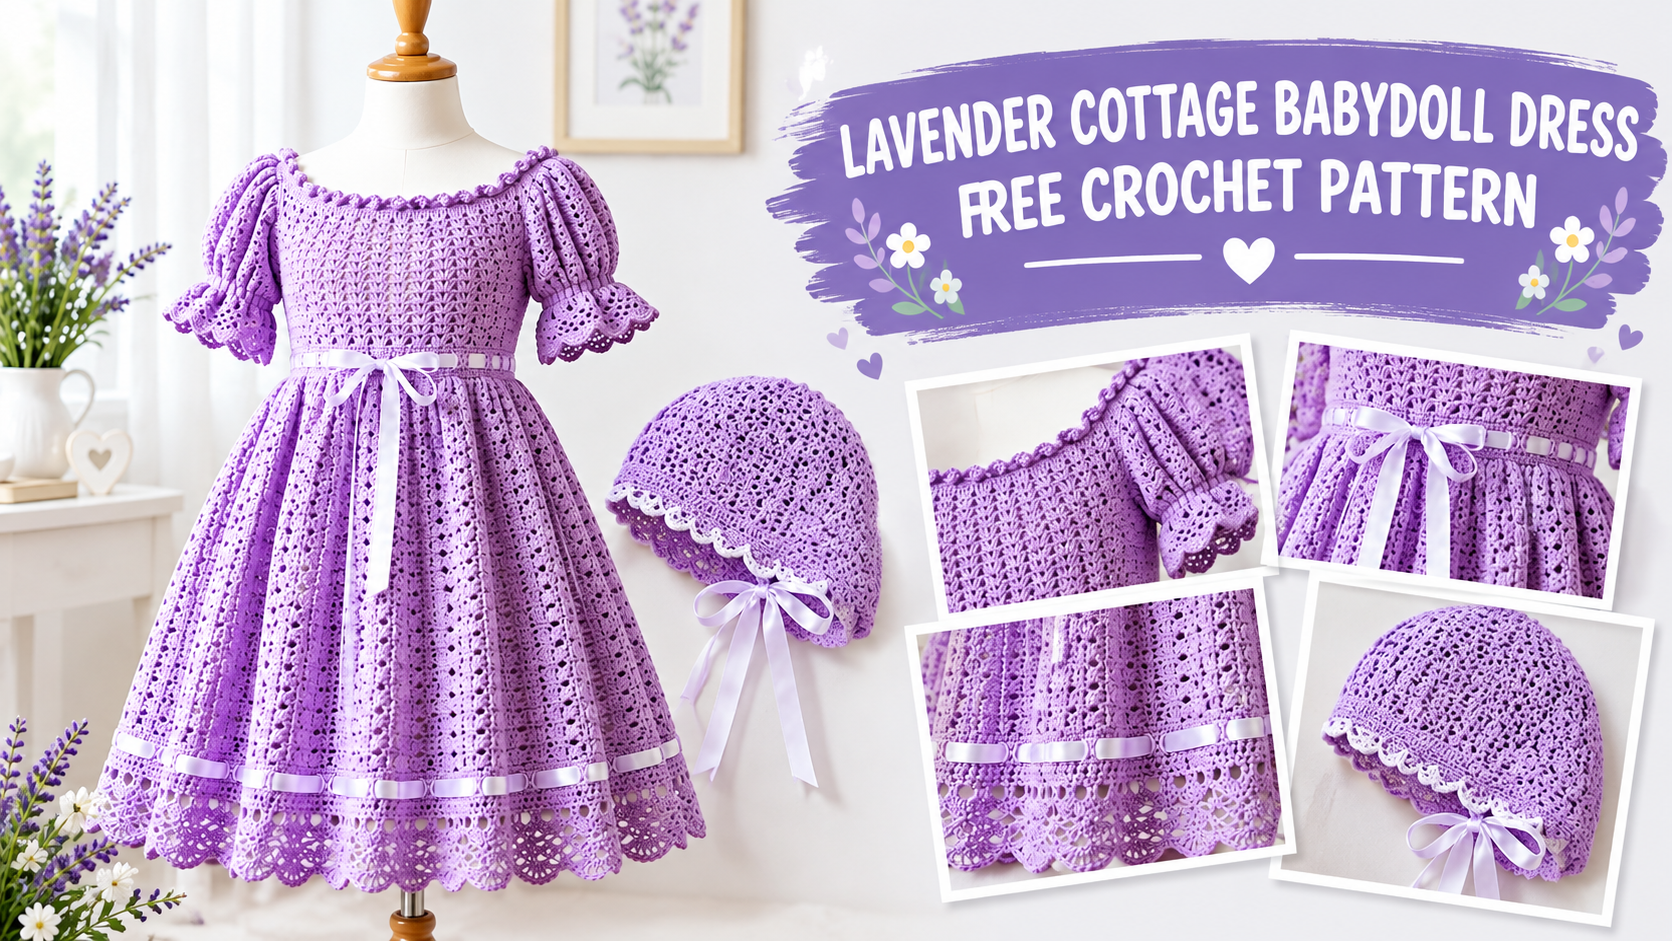

You’ve been saving that dreamy lavender DK skein for something special, right? This is the project. The Lavender Cottage Babydoll Dress turns soft purple yarn into an off-the-shoulder midi with puffed sleeves, a gathered A-line skirt, and delicate fan lace at the hem. It’s romantic, cottage-core perfection that still feels wearable. Let’s make it.
About This Crochet Pattern
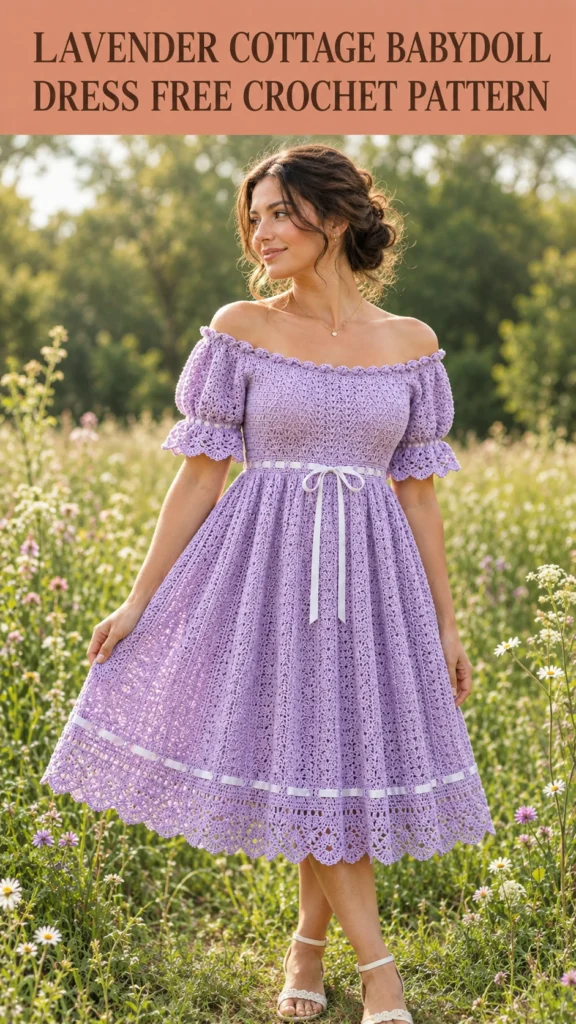
This midi-length babydoll dress features an off-the-shoulder neckline trimmed with scalloped picot edging. The fitted Empire-style bodice uses a dense chevron lace texture that gives structure while still looking delicate. Puffed short sleeves with ruffle cuffs are worked separately and joined at the armholes.
The gathered A-line skirt works in the round from the waist down in a vertical lace column stitch that creates open channels running from waist to hem. An open fan border adds about four inches of stunning lacework at the bottom. Two lengths of white satin ribbon complete the look—one cinches the waist and the other accents the hem.
The dress is designed for a standard US women’s size Medium (dress sizes 8–10). Size customization tips appear at the end.
Skill Level
This pattern rates intermediate to advanced. You should have completed at least two garment projects before diving in. You’ll need to work in the round, follow lace stitch repeats, shape puff sleeves, join sleeves to a bodice, construct an eyelet waist, and add multiple decorative edgings.
Don’t let that scare you off if you’re a confident intermediate. The pattern breaks everything into manageable sections and explains each technique thoroughly.
Finished Measurements
Here are the finished, blocked dimensions:
- Bust: 36 inches (91.5 cm)
- Waist (relaxed, before ribbon): 34 inches (86.5 cm)
- Hip: 44 inches (112 cm)
- Total length (shoulder to hem): 38 inches (96.5 cm)
- Bodice length (neckline to waist): 10 inches (25.5 cm)
- Skirt length (waist to hem, excluding border): 22 inches (56 cm)
- Hem border depth: 4 inches (10 cm)
- Sleeve length: 5 inches (12.5 cm)
These measurements give a flattering Empire silhouette with plenty of twirl room in the skirt.
Materials Needed
Yarn
Main Color (MC): Soft lavender DK weight yarn, approximately 1,400 yards (1,280 meters)
Contrast: White satin ribbon, 3 yards (2.75 meters), 3/8-inch wide (for waist and hem accents—not crocheted)
Yarn Suggestions
Lion Brand Pound of Love in Pastel Purple gives excellent stitch definition, is machine washable, and drapes softly.
Paintbox Yarns Simply DK in Misty Purple is another smooth acrylic option that works cleanly in lace patterns.
We Are Knitters The Petite Wool in Lilac adds a soft halo for extra romance (hand wash only).
Choose any DK weight that hits gauge. Smooth, tightly plied yarn shows the lace best. Avoid fluffy or bouclé yarns.
Hooks
US E-4 (3.5 mm) for bodice and sleeves
US F-5 (3.75 mm) for skirt and borders
Notions
6 stitch markers, tapestry needle, scissors, rust-proof blocking pins, blocking mats, 3 yards white satin ribbon, safety pin or bodkin for threading ribbon, optional dress form.
Gauge
Bodice gauge (E-4 / 3.5 mm, chevron lace): 18 stitches and 14 rows = 4 inches (10 cm), blocked
Skirt gauge (F-5 / 3.75 mm, vertical lace column): 16 stitches and 10 rows = 4 inches (10 cm), blocked
Gauge is critical. Swatch both sections, block them, and adjust hook size if needed. Do not start the dress until you hit gauge.
Abbreviations
Here are the abbreviations used throughout:
- beg = beginning
- BLO = back loop only
- ch = chain
- ch-sp = chain space
- dc = double crochet
- dc2tog = double crochet two together
- hdc = half double crochet
- pm = place marker
- rep = repeat
- rnd = round
- RS = right side
- sc = single crochet
- sk = skip
- sl st = slip stitch
- st(s) = stitch(es)
- WS = wrong side
- yo = yarn over
Special Stitches
Scallop Edging: 5 dc into the same stitch or space. Skip 2 stitches between scallops.
Picot: Chain 3, slip stitch into the first chain.
Puff Stitch: Yarn over, insert hook, pull up loop three times (7 loops on hook), yarn over and pull through all, chain 1 to close.
Chevron Lace Stitch (multiple of 6 + 2): Alternating rows of double crochet with chain spaces and single crochet with chain-3 spaces create the textured chevron.
Vertical Lace Column Stitch (multiple of 8): Four-round repeat that forms open vertical channels of chain spaces.
Fan Border Stitch (multiple of 10): Builds open fans that finish with a scalloped picot edge.
Eyelet Row: (Dc in next 2 sts, ch 1, skip 1 st) creates evenly spaced holes for ribbon.
Pattern Notes
The dress is constructed top-down. The bodice starts flat for the neckline and panels, then joins into a tube. Sleeves are worked separately and attached at the armholes. The skirt grows from the waist in the round with gentle increases for the A-line shape.
Blocking is not optional. The lace patterns need wet blocking to open fully and for the ribbon channels to become accessible. Turning chains count as stitches unless noted. Use stitch markers liberally at underarms, center front, and center back.
Step by Step Instructions
Section 1: Neckline Foundation
Chain 164 with the smaller hook. Work a foundation row of double crochet, then immediately add the picot scallop edging along the top chain edge. This creates the romantic off-the-shoulder neckline.
Section 2: Bodice
Work the left front, back, and right front panels flat in the chevron lace stitch, placing markers to define the armhole gaps. Finish each panel with an eyelet row and a stabilizer row at the waist.
Section 3: Joining Bodice and Armhole Setup
Seam the side edges of the panels, leaving the armhole openings free. Join the bottom edge into a round and work a waist eyelet round followed by a stabilizer round. The bodice is now a tube ready for the skirt and sleeves.
Section 4: Sleeves
Pick up stitches around each armhole opening and work short rounds of double crochet with gradual decreases. Finish with a puff-stitch ruffle and picot edging for that soft gathered cuff.
Section 5: Skirt
Switch to the larger hook. Increase dramatically at the waist for gathering, then work the vertical lace column stitch in the round, adding further increases at set intervals to create the full A-line silhouette. Finish with an eyelet round near the hem for the second ribbon.
Section 6: Hem Fan Border
Work the five-round fan border over a multiple of 10 stitches. The final round adds a scalloped picot edge that echoes the neckline for a cohesive look.
Section 7: Finishing
Weave in all ends. Thread the longer satin ribbon through the waist eyelets and tie a bow at center front. Weave the second ribbon through the hem eyelet round and secure it at a side seam.
Blocking Your Lavender Cottage Babydoll Dress
Wet blocking is required. Soak the dress in cool water, gently press out excess moisture between towels, and pin it flat (or on a dress form) to the finished measurements. Open the fan border fully while pinning. Allow 12–24 hours to dry completely. Blocking transforms the lace and makes the ribbon channels usable.
Tips for Success
Take gauge seriously—the bodice needs a snug fit and the skirt needs proper drape. Use stitch markers everywhere. Block before threading the ribbons so the eyelets open fully. Check the measurement checkpoints in the pattern; catching a sizing issue early saves hours of frogging.
IMO the fan border and those little picots are what make people stop and stare. Don’t rush the finishing steps.
You Might Also Like
- Berry Blush Pompom Crochet Tank Free Crochet Pattern
- Rainbow Sherbet Granny Square Baby Blanket Free Crochet Pattern
- Lilac Ombre Spring Dress Free Crochet Pattern
- Rainbow Bright Daisy Granny Square Blanket Free Crochet Pattern
- Crochet Mint Daisy Baby Dress Free Pattern
FAQ’s
Is this dress really intermediate-to-advanced?
Yes. If you have already made a couple of fitted garments and feel comfortable with lace repeats and joining pieces, you can handle it. Take the sleeves and fan border one section at a time.
Can I make this in a different size?
Yes. Adjust the foundation chain and panel stitch counts in multiples that keep the lace patterns even, then recalculate the skirt increases so the final hem remains a multiple of 10 for the fan border.
Do I have to use satin ribbon?
No. Any soft ribbon about 3/8-inch wide works. Grosgrain or a thin cotton tape also looks pretty. Just make sure it is soft against the skin.
How important is blocking?
Extremely. The lace stays closed and the ribbon channels stay tight until you wet-block. Skipping this step leaves the dress looking unfinished.
Can I skip the hem fan border?
You can, but the dress loses a lot of its romantic impact. The border adds length and that beautiful open lace that catches the light.
What if my sleeves feel too tight or too loose?
Adjust the number of stitches you pick up around the armhole. Aim for a multiple of 6 so the decreases stay even, then try the sleeve on before finishing the cuff.
Thank You for Making This Dress
This Lavender Cottage Babydoll Dress is a true labor of love, and the finished result is worth every hour. The combination of chevron bodice, puffed sleeves, flowing lace skirt, and delicate fan border creates something that feels both heirloom and wearable. Take your time, enjoy the process, and block carefully. You’re going to look (or gift) absolutely stunning. Happy crocheting!



Leave a Reply
You must be logged in to post a comment.