

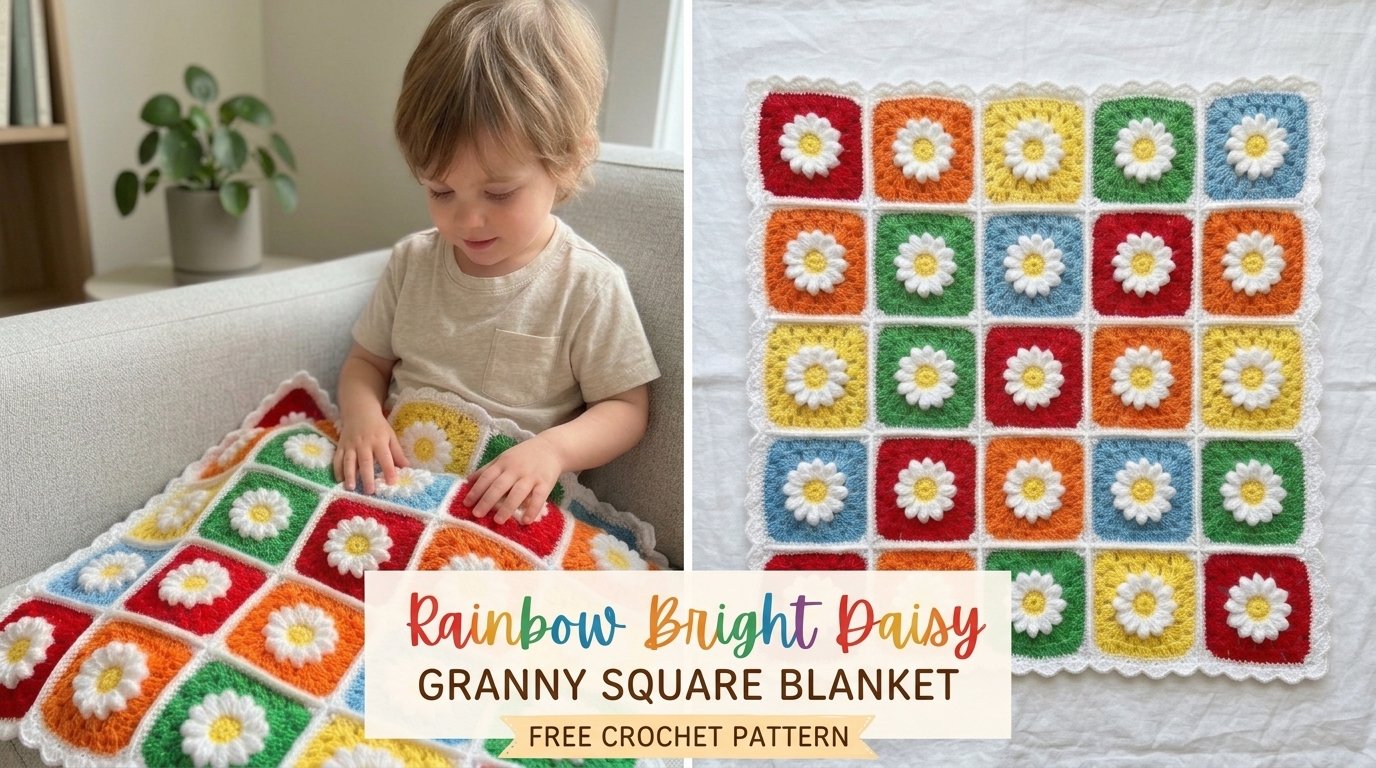
Ever dreamed of a blanket that looks like a garden party exploded in the best way possible? This Rainbow Bright Daisy Granny Square Blanket delivers exactly that—bold petals popping off cheerful rainbow backgrounds, all stitched into one ridiculously happy throw. You get the classic granny square comfort with a 3D daisy twist that somehow stays totally doable. Grab your hook; we’re making magic that actually looks like you spent way more time than you did.
Why You Will Love This Daisy Granny Square Blanket Pattern
This one hits the perfect sweet spot. It’s interesting enough that you won’t zone out after square three, yet repetitive enough that you can binge your favorite show without dropping stitches. Once the daisy center clicks, the rest flies by.
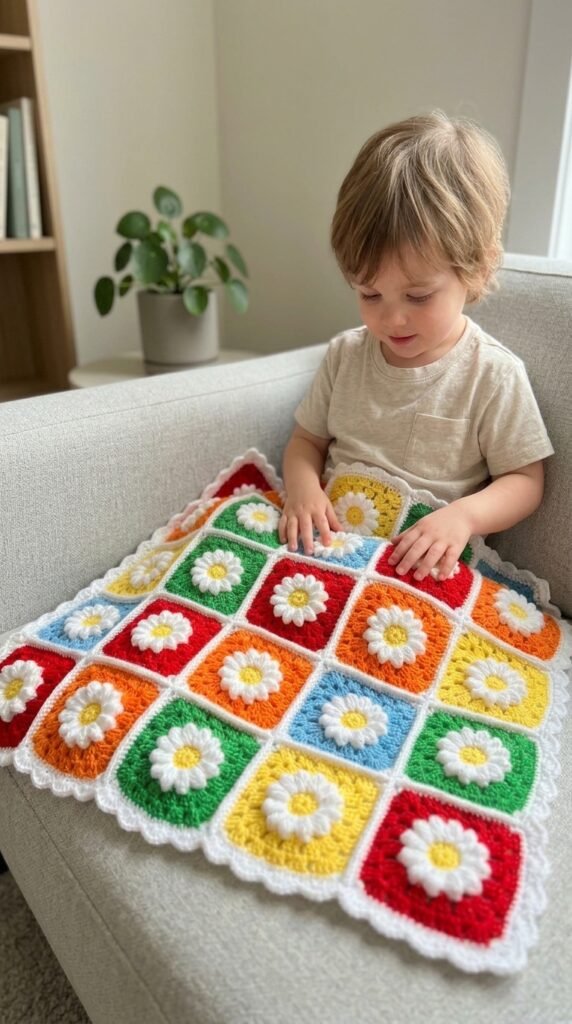
Modular construction is the real win here. Make 25 squares for a cozy 5×5 grid, or scale it down to 16 for a baby gift or up to 49 for a serious sofa takeover. Each square sports a raised white daisy with a sunny yellow center that literally lifts off the background. The texture? Pure eye candy. And no, you don’t need wizard-level skills—just solid basics and a willingness to fold those petals forward for a second.

IMO, the rainbow rotation keeps every square feeling fresh. Red, orange, yellow, green, blue—your brain stays engaged without the drama of constant color changes mid-round.
Materials Needed for Your Daisy Blanket
You’ll need worsted weight (category 4) yarn that holds its shape. Cotton or a cotton-acrylic blend works best so those petals stay crisp instead of flopping over.
Yarn amounts (approximate for a 25-square blanket):
- Yellow for centers: 50 grams
- White for petals and border: 200 grams
- Red background: 75 grams
- Orange background: 75 grams
- Yellow background: 75 grams
- Green background: 75 grams
- Blue background: 75 grams
Hook: 4.0 mm (G/6), or whatever gets you the right gauge.
Notions: yarn needle, scissors, stitch markers (seriously helpful), blocking mats and pins.
That’s it. No fancy gadgets required.
Gauge and Finished Measurements
Each blocked square clocks in around 4 inches by 4 inches (10 cm square). The finished blanket with border lands at roughly 22 by 22 inches (56 cm).
Gauge matters more than usual here. Mismatched squares turn into a wavy mess when you join them. Crochet one test square, measure it, and swap hooks if needed. Trust me—fixing this now beats ripping out twenty squares later.
Skill Level
Call it intermediate beginner. You need to know basic stitches and feel okay working in the round. The petal technique might be new, but it’s just a specific order of stitches. Follow along and you’ll own it by square two.
Abbreviations and Stitch Definitions
Quick refresher so nothing trips you up mid-flow:

- Ch – Chain
- Sl st – Slip stitch
- Sc – Single crochet
- Hdc – Half double crochet
- Dc – Double crochet
- Tr – Treble crochet
- Dc2tog – Double crochet two together (decrease)
- FPdc – Front post double crochet (for that raised look if you want extra texture later)
Nothing scary. Just the usual suspects.
Step by Step Crochet Pattern for the Daisy Granny Square
Here’s where the fun starts. We’ll build one complete square, then rinse and repeat with different background colors.
Round 1: The Daisy Center (Yellow)
Start with yellow and a magic ring. If magic rings still feel like wrestling an octopus, wrap the yarn around two fingers, insert the hook, pull up a loop, and chain one to lock it.
Ch 3 (counts as first dc), then work 11 more dc into the ring. Slip stitch to the top of the starting chain. Pull the tail tight so the center closes clean. You now have 12 dc. Fasten off yellow and weave that short tail right away—future you will high-five present you.
Round 2: The Daisy Petals (White)
Join white with a slip stitch in any dc. Chain 1, single crochet in the same stitch. Then chain 5, skip the next stitch, single crochet in the following stitch. Repeat around until you have six chain-5 loops. End with a chain 5 and slip stitch to the first single crochet. These loops are the skeleton of your petals. Don’t fasten off yet.
Round 3: Building the Petals (White)
Slip stitch into the first chain-5 loop. In that same loop work: sc, hdc, dc, tr, dc, hdc, sc. That’s one full petal. Move to the next loop and repeat the exact sequence. Keep going until all six petals are done. Slip stitch to the first sc to close.
Your daisy should now fan out proudly around the yellow center. If the petals look cramped, loosen your tension or bump up half a hook size just for this round. Fasten off white.
Round 4: Background Color Joins the Daisy
This is the sneaky part that creates the 3D pop. Gently fold the petals forward so you can see the single crochets from Round 2 underneath. Join your background color (red, orange, yellow, green, or blue) with a slip stitch in any of those sc stitches.
Chain 3 (counts as first dc), then dc in the same stitch. Chain 2, work 2 dc in the next Round 2 sc. Repeat around. You’ll end up with six groups of 2 dc separated by chain-2 spaces. Slip stitch to the top of the starting chain. The petals now sit proudly on top while the background sits behind them. Magic, right?
Round 5: First Granny Round
Slip stitch over to the first chain-2 space. Chain 3, 2 dc in the same space, chain 1, then 3 more dc in the same space—that’s your first corner. Chain 1, then (3 dc, chain 2, 3 dc) in the next chain-2 space. Repeat until you have four corners. Slip stitch to close. The square shape is officially happening.
Round 6: Second Granny Round
Slip stitch to a corner chain-2 space. Chain 3, 2 dc, chain 2, 3 dc in that same corner. Chain 1, 3 dc in the next chain-1 space, chain 1, then (3 dc, chain 2, 3 dc) in the next corner. Keep that rhythm all the way around. Fasten off and weave the ends.
One daisy granny square complete. Now make 24 more, rotating the background colors.
Color Distribution for the Blanket
For 25 squares, aim for five of each background color: red, orange, yellow, green, blue. Lay them out before you join so no two identical colors sit side by side. The random-looking scatter creates that lively garden effect instead of neat little stripes. Play with the arrangement until it makes you grin.
Joining the Squares
The original uses a clean whip stitch in white, and it looks sharp. Hold two squares wrong sides together (right sides facing out). Thread a yarn needle with white and work through the back loops only along the edge. Join into rows first, then join the rows together.
Take your time. Neat seams make the whole blanket look polished instead of “I joined this at 2 a.m.”
The Scalloped Border
White scallops frame everything perfectly.
Border Round 1: Join white at any corner. Chain 1 and single crochet evenly around the entire blanket, putting 3 sc in each corner. Slip stitch to join.
Border Round 2: Chain 1, sc in the first stitch. Skip 2 stitches, work 5 dc in the next stitch (there’s your scallop), skip 2 stitches, sc in the next. Repeat around, adjusting slightly at corners so nothing waves. Slip stitch, fasten off, and weave every last end.
Blocking Your Finished Blanket
Blocking is non-negotiable if you want those squares to sit flat and the petals to open up. Soak the blanket, gently squeeze out water (never wring), and pin it square on blocking mats. Let it dry completely. The difference is night and day—suddenly it looks store-bought instead of “my first try.”

Tips for Success with This Crochet Tutorial
- Count stitches after every round. A missed chain space grows into a headache fast.
- Weave ends as you go. Twenty-five squares times multiple colors equals a mountain of tails if you wait.
- Park a stitch marker in each corner space. Your future self will thank you on Round 6.
- If petals curl inward, your tension is too tight. Relax those hands and try again.
FYI, these little habits turn a good blanket into a great one.
Making This Pattern Your Own
The structure is flexible. Swap the rainbow for soft pastels and you’ve got an instant baby gift. Go earthy for fall. Use one solid background color for a calmer look. These squares also shine as pillow covers, tote bag panels, or even a light summer cardigan. The daisy motif works year-round.
Play. Experiment. Make it yours.
You Might Also Like
- Blue Heart Granny Square Baby Blanket Free Crochet Pattern
- Blush Pink Teddy Bear Granny Square Blanket Free Pattern
- Mint and Lemon Spring Granny Square Blanket Free Crochet Pattern
- Sunny Lemon Hexagon Kitchen Throw Free Crochet Pattern
- Rainbow Dolphin Pod Baby Blanket Free Crochet Pattern
FAQ’s
Can complete beginners make this?
If you can chain, single crochet, and double crochet confidently, yes. The petal round is just a specific sequence of stitches you already know. Take it slow on the first square and you’ll be flying by the fifth.
What if my squares come out different sizes?
That’s almost always tension or hook size. Make a gauge square first and adjust. Blocking helps a little, but matching sizes before joining is way easier.
Can I use acrylic instead of cotton?
You can, but cotton or a cotton blend keeps the petals crisp. Acrylic tends to flop more. If acrylic is what you have, go for it—just expect slightly softer petals.
How long does one square take?
Once you’re comfortable, 20–30 minutes per square is realistic. The first few will take longer while you learn the petal sequence.
Do I have to use five background colors?
Nope. Use as many or as few as you like. The pattern works with any color scheme you throw at it.
Is the magic ring required?
It’s ideal for a tight center, but you can start with a chain-4 ring if magic rings still feel awkward. Just pull it tight.
Final Thoughts
There you have it—a cheerful, textured, rainbow-bright daisy blanket that looks way more complicated than it actually is. The raised petals, the modular freedom, the happy color pop… this one earns its keep as a gift or a permanent couch resident.
Now go make some daisies. And when you finish, take a victory photo. You’ve earned it.




Leave a Reply
You must be logged in to post a comment.