

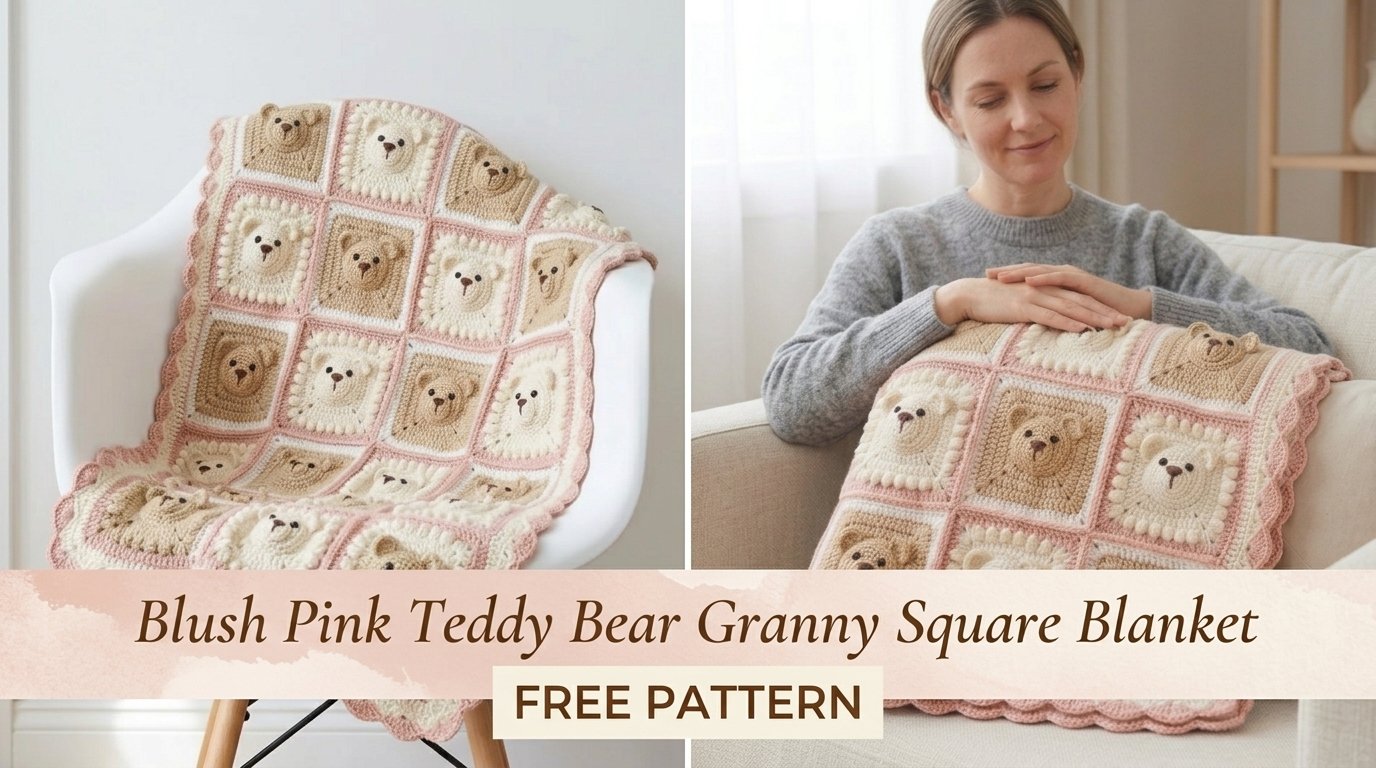
Soft blush pink yarn, tiny teddy bear faces, and classic granny squares come together in one project that looks store-bought but feels completely handmade. This blanket turns a simple stash dive into the kind of baby gift that stops conversations at showers. You get twenty little 3D bears staring back at you, all framed by a scalloped edge that softens every corner. Ready to hook something ridiculously cute?

Why This Teddy Bear Granny Square Blanket Is Worth Your Time
Picture this: soft cream squares, warm tan bears, and that perfect dusty blush pink that somehow makes every nursery look intentional. Each square carries its own little bear head with rounded ears and a stitched smile. The whole thing joins into a cozy 32 by 40 inch rectangle that works as a stroller cover, crib accent, or pure snuggle factor.
You stay in intermediate territory the whole time. Basic stitches in the round handle the squares, while the faces need only simple increases and a bit of sewing. No advanced shaping tricks, no endless counting marathons. The payoff hits hard when those raised bear faces pop off the fabric. IMO, few projects deliver this much “aww” per hour of crochet.
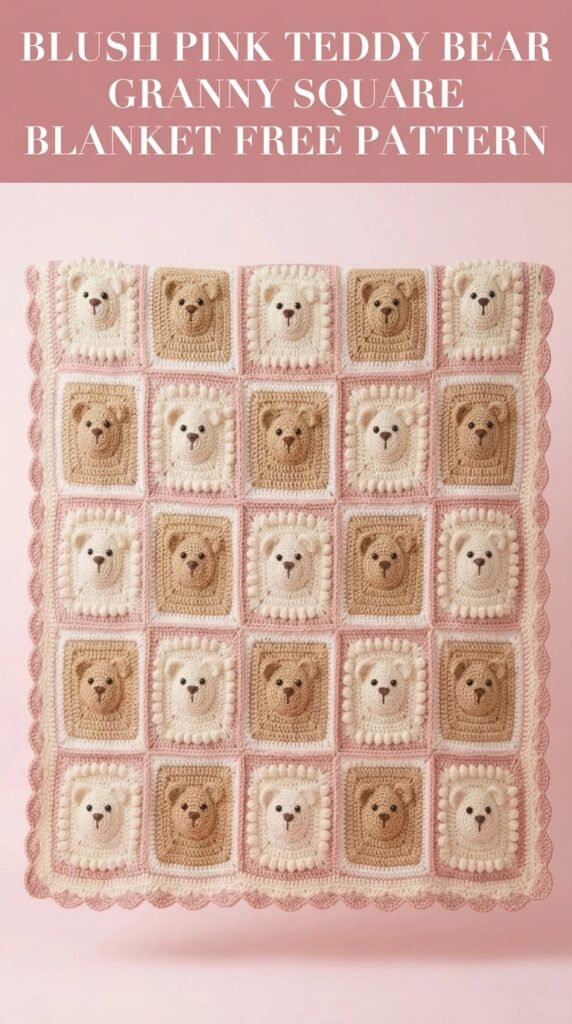
The color story feels timeless. Swap the pinks for soft blues or sage if you want, but the original blush-and-cream mix stays classic for years. You finish something that looks boutique-level without the boutique price tag.
Materials You’ll Need
Grab worsted weight yarn in these amounts:
- Cream (main background): about 400 yards
- Light tan (lighter bears): about 350 yards
- Medium tan (darker bears): about 200 yards
- Blush pink (borders and accents): about 300 yards
- White (border base): about 150 yards
- Tiny bit of dark brown for noses
Soft acrylic or cotton-blend yarns wash like a dream and survive endless baby laundry cycles. Lion Brand Vanna’s Choice or Caron Simply Soft both play nicely here.
Tools stay simple:
- 5.0 mm (H/8) hook for the squares
- 4.0 mm (G/6) hook for the faces
- Tapestry needle
- 6 mm black safety eyes (20 pairs) or black yarn for embroidery
- Stitch markers and scissors
Gauge sits around 4 single crochets and 4 rows per inch with the larger hook. It does not need perfection—finished size will land near 32 by 40 inches either way.
Abbreviations and Stitch Definitions
Here is every move you will use, no fluff:
ch – chain
sl st – slip stitch
sc – single crochet
hdc – half double crochet
dc – double crochet
inc – two stitches in one stitch
dec – two stitches worked together
BLO – back loop only
magic ring – adjustable starting loop that closes tight
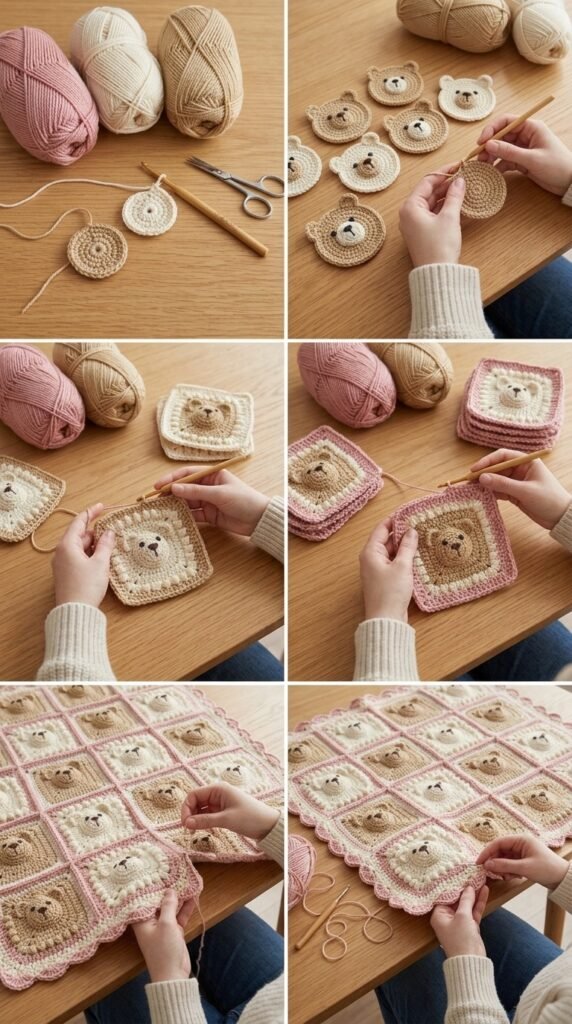
Practice the magic ring once if it still feels fiddly. Everything else builds from stitches you already know.
How to Crochet the Teddy Bear Face
This part feels like pure playtime. You make twenty separate faces, then sew each one onto a square. Alternate light and medium tan so the bears look like a little family instead of clones.
With the 4.0 mm hook and tan yarn:
Round 1: Magic ring, ch 1, 6 sc into the ring. Pull tight. Join with sl st. (6 sts)
Round 2: Ch 1, 2 sc in every stitch. Join. (12 sts)
Round 3: Ch 1, sc, 2 sc in next around. Join. (18 sts)
Round 4: Ch 1, sc in next 2, 2 sc in next around. Join. (24 sts)
Round 5: Ch 1, sc in every stitch. Join. Fasten off and leave a long tail. (24 sts)
That flat circle becomes the perfect bear canvas.
Making the Ears (Make 2 per bear, 40 total)
Same color, same hook:
Round 1: Magic ring, 6 sc. Pull tight. Join. (6 sts)
Round 2: Ch 1, 2 sc in every stitch. Join. Fasten off, leave a tail. (12 sts)
Tiny, quick, and instantly cute.
Assembling the Bear Face
Pin the ears at roughly 10 o’clock and 2 o’clock so they tilt outward just a bit. Sew them down firmly with the yarn tails.
Pop in safety eyes between rounds 3 and 4, about six stitches apart. Prefer embroidery for baby safety? Work small French knots or satin stitches instead.
Dark brown yarn makes the nose: a short triangle between the eyes, a quick vertical line down, and a gentle curve for the smile. Each face ends up with its own expression if you tilt the nose a hair differently. That variety keeps the finished blanket from looking mass-produced.
Crocheting the Granny Squares
Twenty squares total, laid out four across and five down. Alternate cream, light tan, and blush pink for the backgrounds so the colors dance a little.
With the 5.0 mm hook:
Round 1: Magic ring, ch 3 (counts as dc), 2 dc, ch 2, 3 dc, ch 2 three more times. Join to top of ch-3.
Round 2: Slip into the corner space, ch 3, 2 dc, ch 2, 3 dc in same space. Ch 1, (3 dc, ch 2, 3 dc) in next corner. Repeat around. Join.
Round 3: Same idea—corner clusters with an extra 3-dc group on each side.
Round 4 and Round 5: Keep adding one more cluster per side until you hit twenty groups of 3 dc total.
Each square measures roughly six inches. Fasten off and weave the ends now so they stay out of your way later.
Attaching the Bear Face to the Square
Center the face on the finished square. Use the long tail and a whip stitch around the entire edge. The face sits slightly raised, giving that soft 3D effect everyone loves. Press gently so the ears stay upright.
Joining the Squares
Lay everything out in a 4-by-5 grid. Step back and check the color flow before you commit. Alternate bear shades and square colors until the arrangement feels balanced.
Join with blush pink yarn and a tapestry needle. Hold two squares wrong sides together and whip stitch through the back loops only. The front stays flat and neat. Join entire rows first, then sew the rows together. The seams almost disappear once the border goes on.
Adding the Scalloped Border
This edge turns the blanket from “cute project” into “finished heirloom.”
Round 1 (white): Join in any corner, ch 1, 3 sc in the corner. Sc evenly around, placing 3 sc in every corner. Aim for three stitches per granny cluster. Join.
Round 2 (blush pink): Ch 1, sc in every stitch, 3 sc in the center corner stitch. Join.
Round 3 (blush pink): Ch 1, sc in first stitch. Skip 2, 5 dc in next stitch, skip 2, sc in next. Repeat all the way around. Adjust at corners so the shells stay even. Join.
Optional Round 4: One final sc round in blush pink for a polished finish.
Weave every last end. The scallops frame those teddy faces like little picture frames.
Tips for Success
Spend extra minutes on the faces—they steal the show. Slightly different nose angles give each bear personality.
Block the squares before joining. A light steam or wet block makes every edge match and the seams behave.
Skip plastic eyes for babies under three. Embroidered eyes look just as sweet and stay completely safe.
Count after every granny round. Five seconds of counting saves twenty minutes of frogging later.
Work in short evening sessions. Twenty faces sound like a lot until you realize each one takes only a few minutes.
Caring for Your Finished Blanket
Machine wash on gentle with cold water. Lay flat to dry so the shape stays true. Acrylic softens with every wash, which only makes the blanket better over time. Skip high dryer heat—it can loosen stitches and fuzz the yarn.

This blush pink teddy bear granny square blanket rewards every stitch you put into it. The finished piece looks like it walked out of a high-end baby boutique, yet you made every single bear yourself. Whether it becomes a shower gift, a nursery centerpiece, or your own little one’s first snuggle companion, the project delivers pure joy from the first magic ring to the last scallop.
You Might Also Like
- Sunny Lemon Hexagon Kitchen Throw Free Crochet Pattern
- Rainbow Dolphin Pod Baby Blanket Free Crochet Pattern
- Cream Lamb Baby Romper Set Free Crochet Pattern
- Elsa Frozen Ice Queen Baby Dress Free Crochet Pattern
FAQ’s
How long does this blanket usually take?
Most makers finish in about two weeks of evening sessions. The faces go fast once you find a rhythm, and the squares are pure muscle memory after the first few.
Can I change the colors?
Absolutely. Soft blues, sage greens, or even classic yellow and brown all work. Keep the contrast between the bears and the backgrounds so the faces stay visible.
Is this safe for newborns?
Embroider the eyes instead of using safety eyes and the blanket becomes fully newborn-safe. The yarn choices listed are already machine-washable and soft enough for sensitive skin.
What if my squares end up different sizes?
Block them. A quick steam or wet block equalizes almost any tension difference. If one square still fights you, frog the last round and rework it with slightly tighter or looser tension.
Can beginners handle this pattern?
Confident beginners who already know magic rings, single crochet, and double crochet can jump in. The face shaping stays simple, and the rest is classic granny square work.
How do I store the finished blanket?
Fold it loosely or roll it. Avoid hanging, which can stretch the seams over time. A breathable cotton bag keeps dust away without trapping moisture.
Final Thoughts
You now hold every step needed to create a blush pink teddy bear granny square blanket that feels special from the first stitch. Grab your hooks, pick your favorite soft yarns, and start building those little faces. The finished piece will make someone smile every single time they see it—and that is the best reason to crochet anything.


Leave a Reply
You must be logged in to post a comment.