

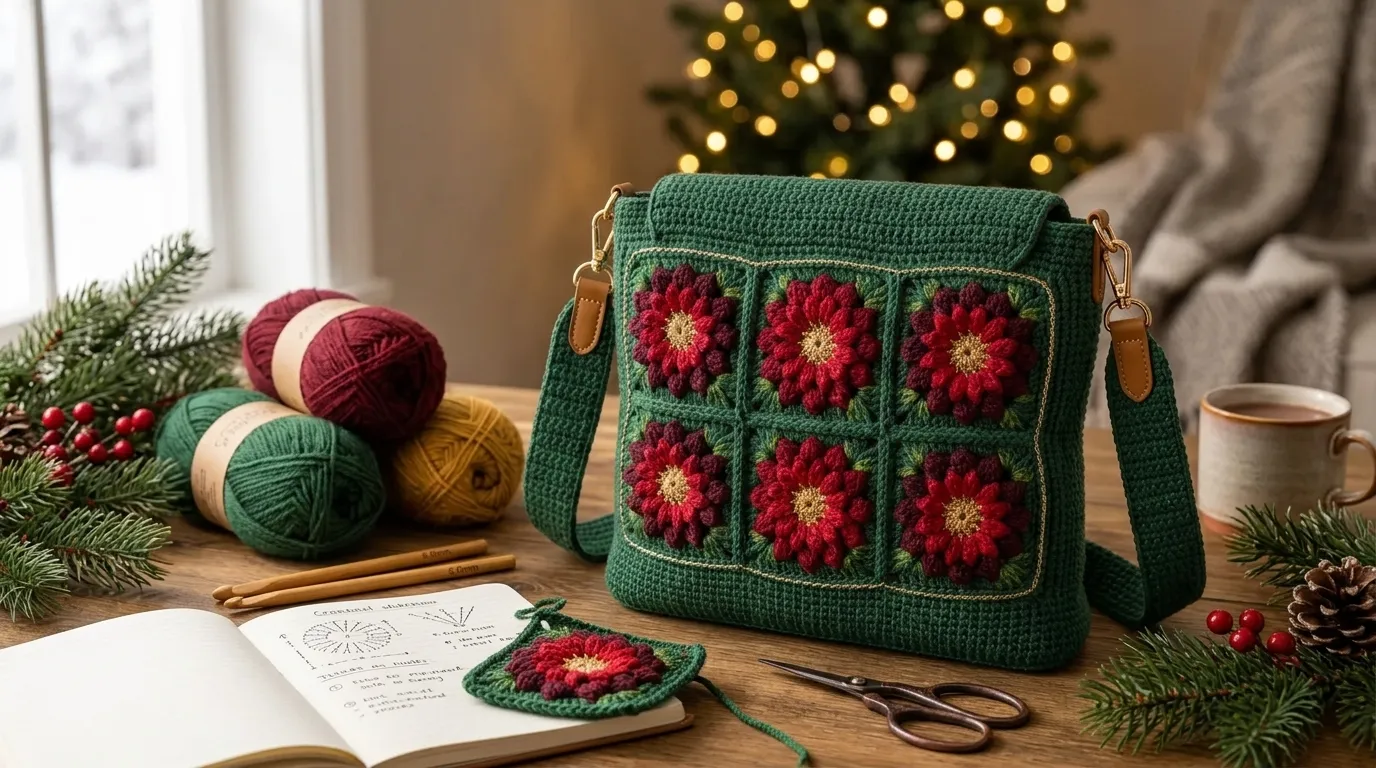
The finished design features colorful floral granny squares, a comfortable shoulder strap, and a sturdy crocheted base. The poinsettia flowers sit slightly raised against the background, giving the bag a lovely dimensional appearance.
If you enjoy floral crochet and traditional granny squares, this Christmas Poinsettia Granny Square Bag is a fun project to add to your holiday crochet list.
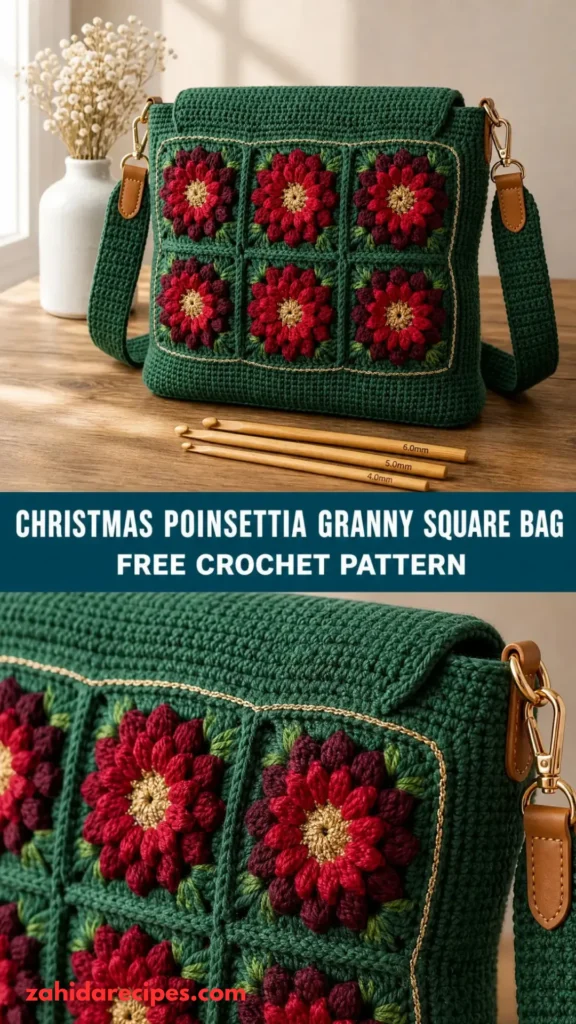
About This Christmas Poinsettia Granny Square Bag Pattern
This bag is constructed from 13 individual granny squares, each featuring a decorative poinsettia flower in the center.
The flower is made using layered red crochet petals surrounded by dark green leaf details. A cream-colored background frames each flower and helps the festive colors stand out.
The squares are joined together to create two large rectangular panels. A crocheted base and side gussets give the bag extra structure, while a reinforced shoulder strap makes it practical for everyday use.
Skill Level: Intermediate
You should feel comfortable with basic stitches, working in rounds, changing colors, and joining crochet motifs. The layered flower petals require a little extra attention, but I’ll walk you through each part.
Finished Size:
- Width: Approximately 14 inches (35.5 cm)
- Height: Approximately 13 inches (33 cm)
- Depth: Approximately 3 inches (7.5 cm)
- Strap length: Approximately 24 inches (61 cm)
The finished bag is roomy enough for a wallet, phone, small notebook, sunglasses, and other daily essentials.
Because the flower motifs add texture, the bag has a slightly decorative finish. I recommend using cotton yarn for better stitch definition and durability.
Materials You’ll Need
Yarn
Choose medium-weight cotton yarn (Category 4) for a sturdy, structured bag.
| Color | Purpose | Approximate Amount |
|---|---|---|
| A – Deep Red | Poinsettia petals | 180 yards |
| B – Dark Green | Leaves and accents | 150 yards |
| C – Cream | Granny square backgrounds | 350 yards |
| D – Golden Yellow | Flower centers | 30 yards |
| E – Forest Green | Joining, sides, and strap | 250 yards |
Total: Approximately 960 yards (878 meters).
Allow 15% extra for gauge variation and individual tension differences.
Crochet Hooks
- 4.0 mm hook for granny squares and flowers.
- 4.5 mm hook for joining, bag sides, and strap.
- 3.5 mm hook for tighter flower-center details if needed.
Additional Supplies
- Tapestry needle
- Stitch markers
- Scissors
- Measuring tape
- Blocking mats and rust-resistant pins
- Cotton fabric for optional lining
- Sewing needle and matching thread
- Removable stitch markers for panel alignment
Abbreviations and Terminology
This pattern uses US crochet terminology.
- ch: Chain stitch. Yarn over and pull through the loop on your hook.
- sl st: Slip stitch. Insert hook, yarn over, and pull through both loops.
- sc: Single crochet. Insert hook, yarn over, pull up a loop, yarn over, and pull through both loops.
- hdc: Half double crochet. Yarn over, insert hook, pull up a loop, yarn over, and pull through all three loops.
- dc: Double crochet. Yarn over, insert hook, pull up a loop, yarn over and pull through two loops twice.
- tr: Treble crochet. Yarn over twice, insert hook, pull up a loop, then yarn over and pull through two loops three times.
- st: Stitch.
- sts: Stitches.
- sp: Space.
- sk: Skip.
- rep: Repeat.
- RS: Right side.
- WS: Wrong side.
- FO: Fasten off.
- MR: Magic ring.
- BLO: Back loop only.
- FLO: Front loop only.
Special Stitches
- Puff stitch: Yarn over, insert hook into the indicated space, pull up a loop. Repeat this process until you have seven loops on the hook. Yarn over and pull through all loops, then chain 1 to secure.
- Shell: Work 5 dc into the same stitch or space.
- Petal stitch: Work 3 dc, 1 tr, and 3 dc into the same designated space.
- Cluster: Work the specified number of incomplete double crochets into the same space, then yarn over and pull through all remaining loops.
Turning chains do not count as stitches unless a step explicitly says they do.
Gauge
Gauge matters because you want all your granny squares to be the same size.
Using a 4.0 mm hook and cream yarn, work a traditional granny square for five rounds.
Your finished square should measure approximately 4.5 × 4.5 inches (11.5 × 11.5 cm).
If your square measures larger, switch to a smaller hook. If it measures smaller, try a 4.5 mm hook.
Keep your tension consistent, especially when working the floral centers and changing colors.
Main Pattern Instructions
The bag is made in several manageable pieces: floral granny squares, two body panels, a small decorative pocket, side and bottom gussets, and a reinforced strap.
Before starting, remember that each square should have the same number of rounds. This makes joining much easier and keeps the finished bag looking neat.
Part 1: Crochet the Poinsettia Flower Center
Begin with golden yellow yarn (Color D).
Round 1: Make a magic ring. Ch 1, work 8 sc into the ring. Join with a sl st to the first sc.
Count: 8 sc.
Round 2: Change to red yarn (Color A). Ch 1, work 2 sc into each stitch around. Join with a sl st.
Count: 16 sc.
This red round creates the foundation for the flower petals.
Part 2: Create the Poinsettia Petals
The poinsettia petals are worked using puff stitches to create a raised floral effect.
Round 3: Ch 1. Work 1 puff stitch into the first stitch, ch 2, skip 1 stitch, and repeat around. Join with a sl st to the first puff stitch.
You should have 8 puff stitches and 8 chain spaces.
Round 4: Sl st into the next chain space. Ch 1. Work 1 petal stitch (3 dc, 1 tr, 3 dc) into the same chain space. Sl st into the next chain space.
Repeat around to create 8 petals.
Fasten off red yarn.
Round 5: Attach dark green yarn (Color B) behind the red petals, working into the unused loops from Round 2.
Ch 1, work 1 sc into the first available stitch, ch 3, skip 1 stitch, and repeat around. Join with a sl st.
This creates the foundation for the green leaves.
Round 6: Sl st into the first chain space. Ch 1, work 1 leaf cluster consisting of 2 hdc, 2 dc, 2 hdc into the space. Ch 2, sl st into the same space.
Repeat in each chain space.
Fasten off.
You now have a layered poinsettia flower with red petals and green leaves.
Part 3: Turn the Flower Into a Granny Square
Now we’ll add the cream background to transform the flower into a square motif.
The corners are formed using chain spaces, while the sides are worked in traditional granny clusters.
Attach cream yarn (Color C) to a gap between two green leaves.
Round 7: Ch 3 (counts as 1 dc). Work 2 dc into the same space.
Ch 2, work 3 dc into the next space.
Continue working 3-dc clusters into the available spaces around the flower, using ch-2 spaces to form the four corners.
At each corner, work:
3 dc, ch 2, 3 dc.
Join with a sl st to the top of the beginning ch-3.
Round 8: Sl st across to the first corner space.
Ch 3, work 2 dc, ch 2, 3 dc into the same corner space.
Work 3 dc into each side space.
At each remaining corner, work 3 dc, ch 2, 3 dc.
Join with a sl st.
Round 9: Repeat Round 8, adding one additional 3-dc cluster along each side as needed.
Round 10: Repeat the granny-square pattern in cream yarn.
Finish with a sl st and fasten off.
Motif check: Each completed square should measure approximately 4.5 inches across. If necessary, adjust the final round slightly to achieve the same measurement for all squares.
Part 4: Make the Remaining Granny Squares
Repeat the poinsettia granny square instructions until you have:
- 6 squares for the front panel.
- 6 squares for the back panel.
- 1 square for the inside decorative pocket.
Total: 13 granny squares.
Keep the flower orientation consistent. I like arranging the flowers so their petals point naturally toward the corners rather than turning randomly.
Block all squares before joining them.
Part 5: Join the Granny Squares
Arrange six squares into a rectangle with three squares across and two squares down.
Make two identical rectangles for the front and back panels.
Place the squares with their right sides facing upward.
Using forest green yarn (Color E) and a 4.5 mm hook, join the squares using the mattress stitch.
Mattress Stitch Joining
- Place two squares side by side.
- Insert your tapestry needle through the corresponding outer loops.
- Alternate between the two squares.
- Pull the yarn gently to close the seam.
- Continue until the edges are completely joined.
Repeat for all horizontal and vertical seams.
The finished panel should measure approximately 13.5 inches wide and 9 inches tall.
Do not pull your joining yarn too tightly. You want the seams secure but flexible.
Part 6: Add the Top Border
Attach forest green yarn to one upper corner of the front panel.
Round 1: Ch 1 and work sc evenly across the top edge. Work 2 sc into each exposed joining area where necessary to avoid gaps.
Repeat across the back panel.
Round 2: Ch 1, work 1 sc into each stitch around the upper opening. Join with a sl st.
Round 3: Ch 1, work 1 sc in each stitch around.
Fasten off.
The green border frames the flowers beautifully and gives the top opening a clean appearance.
Part 7: Crochet the Side and Bottom Gusset
The gusset creates the depth of the bag.
Using forest green yarn and a 4.5 mm hook, begin with:
Foundation: Ch 13.
Row 1: Sc in the second ch from the hook and across. Turn.
Count: 12 sc.
Row 2: Ch 1, sc in each stitch across. Turn.
Count: 12 sc.
Rows 3–40: Repeat Row 2.
The finished strip should measure approximately 3 inches wide and long enough to cover both sides and the bottom of the bag.
For a more accurate fit, measure the joined panels around their sides and bottom before fastening off. Add or remove rows if necessary.
Fasten off, leaving a long tail for sewing.
Attach the Gusset
Place the front panel and gusset with their right sides together.
Use stitch markers to hold the pieces in place.
Sew the gusset around the bottom and both sides using a whip stitch.
Repeat with the back panel.
Make sure the corners are secure. These areas receive extra stress when the bag is filled.
Part 8: Add the Inside Pocket
Take the thirteenth poinsettia granny square.
Fold approximately 1 inch of its upper edge toward the wrong side and sew it down to create a neat pocket opening.
Position the square inside the front panel, centered approximately 2 inches below the top border.
Using matching cream or green yarn, sew the bottom and side edges securely.
Leave the top edge open.
This pocket is perfect for storing keys, lip balm, or other small items.
Part 9: Crochet the Shoulder Strap
A comfortable strap makes the bag much more practical.
Using forest green yarn and a 4.5 mm hook, ch 9.
Row 1: Sc in the second ch from the hook and across. Turn.
Count: 8 sc.
Row 2: Ch 1, sc in BLO across. Turn.
Rows 3–105: Repeat Row 2.
The strap should measure approximately 24 inches long. Add or remove rows to customize the length.
For extra strength, fold the strap lengthwise and sew the long edges together to create a firm, double-layered strap.
Attach the Strap
Position one end of the strap approximately 2 inches from the left side seam.
Place the other end at the corresponding position on the opposite side.
Sew each end securely using a tapestry needle and matching yarn.
I recommend sewing a small rectangular reinforcement with an X through the center at each attachment point. This helps distribute weight and reduces stretching.
Special Techniques and Decorative Finishing
Add Extra Poinsettia Details
For a more dimensional flower, you can add small surface details using golden yellow yarn.
Attach yellow yarn to the center of each flower.
Work 3 small French knots using a tapestry needle.
Alternatively, make three tiny puff stitches in the flower center.
These little details make the flowers look more finished without overwhelming the red petals.
Optional Tassels
Tassels are a lovely finishing touch for a holiday-inspired bag.
Cut 20 strands of red and green yarn, each approximately 8 inches long.
Fold the strands in half and attach them to a small chain loop.
Secure the tassel with a separate strand of yarn.
Make two tassels and attach them to the upper side corners of the bag.
Trim the ends evenly.
Avoid making the tassels too heavy, especially if you plan to carry the bag regularly.
Assembly and Finishing
Once all the crochet pieces are complete, take a few minutes to inspect the bag before weaving in every loose end.
Check the Seams
Turn the bag inside out and check the joins between the granny squares.
Look for:
- Loose stitches along the seams.
- Gaps between the gusset and body panels.
- Uneven corners.
- Weak strap attachment points.
Reinforce any areas that look loose.
Add a Fabric Lining (Optional)
Although the crochet bag looks beautiful without a lining, adding fabric makes it more practical.
Choose cotton fabric in cream, red, or dark green.
- Cut two rectangular fabric pieces slightly smaller than the finished bag panels.
- Sew the bottom and side edges together.
- Fold the top edge inward and hem it.
- Place the lining inside the crochet bag.
- Hand-sew the lining to the inside of the upper crochet border.
Keep the lining slightly relaxed rather than stretching it tightly.
A lining also helps prevent small belongings from slipping through the crochet stitches.
Weave in Loose Ends
Use a tapestry needle to weave all remaining yarn tails through several stitches on the wrong side.
Change direction once or twice to help secure the ends.
Trim excess yarn carefully.
Blocking and Care
Blocking helps your Christmas Poinsettia Granny Square Bag look neat and professionally finished.
Wet Blocking
If you used cotton yarn:
- Fill a basin with cool or lukewarm water.
- Add a small amount of gentle wool-safe or fabric detergent.
- Submerge the crochet bag or individual motifs.
- Allow them to soak for approximately 10–15 minutes.
- Remove the bag and gently squeeze out excess water.
- Never wring or twist the crochet fabric.
- Lay it flat on a clean towel.
- Shape the panels, flowers, and edges.
- Allow the bag to dry completely.
If your bag has a fabric lining, follow the care instructions for that fabric as well.
Care Instructions
- Hand wash gently when needed.
- Avoid bleach and harsh detergents.
- Never hang the bag while wet.
- Dry flat to prevent stretching.
- Store it in a clean, dry place.
- Avoid placing heavy objects inside for extended periods.
Cotton crochet bags can stretch with frequent use, so empty them before storing.
Fit and Troubleshooting Tips
Even experienced crocheters sometimes run into little problems. Here are a few things to watch for while making your bag.
1. My Granny Squares Are Different Sizes
This usually happens because of inconsistent tension or changes in hook size.
Solution: Block each square to the same measurements before joining. If one square is noticeably smaller, check your tension and adjust the final background round.
2. My Flower Petals Curl Up Too Much
Raised petals naturally create texture, but excessive curling can make the flower look crowded.
Solution: Check your puff-stitch tension. Avoid pulling the securing chain too tightly. Lightly shape the petals with your fingers during blocking.
3. My Bag Looks Wavy Around the Edges
Wavy edges usually mean there are too many stitches or clusters.
Solution: Check the stitch counts along the granny-square rounds. Make sure you’re working the correct number of clusters between corners.
4. The Bag Feels Too Soft
Cotton yarn provides good stitch definition, but a loose gauge can make the finished bag floppy.
Solution: Use a smaller hook for the gusset and strap. You can also add a fabric lining or lightweight interfacing to improve structure.
5. My Shoulder Strap Stretches
A single-layer crochet strap may stretch after repeated use.
Solution: Double the strap by folding and sewing it together. Reinforce both attachment points and avoid carrying excessively heavy items.
6. The Bag Looks Too Small
If you want a larger bag, you can increase the dimensions without changing the poinsettia design.
Add another granny-square column to each body panel, or add an extra granny-square row.
Remember to increase the gusset length accordingly.
Final Thoughts
I absolutely love how this Christmas Poinsettia Granny Square Bag combines traditional crochet techniques with cheerful holiday colors.
The raised red flowers, deep green leaves, and cream granny-square backgrounds create a festive combination that feels timeless rather than overly seasonal. It’s the kind of handmade accessory that makes even a simple winter outfit feel a little more special.
You can carry it to holiday gatherings, use it for shopping, or fill it with small gifts for someone who appreciates handmade treasures.
You can also experiment with the colors. Try burgundy petals with sage green leaves for a softer winter look, or use white petals and silver accents for a snowy holiday version.
Most importantly, enjoy making it. Take your time with the flower details, keep your squares consistent, and don’t worry if your first poinsettia isn’t absolutely perfect.
Every handmade piece has its own personality, and that’s part of the charm of crochet.
If you make this Christmas Poinsettia Granny Square Bag, I’d love to see your finished version! Share your project, save the pattern to your Pinterest crochet boards, and enjoy creating something beautiful for the holiday season.
Happy crocheting! 🎄




Leave a Reply
You must be logged in to post a comment.