

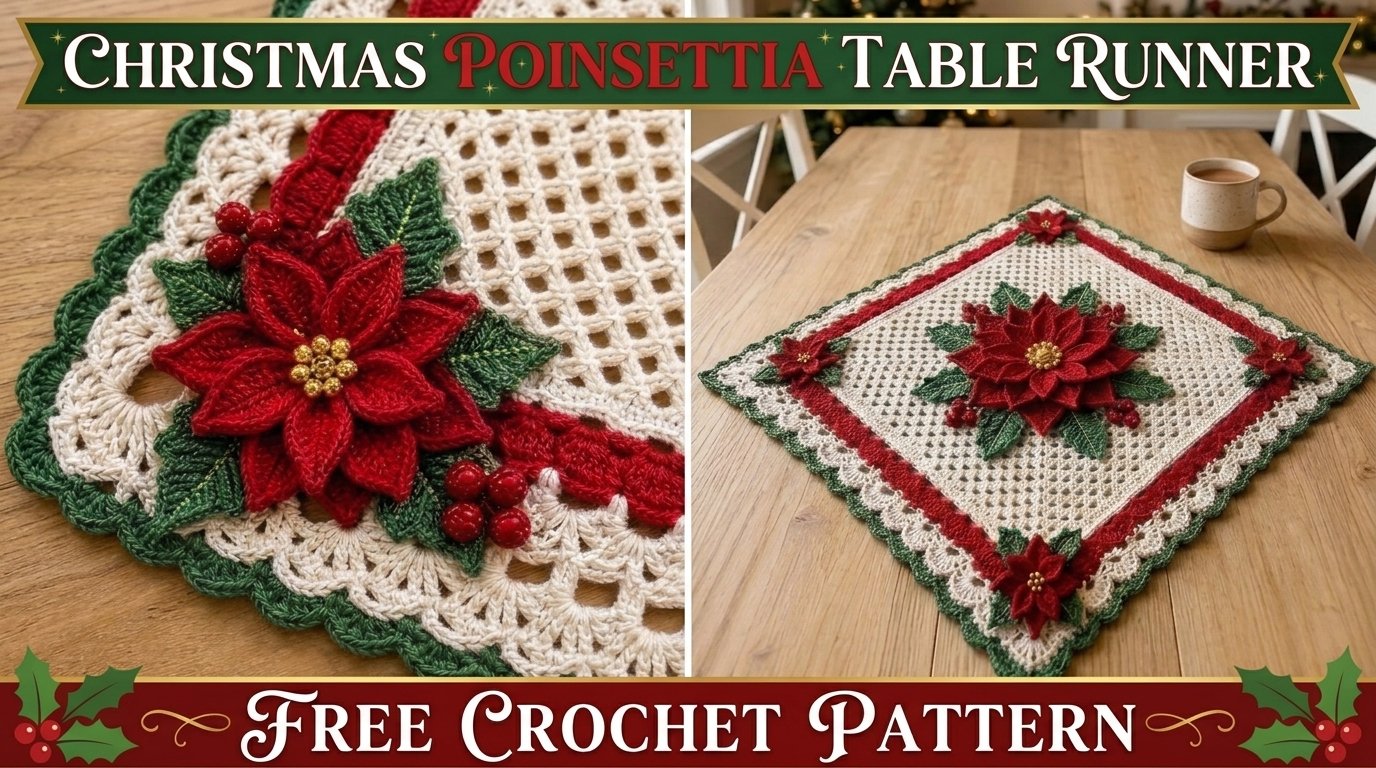
Every December I find myself lingering a little longer in the grocery store floral section. Those deep red poinsettias stacked near the entrance always stop me. The way the bracts radiate outward, the soft yellow centers, the glossy green leaves underneath—they feel like pure Christmas. One year I brought three home and set them on the dining table. By the next morning the petals had already started to droop, and I realized I wanted something that would last the entire season without watering or worry.
That is how this Christmas Poinsettia Table Runner began. I wanted the drama of real poinsettias stretched down the center of the table, but in yarn that could be packed away and brought out year after year. The result is a runner built from layered flower motifs and accompanying leaf clusters, joined into a long, elegant strip that looks like a cascade of blooms. It is intermediate in skill level because of the layered construction and careful joining, yet every step is written so you can follow along without guessing.
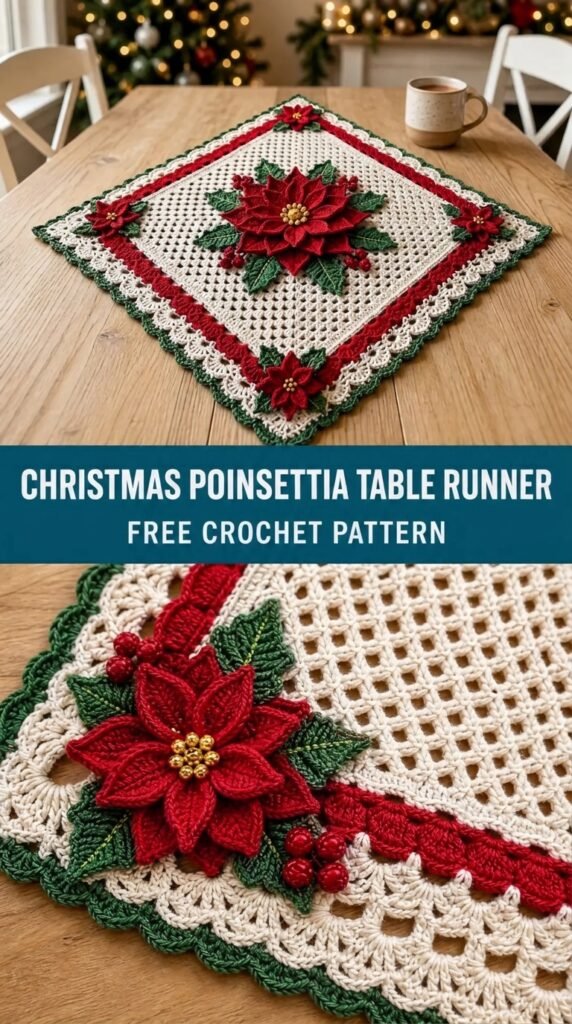
The finished piece measures approximately 14 inches wide by 52 inches long after blocking, perfect for most dining tables. The raised petals catch the light from candles or overhead fixtures and give the whole runner a dimensional, almost sculptural quality.
About This Pattern
This Christmas Poinsettia Table Runner is constructed from individual poinsettia flower motifs and separate leaf sprays that are joined as you go or seamed afterward. Each flower is worked in three layers: a small gold center, a middle layer of shorter red petals, and an outer layer of longer, slightly curved red petals. The leaves are simple pointed ovals worked in dark green and attached beneath and around the flowers so the arrangement feels natural rather than stiff.
You will make seven full poinsettia motifs and eight leaf clusters, then join them end to end with short connecting strips of green to create one continuous runner. A simple single-crochet border finishes the edges. The design is modular, so you can easily add or subtract motifs if you need a shorter or longer runner.
Skill level is intermediate. You should be comfortable with basic stitches, working in the round, changing colors cleanly, and sewing motifs together with a tapestry needle. The layering of petals requires a bit of patience the first time, but once you complete one flower the rest move quickly.
Materials You’ll Need
Yarn (worsted weight / Category 4, approximately 1,100 total yards)
- Color A – Deep Poinsettia Red: 550 yards (main petals)
- Color B – Forest Green: 400 yards (leaves and joining strips)
- Color C – Soft Gold or Mustard: 80 yards (flower centers)
- Color D – optional Cream or Ivory: 50 yards (if you prefer a lighter joining path or contrast border)
Allow 15 % extra yarn for gauge variation and swatching. I used a soft acrylic-wool blend that holds its shape well after blocking and is easy to wash, but any worsted-weight yarn with good stitch definition will work.
Hooks
- 5.0 mm (H-8) – main hook for motifs and leaves
- 4.5 mm (G-7) – optional tighter hook for the flower centers if you want them denser
Notions
- Tapestry needle
- Stitch markers (at least 8)
- Scissors
- Blocking mats and rust-proof pins
- Optional: fabric stiffener or light spray starch if you want the petals to stand more dramatically
Abbreviations and Terminology (US Terms)
- ch – chain
- sc – single crochet (insert hook, yarn over, pull up loop, yarn over, pull through both loops)
- hdc – half double crochet (yarn over, insert hook, yarn over, pull up loop, yarn over, pull through all three loops)
- dc – double crochet (yarn over, insert hook, yarn over, pull up loop, yarn over, pull through two loops, yarn over, pull through remaining two loops)
- tr – treble crochet (yarn over twice, insert hook, yarn over, pull up loop, [yarn over, pull through two loops] three times)
- sl st – slip stitch
- st(s) – stitch(es)
- sp – space
- rep – repeat
- BLO – back loop only
- FLO – front loop only
- pc – popcorn stitch: work 4 dc in the same stitch, remove hook from working loop, insert hook from front to back under the first of the 4 dc, grab the working loop and pull it through to close the popcorn.
Turning chains do not count as a stitch unless a step explicitly says they do. When changing colors, complete the last yarn-over of the previous stitch with the new color for the cleanest join.
Gauge
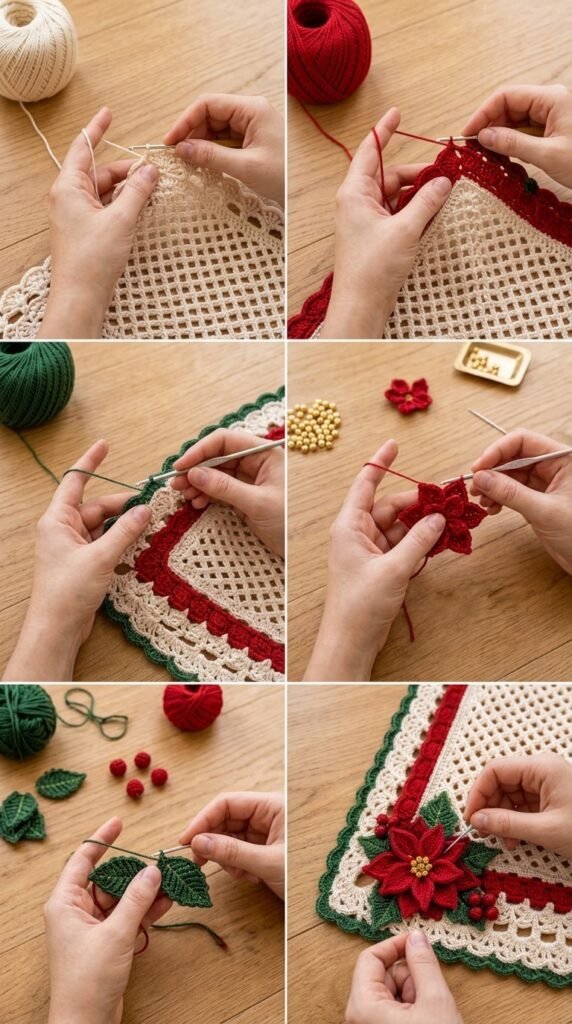
Make one complete poinsettia motif (all three layers) and block it lightly.
Blocked motif should measure approximately 6 inches across from petal tip to petal tip.
If your motif is larger, drop to a 4.5 mm hook. If it is smaller, try a 5.5 mm hook. Exact gauge is not critical for fit the way it is for a garment, but consistent motif size makes joining much easier.
Main Pattern Instructions
Poinsettia Flower Motif (Make 7)
Each flower is worked in three separate layers that are stacked and joined at the center.
Layer 1 – Gold Center
With Color C and 5.0 mm hook (or 4.5 mm for denser center):
Rnd 1: Make a magic ring, ch 1, work 8 sc into the ring. Pull ring closed. Join with sl st to first sc. (8 sc)
Rnd 2: Ch 1, 2 sc in each st around. Join. (16 sc)
Fasten off, leaving a 12-inch tail for sewing later if desired. Weave in the beginning tail.
Layer 2 – Middle Petals (shorter red layer)
With Color A:
Rnd 1: Make a magic ring, ch 2 (does not count as st), work 12 dc into the ring. Pull closed. Join with sl st to first dc. (12 dc)
Rnd 2: Ch 1, *sc in next st, (hdc, dc, hdc) in next st; rep from * around. Join. (6 petal clusters)
Rnd 3: Ch 1, *sc in the sc, sc in next hdc, (hdc, dc, hdc) in the dc, sc in next hdc; rep from * around. Join.
Fasten off. The middle layer should sit flatter and slightly smaller than the outer layer.
Layer 3 – Outer Petals (longer red layer)
With Color A:
Rnd 1: Magic ring, ch 3 (counts as first dc), 11 dc into ring. Join to top of ch-3. (12 dc)
Rnd 2: Ch 1, *sc in next st, ch 3, skip 1 st; rep from * around. Join. (6 ch-3 spaces)
Rnd 3: Sl st into first ch-3 sp, ch 1, *(sc, hdc, dc, tr, dc, hdc, sc) in ch-3 sp, sc in next sc; rep from * around. Join.
Rnd 4: Ch 1, *sc in next 2 sts, hdc in next, (dc, tr, dc) in next tr, hdc in next, sc in next 2 sts, skip the sc between petals; rep from * around. Join.
Fasten off, leaving a long tail for sewing if you prefer to attach layers by sewing rather than crocheting them together.
Assembling the Flower
Stack the layers: gold center on top of middle red layer, both centered on the outer red layer. Using the gold tail or a separate length of Color C, sew through all three layers at the very center with several firm stitches, securing the layers so they cannot shift. The middle layer should peek out slightly between the longer outer petals. Shape the outer petals gently with your fingers so they curve outward and slightly upward.
Leaf Cluster (Make 8)
Each cluster consists of three leaves joined at the base.
Single Leaf
With Color B:
Ch 12.
Row 1: Sc in 2nd ch from hook and in each ch across. (11 sc) Turn.
Row 2: Ch 1, sc in first 2 sts, hdc in next 2, dc in next 3, hdc in next 2, sc in last 2. Turn.
Row 3: Ch 1, sc in first 2, hdc in next 2, dc in next 3, hdc in next 2, sc in last 2.
Row 4: Ch 1, sc2tog, sc in next 7, sc2tog. (9 sts)
Row 5: Ch 1, sc2tog, sc in next 5, sc2tog. (7 sts)
Row 6: Ch 1, sc2tog, sc in next 3, sc2tog. (5 sts)
Row 7: Ch 1, sc2tog, sc, sc2tog. (3 sts)
Row 8: Ch 1, sc3tog. Fasten off, leaving a tail.
Make three leaves. Using the tails, sew the three leaves together at their bases so they fan slightly. The finished cluster should measure roughly 4–4.5 inches from base to tip of the longest leaf.
Connecting Strips and Assembly
You will join the seven flowers and eight leaf clusters into one long runner.
Lay the motifs out on a flat surface in this order (from one end to the other):
Leaf cluster – Flower – Leaf cluster – Flower – Leaf cluster – Flower – Leaf cluster – Flower – Leaf cluster – Flower – Leaf cluster – Flower – Leaf cluster – Flower – Leaf cluster.
Joining Method (recommended)
With Color B and 5.0 mm hook, work a short connecting strip between each pair of motifs as follows:
Attach yarn to the side edge of one motif (usually into the outer petal or leaf edge).
Ch 6, sc into the corresponding edge of the next motif.
Turn, ch 1, sc in each of the 6 chains.
Turn, ch 1, sc across again. Fasten off.
This creates a firm 1-inch-wide green bridge. Repeat between every motif so the runner becomes one continuous piece approximately 50–52 inches long before the final border.
Alternatively you may sew the motifs together with mattress stitch for a completely seamless look; the crocheted bridges simply speed the process and add a little extra length.
Border
Once all motifs are joined:
With Color B (or Color D if using cream), attach yarn at any outer corner.
Rnd 1: Work sc evenly around the entire outer edge of the runner, placing 3 sc in each outer corner and 1 sc in each stitch or chain space along the sides. Aim for approximately 3 sc per inch so the border lies flat. Join with sl st.
Rnd 2: Ch 1, sc in each sc around, again placing 3 sc in the center stitch of each corner. Join and fasten off.
Weave in all remaining ends carefully on the wrong side.
Special Techniques
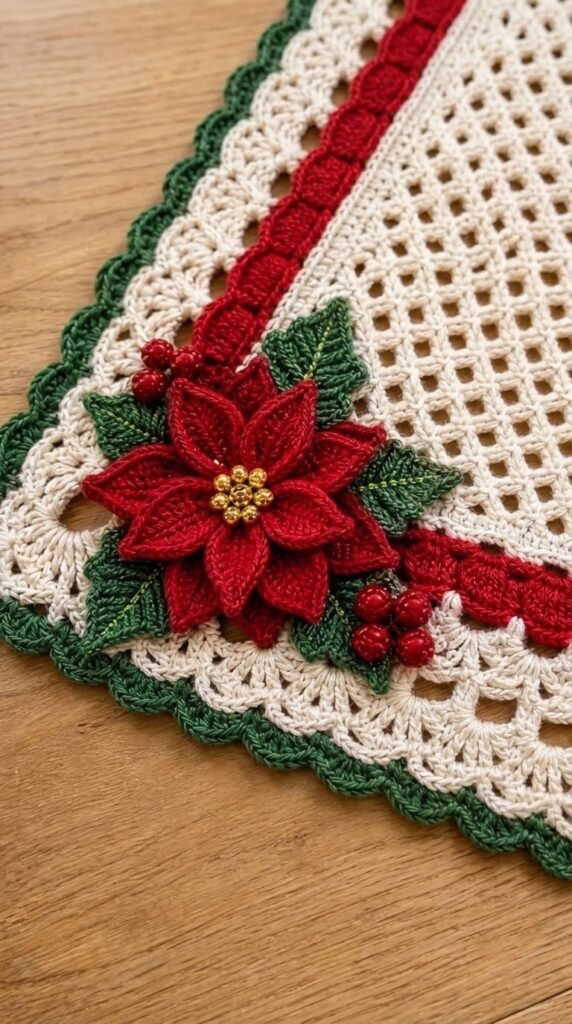
Layering the Petals
The key to a realistic poinsettia is the slight offset between the middle and outer petal layers. After stacking, gently tug the outer petals outward and the middle petals slightly inward so the gold center remains visible. A light mist of water and finger-shaping while the flower is still damp helps set the curve.
Magic Ring
If you prefer not to use a magic ring, ch 2 and work the first round of stitches into the second chain; pull the beginning tail tightly to close the hole.
Popcorn Centers (optional variation)
For a more textured gold center, replace Rnd 2 of the gold layer with: *pc in next st, sc in next st; rep from * around. This creates raised bumps that catch the light beautifully.
Blocking and Care
Wet-block the finished runner for best results.
Fill a basin with lukewarm water and a small amount of wool wash or mild detergent. Submerge the runner and gently press (do not agitate). Let it soak 15–20 minutes.
Lift out, press against the side of the basin to remove excess water, then roll in a clean towel and press again.
Lay the runner flat on blocking mats. Pin the outer edges straight and gently shape each petal and leaf into a natural curve. Allow to dry completely (usually 24 hours).
Care: Hand wash cold, roll in a towel to remove water, and dry flat. Never hang a wet runner—the weight of the water can stretch the joins. Store flat or loosely rolled with tissue paper between layers to protect the dimensional petals.
Fit and Troubleshooting Tips
- Petals curling too tightly: Block more aggressively or go up half a hook size for the outer layer only.
- Motifs not lying flat after joining: Check that your connecting strips are the same length on both sides of the runner. Uneven bridges cause cupping.
- Runner shorter or longer than desired: Simply add or omit one flower-and-leaf unit. Each full unit (flower + two half-clusters) adds roughly 7–7.5 inches.
- Visible sewing tails: Weave ends into the back of the gold center or along the green joins where they disappear.
- Heavy or droopy petals: A light application of fabric stiffener on the wrong side of the outer petals (after blocking) will help them hold their shape through the holiday season.
Final Thoughts
I still smile every time I unroll this runner in early December. The red petals catch the afternoon light just the way real poinsettias do, and the green leaves give the whole piece a soft, natural frame. It has become one of those projects I look forward to bringing out year after year—something that feels handmade and festive without being fussy.
I hope your version brings the same quiet joy to your table. If you make this Christmas Poinsettia Table Runner, I would love to see how your color choices and petal shaping turn out. Leave a comment, share a photo, or tag your project so others can admire your work. Happy crocheting, and may your holidays be warm and bright.
FAQ’s
Can I use a different yarn weight?
Yes, but the finished size and drape will change. DK weight will produce a more delicate, smaller runner; bulky weight will make a thicker, cozier piece. Adjust hook size accordingly and make a full motif swatch first.
How many motifs do I need for a longer table?
Each additional flower-plus-leaf unit adds approximately 7–7.5 inches. For an 8-foot table you may want 9 or 10 flowers.
Is this pattern suitable for beginners?
It is best suited to intermediate crocheters who are comfortable working in the round and sewing motifs. Absolute beginners may find the layering and joining frustrating at first.
Can I make the flowers in different colors?
Absolutely. Cream or white poinsettias with soft green leaves look elegant. Variegated reds also create beautiful depth.
Do I have to block the runner?
Blocking is strongly recommended. It opens the petals, evens the joins, and gives the finished piece a professional, polished look that lasts through the season.
What if my centers look messy?
Work the gold center with a smaller hook and weave the tails very thoroughly into the back of the middle layer before attaching the outer petals. A few extra stitches through all layers at the very center will keep everything secure.



Leave a Reply
You must be logged in to post a comment.