


There is something about autumn colors that makes a home feel extra cozy. The combination of burnt orange, golden mustard, deep brown, and warm cream always reminds me of falling leaves, pumpkin decorations, and comfortable afternoons with a cup of coffee.
I wanted to create a table runner that captured that feeling without making the design too complicated or overly decorative. Granny squares seemed like the perfect starting point because they are versatile, beautiful, and easy to customize.
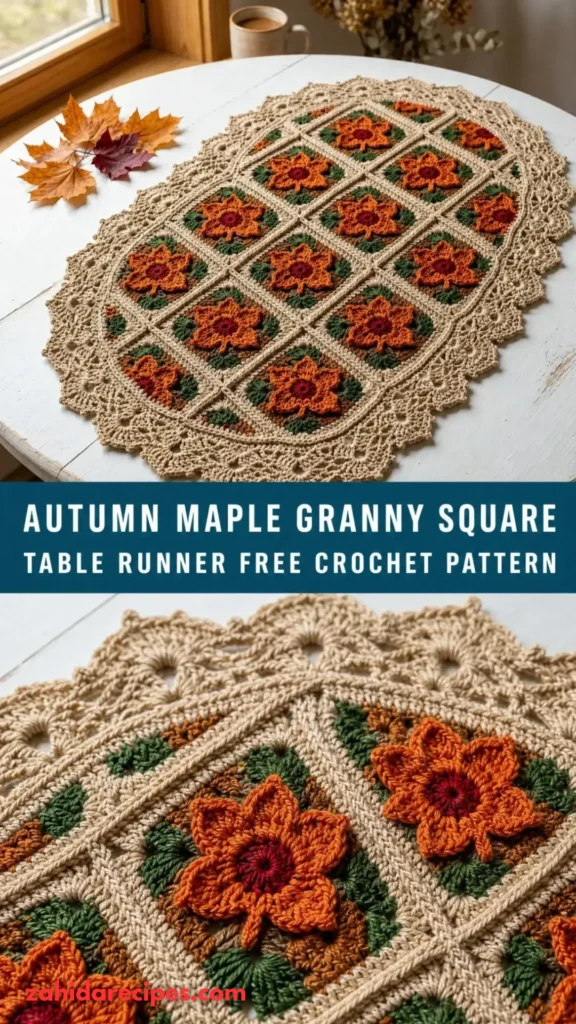
For this project, I combined classic granny square construction with a charming maple-inspired leaf motif. Each square has a warm autumn palette, and when joined together, the motifs create a lovely seasonal centerpiece.
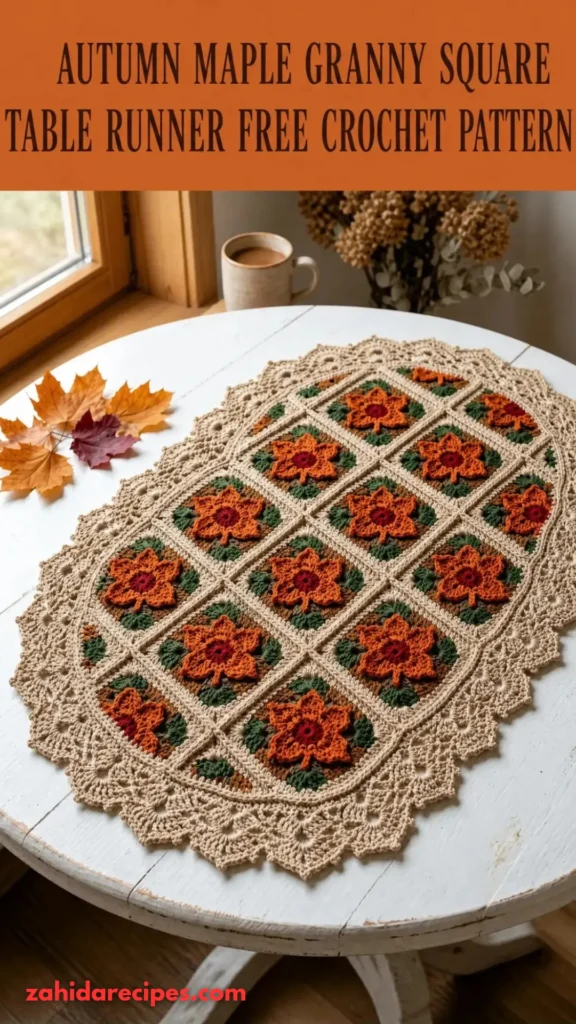
This Autumn Maple Granny Square Table Runner Free Crochet Pattern is a beautiful way to bring handmade autumn charm to your dining table, coffee table, or kitchen island.
About This Pattern
This table runner is made using individual granny squares featuring a simple maple leaf-inspired center. Each square is crocheted separately and joined to create a long decorative runner.
The design uses traditional granny clusters, textured stitches, and contrasting autumn colors.
Pattern Details
- Skill Level: Intermediate
- Construction: Individual squares joined together
- Terminology: US crochet terms
- Finished Size: Approximately 12 x 36 inches
- Square Size: Approximately 6 x 6 inches
- Number of Squares: 12
- Shape: Rectangular
- Stretch: Minimal after blocking
You can easily adjust the length by adding or removing squares.
Materials You’ll Need
Yarn
Choose a medium-weight cotton or cotton-blend yarn for a table runner that holds its shape.
- Color A – Burnt Orange: 180 yards for maple leaf centers.
- Color B – Golden Mustard: 150 yards for decorative rounds.
- Color C – Deep Rust: 120 yards for contrasting details.
- Color D – Warm Cream: 250 yards for granny square backgrounds and joining.
- Color E – Chocolate Brown: 100 yards for borders and finishing.
Allow approximately 15% extra yarn if your tension varies.
Crochet Hooks
- 4.0 mm crochet hook for granny squares.
- 3.5 mm crochet hook for the final edging.
Additional Supplies
- Tapestry needle
- Sharp scissors
- Stitch markers
- Measuring tape
- Blocking mats
- Rust-proof blocking pins
Abbreviations and Terminology
All instructions use US crochet terminology.
- ch: Chain stitch. Yarn over and pull through the loop.
- sl st: Slip stitch. Insert hook, yarn over, and pull through both loops.
- sc: Single crochet. Insert hook, yarn over, pull up a loop, yarn over, and pull through both loops.
- hdc: Half double crochet. Yarn over, insert hook, pull up a loop, yarn over, and pull through all three loops.
- dc: Double crochet. Yarn over, insert hook, pull up a loop, yarn over and pull through two loops twice.
- tr: Treble crochet. Yarn over twice, insert hook, pull up a loop, and work through two loops three times.
- sp: Space.
- sk: Skip.
- st(s): Stitch(es).
- rnd: Round.
- rep: Repeat.
- FO: Fasten off.
Special Stitches
- Granny cluster: Three double crochet stitches worked into the same space.
- Picot: Chain 3, then slip stitch into the first chain.
- Leaf cluster: A combination of single crochet, half double crochet, double crochet, and treble crochet worked into the same area to create a pointed leaf shape.
Turning chains do not count as stitches unless specifically stated.
Gauge
Gauge is important because all twelve squares should be approximately the same size.
Make a small granny square using your 4.0 mm hook.
Target gauge: Approximately 4 granny clusters and 4 rounds should measure 4 inches.
If your square is too small, try a larger hook. If it is too large, use a smaller hook.
Keep your tension consistent throughout the project.
Main Pattern Instructions
Part 1: Creating the Maple Leaf Center
Each square begins with a small maple-inspired motif.
Use Color A (Burnt Orange).
Round 1
- Make a magic ring.
- Ch 1.
- Work 5 sc into the ring.
- Sl st into the first sc to join.
Count: 5 sc
Pull the magic ring tight.
Round 2
- Ch 1.
- Work 2 sc into each stitch around.
- Sl st into the first sc.
Count: 10 sc
Round 3: Creating the Leaf Points
This round creates the decorative points around the center.
Repeat the following sequence five times:
- Sl st into the next stitch.
- Ch 2.
- Work 1 hdc into the same stitch.
- Work 1 dc into the next stitch.
- Work 1 tr into the following stitch.
- Ch 2.
- Sl st into the base of the tr to create a pointed tip.
The five raised sections create a maple-inspired silhouette.
Fasten off.
Designer Tip: Don’t worry if the motif looks slightly curled at this stage. Blocking will help flatten the leaf points.
Part 2: Building the Granny Square
Attach Color B (Golden Mustard) to a suitable space between the leaf sections.
Round 4
- Ch 3 (counts as first dc).
- Work 2 dc into the same space.
- Ch 2.
- Work 3 dc into the next space.
- Ch 2.
- Repeat around to create four corner sections.
- Join with a sl st to the top of the beginning ch-3.
You should now have four corner spaces.
Round 5
Switch to Color D (Warm Cream).
- Join yarn in any corner ch-2 space.
- Ch 3.
- Work 2 dc, ch 2, and 3 dc into the same corner.
- Ch 1.
- Work 3 dc into the next side space.
- Ch 1.
- In the next corner, work 3 dc, ch 2, and 3 dc.
- Continue around.
- Join with a sl st.
Round 6
Continue using Color D.
- Sl st into the next corner space.
- Ch 3.
- Work 2 dc, ch 2, and 3 dc in the corner.
- Ch 1.
- Work 3 dc in each side space, separated by ch 1.
- Work 3 dc, ch 2, and 3 dc in each corner.
- Join with a sl st.
Fasten off.
Your finished square should measure approximately 6 inches.
Part 3: Create the Remaining Squares
Repeat the same instructions to make twelve squares.
For a natural autumn appearance, alternate the colors slightly.
Suggested Arrangement
- Four squares with burnt orange centers.
- Three squares with deep rust centers.
- Three squares with golden mustard centers.
- Two squares with cream accents.
Keep the background color consistent so the runner looks coordinated.
Special Techniques and Additional Elements
Adding Textured Maple Leaf Details
For a more dimensional autumn appearance, add a small raised leaf accent to selected squares.
Use Color C (Deep Rust).
Leaf Detail
- Attach yarn near the center of the maple motif.
- Ch 4.
- Work 1 sc into the second chain from the hook.
- Work 1 hdc into the next chain.
- Work 1 dc into the final chain.
- Ch 2 and sl st into the base.
- Sl st down the starting chain to create a small stem.
- Fasten off and weave in the ends.
Make four or five accents and distribute them evenly across the runner.
Decorative Granny Square Edging
For a polished finish, work a simple edging around each square before joining.
Attach Color E (Chocolate Brown) to any corner.
- Ch 1.
- Work 1 sc in each stitch along the edge.
- Work 3 sc into each corner space.
- Continue around.
- Join with a sl st.
Fasten off.
This edging creates a defined outline that helps the autumn colors stand out.
Assembly and Finishing
Once all twelve squares are complete, arrange them on a flat surface.
For the rectangular runner, arrange the squares in two rows of six.
Joining the Squares
I recommend the slip-stitch joining method because it creates a neat, slightly raised seam.
- Place two squares with their right sides facing outward.
- Insert your hook through the corresponding stitches on both squares.
- Attach Color D.
- Ch 1.
- Work slip stitches through both layers along the edge.
- Continue until the squares are joined.
- Repeat until all squares form two rows.
- Join the two rows using the same technique.
Keep your joining tension relaxed. Tight seams can cause the table runner to buckle.
Adding the Outer Border
Attach Color E (Chocolate Brown) to any corner.
Round 1
- Ch 1.
- Work sc evenly around the entire runner.
- Work 3 sc into each corner.
- Join with a sl st.
Round 2
- Ch 1.
- Work 1 sc in the first stitch.
- Ch 3.
- Sk 1 stitch.
- Work 1 sc in the next stitch.
- Repeat around.
- Adjust slightly at the corners to maintain a flat edge.
- Join and fasten off.
This simple chain-loop border creates a delicate frame without competing with the maple motifs.
Blocking and Care
Blocking is especially helpful for granny square projects because it makes the individual motifs look even and professional.
Wet Blocking
- Fill a basin with cool water.
- Add a small amount of gentle yarn wash.
- Submerge the finished runner.
- Allow it to soak for approximately 10 minutes.
- Remove it carefully without twisting.
- Press excess water out using a clean towel.
- Lay it flat on blocking mats.
- Gently shape the corners and edges.
- Pin the runner in place.
- Allow it to dry completely.
If you use cotton yarn, avoid stretching it excessively.
Care Instructions
- Hand wash with cool water when possible.
- Use mild detergent.
- Avoid bleach.
- Dry flat.
- Never hang the runner while wet.
- Store folded in a dry place.
Fit and Troubleshooting Tips
1. My Granny Squares Are Curling
Your tension may be too tight. Try a larger hook and make sure your chain spaces are not restricted.
2. My Squares Are Different Sizes
Check your gauge and count the rounds carefully. Blocking each square before joining can help.
3. The Runner Looks Wavy
This usually happens when too many stitches are added along the edges. Check your stitch placement and avoid overcrowding the corners.
4. The Maple Leaves Look Uneven
Keep your stitches consistent and use stitch markers to identify the five motif sections.
5. The Joining Seams Are Bulky
Try a relaxed slip-stitch join or use a smaller hook for joining.
Easy Size Adjustments
Want a shorter table runner?
Make two rows of four squares for a smaller 12 x 24-inch design.
Want something longer?
Add more squares to each row. Just remember that the finished dimensions will depend on your individual square size and joining seams.
Final Thoughts
I absolutely love how this Autumn Maple Granny Square Table Runner brings together traditional crochet and beautiful seasonal colors.
The little maple-inspired motifs give each square personality, while the cream granny square backgrounds help the warm orange, rust, and mustard shades stand out.
You can use it on your dining table, coffee table, kitchen island, or even as a handmade autumn centerpiece for Thanksgiving gatherings.
The best part is that you can customize the colors to match your home. Try deeper burgundy shades for a dramatic fall look or softer caramel and cream tones for a more neutral farmhouse style.
I hope you enjoy making this Autumn Maple Granny Square Table Runner Free Crochet Pattern as much as I enjoyed designing it.
Happy crocheting,


Leave a Reply
You must be logged in to post a comment.