

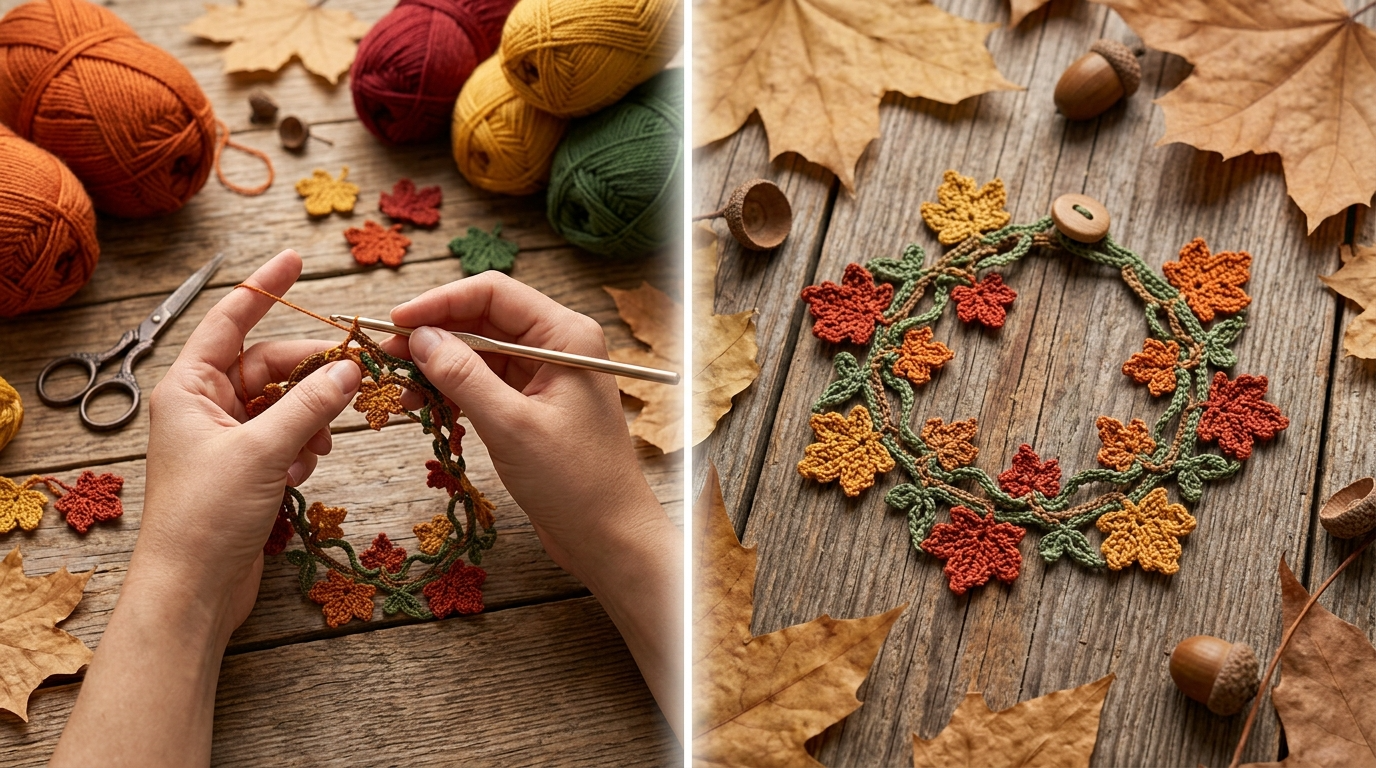
There is something special about the colors of autumn. I love how the trees slowly change from fresh green to warm shades of golden yellow, burnt orange, deep red, and earthy brown. Those colors always inspire me to create small handmade accessories that capture the feeling of the season.
While working on this design, I wanted to make something delicate rather than an oversized statement bracelet. I imagined a slender green vine winding gently around the wrist, decorated with tiny maple leaves in beautiful fall shades. The result was a piece of crochet jewelry that feels botanical, feminine, and wonderfully seasonal.
This Autumn Maple Vine Bracelet Crochet Pattern combines miniature maple leaf motifs, a flexible crocheted vine, and a simple adjustable closure. It is a lovely project for using leftover cotton thread and creating a thoughtful handmade gift.
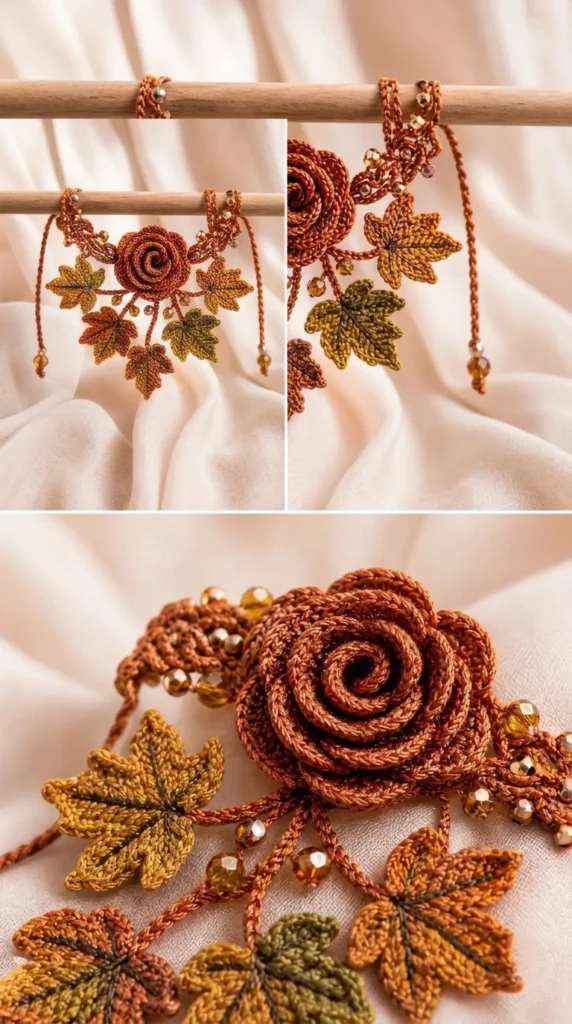
About This Autumn Maple Vine Bracelet Pattern
The bracelet is designed as a narrow crocheted vine with five miniature maple leaves attached along its length. Each leaf is worked separately and then sewn onto the vine.
The finished bracelet has a natural, slightly irregular appearance. I intentionally avoided making the leaves perfectly identical in placement because a real autumn vine looks more charming when its leaves follow a gentle, organic arrangement.
Pattern details:
- Skill Level: Intermediate
- Construction: Crocheted vine with separate maple leaf motifs
- Terminology: US crochet terms
- Finished Length: Approximately 7–8 inches before the adjustable extension
- Finished Width: Approximately 1–1.5 inches at the widest leaf section
- Closure: Adjustable chain loop and button
- Main Colors: Sage green, maple red, burnt orange, mustard yellow, and golden brown
The bracelet is lightweight and comfortable for everyday wear. Fine cotton thread gives the leaves enough structure to hold their shape without making the bracelet stiff.
Materials You’ll Need
Yarn
Use lightweight cotton thread for a neat, delicate finish.
| Color | Purpose | Approximate Amount |
|---|---|---|
| A – Sage Green | Main vine and leaves stems | 12 yards |
| B – Maple Red | Two maple leaves | 5 yards |
| C – Burnt Orange | One maple leaf | 3 yards |
| D – Mustard Yellow | One maple leaf | 3 yards |
| E – Golden Brown | One maple leaf | 3 yards |
A small amount of leftover cotton thread is usually enough for this project. Allow approximately 15% extra for gauge variation.
Crochet Hooks
- 1.75 mm steel crochet hook for the main bracelet.
- 1.5 mm steel crochet hook for the miniature leaves if you prefer tighter stitches.
Notions
- Small tapestry needle
- Sharp embroidery scissors
- Five small stitch markers
- One small decorative button, approximately 8–10 mm
- Sewing needle and matching thread
- Measuring tape
- Blocking pins
- Optional fabric stiffener for firmer leaves
Abbreviations and Terminology
All instructions use US crochet terminology.
| Abbreviation | Meaning |
|---|---|
| ch | Chain |
| sl st | Slip stitch |
| sc | Single crochet |
| hdc | Half double crochet |
| dc | Double crochet |
| tr | Treble crochet |
| picot | Small decorative pointed loop |
| inc | Increase |
| rep | Repeat |
| st | Stitch |
| sts | Stitches |
| sp | Space |
| FO | Fasten off |
| RS | Right side |
| WS | Wrong side |
Basic stitch explanations:
- Chain (ch): Yarn over and pull through the loop on your hook.
- Slip Stitch (sl st): Insert the hook, yarn over, and pull through both the stitch and the loop on your hook.
- Single Crochet (sc): Insert the hook, yarn over and pull up a loop, yarn over again and pull through both loops.
- Half Double Crochet (hdc): Yarn over, insert the hook, pull up a loop, yarn over and pull through all three loops.
- Double Crochet (dc): Yarn over, insert the hook, pull up a loop, yarn over and pull through two loops twice.
- Treble Crochet (tr): Yarn over twice, insert the hook, pull up a loop, then work through two loops three times.
- Picot: Chain 3, then slip stitch into the first chain to create a tiny decorative point.
Turning chains do not count as stitches unless a step explicitly says otherwise.
Gauge
Gauge is not extremely strict for this bracelet, but consistent stitches will help the finished piece look neat.
Using the 1.75 mm hook and sage green cotton thread:
- Work approximately 18 sc stitches.
- Crochet 10 rows.
- Aim for a swatch measuring approximately 1.5 inches wide and 1.5 inches tall.
If your stitches are too loose, try a smaller hook. If the fabric feels stiff or curls excessively, use a slightly larger hook.
The miniature maple leaves should lie flat after blocking rather than curling inward.
Main Pattern Instructions
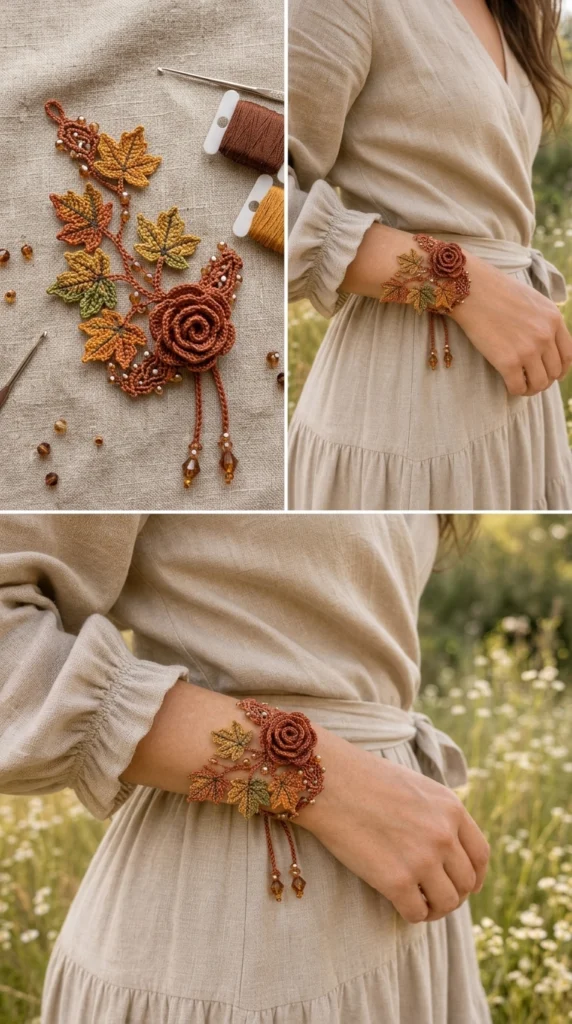
The bracelet is made in three main stages:
- Crochet the green vine foundation.
- Make five miniature maple leaves.
- Attach the leaves and finish the adjustable closure.
I recommend completing all five leaves before sewing them onto the vine. This makes it easier to arrange the colors and check the overall balance.
Part 1: Crochet the Main Vine Foundation
Using Color A (Sage Green) and the 1.75 mm hook.
Foundation Chain: Ch 52.
Measure the chain gently without stretching it. It should measure approximately 7 inches.
Row 1: Sc in the second ch from the hook and in each remaining ch across. Turn. (51 sc)
Row 2: Ch 1, sc in each st across. Turn. (51 sc)
Row 3: Ch 1, sl st in the first 5 sts, ch 3, skip the next st, sl st in the following st, sc in the next 39 sts, ch 3, skip the next st, sl st in the final 5 sts. (The two ch-3 spaces create small decorative attachment points near the ends.)
FO and weave in the yarn end.
The vine should look like a slim, flexible strip. Avoid pulling your stitches too tightly because the bracelet needs to curve naturally around your wrist.
Count check: The foundation contains 51 single crochet stitches in each of the first two rows.
Part 2: Create the Adjustable Closure
The bracelet uses a small button and crocheted loop.
At one end of the vine, attach Color A with a sl st.
Closure Row: Ch 1, sc in the first 5 sts, ch 8, skip the next 3 sts, sc in the remaining sts across. FO.
The chain loop should be large enough to pass comfortably over your selected button.
At the opposite end, sew the small button securely to the center of the vine. Position it approximately ¼ inch from the edge.
Try the closure before continuing. If the loop is too tight, replace the ch-8 loop with ch 10.
Part 3: Crochet the Miniature Maple Leaves
Now comes my favorite part of the project!
The maple leaves give this bracelet its autumn personality. Each leaf uses a combination of single crochet, half double crochet, double crochet, and treble crochet stitches to create pointed edges and a slightly textured center.
Make five leaves using the following color arrangement:
- Two Maple Red leaves
- One Burnt Orange leaf
- One Mustard Yellow leaf
- One Golden Brown leaf
Mini Maple Leaf Pattern
Make five leaves using the following instructions.
Step 1: Create the Center
Using your selected leaf color, ch 8.
Row 1: Sl st in the second ch from the hook, sc in the next ch, hdc in the next ch, dc in the next 2 ch, hdc in the next ch, sc in the final ch.
This creates a narrow central foundation.
Turn the work so you can crochet along the opposite side of the original chain.
Row 2: Sc in the first ch, hdc in the next ch, dc in the next 2 ch, hdc in the next ch, sc in the final ch.
You should now have a small, elongated leaf-shaped base.
Step 2: Shape the Maple Leaf Points
The five-pointed appearance is created by working decorative point clusters around the foundation.
Point 1: Sl st into the first edge stitch, ch 3, tr in the same stitch, ch 2, sl st in the same stitch.
Point 2: Sl st in the next edge stitch, ch 3, dc in the same stitch, ch 2, sl st in the same stitch.
Point 3: Sl st in the next center stitch, ch 4, tr in the same stitch, ch 2, sl st in the same stitch.
Point 4: Sl st in the next edge stitch, ch 3, dc in the same stitch, ch 2, sl st in the same stitch.
Point 5: Sl st in the final edge stitch, ch 3, tr in the same stitch, ch 2, sl st in the same stitch.
FO, leaving a 6-inch tail for sewing.
Important shaping note: Space the five points along the two sides and outer end of the leaf base. The center point should be slightly taller than the surrounding points. This creates the recognizable maple leaf silhouette.
Step 3: Add the Leaf Stem
Attach the matching yarn to the bottom center of the leaf.
Ch 4, sl st back along the chain, and sl st into the base of the leaf.
FO and weave in the loose end.
The small stem makes it easier to attach each leaf to the green vine.
Designer tip: If the points curl, lightly wet-block the leaf before attaching it. The points should remain distinct rather than folding toward the center.
Part 4: Add Decorative Vine Tendrils
A few delicate tendrils make the bracelet look more like a real climbing vine.
Using Color A, create two small tendrils.
Tendril 1:
- Ch 10.
- Sl st in the second ch from the hook.
- Work sl st in each remaining ch.
- FO, leaving a sewing tail.
Tendril 2:
- Ch 12.
- Sl st in the second ch from the hook.
- Work sl st in each remaining ch.
- FO.
These tendrils should curve gently. You can encourage a natural curl by wrapping them loosely around a crochet hook before attaching them.
Part 5: Arrange the Autumn Maple Leaves
Before sewing anything, lay the five leaves along the green vine.
I prefer an arrangement that feels natural rather than perfectly symmetrical.
| Position | Leaf Color | Direction |
|---|---|---|
| Left end | Maple Red | Pointing upward |
| Left center | Mustard Yellow | Pointing outward |
| Middle | Burnt Orange | Pointing upward |
| Right center | Golden Brown | Pointing outward |
| Right end | Maple Red | Pointing upward |
Leave approximately ¾–1 inch between the centers of neighboring leaves.
Keep the button and closure loop clear of the leaf motifs so they do not interfere with fastening.
Special Techniques and Additional Elements
Creating a Natural Leaf Texture
If you want your leaves to look slightly more dimensional, use a tapestry needle and a small amount of matching thread to embroider a central vein.
Insert the needle at the bottom of the leaf and work a straight stitch toward the tallest point.
Add two short diagonal stitches on each side to represent the smaller veins.
Do not pull the embroidery thread too tightly. The leaf should remain flexible.
Adding a Contrasting Leaf Border
For a more detailed finish, use a small amount of golden brown thread around the red and orange leaves.
Attach the thread to the outer edge and work a row of sl sts around the leaf.
Use one sl st in each available edge stitch, adding a tiny ch 1 at the sharp points if needed to prevent curling.
This subtle contrast creates a beautiful autumn-inspired outline.
Optional Bead Decoration
If you enjoy delicate jewelry details, you can sew one tiny wooden or gold-colored bead near the base of each leaf.
Keep the beads lightweight so the bracelet does not become uncomfortable.
Make sure every bead is securely attached and that no sharp edges remain exposed.
Assembly and Finishing
Once all the leaves and tendrils are complete, it is time to bring everything together.
Step 1: Attach the Maple Leaves
Thread your tapestry needle with the matching yarn tail from each leaf.
Position the leaves according to your chosen arrangement.
Sew each leaf onto the green vine using small, discreet stitches through the bottom center and stem.
I recommend securing the base of each leaf at two points. This prevents the motifs from twisting when the bracelet is worn.
Avoid sewing through the decorative points because they should remain free to move slightly.
Step 2: Attach the Vine Tendrils
Position one tendril near the second leaf and the other near the fourth leaf.
Sew only the bottom end of each tendril to the bracelet.
Allow the remaining length to curve naturally around the neighboring leaves.
Step 3: Secure the Leaf Details
Check every leaf individually.
- Make sure the five points are visible.
- Straighten the central veins.
- Secure any loose yarn tails.
- Check that the leaves do not overlap excessively.
- Confirm that the bracelet remains flexible.
Step 4: Finish the Bracelet
Attach the button securely at the opposite end of the chain loop.
Try the bracelet around your wrist and adjust the button position if necessary.
Weave in all remaining ends using a tapestry needle. Trim excess yarn carefully without cutting through the stitches.
Your Autumn Maple Vine Bracelet is now ready for its final finishing treatment!
Blocking and Care
Blocking makes a noticeable difference in miniature crochet accessories. It helps the maple leaf points open up and gives the vine a cleaner appearance.
Wet Blocking the Leaves
I recommend gentle wet blocking for cotton thread.
- Fill a small bowl with cool or lukewarm water.
- Add a little gentle detergent if needed.
- Place the leaves in the water for approximately 5–10 minutes.
- Remove them carefully without twisting or squeezing.
- Press between two clean towels to remove excess moisture.
- Arrange each leaf on a blocking mat.
- Pin the five points outward.
- Allow the leaves to dry completely.
Do not stretch the leaves excessively. You want to define their natural shape, not change their proportions.
Blocking the Vine
Lightly dampen the green vine and straighten it on a flat surface.
Use a few blocking pins to keep the edges even.
Avoid stretching the button loop because it needs to retain its original size.
Optional Steam Finishing
If you prefer steam finishing, use a low-temperature setting appropriate for your yarn.
Keep the iron or steamer away from direct contact with the crochet.
Always test on a small swatch first.
Bracelet Care Instructions
To keep your handmade bracelet looking beautiful:
- Hand wash gently in cool water.
- Avoid harsh detergents and bleach.
- Never wring or twist the bracelet.
- Lay flat to dry.
- Remove the bracelet before swimming or bathing.
- Store it flat in a small jewelry pouch.
- Keep it away from rough surfaces that may catch the delicate stitches.
If you have added beads, check their attachment occasionally.
Fit and Troubleshooting Tips
Even a small crochet jewelry project can present a few challenges. Here are some helpful solutions.
1. My Maple Leaves Are Curling
This usually happens when the stitches are too tight or the leaf points are not evenly spaced.
Solution: Try a slightly larger hook and gently block each leaf. Pin the points outward until they dry.
2. The Bracelet Feels Too Stiff
Cotton thread can become stiff when worked with very tight tension.
Solution: Relax your tension or use a 1.75 mm hook instead of a smaller hook. The vine should bend comfortably around your wrist.
3. The Leaves Look Too Small
If your leaves are difficult to recognize, increase the foundation chain from 8 to 9 chains and adjust the point placement accordingly.
Use a slightly larger hook for a more visible silhouette.
4. The Bracelet Is Too Long
Measure your wrist before finishing the button placement.
For a smaller wrist, reduce the foundation chain by approximately 4 stitches. For a larger wrist, add approximately 4 stitches.
Each additional chain changes the bracelet length by approximately the width of one chain stitch.
5. The Leaves Keep Moving
If your leaves rotate while wearing the bracelet, they probably need stronger attachment points.
Add two or three small securing stitches through each leaf stem and the vine foundation.
6. The Button Loop Is Too Loose
Replace the original chain loop with a shorter one.
Try ch 6 instead of ch 8, then test it against your button before fastening off.
Customization Ideas
One of the nicest things about this Autumn Maple Vine Bracelet is how easily you can personalize it.
Here are a few variations worth trying.
1. Deep Burgundy Autumn Bracelet
Replace the mustard and orange leaves with burgundy, wine red, and dark copper. This combination creates a rich fall color palette.
2. Golden Harvest Bracelet
Use mustard yellow, golden brown, cream, and sage green for a softer seasonal accessory.
3. Minimalist Green Vine Bracelet
Make all the leaves in muted sage and olive green. This version works beautifully beyond the autumn season.
4. Romantic Autumn Bracelet
Use dusty rose, terracotta, and warm beige for a softer, more feminine appearance.
5. Gift Bracelet
Make a matching pair of bracelets in complementary colors. Package them in a small kraft jewelry box with a handwritten care note.
Frequently Asked Questions
Is this Autumn Maple Vine Bracelet suitable for beginners?
This pattern is best suited to intermediate crocheters because the miniature leaves require careful stitch placement and shaping. Confident beginners can try it by practicing the basic stitches and picot details first.
What yarn is best for crochet leaf jewelry?
Fine cotton thread is my first choice. It produces neat stitches, holds the leaf shape well, and creates lightweight jewelry.
Can I make the bracelet without beads?
Absolutely! The beads are completely optional. The colorful leaves and green vine already provide plenty of detail.
How many maple leaves does the pattern include?
The standard design uses five miniature maple leaves. You can add more leaves for a fuller botanical appearance or use three for a simpler bracelet.
Can I sell bracelets made using this pattern?
You can make finished bracelets for personal use or small handmade sales. If you sell finished items, please credit the pattern designer when sharing the design. Do not claim the written pattern as your own.
Final Thoughts
I hope you enjoy making this Autumn Maple Vine Bracelet Crochet Pattern as much as I enjoyed designing it.
What I love most about this little project is how a few small crochet leaves can transform a simple green vine into something special. The warm colors, delicate details, and natural arrangement make it a lovely accessory for autumn outfits, handmade gifts, and anyone who appreciates botanical-inspired jewelry.
Don’t worry if your leaves are slightly different from one another. Handmade details are part of the charm, and each bracelet will have its own personality.
Try experimenting with different autumn shades, add a few beads if you like, or create a matching set for someone special.
If you make this bracelet, I’d love to see your finished version! Share your favorite color combination in the comments, and save the pattern to Pinterest so you can return to it whenever you’re ready for another little crochet project.
Happy crocheting!


Leave a Reply
You must be logged in to post a comment.