


I still remember the afternoon I pulled a handful of leftover yarn cakes from my basket and spread them across the table. Soft terracotta, warm cream, deep olive, and a dusty mustard that had been waiting for the right project. The light coming through the window caught the fibers just right, and I thought, “This needs to become something that feels lived-in and free.”
I wanted a bag that could carry a market haul, a book, and a little bit of the outdoors with me. Something that looked like it belonged at a weekend flea market or draped over the back of a café chair. The classic granny square felt like the perfect foundation—familiar enough to be comforting, yet open to the kind of color play that makes a piece feel personal.
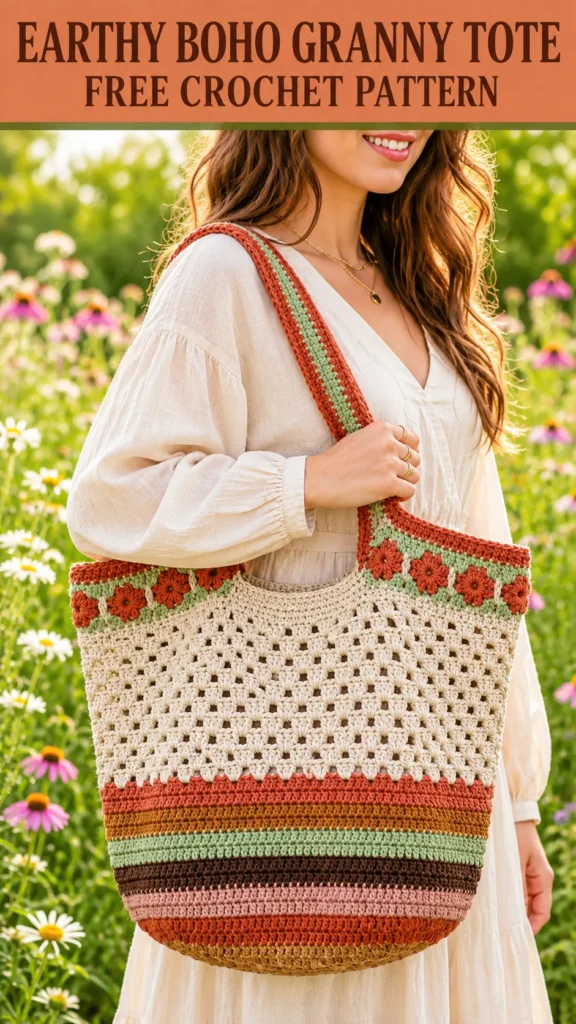
That afternoon turned into this pattern: the Earthy Boho Granny Tote. It’s a roomy, structured bag built from twelve granny squares joined in a way that creates soft structure without stiffness, finished with simple leather handles and a touch of fringe. The colors shift gently from square to square, giving it that collected, slightly imperfect beauty I love in handmade things.

About This Pattern
This tote is constructed from twelve classic granny squares arranged into a rectangular body with a solid base. The sides and front/back panels are joined as you go, so there’s very little seaming at the end. The finished bag measures approximately 14 inches wide, 13 inches tall (excluding handles), and 5 inches deep—roomy enough for everyday use without becoming heavy.
Skill level is solid intermediate. You’ll need to be comfortable with granny squares, joining as you go, and working a few simple increases for the base. The color changes are straightforward, and the overall construction is forgiving. The finished fabric has a lovely drape while still holding its shape once blocked.
Materials You’ll Need
Yarn (worsted weight / category 4)
- Color A (Cream): 180 yards / 165 meters
- Color B (Terracotta): 160 yards / 146 meters
- Color C (Olive): 140 yards / 128 meters
- Color D (Mustard): 100 yards / 91 meters
Allow 15% extra for gauge variation and fringe. I used a soft acrylic-wool blend that blocks beautifully and holds structure without feeling stiff.
Hooks
- 5.0 mm (H-8) for the granny squares
- 4.5 mm (G-7) for the joining and base (creates a slightly firmer fabric)
Notions
- Tapestry needle
- Stitch markers (at least 8)
- Leather tote handles, 24–26 inches long (or ready-made bag handles of your choice)
- Optional: 1–2 yards of cotton cord or yarn for fringe
- Blocking mats and pins
Abbreviations and Terminology
All instructions use US crochet terms.
- ch – chain
- sc – single crochet: insert hook, yarn over, pull up loop, yarn over, pull through both loops
- dc – double crochet: yarn over, insert hook, yarn over, pull up loop, yarn over, pull through two, yarn over, pull through remaining two
- sl st – slip stitch: insert hook, yarn over, pull through stitch and loop on hook
- sp – space
- st(s) – stitch(es)
- rnd – round
- rep – repeat
Turning chains do not count as a stitch unless a step explicitly says they do. When joining colors, leave a 6-inch tail for weaving in later.
Gauge
Work one granny square through Round 4.
Blocked square should measure 4.5 inches × 4.5 inches.
If your square is larger, try a smaller hook. If smaller, move up a hook size. Consistent tension matters more than exact numbers here—aim for squares that lie flat without cupping or ruffling.
Main Pattern Instructions
Granny Square (Make 12)
You will make four squares in Color A, three in Color B, three in Color C, and two in Color D. Change colors at the end of any round by completing the last yarn-over of the final stitch with the new color.
Foundation: With chosen color and 5.0 mm hook, ch 4. Join with sl st to form a ring.
Rnd 1: Ch 3 (counts as first dc), 2 dc in ring, ch 2, *3 dc in ring, ch 2; rep from * twice more. Join with sl st to top of beginning ch-3. (12 dc, 4 ch-2 sps)
Rnd 2: Sl st into next 2 dc and into the first ch-2 sp. Ch 3, (2 dc, ch 2, 3 dc) in same sp (first corner made). *Ch 1, (3 dc, ch 2, 3 dc) in next ch-2 sp; rep from * around. Ch 1, join with sl st to top of beginning ch-3. (24 dc, 4 ch-2 sps, 4 ch-1 sps)
Rnd 3: Sl st into next 2 dc and into the first ch-2 sp. Ch 3, (2 dc, ch 2, 3 dc) in same sp. *Ch 1, 3 dc in next ch-1 sp, ch 1, (3 dc, ch 2, 3 dc) in next ch-2 sp; rep from * around, ending with ch 1, 3 dc in last ch-1 sp, ch 1. Join with sl st to top of beginning ch-3. (36 dc)
Rnd 4: Sl st into next 2 dc and into the first ch-2 sp. Ch 3, (2 dc, ch 2, 3 dc) in same sp. *Ch 1, 3 dc in next ch-1 sp, ch 1, 3 dc in next ch-1 sp, ch 1, (3 dc, ch 2, 3 dc) in next ch-2 sp; rep from * around, ending with the side repeats. Join with sl st to top of beginning ch-3. (48 dc)
Fasten off, leaving a 6-inch tail. Weave in ends as you go if preferred.
Joining the Squares
Arrange the twelve squares into a layout of 3 squares wide by 4 squares tall for the body (this will fold to create the front, back, and sides). Place the two Color D squares near the bottom corners for visual weight.
Using the 4.5 mm hook and Color A, join squares with a continuous slip-stitch join worked through the back loops only. Work from the right side. When you reach a corner, work 2 sc into the corner space to keep the join flexible.
Join the four lower squares first to form the base rectangle, then join the remaining squares upward to create the sides and top edges.
Base Reinforcement
Once the body is joined, turn the bag inside out. With 4.5 mm hook and Color B, work a round of single crochet around the entire bottom edge, placing 3 sc into each corner. This firms up the base so the bag sits flat when filled.
Special Techniques / Additional Elements
Optional Fringe
Cut 12-inch lengths of Color D (or a mix of remaining colors). Fold each strand in half, insert the folded end through a stitch along the top edge of the bag (or along the short sides), pull the tails through the loop, and tighten. Trim to even length after attaching all fringe. Ten to twelve strands on each short side give a nice boho finish without overwhelming the design.
Assembly and Finishing
Weave in all remaining ends securely on the wrong side.
Attach leather handles: Mark placement approximately 3 inches in from each side seam on the top edge of the front and back. Use a strong tapestry needle and matching yarn (or thin leather cord) to sew the handle ends firmly in place, going through both the handle and several rows of the crochet fabric. Reinforce with a second pass of stitching.
If you prefer fabric or crocheted handles, you can chain a long strap, work several rows of single crochet, and sew the ends in the same positions.
Blocking and Care
Lightly wet-block the finished bag. Pin the squares so they sit flat and the overall shape is rectangular. Allow to dry completely. A gentle steam can help settle any remaining unevenness, but avoid pressing hard on the leather handles.
Care: Hand wash in cool water with mild soap. Squeeze gently—never wring. Reshape and dry flat. Do not hang the bag while wet, as the weight can stretch the fabric. Spot clean when possible to extend the life of the colors.
Fit and Troubleshooting Tips
If the bag feels too floppy after joining, work an extra round of single crochet around the top edge with the smaller hook. This creates a firm rim that holds the shape better.
Cupping squares usually mean the tension is tighter on the later rounds—try going up a hook size for Rounds 3 and 4 only.
If the base sags under weight, add a simple fabric lining or a piece of plastic canvas cut to size and slip-stitched in place along the bottom.
Color placement is flexible. Feel free to rearrange the squares until the balance of terracotta, olive, and cream feels right to you. That’s part of the joy of a project like this.
Final Thoughts
There’s something deeply satisfying about a bag that starts as twelve simple squares and becomes a piece you reach for every time you leave the house. The Earthy Boho Granny Tote carries the quiet confidence of handmade things—imperfect edges, honest color shifts, and the knowledge that you made it yourself.
I hope your version finds its way to farmers’ markets, long walks, and coffee tables piled with books. When you finish, I’d love to see how your color choices turned out. Share a photo if you like, or simply enjoy the quiet pleasure of using something you created with your own hands.



Leave a Reply
You must be logged in to post a comment.