

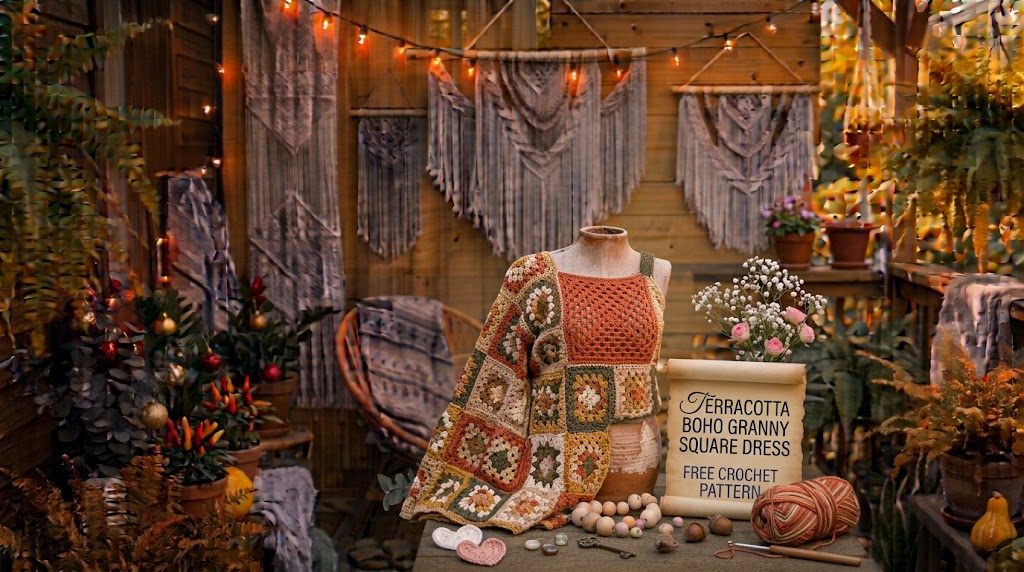
There is something special about warm terracotta yarn. It reminds me of sun-baked earth, handmade pottery, golden summer afternoons, and relaxed bohemian fashion. I wanted to bring those feelings into a crochet dress that would feel comfortable, feminine, and full of handmade character.
For this design, I chose classic granny squares with a slightly modern twist. Instead of using several bright colors, I kept the palette focused on beautiful terracotta shades. The result is a dress with a lovely vintage-inspired appearance and an easygoing boho personality.
The Terracotta Boho Granny Square Dress Free Crochet Pattern combines individual crochet motifs, simple shaping, and an airy skirt. It is a rewarding project for crocheters who enjoy joining motifs and creating wearable handmade clothing.
About This Pattern
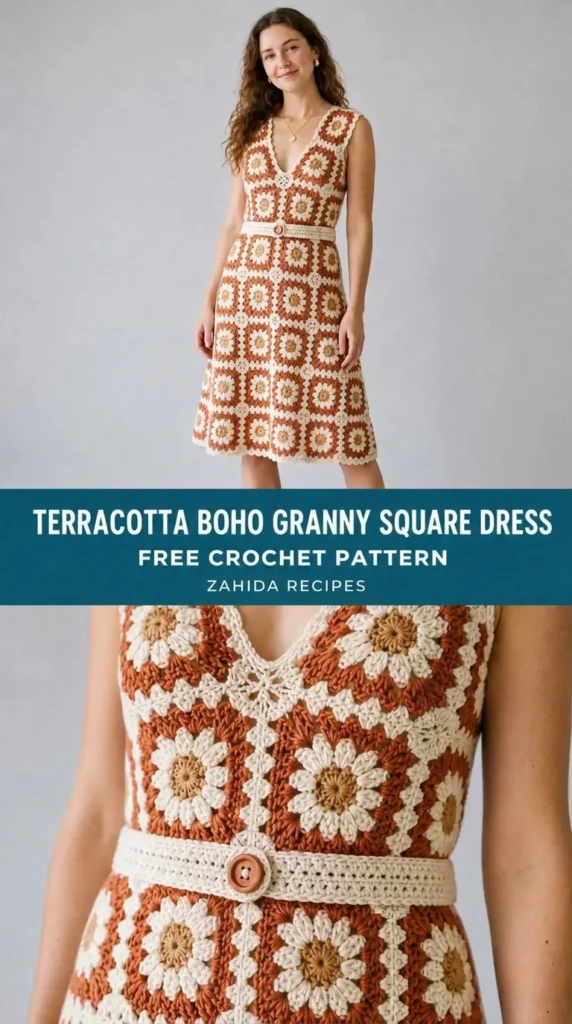
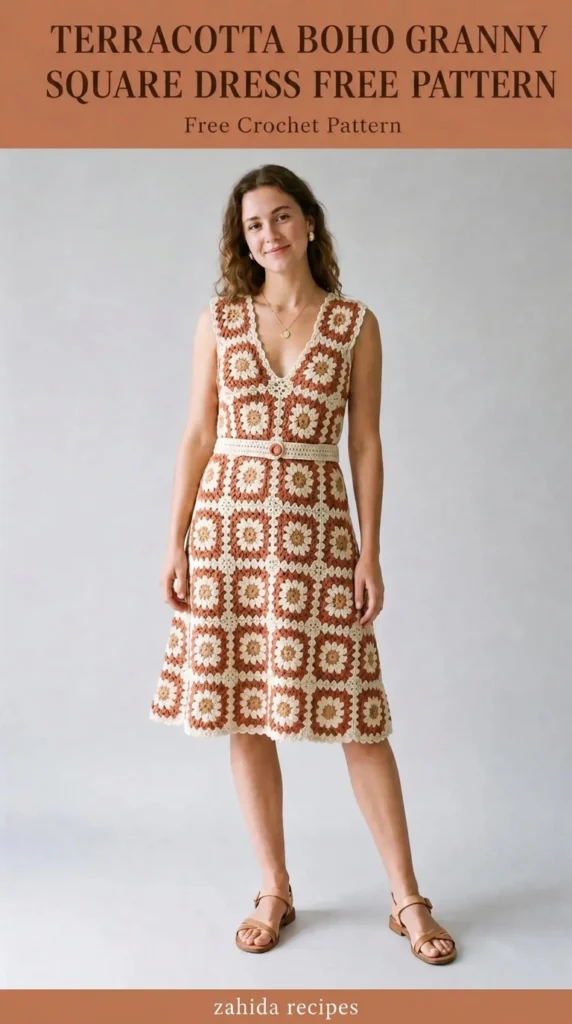
This dress is made from individual granny squares joined together to create a fitted bodice and a softly flared skirt.
The upper section features floral-inspired granny squares, while the lower section uses repeating openwork rounds to create movement and a relaxed silhouette.
Pattern details:
- Skill level: Intermediate
- Construction: Separate granny squares joined into panels, followed by a crocheted skirt.
- Fit: Comfortable, slightly relaxed fit.
- Style: Bohemian, vintage-inspired, summer fashion.
- Sleeves: Sleeveless with adjustable shoulder straps.
- Length: Above-knee to midi, depending on preference.
Finished measurements:
| Size | Bust | Waist | Length |
| XS/S | 32–34 in | 26–28 in | 34 in |
| M/L | 36–40 in | 30–34 in | 36 in |
| XL/2XL | 42–46 in | 36–40 in | 38 in |
The dress has a little flexibility because of the granny-square construction. For a comfortable fit, measure yourself before choosing your size.
Materials You’ll Need
Yarn
Choose a breathable cotton or cotton-blend yarn. Cotton gives the granny squares excellent stitch definition and makes the finished dress comfortable in warmer weather.
- Color A – Terracotta: 1,200–1,500 yards (main color).
- Color B – Rust: 150–200 yards (optional floral centers and decorative details).
- Color C – Warm Cream: 100–150 yards (optional square accents).
Use approximately 1,500–1,850 yards in total, depending on size and dress length.
Yarn weight: DK (Category 3).
Allow approximately 15% extra yarn if your gauge varies or you want a longer skirt.
Crochet Hooks
- 4.0 mm crochet hook for granny squares.
- 3.5 mm crochet hook for joining and edging.
- 4.5 mm crochet hook for the skirt if you prefer a softer drape.
Additional Supplies
- Tapestry needle.
- Stitch markers.
- Measuring tape.
- Scissors.
- Blocking mats and rust-resistant pins.
- Optional cotton lining.
- Optional removable stitch markers for fitting.
Abbreviations and Terminology
This pattern uses US crochet terminology.
- ch: Chain stitch. Yarn over and pull through the loop.
- sl st: Slip stitch. Insert hook, yarn over, and pull through both loops.
- sc: Single crochet. Insert hook, yarn over, pull up a loop, yarn over, and pull through both loops.
- hdc: Half double crochet. Yarn over, insert hook, pull up a loop, yarn over, and pull through all three loops.
- dc: Double crochet. Yarn over, insert hook, pull up a loop, yarn over and pull through two loops twice.
- tr: Treble crochet. Yarn over twice, insert hook, pull up a loop, then work through two loops three times.
- ch-sp: Chain space.
- sk: Skip.
- sp: Space.
- rep: Repeat.
- RS: Right side.
- WS: Wrong side.
- FO: Fasten off.
Special stitch: Granny cluster: Three double crochet stitches worked into the same space.
Turning chains do not count as stitches unless specifically stated.
Gauge
Before making your dress, crochet a small granny-square swatch.
Gauge: One completed square should measure approximately 4.5 inches (11.5 cm) after blocking.
If your square is larger than this measurement, try a smaller hook. If it is smaller, use a larger hook.
Consistent square measurements are important because even small differences can affect the finished dress.
Main Pattern Instructions
Part 1: Making the Granny Squares
The dress uses traditional granny-style squares with a small decorative center.
Make 24 squares for the standard M/L version.
- 6 squares for the front bodice.
- 6 squares for the back bodice.
- 6 squares for the upper skirt.
- 6 squares for the lower skirt.
For smaller or larger sizes, adjust the number of squares and check the garment measurements before joining.
Granny Square Instructions
Use Color B for the center if desired, then switch to Color A.
Round 1: Ch 4 and join with a sl st to form a ring. Ch 3 (counts as first dc). Work 2 dc into the ring, ch 2. Repeat 3 more times. Join with a sl st to the top of the beginning ch-3.
(4 granny clusters and 4 corner spaces.)
Round 2: Sl st into the next two stitches and corner space. Ch 3, 2 dc, ch 2, 3 dc in the same corner space. Ch 1. In the next corner space, work 3 dc, ch 2, 3 dc. Ch 1. Repeat around. Join.
Round 3: Sl st into the next corner space. Ch 3, 2 dc, ch 2, 3 dc in the same space. Ch 1. Work 3 dc into the next side space, ch 1. In the next corner space, work 3 dc, ch 2, 3 dc. Continue around, placing one granny cluster in each side space and a corner cluster in each corner.
Round 4: Repeat Round 3, adding one additional side cluster along each side.
Round 5: Repeat the established granny-square pattern. Fasten off and weave in ends.
Your completed square should measure approximately 4.5 inches.
Make the required number of squares, keeping the same stitch tension throughout.
Part 2: Blocking the Squares
Blocking makes joining much easier.
Lightly wet each square, gently squeeze out excess water, and pin it to the correct measurements on a blocking mat.
Allow the squares to dry completely before assembly.
Avoid stretching the corners too far. They should remain neat and square.
Constructing the Bodice
Front Panel
Arrange six granny squares in two columns and three rows.
Place the squares with their right sides facing upward. Alternate the orientation if you want the floral centers to create a more interesting visual arrangement.
Join the squares using a slip-stitch join or mattress stitch.
Back Panel
Repeat the same arrangement with six additional squares.
Check that both panels have matching measurements.
Joining the Shoulder Sections
Place the front and back panels together with right sides facing inward.
Join the shoulder edges, leaving enough space for the neckline.
For the standard size, join approximately 1.5 inches at each shoulder.
Try the bodice on before completing the side seams.
Join the sides from the lower edge upward, leaving approximately 7–8 inches open for armholes.
Creating the Skirt
The skirt is worked in joined rounds from the bottom edge of the bodice.
Attach Color A at the waistline.
Round 1: Ch 3, work dc stitches evenly around the waist opening. Aim for approximately 120 dc stitches for the M/L size. Adjust the stitch count so it is divisible by 4.
Join with a sl st.
Round 2: Ch 3, dc in each stitch around. Join.
Round 3: Ch 3, dc in the next stitch, ch 1, sk 1. Repeat around.
This creates an airy mesh texture.
Round 4: Ch 3, work 2 dc into each chain space around. Work 1 dc over each skipped stitch where needed to maintain the stitch count.
Round 5: Ch 3, dc in each stitch around.
Repeat Rounds 3–5 until the skirt reaches your preferred length.
For a gently flared shape, increase 8 stitches evenly every fourth round.
Length suggestions:
- Above-knee: approximately 12 inches from waist.
- Knee-length: approximately 17 inches.
- Midi: approximately 25 inches.
Try the dress on periodically to check the length and drape.
Special Techniques and Decorative Details
Adding a Scalloped Hem
A delicate scalloped edge gives the dress a lovely feminine finish.
Join Color B at the bottom edge.
Round 1: Ch 1, sc evenly around the hem. Join.
Round 2: Sk 1 stitch, work 5 dc into the next stitch, sk 1 stitch, sl st into the next stitch.
Repeat around.
If the scallops do not fit evenly, adjust the skipped stitches slightly to maintain an attractive pattern.
Decorative Neckline
Work one round of sc evenly around the neckline.
For a more decorative appearance, work a second round of reverse single crochet (crab stitch).
Keep the neckline comfortable rather than pulling it too tightly.
Shoulder Straps
Attach yarn at the top front shoulder corner.
Row 1: Ch 1, work 5 sc across the shoulder edge.
Rows 2–20: Ch 1, turn, sc across.
Adjust strap length to fit your body.
Repeat for the second strap and securely attach each to the back bodice.
For additional support, you can sew a narrow piece of soft elastic inside the straps.
Assembly and Finishing
Before weaving in all remaining ends, try on your dress and check the overall fit.
Make sure:
- The bodice sits comfortably around your bust.
- The waistline rests at your preferred position.
- The armholes allow comfortable movement.
- The shoulder straps stay in place.
- The skirt hangs evenly.
Use a tapestry needle to weave in all loose ends securely.
For a bohemian finish, you can add small tassels to the lower hem or decorative crochet ties at the back waist.
I recommend keeping embellishments light so the cotton dress does not become unnecessarily heavy.
Blocking and Care
Because this dress contains several joined motifs, gentle blocking is especially helpful.
For cotton yarn:
- Fill a basin with cool or lukewarm water.
- Add a small amount of gentle detergent.
- Submerge the dress and allow it to soak for approximately 10 minutes.
- Remove it carefully without twisting.
- Press excess water out using a clean towel.
- Lay flat and shape the bodice, skirt, and hem.
- Allow it to dry completely.
Avoid hanging the dress while wet because cotton can stretch under its own weight.
For regular care, hand wash gently and dry flat. If using a washing machine, place the dress in a mesh laundry bag and select a delicate cycle.
Fit and Troubleshooting Tips
My granny squares are different sizes.
Check your tension and hook size. Blocking can correct small differences, but noticeably uneven squares should be remade.
The bodice feels too tight.
Add another square to the front and back panels or use a larger hook for the next project. Check your measurements before joining.
The skirt looks too narrow.
Add evenly spaced increases in the solid double-crochet rounds.
The skirt waves or ruffles.
You may have too many increases. Reduce the number of added stitches and check the skirt after several rounds.
The neckline stretches.
Work a slightly tighter single-crochet edging and avoid hanging the dress when wet.
The dress feels heavy.
Use lightweight cotton yarn and avoid adding too many decorative elements. A lighter yarn also helps the skirt drape naturally.
Final Thoughts
I love how the Terracotta Boho Granny Square Dress Free Crochet Pattern combines traditional granny-square techniques with a modern, wearable silhouette.
The warm terracotta color gives it a beautiful earthy personality, while the openwork skirt keeps the overall design light and comfortable.
Take your time with the granny squares, block them carefully, and check the fit before completing the final seams. Those little details make a noticeable difference in the finished garment.
Most importantly, enjoy making something that reflects your own style. You can experiment with cream accents, deeper rust shades, longer skirt lengths, or delicate scalloped edges.
I hope this handmade boho dress becomes one of those special crochet projects you’ll feel proud to wear. Happy crocheting!



Leave a Reply
You must be logged in to post a comment.