


You’ve got a baby on the way (or know someone who does) and you’re staring at your yarn stash wondering what to make that doesn’t look like every other blanket on Pinterest. This panda bear granny square baby blanket is the answer. It’s modular, ridiculously cute, and somehow manages to look fancy without requiring you to learn a single fancy stitch. Grab your hook—we’re making pandas.
Why This Crochet Pattern Works So Well
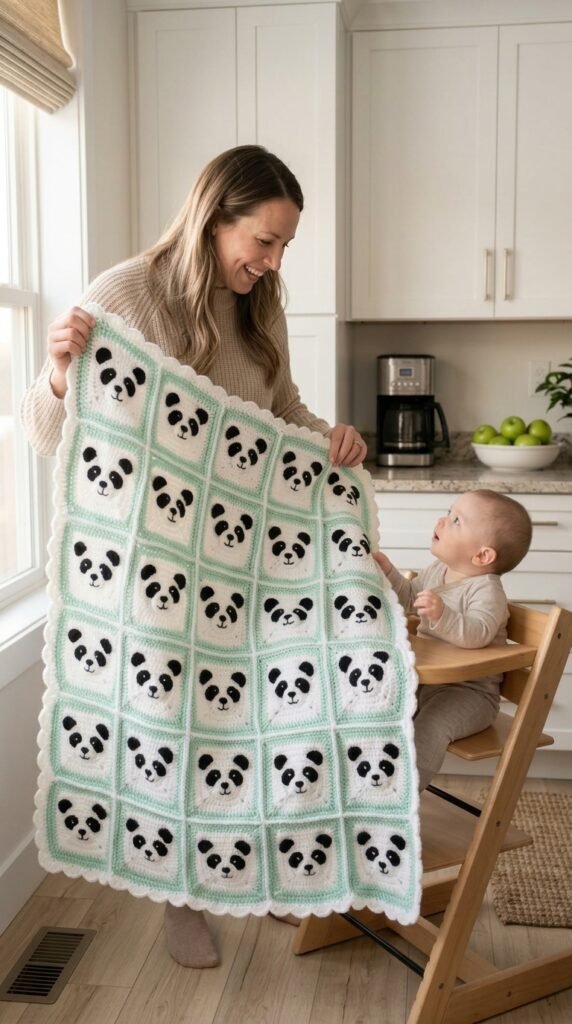
This design hits that sweet spot between classic granny squares and something that actually makes people say “aww” out loud. You crochet simple white squares, add a mint border, then sew on tiny black panda faces. No color changes mid-round. No complicated tapestry work. Just straightforward stitching and a little appliqué magic.
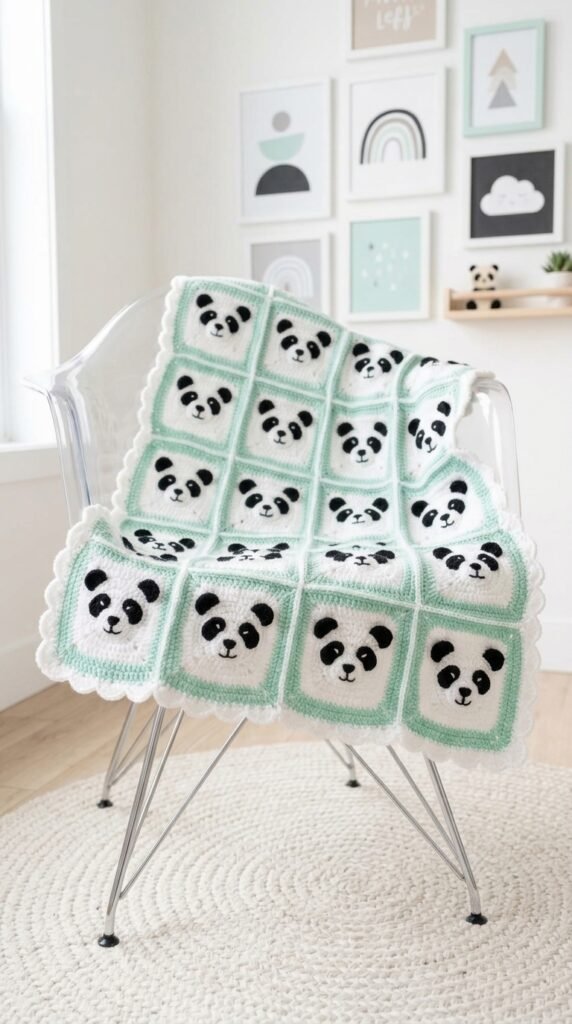
The modular approach is pure genius. You finish one square, feel that tiny rush of accomplishment, and move on. Perfect for couch sessions, waiting rooms, or those rare quiet moments when the house isn’t pure chaos. Twenty squares arranged 4 by 5 give you a solid baby-size blanket—big enough for tummy time or stroller duty, small enough that it doesn’t take over your living room while you work.

And let’s be honest: pandas never go out of style. Soft mint and crisp black-and-white keep it gender-neutral and nursery-friendly without screaming “I tried too hard.”
Materials You Will Need
You’ll need worsted weight yarn (category 4) in three colors:
- White – about 400 grams for the square centers and final border
- Mint green – roughly 150 grams for the square borders
- Black – around 75 grams for the faces
Go for a soft acrylic or cotton blend. Babies are messy. Machine-washable yarn is non-negotiable.
Other stuff:
- 5.0 mm (H/8) crochet hook
- Yarn needle
- Scissors
- Stitch markers (optional but helpful)
- Pins for holding those faces in place while you sew
Gauge sits around 6 inches square before joining. Don’t stress if yours is a hair off—just keep your tension consistent. Finished blanket lands about 24 by 30 inches.
Skill Level
Beginner-friendly with a few intermediate touches. If you can make a granny square and sew on a button, you can handle this. The faces are all simple circles and ovals worked separately, so zero scary colorwork. You’ll feel like a pro by square number three.
Abbreviations and Stitch Definitions
Quick refresher so we’re all speaking the same language:
- Ch – chain
- Sl st – slip stitch
- Sc – single crochet
- Hdc – half double crochet
- Dc – double crochet
- Magic ring – adjustable starting loop (or ch 4 and join if the ring fights you)
- Inc – increase (two stitches in one)
That’s the whole toolkit. Nothing fancy.
How to Crochet the Panda Granny Square
You’re making 20 identical squares. White center, mint border. Easy rhythm once you get going.
Base Square (Make 20)
Start with white yarn.
Round 1: Magic ring. Ch 3 (counts as dc), 2 dc in ring, ch 2. Repeat 3 dc, ch 2 three more times. Join with sl st to top of beginning ch-3. Pull ring tight. (12 dc, 4 corners)
Round 2: Slip over to the corner space. Ch 3, 2 dc, ch 1 in the same space. Then 3 dc, ch 2, 3 dc in each corner with ch 1 between side clusters. Join. (24 dc)
Round 3: Same idea—corner clusters stay 3 dc, ch 2, 3 dc, and you add a 3-dc cluster in each ch-1 space along the sides with ch 1 between everything. Join. (36 dc)
Round 4: Keep the pattern rolling. One more 3-dc cluster appears on each side. Join. (48 dc)
Round 5: Repeat Round 4 style—another cluster per side. Fasten off white. (60 dc)
Round 6: Join mint green in any corner. Work the same corner and side pattern. Join. (72 dc)
Round 7: One more mint round the exact same way. Fasten off and weave ends. (84 dc)
Your square should measure right around 6 inches. Boom—one down, 19 to go.
How to Crochet the Panda Face Appliqués
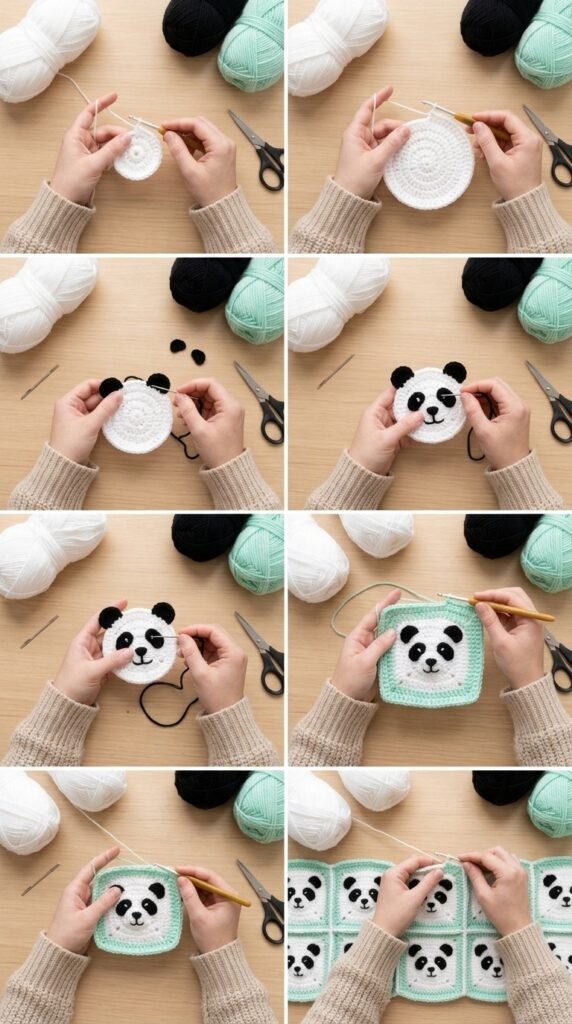
Each face needs two ears, two eye patches, and one nose—all in black. Make them in batches. Trust me, assembly-line mode keeps you sane.
Ears (Make 40)
Round 1: Magic ring, ch 1, 6 sc. Join.
Round 2: Ch 1, 2 sc in every stitch. Join. (12 sc)
Round 3: Ch 1, sc around. Join. Leave a long tail for sewing.
Eye Patches (Make 40)
These are little ovals.
Round 1: Ch 4. Sc in 2nd ch from hook, sc in next, 3 sc in last. Work back along the other side: sc, 2 sc in last. Join. (8 sc)
Round 2: Ch 1, increase at the ends and work even along the sides so it stays oval. Fasten off with a long tail. (12 sc)
Nose (Make 20)
Magic ring, ch 1, 6 sc. Don’t join—just pull the ring closed and leave a tail. Tiny solid circle. Perfect.
Assembling the Panda Faces
This is the fun part where the squares stop looking like plain granny squares and start looking like actual pandas.
Lay a square right-side up. Pin the ears at the top of the white section so they peek just inside the mint border—slightly outward, like real panda ears. Place the eye patches in the center, about 1.5 inches apart, tilted a little downward toward the middle. Drop the nose right under them, half an inch down.
Whip-stitch everything firmly with the yarn tails. Go around each piece twice if you’re the nervous type (I always do). Consistency is key—once you lock in the expression on the first few, the rest match up easily.
Pro tip: Finish faces on four or five squares at a time. Your hands get into a rhythm and all the pandas end up looking like happy little siblings.
Joining the Granny Squares
Lay out all 20 squares in a 4-by-5 grid. Make sure every panda faces the same direction—nobody wants a confused blanket.
Whip-stitch the squares together through the back loops only using mint green yarn. Wrong sides together, neat little raised seam on the front. Join into rows first, then join the rows. Clean and sturdy.
Prefer slip-stitch or single-crochet joins? Go for it. The whip stitch just looks the cleanest with this mint border.
Adding the Scalloped Border
The white scalloped edge is the cherry on top.
Round 1: Join white in any corner. Sc evenly around the entire blanket, putting 3 sc in each corner. Join.
Round 2: Ch 1, sc in first stitch. Skip 2 stitches, 5 dc in next stitch (that’s your scallop), skip 2 stitches, sc in next. Repeat all the way around, nudging the count a little at the corners so the scallops stay even. Join and fasten off.
Weave in every last end. Light blocking is optional—this thing is going to get washed a lot anyway.
Care Instructions
Machine wash cold on gentle. Tumble dry low or lay flat. Skip the high heat—acrylic can get sad and stiff if you roast it. That’s it. Real-life baby gear needs real-life care.
You Might Also Like
- Sunny Lemon Hexagon Kitchen Throw Free Crochet Pattern
- Rainbow Dolphin Pod Baby Blanket Free Crochet Pattern
- Mint and Lemon Spring Granny Square Blanket Free Crochet Pattern
- Blush Pink Teddy Bear Granny Square Blanket Free Pattern
- Rainbow Bright Daisy Granny Square Blanket Free Crochet Pattern
FAQ’s
Can I change the colors?
Absolutely. Soft gray borders with cream centers look amazing. Or go full pastel rainbow if the baby’s nursery demands it. Just keep the faces black (or dark brown) so they still read as pandas.
How long does this actually take?
Depends on your speed and how many Netflix episodes you watch. Most people finish a square in 30–45 minutes. Faces add another 10–15 minutes each. Full blanket in a couple of focused weekends is realistic.
What if my squares aren’t exactly 6 inches?
As long as they’re all the same size, you’re golden. A little variation disappears once everything is joined and bordered.
Can I make this bigger?
Yes. Add more squares. A 5-by-6 layout turns it into a toddler throw. One single square with a face makes an adorable lovey.
Is the magic ring mandatory?
Nope. Chain 4 and join into a ring if the magic ring still feels like wrestling a tiny octopus. Works fine.
Will the faces stay on after washing?
If you sew them securely (double pass recommended), yes. I’ve put mine through the washer multiple times with zero casualties.
Final Thoughts
This blanket somehow walks the line between classic and modern without trying too hard. The modular squares keep the project from ever feeling overwhelming, and those little panda faces deliver pure joy every time you look at them. Whether you’re making it for a baby shower, your own nursery, or just because you needed a project that makes you smile while you stitch, this one delivers.
Adjust the size, play with colors, or keep it exactly as written—either way you’ll end up with something that feels special. Now go make some pandas. Your yarn is waiting.



Leave a Reply
You must be logged in to post a comment.