


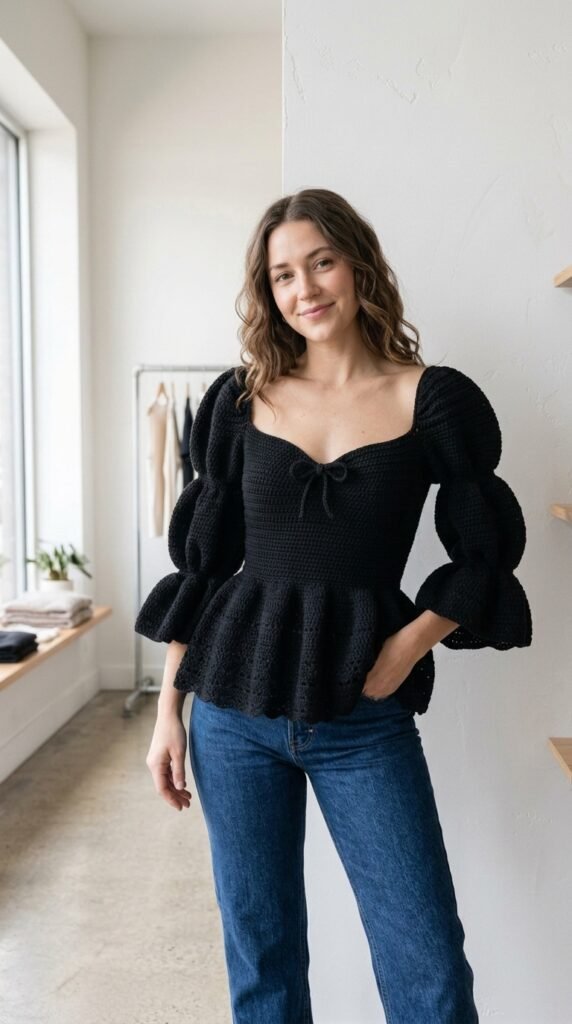
Go dig through your yarn stash right now. That gorgeous black yarn you have been saving deserves a project this dramatic. This Classic Black Chic Peplum Crochet Top delivers a fitted bodice, romantic sweetheart neckline, tiered puff sleeves, and a flirty peplum that skims the hips like it was made for you. The construction breaks into manageable pieces so you never feel overwhelmed, and the finished look has serious “where did you buy that?” energy.
Why This Crochet Top Pattern Stands Out
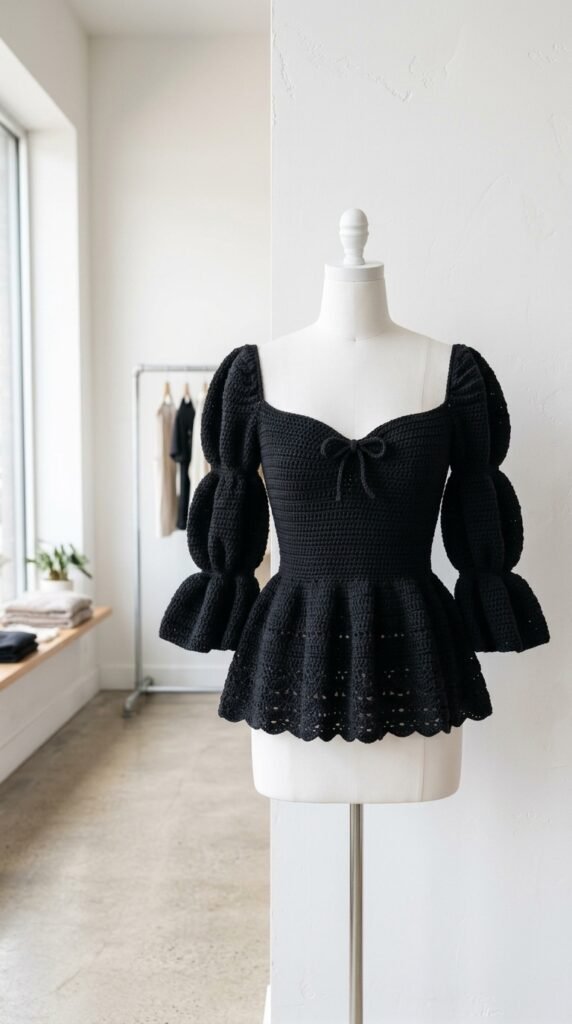
This top flatters almost every body type. The ribbed bodice cinches at the waist while the peplum softens the hips, and those puff sleeves add just enough drama without looking costume-y. The openwork lace on the lower edge keeps the peplum light so the whole piece moves with you instead of weighing you down.
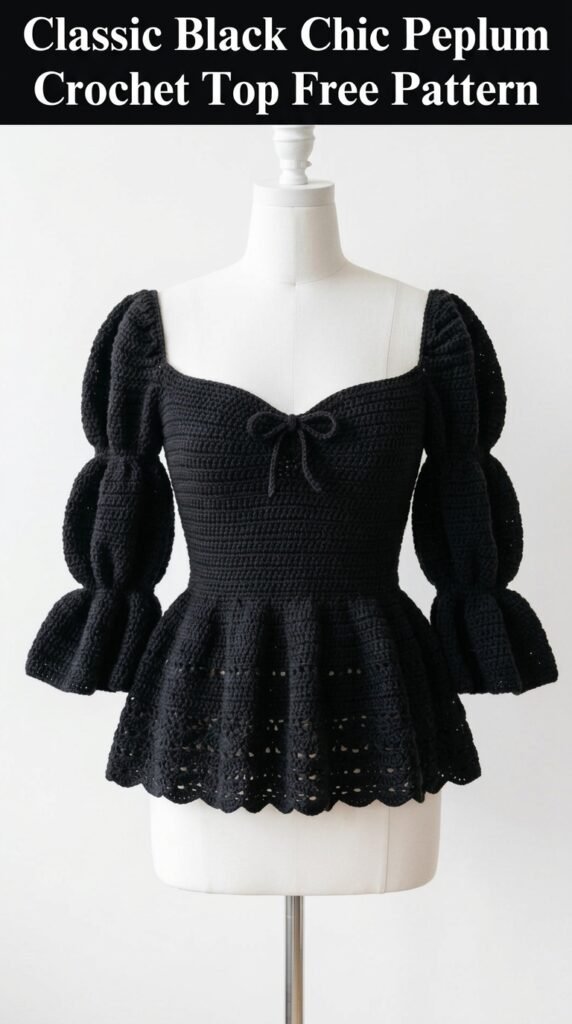
What really sells it? The little bow at the sweetheart neckline. One tiny detail that turns “pretty crochet top” into “statement piece.” You get structure, softness, and a bit of romance all in one garment. Ready to feel like you just stepped off a runway while still being able to raise your arms comfortably?
Skill Level
Intermediate to Advanced
You need solid experience with garment shaping, working in the round, increases, decreases, and clean seaming. If you have already made a fitted top or sweater, you have the skills. Complete beginners should practice a simpler garment first.
Materials Needed
Yarn:
- 800 to 1000 yards of DK weight yarn (category 3)
- A cotton blend or mercerized cotton gives the best stitch definition and drape
- Color shown: classic black
Hook:
- 4.0 mm (G/6) for the bodice
- 4.5 mm for the peplum so it drapes more softly
- Adjust if needed to hit gauge
Notions:
- Yarn needle
- Stitch markers
- Measuring tape
- Blocking mats and pins
That is everything. No special hardware required.
Gauge
With the 4.0 mm hook in single crochet: 18 stitches and 20 rows = 4 inches.
Check this carefully. This top is fitted, so an off gauge means an off fit. Swatch, measure, and adjust your hook size before you start the real thing.
Finished Measurements
Written for size Small with notes for adjusting. Finished bust sits around 32–34 inches with a bit of negative ease for that sleek look.
- Bust: 32 inches
- Waist: 28 inches
- Total length from shoulder to hem: 22 inches
- Sleeve length: 14 inches
Want a larger size? Simply add stitches to the foundation chain and adjust the decrease points proportionally.
Abbreviations and Stitch Definitions
Here is every stitch you will meet:
- Ch = chain
- Sl st = slip stitch
- Sc = single crochet
- Hdc = half double crochet
- Dc = double crochet
- Sc2tog = single crochet two together
- Inc = increase (two stitches in one)
- BLO = back loop only
- Puff st = puff stitch (yarn over, insert, pull up loop three times, yarn over and pull through all loops, chain one to close)
Nothing exotic. Just the classics plus one textured puff for the sleeves.

Special Techniques
Horizontal Ribbing
The bodice uses single crochet worked in the back loop only. That simple change creates stretchy horizontal lines that hug the body and give the fabric structure.
Sweetheart Neckline Shaping
You shape each cup separately with strategic decreases at the center and gentle tapering at the top. The result is a soft curve that dips in the middle and rises at the sides.
Puff Sleeve Construction
Each sleeve starts with dramatic increases, then decreases to gather the fabric into soft tiers. Think of it as building little balloons that sit prettily on the arm.
Step by Step Crochet Pattern
Work the pieces in this order and the top comes together smoothly.
Bodice Front Panel
Chain a foundation that matches your bust measurement (roughly 72 stitches for the sample size). Work rows of back-loop single crochet until the panel reaches the under-bust. Then split the work to shape each sweetheart cup separately, decreasing at the center front and tapering the shoulder straps. Fasten off each cup when the strap reaches the right length.
Bodice Back Panel
Work a matching rectangle of back-loop single crochet, then shape simple shoulder straps at the top while leaving the center neckline open. Keep the same stitch count and tension as the front so the side seams match perfectly.
Assembling the Bodice
Lay the front and back panels with right sides facing. Seam the shoulder straps, then sew the side seams from the bottom edge up, leaving armhole openings of about 8 inches. Try the bodice on at this stage. Adjust length if needed before you commit to the peplum.
Puff Sleeves (Make 2)
Join yarn at the armhole and work in the round. Increase heavily for the first tier, work several even rounds, then decrease to gather the fabric. Repeat the increase-and-decrease sequence for a second tier, then finish with a flared cuff and a simple scallop edge. The result is soft, dramatic volume that still feels wearable.
Peplum Skirt
Switch to the larger hook and join yarn at the bottom of the bodice. Work even single crochet around the entire lower edge, then increase evenly for a soft flare. Add a couple of openwork lace rounds for lightness, continue with double crochet, and finish with a pretty scalloped edge. The peplum should skim the hips without adding bulk.
Bow Detail
Chain a short strip, work a few rows of single crochet, and tie it into a small bow. Stitch it securely to the center of the sweetheart neckline. Instant polish.
Finishing Your Crochet Top
Weave in every end carefully. Soak the finished top in cool water, gently press out excess moisture, and pin it to the correct measurements on blocking mats. Pay extra attention to the scallops and sleeve edges. Let it dry completely before you wear it. Blocking transforms the drape and makes every stitch look intentional.
Tips for Success
Keep tension consistent on the bodice. A fitted garment shows every variation. You can relax a little on the peplum for better flow.
Try the bodice on before adding the peplum. Catching length issues early saves frogging later.
Use stitch markers at the start of every round on the sleeves and peplum. Count after each section. Yes, it is tedious. It also prevents heartbreak.
IMO, the blocking step is non-negotiable. Skip it and the peplum will never sit as nicely.
Customization Ideas
Add an extra puff tier on the sleeves for more drama. Lengthen the peplum into a short skirt if you want more coverage. Swap black for emerald, deep burgundy, or soft ivory for a completely different mood. Add a light lining to the bodice if you prefer extra support or opacity.
Yarn Substitution Notes
Cotton or cotton blends give crisp stitch definition and structure. Bamboo blends create more fluid drape. Avoid anything too fuzzy or heavily textured—it hides the beautiful ribbing and openwork details. FYI, a mercerized cotton will make those scallops shine.
You Might Also Like
- Midnight Navy Blue Peplum Crochet Top Free Pattern
- Lavender Cottage Babydoll Dress Free Crochet Pattern
- Lilac Starflower Lace Dress Crochet Pattern
- Ivory Bridal Mesh Crochet Bell Sleeve Shrug Pattern
FAQ’s
How long does this top usually take to finish?
Most intermediate crocheters complete it in 15–25 hours spread over a week or two. The bodice is the slowest part because of the ribbing and shaping. The sleeves and peplum move faster once you hit the rhythm.
Can I make this in a larger size?
Yes. Add stitches to the foundation chain in multiples that keep the decreases balanced. Measure your own bust and waist and adjust the number of rows and decrease points accordingly. The peplum increases scale easily.
Is the bodice see-through?
In solid black DK cotton it is usually opaque enough for everyday wear. If you prefer more coverage or plan to wear it without a camisole, add a simple fabric lining after blocking.
How do I keep the puff sleeves from looking costume-like?
Work the decreases firmly so the gathers sit close to the arm rather than ballooning wildly. Blocking helps the tiers settle into soft, intentional volume instead of random fluff.
What if my gauge is slightly off?
Go up or down a hook size until you match the 18 stitches and 20 rows. Because this is a fitted top, even a small gauge difference changes the finished size noticeably.
Can I wear this top for more formal occasions?
Absolutely. Pair it with tailored trousers or a sleek skirt and the black peplum silhouette looks polished enough for evening events. The bow detail already gives it a dressed-up feel.
Final Thoughts
You now have everything you need to create a Classic Black Chic Peplum Crochet Top that looks far more complicated than it actually is. Start with the ribbed bodice, shape those sweetheart curves, add the dramatic sleeves, and finish with the flirty peplum and tiny bow. Once you block it and try it on, you will wonder why you waited so long to use that special black yarn. Happy stitching—this one is worth every single stitch.


Leave a Reply
You must be logged in to post a comment.