

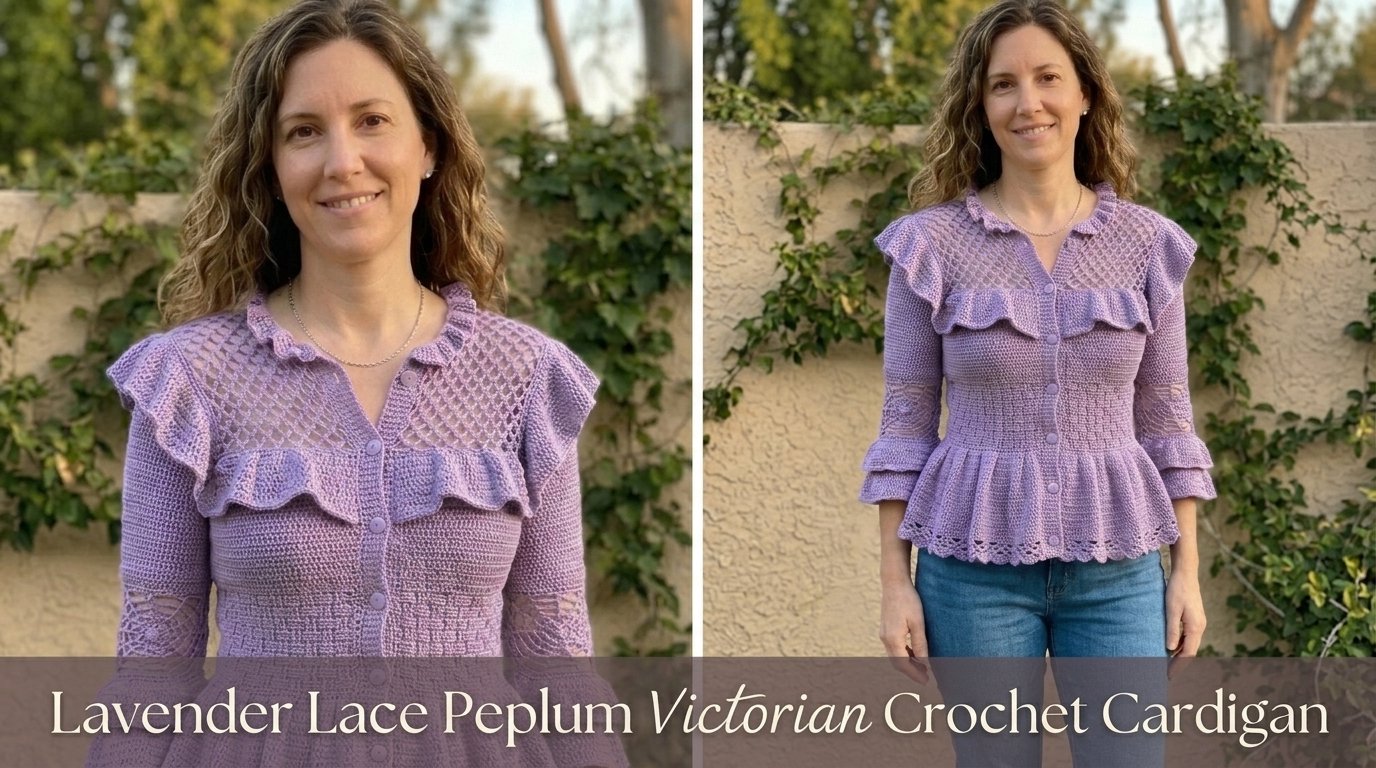
I still remember the afternoon the idea for this cardigan settled into my hands. I was sorting through a box of old photographs my grandmother had left me—faded pictures of women in high-necked blouses and soft, draped jackets that somehow managed to look both proper and quietly rebellious. One image in particular stayed with me: a young woman standing in a garden, her cardigan falling in soft folds around her hips, the lace catching the light like frost on lavender stems. I wanted that feeling. Not a costume, not a strict historical reproduction, but a modern piece that carried the same romantic drape and delicate strength.
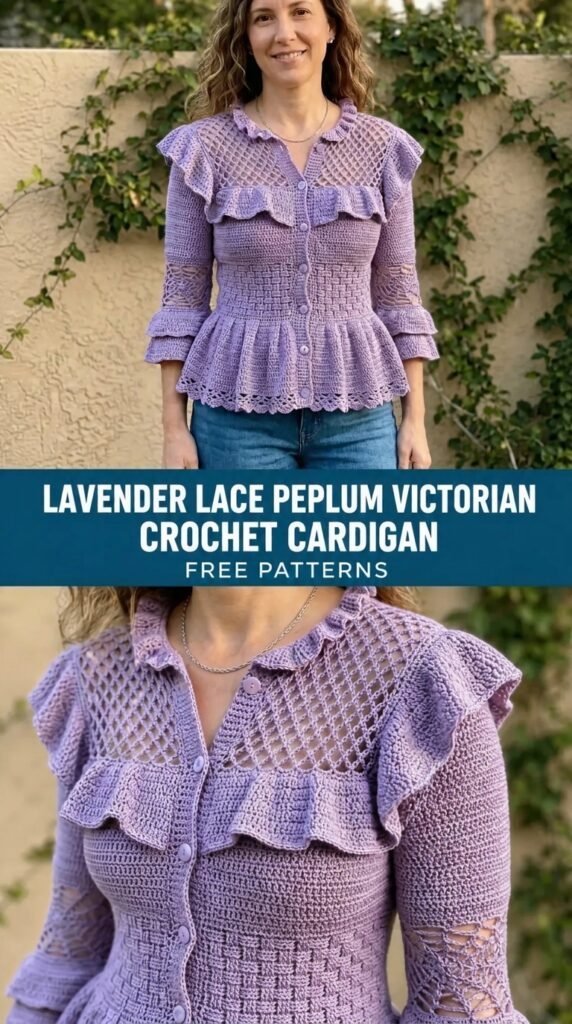
So I began sketching with yarn instead of pencil. Soft lavender that shifts between cool violet and warm rose depending on the light. Open lace that lets the fabric breathe and move. A peplum that flares just enough to create a gentle hourglass without ever feeling stiff. The result is the Lavender Lace Peplum Victorian Crochet Cardigan—an intermediate lace project that feels special the moment you put it on and even better after the first blocking.
About This Pattern
This cardigan is worked from the top down in one piece to the underarms, then the body and sleeves are continued separately. The lace is a repeating four-row pattern of clusters and open chains that creates a soft, textured fabric with excellent drape. A short, gently flared peplum is added after the waist, and simple ribbed button bands finish the front edges. The sleeves are three-quarter length with a matching lace cuff.
Skill level is intermediate. You should be comfortable reading a lace chart or written repeats, working in the round for the sleeves if you prefer, and managing simple shaping. The finished cardigan is designed for a relaxed, slightly cropped fit through the body with a peplum that adds about 4–5 inches of flare. The sample is shown in size M on a 36-inch bust.
Finished bust measurements (buttoned):
XS 32″ · S 36″ · M 40″ · L 44″ · XL 48″ · 2X 52″
Materials You’ll Need
Yarn
Fingering-weight yarn with good drape (merino, merino-silk, or similar). Sample used a soft merino-silk blend in a dusty lavender.
- Color A (main body and sleeves): approximately 1200 (1350, 1500, 1700, 1900, 2100) yards / 1100 (1235, 1370, 1555, 1740, 1920) meters
- Allow 15% extra for gauge variation and swatching.
Hooks
- 3.5 mm (E) for the main lace fabric
- 3.25 mm (D) for the ribbed bands and tighter cuffs (optional but recommended for neater edges)
Notions
- Tapestry needle
- Stitch markers (at least 6)
- 5–7 small buttons (about ½ inch / 12 mm diameter)
- Blocking mats and pins
- Optional: matching sewing thread for button reinforcement
Abbreviations and Terminology
All instructions use US crochet terminology.
- ch – chain
- sc – single crochet: insert hook, yarn over, pull up a loop, yarn over, pull through both loops
- dc – double crochet: yarn over, insert hook, yarn over, pull up a loop, (yarn over, pull through 2 loops) twice
- hdc – half double crochet: yarn over, insert hook, yarn over, pull up a loop, yarn over, pull through all three loops
- tr – treble crochet: yarn over twice, insert hook, yarn over, pull up a loop, (yarn over, pull through 2 loops) three times
- cl – cluster (2-dc cluster): yarn over, insert hook, yarn over, pull up a loop, yarn over, pull through 2 loops (2 loops on hook); yarn over, insert hook in same stitch, yarn over, pull up a loop, yarn over, pull through 2 loops, yarn over, pull through all 3 loops on hook
- ch-sp – chain space
- sk – skip
- st(s) – stitch(es)
- rep – repeat
- RS – right side
- WS – wrong side
Turning chains do not count as a stitch unless a step explicitly says they do. When a row begins with “ch 3,” the ch-3 is the turning chain and is not counted in the stitch totals that follow.
Gauge
Work a swatch in the lace pattern:
Chain 35.
Row 1 (RS): Dc in 4th ch from hook and in each ch across. Turn. (32 dc)
Rows 2–5: Work Rows 2–5 of the Body Lace Pattern below.
Rows 6–9: Repeat Rows 2–5 once more.
Block the swatch gently.
Target: 22 stitches and 12 rows = 4 inches (10 cm) in the lace pattern after blocking, measured over the center of the swatch.
If your swatch is too small, go up a hook size. If it is too large, go down a hook size. Lace grows noticeably with blocking, so always measure after blocking.
Main Pattern Instructions
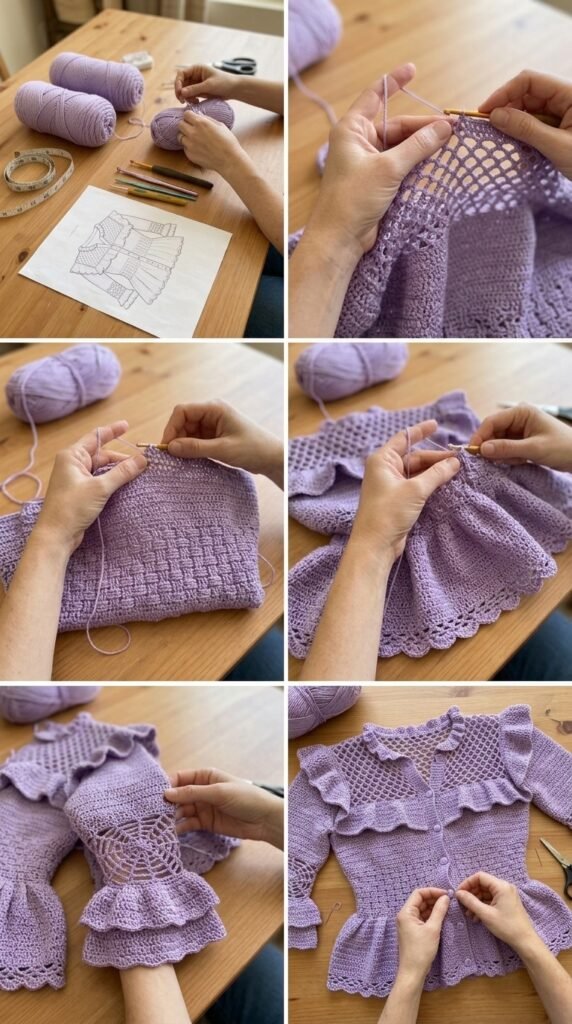
Yoke
Foundation
With 3.5 mm hook and Color A, chain 90 (98, 106, 114, 122, 130).
Row 1 (RS): Dc in 4th ch from hook and in each ch across. Turn.
Count: 88 (96, 104, 112, 120, 128) dc.
Row 2 (WS): Ch 3, dc in first dc, *ch 1, sk 1 dc, cl in next dc; rep from * to last dc, ch 1, dc in last dc. Turn.
Count: 44 (48, 52, 56, 60, 64) clusters + 2 dc.
Row 3: Ch 3, dc in first dc, *ch 1, cl in next ch-1 sp; rep from * across, ending with cl in last ch-1 sp, ch 1, dc in last dc. Turn.
Row 4: Ch 3, 2 dc in first ch-1 sp, *ch 1, 2 dc in next ch-1 sp; rep from * across, ending with 2 dc in last ch-1 sp, dc in last dc. Turn.
Count: 90 (98, 106, 114, 122, 130) dc.
Row 5: Ch 3, dc in each dc and ch-1 sp across. Turn.
Count: 134 (146, 158, 170, 182, 194) dc.
These five rows establish the lace foundation and begin the gentle increase that shapes the yoke. The fabric should already feel light and open.
Body Lace Pattern (repeat section)
Row 1 (RS): Ch 3, dc in first st, *ch 1, sk 1 st, cl in next st; rep from * to last st, ch 1, dc in last st. Turn.
Row 2: Ch 3, dc in first dc, *ch 1, cl in next ch-1 sp; rep from * across, ending with dc in last dc. Turn.
Row 3: Ch 3, 2 dc in first ch-1 sp, *ch 1, 2 dc in next ch-1 sp; rep from * across, ending with dc in last dc. Turn.
Row 4: Ch 3, dc in each dc and ch-1 sp across. Turn.
Repeat these four rows for the lace fabric throughout the body and sleeves.
Continue Yoke
Work Body Lace Pattern Rows 1–4 a total of 4 (4, 5, 5, 6, 6) times, then work Rows 1–2 once more.
At the same time, place markers for raglan-style increases as follows on the next RS row:
Mark the following stitches (counting from the right front edge):
- After 14 (15, 16, 17, 18, 19) sts (right front)
- After next 16 (18, 20, 22, 24, 26) sts (right sleeve)
- After next 28 (30, 32, 34, 36, 38) sts (back)
- After next 16 (18, 20, 22, 24, 26) sts (left sleeve)
- Remaining stitches are left front.
On every RS row of the lace pattern, work an increase (2 dc in the same stitch or ch-1 sp) in the stitch immediately before and immediately after each marker. This creates four increase lines that shape the yoke.
Continue in pattern with increases until the yoke measures approximately 7.5 (8, 8.5, 9, 9.5, 10) inches from the foundation chain, ending after a Row 4 of the lace pattern.
Stitch counts will vary by size; the important thing is that the fabric lies flat and the armhole openings look balanced.
Separate Body and Sleeves
Next row (RS): Work in pattern across right front to the first marker, remove marker, chain 6 (8, 8, 10, 10, 12) for underarm, skip all stitches of the right sleeve to the next marker, remove marker, work in pattern across the back to the next marker, remove marker, chain 6 (8, 8, 10, 10, 12) for underarm, skip all stitches of the left sleeve, remove marker, work in pattern across left front. Turn.
You have now joined the fronts and back and set the sleeves aside.
Body
Continue in Body Lace Pattern on the body stitches only (including the underarm chains). Work even until the body measures 9 (9.5, 10, 10.5, 11, 11.5) inches from the underarm, ending after a Row 4.
Peplum
The peplum is worked by increasing evenly across the next two rows to create a gentle flare.
Peplum Row 1 (RS): Ch 3, dc in first st, *ch 1, sk 1 st, (cl, ch 1, cl) in next st; rep from * to last st, ch 1, dc in last st. Turn.
This roughly doubles the number of clusters.
Peplum Row 2: Ch 3, dc in first dc, *ch 1, cl in next ch-1 sp; rep from * across, ending with dc in last dc. Turn.
Peplum Rows 3–8: Work Body Lace Pattern Rows 3–4 twice, then Rows 1–4 once.
The fabric will begin to flare softly. If you prefer a deeper peplum, work two additional repeats of the four-row lace pattern.
Fasten off after the final Row 4.
Sleeves
Return to one set of sleeve stitches. With RS facing, join yarn at the center of the underarm chain.
Round 1: Ch 3 (counts as dc), work in Body Lace Pattern evenly around the sleeve opening, incorporating the underarm chains. Join with slip stitch to top of beginning ch-3.
Continue working in the round, following the four-row lace pattern and joining at the end of each round. Work even until the sleeve measures 9 (9.5, 10, 10.5, 11, 11.5) inches from the underarm, or desired length to the start of the cuff.
Cuff
Switch to 3.25 mm hook if desired.
Work 4 rounds of sc, decreasing 4–6 stitches evenly across the first round to gently gather the lace into a soft cuff. Fasten off.
Repeat for the second sleeve.
Special Techniques
Cluster stitch (cl)
The 2-dc cluster is the heart of this lace. Work it firmly but not tightly so the stitch sits neatly and the fabric retains its open quality. If your clusters feel stiff, try relaxing your tension slightly on the final pull-through.
Maintaining the lace rhythm
Because the pattern is a four-row repeat, it is easy to lose track after interruptions. Place a removable marker in the first stitch of every Row 1 so you can always see where the repeat begins.
Assembly and Finishing
Button Bands
With 3.25 mm hook and RS facing, join yarn at the lower right front edge.
Work 1 row of sc evenly up the right front edge, around the neckline, and down the left front edge. Aim for approximately 3 sc for every 2 rows of lace so the band lies flat.
Next row (buttonhole row – right front only): Work sc to the first desired button placement (usually about ½ inch above the peplum), *ch 2, sk 2 sc, sc in next 8–10 sc; rep from * until you have 5–7 buttonholes, ending with sc to the neck edge. Continue sc around the neck and down the left front.
Final band row: Sc in each sc and work 2 sc in each ch-2 buttonhole space. Fasten off.
Sew buttons to the left front band, aligning them with the buttonholes. Use a small reinforcing stitch on the back of each button if the yarn is soft.
Weave in all ends carefully, following the path of the stitches so they disappear into the lace.
Blocking and Care
This lace benefits greatly from wet blocking.
Fill a basin with lukewarm water and a small amount of wool wash. Submerge the cardigan and let it soak for 15–20 minutes. Gently squeeze out excess water—never wring. Roll in a clean towel to remove more moisture, then lay flat on blocking mats.
Pin the body to the finished measurements, paying special attention to the peplum so it flares evenly. Pin the sleeve edges and neckline straight. Allow to dry completely.

Care: Hand wash in cool water, roll in a towel, and dry flat. Never hang a wet lace garment; the weight of the water can stretch the fabric permanently. Store folded rather than on a hanger.
Fit and Troubleshooting Tips
- If the yoke feels tight across the shoulders, you may need a larger size or slightly larger hook for the yoke section only.
- If the fabric cups or pulls inward, check that your clusters are not too tight and that you are not accidentally skipping chain spaces.
- If the peplum does not flare enough, add one or two extra increase rows before returning to the regular lace pattern.
- If the button bands ripple, you have too many stitches; if they pull, you have too few. Adjust the number of sc on the first band row until the edge lies flat.
- Lace looks dramatically different before and after blocking. Trust the process and evaluate the fabric only after it is fully dry and pinned.
FAQ’s
Can I use a different yarn weight?
This pattern is written for fingering-weight yarn to keep the lace light and the finished cardigan soft and drapey. Sport weight can work if you go up a hook size and accept a slightly denser fabric and higher yardage. Worsted weight is not recommended—it will make the lace heavy and the peplum less graceful.
How do I make the sleeves longer or shorter?
Simply work more or fewer rounds of the lace pattern before starting the cuff. Measure from the underarm as you go and try the sleeve on if possible. Keep in mind that longer sleeves will require extra yarn (roughly 50–80 yards per additional inch of length).
Is this pattern suitable for an adventurous beginner?
If you are comfortable with double crochet, reading written repeats, and basic increases, you can manage it. The cluster stitch is the only special technique, and it is explained in detail. Take your time with the first few lace repeats and use plenty of stitch markers.
Can I omit the buttons and wear it open?
Absolutely. The button bands still give a polished edge, but you can skip the buttonholes and buttons entirely if you prefer a clean, open-front look. The cardigan holds its shape well either way.
What if my peplum looks too full or too flat after blocking?
Peplum flare is easy to adjust. If it feels overly full, you can frog the last two peplum rows and work fewer increases. If it looks too straight, add one extra increase row before returning to the regular lace pattern. Blocking will soften the final shape, so evaluate only after the fabric is fully dry.
How much extra yarn should I buy if I want a longer body?
Each additional inch of body length before the peplum uses approximately 40–55 yards depending on size. Adding two extra inches is a popular modification and usually stays within one extra skein for most sizes.
Can I work the sleeves flat instead of in the round?
Yes. After separating the body, place the sleeve stitches on a holder. Later, rejoin yarn and work the sleeve back and forth in rows, following the same lace pattern. Seam the underarm with mattress stitch when finishing. Some crocheters find this easier for maintaining the lace rhythm.
Final Thoughts
There is something deeply satisfying about watching this cardigan take shape—the way the lace opens up under the blocking pins, the soft peplum that suddenly has life, the quiet lavender that changes with every shift of light. It is a piece that feels both delicate and durable, romantic and wearable.
I hope you enjoy making it as much as I enjoyed designing it. When you finish, I would love to see how your version turns out. Share a photo in the comments or tag it so others can find a little inspiration for their own lavender lace moments.
Happy stitching.


Leave a Reply
You must be logged in to post a comment.