

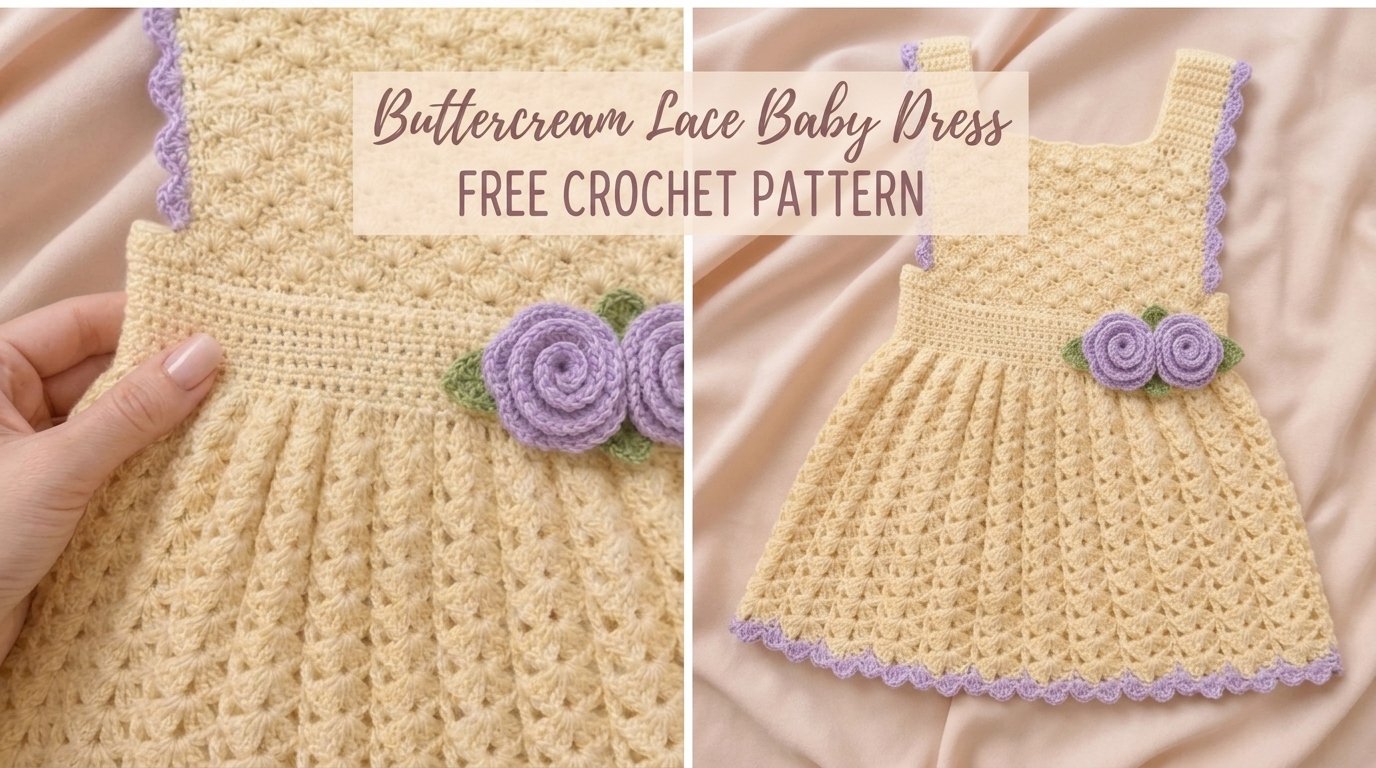
I still remember the afternoon I first sketched this dress. I was holding a tiny, almost weightless length of soft cream yarn that felt like whipped butter between my fingers, and the name “buttercream” just settled into place. I wanted something that looked delicate without being fragile, something a new parent could dress a baby in for a family photo or a quiet afternoon and still feel confident washing and re-wearing. The lace needed to breathe, the skirt needed to have movement, and the whole piece had to stay soft against newborn skin.
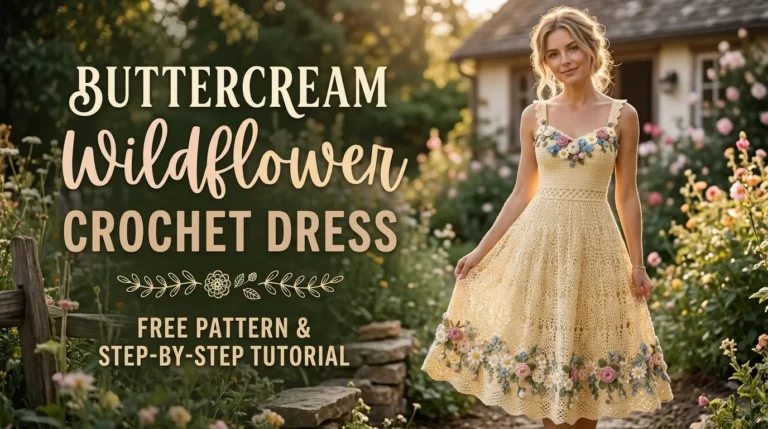
That sketch turned into the Buttercream Lace Baby Dress. It is worked top-down in one piece with a gentle yoke that grows into an open lace skirt. The shell pattern creates soft peaks and valleys that catch the light without looking heavy. I kept the construction straightforward so you can focus on the rhythm of the stitches rather than constant counting. The finished dress has a sweet vintage feel but wears like a modern everyday piece.
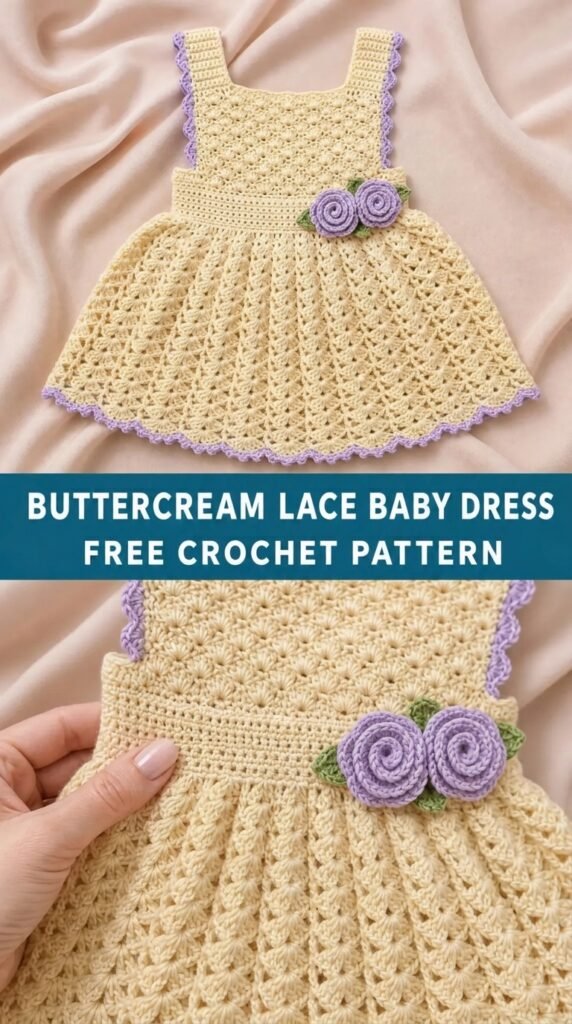
This free pattern includes full instructions for sizes newborn through 12 months, clear stitch counts, and practical finishing notes so you can make a dress that actually fits and lasts.
About This Pattern
The Buttercream Lace Baby Dress is a seamless top-down design. You begin at the neckline, increase through the yoke, separate the body and sleeves (the sleeves are left open as short cap sleeves), then work the skirt in continuous rounds of lace shells. The neckline is finished with a simple round of single crochet and two short ribbon or yarn ties.
Skill level is intermediate. You should be comfortable with working in the round, basic increases, and following a repeating lace sequence. The pattern is written with plenty of stitch counts and “count check” lines so you can stay on track.
Finished chest measurements (approximate):
- Newborn: 16 in (40.5 cm)
- 0–3 months: 17.5 in (44.5 cm)
- 3–6 months: 18.5 in (47 cm)
- 6–12 months: 20 in (51 cm)
Length from shoulder to hem is adjustable. The sample shown measures about 13–15 in (33–38 cm) depending on size. The lace skirt has good drape and will grow slightly with blocking.
Materials You’ll Need
Yarn
DK weight (Category 3) soft cotton or cotton-blend yarn in a light cream or pale buttercream shade.
- Newborn: approximately 280 yd / 255 m
- 0–3 months: 320 yd / 290 m
- 3–6 months: 380 yd / 350 m
- 6–12 months: 450 yd / 410 m
Allow 15 % extra for gauge variation and swatching. I used a smooth, lightly mercerized cotton that shows the lace clearly and washes well.
Hooks
- 3.5 mm (E-4) for the main body and lace
- 3.25 mm (D-3) for the neckline edging (optional, for a neater edge)
Notions
- Tapestry needle
- Stitch markers (at least 4)
- Scissors
- Soft ribbon or matching yarn for neckline ties (about 20 in / 50 cm total)
- Blocking mats and pins or wires
Abbreviations and Terminology (US Terms)
- ch – chain
- sc – single crochet: insert hook, yarn over, pull up a loop, yarn over, pull through both loops
- hdc – half double crochet: yarn over, insert hook, yarn over, pull up a loop, yarn over, pull through all three loops
- dc – double crochet: yarn over, insert hook, yarn over, pull up a loop, (yarn over, pull through two loops) twice
- tr – treble crochet: yarn over twice, insert hook, yarn over, pull up a loop, (yarn over, pull through two loops) three times
- sl st – slip stitch: insert hook, yarn over, pull through both the stitch and the loop on the hook
- sp – space
- sk – skip
- rep – repeat
- rnd – round
- beg – beginning
Turning chains do not count as a stitch unless a step specifically says they do. The lace shell is worked as (2 dc, ch 1, 2 dc) in the indicated space or stitch.
Gauge
Work a small swatch in the lace pattern:
Chain 30, work 6 rows of the Main Lace Pattern (given below).
Blocked gauge: 4 lace shells and 8 rows = approximately 4 in (10 cm) across.
If your swatch is tighter, go up a hook size. If it is looser, go down a size. Baby garments need a little give, so aim for a fabric that feels soft rather than stiff.
Main Pattern Instructions
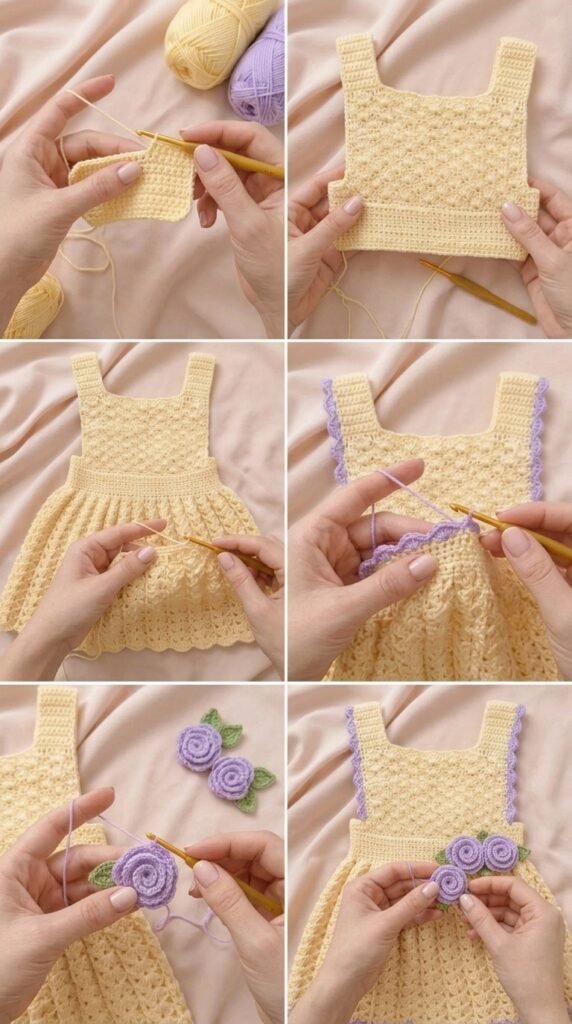
Yoke
All sizes begin the same way. Place a stitch marker in the first stitch of every round and move it up as you go.
Foundation
With 3.5 mm hook, ch 60 (64, 68, 72). Being careful not to twist, join with sl st to first ch to form a ring.
Rnd 1: Ch 1, sc in each ch around. Join with sl st to first sc.
Count: 60 (64, 68, 72) sc.
Rnd 2 (increase round): Ch 2 (does not count as a stitch), *dc in next 4 sts, 2 dc in next st; rep from * around. Join.
Count: 72 (76, 80, 84) dc.
Rnd 3: Ch 2, dc in each st around. Join.
Count remains the same.
Rnd 4 (increase round): Ch 2, *dc in next 5 sts, 2 dc in next st; rep from * around. Join.
Count: 84 (88, 92, 96) dc.
Rnd 5: Ch 2, dc in each st around. Join.
Rnd 6 (increase round): Ch 2, *dc in next 6 sts, 2 dc in next st; rep from * around. Join.
Count: 96 (100, 104, 108) dc.
Rnd 7: Ch 2, dc in each st around. Join.
For the larger sizes continue one more increase round:
0–3, 3–6, and 6–12 months only – Rnd 8 (increase): Ch 2, *dc in next 7 (7, 8) sts, 2 dc in next st; rep from * around. Join.
Count: — (112, 116, 120) dc.
All sizes – next round: Ch 2, dc in each st around. Join.
You should now have a gently flared yoke. Try it on the intended baby or a similar-sized doll if possible. The yoke should sit comfortably across the shoulders without pulling.
Separate Body and Sleeves
Mark the underarm points. From the join, count approximately 14 (15, 16, 17) stitches for the first front/back section, place a marker, skip the next 20 (22, 24, 26) stitches for the first sleeve, place a marker, work across the next 28 (30, 32, 34) stitches for the other front/back section, place a marker, skip the remaining sleeve stitches.
Body Rnd 1: Ch 2, dc in each stitch to the first underarm marker, ch 4 (underarm chain), skip the sleeve stitches, dc across the body section to the next underarm marker, ch 4, skip the second sleeve, dc to the end of the round. Join.
You are now working only the body.
Body Rnd 2: Ch 2, dc in each dc and in each of the 4 underarm chains around. Join.
Count the total body stitches; they should be even.
Work 1–2 more plain dc rounds if you want a slightly longer bodice before the lace begins. Most sizes look balanced with 2–3 total body rounds of plain dc after separation.
Main Lace Skirt
The lace is worked in continuous rounds. The shell is (2 dc, ch 1, 2 dc).
Lace Setup Rnd: Ch 1, sc in first st, *ch 3, sk 2 sts, sc in next st; rep from * around, adjusting the final skip if needed so the number of ch-3 spaces is a multiple of 4. Join with sl st to first sc.
Lace Rnd 1: Sl st into first ch-3 sp, ch 3 (counts as dc), (dc, ch 1, 2 dc) in same sp (first shell made), *sk next sc, shell in next ch-3 sp; rep from * around. Join to top of beg ch-3.
Lace Rnd 2: Sl st to the ch-1 sp of the first shell, ch 3, (dc, ch 1, 2 dc) in same ch-1 sp, *shell in ch-1 sp of next shell; rep from * around. Join.
Repeat Lace Rnd 2 until the skirt measures approximately:
- Newborn: 7 in (18 cm) from underarm
- 0–3 months: 8 in (20 cm)
- 3–6 months: 9 in (23 cm)
- 6–12 months: 10.5 in (27 cm)
or until the desired length is reached. End after any lace round.
Final Lace Edge: Ch 1, sc in each dc and in each ch-1 space around, working 2 sc in every third ch-1 space for a gentle flare if desired. Join and fasten off.
Cap Sleeve Edges (optional but recommended)
Rejoin yarn at the underarm of one sleeve opening.
Work 1 round of sc evenly around the armhole (approximately 28–36 stitches depending on size). Join and fasten off. Repeat for the second armhole. This neatens the edge and prevents stretching.
Neckline Finishing
With 3.25 mm hook (or same size if preferred), rejoin yarn at the back of the neck.
Work 1 round of sc evenly around the neckline, placing a stitch marker at each shoulder point.
At the center front, create two small button loops or leave yarn tails for ties: ch 12, skip 2 sc, continue sc around.
On the opposite side of the center front, leave a matching length of yarn or attach ribbon later.
Fasten off and weave in ends.
Thread soft ribbon or a twisted yarn cord through the neckline stitches at the front and tie in a small bow.
Special Techniques
Shell Lace Consistency
Keep the tension of the ch-1 inside each shell relaxed. If the shells look pointed rather than rounded, try a slightly larger hook for the lace rounds only.
Underarm Chains
The 4-chain underarm is intentional. It gives the armhole enough ease for a baby’s shoulder without leaving a large gap. If the armhole feels tight on a particular size, work ch 5 instead and place 5 dc into those chains on the following round.
Assembly and Finishing
There is almost no seaming. Weave in all ends securely on the wrong side. Because this is a baby garment, take extra care that no tails can work free.

If you prefer a closed sleeve, you can sew the underarm chains to the adjacent body stitches with a few invisible stitches, but the open cap sleeve is part of the design’s soft look.
Blocking and Care
Wet-block the finished dress. Soak in lukewarm water with a little mild wool wash or baby-safe detergent for 15–20 minutes. Gently squeeze (do not wring). Roll in a towel to remove excess water. Lay flat on blocking mats, gently shape the lace shells so they open evenly, and pin the hem in a soft curve. Let dry completely.
Care: Hand wash in cool water, reshape, and dry flat. Do not hang the wet dress; the lace will stretch. Avoid high heat in the dryer.
Fit and Troubleshooting Tips
- Yoke feels tight: Add one extra increase round before separating the sleeves.
- Skirt cups or ruffles unevenly: Check that you are placing the same number of shells in every round and that your tension is consistent. Blocking almost always corrects minor cupping.
- Dress feels short after washing: Cotton can relax. Work 1–2 extra lace rounds if you know the yarn tends to grow.
- Neckline gapes: Use the smaller hook for the neckline round and keep the sc stitches firm.
- Sleeves too open: Work an extra round of sc around the armhole or add a second round of sc decreasing slightly.
Final Thoughts
There is something quietly joyful about finishing a small lace dress. The fabric is light, the stitches feel familiar after a few rounds, and the finished piece looks as though it could have come from a quiet afternoon in a sunny room. I hope this Buttercream Lace Baby Dress becomes one of those projects you return to—perhaps for a new baby in the family, a gift, or simply because the soft cream yarn called to you again.
When you finish yours, I would love to see how it turned out. Leave a comment, share a photo, or pin it for later. Happy stitching, and may every little dress you make be worn with soft, happy days.
FAQ’s
Can I use a different weight of yarn?
Yes, but you will need to adjust hook size and possibly the number of increase rounds. A lighter fingering yarn will create a more delicate fabric and may require extra repeats of the lace. A worsted weight will produce a heavier, warmer dress and fewer lace rounds for the same length.
Is this pattern suitable for a beginner?
It is written for intermediate crocheters. If you are comfortable with double crochet, working in the round, and following a simple repeating lace sequence, you should be fine. Absolute beginners may want to practice the shell stitch on a small swatch first.
How do I adjust the length of the skirt?
Simply work more or fewer repeats of Lace Rnd 2. Measure from the underarm as you go. The lace has enough stretch that an extra half-inch or so after blocking is normal.
Can I add long sleeves?
Yes. After separating the body, rejoin yarn at the underarm and work the sleeve downward in rounds of dc or a simplified lace, increasing or decreasing as needed for the arm. Cap sleeves are the default for summer wear and ease of dressing.
What is the best yarn for a baby dress?
Soft cotton, bamboo, or a cotton-acrylic blend that is labeled machine-washable or easy-care is ideal. Avoid anything itchy or with long fibers that can pill against delicate skin. Always check the care label.
Do I need to block the dress?
Yes. Blocking opens the lace shells and evens the fabric. It makes a noticeable difference in the final drape and appearance.
Can I sell items made from this pattern?
You are welcome to sell finished dresses made from this free pattern. Please credit the design when possible and do not sell or distribute the written pattern itself.


Leave a Reply
You must be logged in to post a comment.