

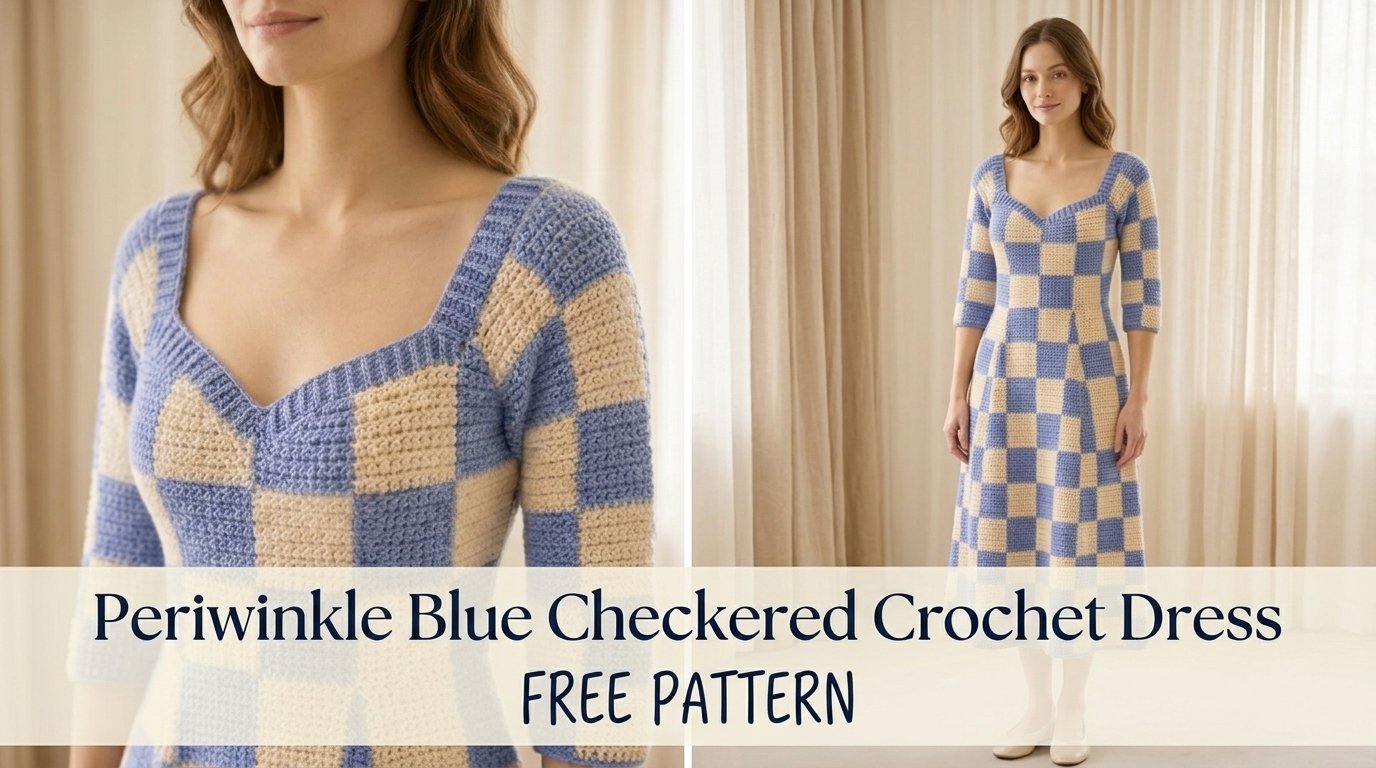
I still remember the afternoon I first imagined this dress. I was sorting through a basket of leftover cotton and came across a soft periwinkle that looked like the sky just after a spring rain. Next to it sat a creamy off-white that felt quiet and calm. I held the two skeins together and suddenly saw a checkerboard — soft, graphic, and somehow still gentle. I wanted a dress that would feel light on the skin, move with every step, and still look intentional. That is how the Periwinkle Blue Checkered Crochet Dress was born.

This is the kind of piece you can wear to a weekend market, a long lunch with friends, or simply around the house when you want to feel put-together without trying too hard. The checkered fabric has just enough structure to hold its shape, yet the cotton keeps it cool and breathable. I designed it to be approachable for confident intermediate crocheters while still offering clear guidance so nothing feels mysterious.
About This Pattern
This dress is worked from the top down in one piece for the bodice, then continued seamlessly into the skirt. The signature checkerboard is created by alternating blocks of periwinkle and cream in a simple intarsia-style color change that is easier than it looks. The silhouette is relaxed and slightly A-line, with short sleeves and a gentle scoop neck. Finished length hits mid-calf on most heights, but the pattern includes easy adjustment notes if you prefer a shorter or longer hem.
Skill level sits firmly at intermediate. You should be comfortable changing colors mid-row, reading basic stitch counts, and blocking cotton fabric. The finished fabric has a soft drape with enough body to keep the checkers crisp. Expected finished bust sizes range from approximately 34–48 inches, with the dress designed to be worn with 2–4 inches of positive ease.
Materials You’ll Need
Yarn
Use a soft, breathable DK-weight cotton or cotton-blend yarn.
- Color A (Periwinkle Blue): approximately 950–1,400 yards / 870–1,280 meters depending on size
- Color B (Cream or Soft Ivory): approximately 850–1,250 yards / 780–1,140 meters
Allow 15 % extra for gauge variation and personal tension differences.
Hooks
- 4.0 mm (G-6) for the main fabric
- 3.5 mm (E-4) for the neckline and sleeve edging if you prefer a slightly firmer finish
Notions
- Tapestry needle
- Stitch markers (at least 8)
- Scissors
- Blocking mats and pins
- Optional: 1–2 small buttons or snaps for the optional keyhole back if you choose that variation
Abbreviations and Terminology (US Crochet Terms)
- ch – chain
- sc – single crochet: insert hook, yarn over, pull up a loop, yarn over, pull through both loops
- hdc – half double crochet: yarn over, insert hook, yarn over, pull up a loop, yarn over, pull through all three loops
- dc – double crochet: yarn over, insert hook, yarn over, pull up a loop, yarn over, pull through two loops, yarn over, pull through remaining two loops
- sl st – slip stitch
- st(s) – stitch(es)
- sp – space
- rep – repeat
- RS – right side
- WS – wrong side
Turning chains do not count as a stitch unless a step specifically says they do. When changing colors for the checkers, work the last yarn-over of the previous stitch with the new color so the color change sits neatly on the edge of the block.
Gauge
Work a 6 × 6 inch (15 × 15 cm) swatch in the checkerboard pattern using 4.0 mm hook.
Target: 18 stitches and 12 rows = 4 inches (10 cm) in double crochet checkerboard.
If your swatch is smaller, go up a hook size. If it is larger, go down a hook size. Cotton can relax a little after blocking, so block your swatch the same way you plan to block the finished dress before measuring.
Main Pattern Instructions
Sizing Notes
The pattern is written for four sizes: S (M, L, XL). Numbers are given in that order. Choose the size closest to your bust measurement plus 2–4 inches of ease. The bodice is fitted enough to stay in place; the skirt flares gently.
Bodice Foundation
With Color A and 4.0 mm hook, chain 90 (100, 110, 120).
Row 1 (RS): Dc in 4th ch from hook and in each ch across. Turn.
Count: 88 (98, 108, 118) dc
Row 2: Ch 2 (does not count as st), dc in each st across. Turn.
Begin the checkerboard on the next row. Each checker is 8 stitches wide and 4 rows tall. You will work 11 (12, 13, 14) checkers across the width.
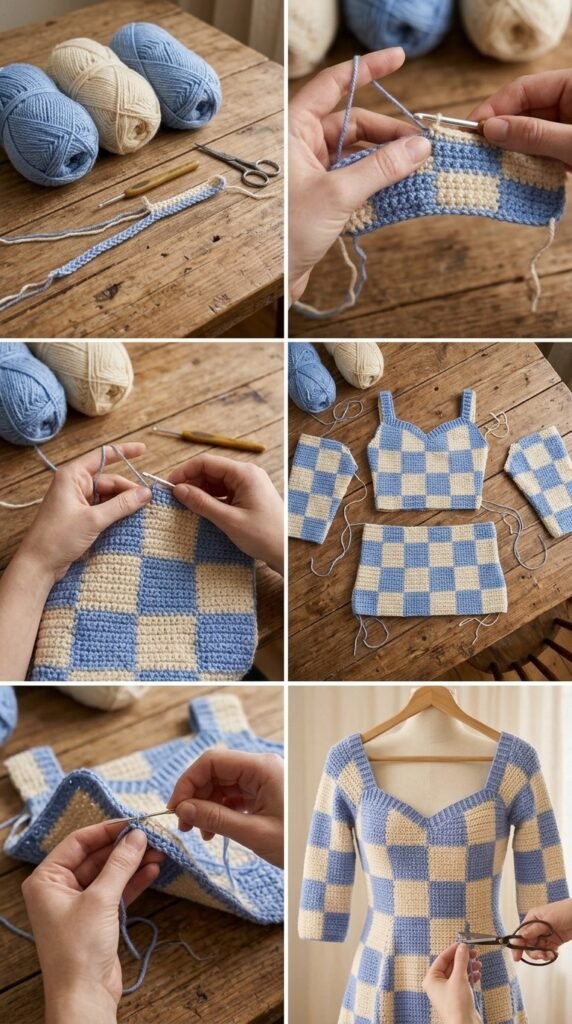
Establishing the Checkerboard
Row 3 (RS): With Color A, ch 2, dc in first 8 sts. Drop Color A (do not cut). Join Color B, dc in next 8 sts. Drop Color B, pick up Color A, dc in next 8 sts. Continue alternating 8-st blocks of Color A and Color B across the row. Turn.
Rows 4–6: Work even in dc, maintaining the color of each 8-st block. At the end of every row, carry the unused color loosely up the side or cut and rejoin if preferred. I prefer carrying for fewer ends.
Row 7: Switch the color sequence so that Color B sits above the previous Color A blocks and Color A sits above the previous Color B blocks. Continue alternating every 4 rows for the height of the bodice.
Work a total of 20 (22, 24, 26) rows of checkerboard for the bodice depth, or until the piece measures approximately 8.5 (9, 9.5, 10) inches from the foundation chain. Place a stitch marker at each underarm point: 22 (24, 27, 29) stitches in from each side edge. These mark the beginning of the armhole shaping.
Armhole Shaping
Next Row: Work in established checkerboard pattern to the first underarm marker. Ch 2, turn, leaving the remaining stitches unworked for now. Continue working only on these front stitches for the left front.
Work 6 (7, 8, 9) more rows even on the left front, maintaining the checker pattern. Fasten off.
Rejoin yarn at the opposite underarm marker and work the right front to match. Fasten off.
For the back, rejoin yarn at one underarm marker and work across the back stitches only for 8 (9, 10, 11) rows. Fasten off. This creates a slightly higher back neckline.
Shoulder Seaming
With right sides together, seam the front shoulders to the back shoulders using mattress stitch or whipstitch, matching the checker pattern as closely as possible. Leave the center back neck open if you want a keyhole option; otherwise seam fully.
Skirt
Rejoin Color A at one underarm and work in continuous rounds (or joined rows if you prefer) around the entire lower edge of the bodice. Increase evenly by 12 (14, 16, 18) stitches on the first round to create gentle flare. Continue the checkerboard pattern, shifting the color blocks every 4 rows as established.
Work until the skirt measures approximately 22 (23, 24, 25) inches from the underarm, or desired length. The dress is meant to hit mid-calf; try it on and adjust if needed. Fasten off after a complete 4-row checker sequence so the hem looks balanced.
Special Techniques
Clean Color Changes for Checkers
When you reach the last stitch of a color block, work the stitch until two loops remain on the hook. Drop the current color, pick up the next color, and complete the final yarn-over with the new color. This keeps the color change sharp and vertical.
Optional Keyhole Back
If you left the center back neck open, work 2–3 rounds of single crochet around the neckline and create a small button loop on one side. Sew a small button or snap on the opposite side.
Assembly and Finishing
Weave in all ends carefully, especially the carried yarns along the sides of the color blocks. Seam any remaining underarm gaps if you worked the bodice in sections. For the sleeves, you can leave them as simple armhole openings or add a short sleeve by picking up stitches around the armhole and working 6–8 rounds of checkerboard (or solid Color A) before fastening off.

Blocking and Care
Fill a basin with lukewarm water and a small amount of wool wash or mild detergent. Submerge the dress and let it soak for 20 minutes. Gently press out excess water — never wring. Roll in a clean towel to remove more moisture, then lay flat on blocking mats. Pin the neckline, armholes, and hem to the desired measurements, keeping the checkers square. Allow to dry completely.
Care: Hand wash in cool water, dry flat. Do not hang the dress while wet, as the cotton can stretch. Store folded rather than on a hanger for long-term care.
Fit and Troubleshooting Tips
- If the bodice feels too tight across the bust, add an extra checker width when you start or go up one size.
- If the skirt flares more than you like, reduce the number of increases on the first skirt round.
- Cupping or ruffling at the neckline usually means the neckline edging was worked too tightly — switch to a larger hook for the edging only.
- Color changes looking messy? Slow down at the transition stitches and make sure the new color is pulled snugly (but not tightly) against the previous stitch.
- If the dress feels heavy, you may have used a denser cotton. Blocking will relax it somewhat; next time try a lighter cotton-linen blend.
Final Thoughts
There is something quietly satisfying about watching a simple grid of periwinkle and cream grow into a dress you can actually wear. I hope this Periwinkle Blue Checkered Crochet Dress becomes one of those pieces you reach for again and again — the kind that feels like you the moment you put it on.
If you make one, I would love to see it. Leave a comment, tag your photos, or pin your finished dress so others can find the pattern too. Happy stitching, and enjoy every checker.
FAQ’s
Can beginners make this dress?
This pattern is best suited for intermediate crocheters who are already comfortable with double crochet, basic shaping, and changing colors. Confident beginners who have made a few garments may manage it with careful attention to the color-change instructions.
How do I adjust the length?
Simply work more or fewer rows in the skirt section. Always end after a complete 4-row checker sequence so the hem looks intentional.
What yarn substitutes work well?
Any soft DK-weight cotton, cotton-bamboo, or cotton-linen blend will work. Avoid pure acrylic if you want good drape and breathability in warm weather.
Is the checker pattern difficult?
Once you complete the first two or three color-change rows, the rhythm becomes clear. Marking the start of each 8-stitch block with a stitch marker for the first few rows can help.
Can I make this dress sleeveless or with longer sleeves?
Yes. For sleeveless, simply finish the armholes with a round or two of single crochet. For longer sleeves, continue the checkerboard (or solid color) for the desired sleeve length after picking up stitches around the armhole.



Leave a Reply
You must be logged in to post a comment.