

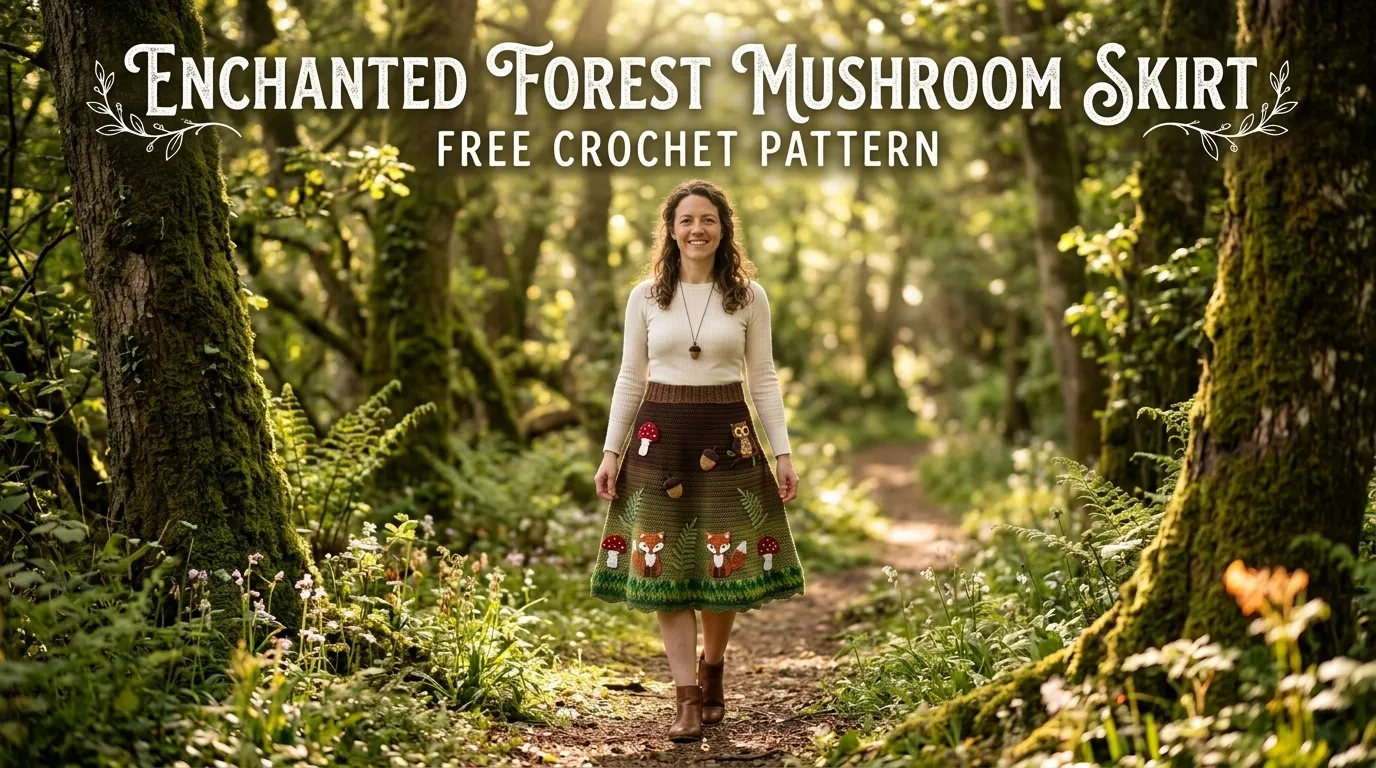
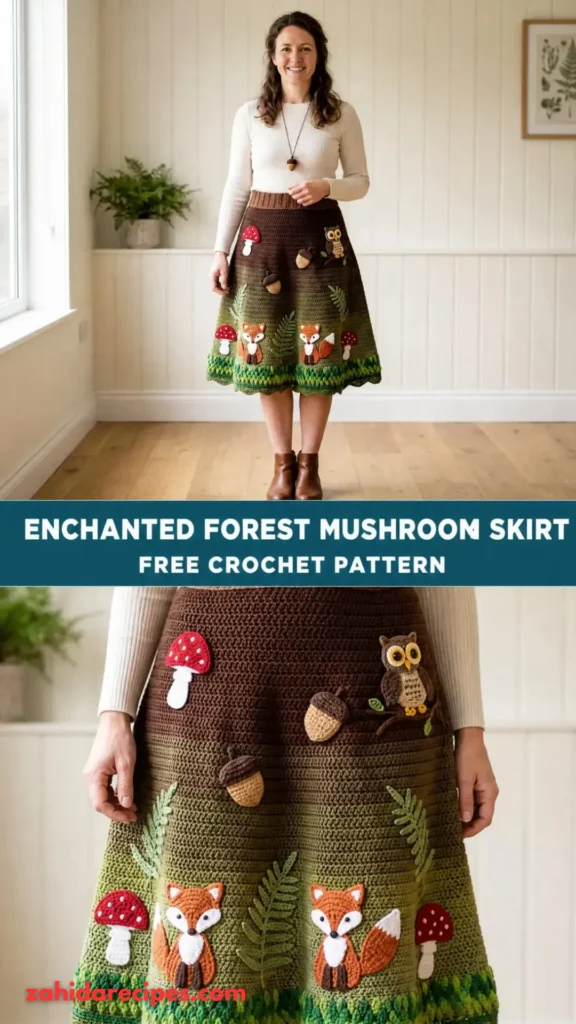
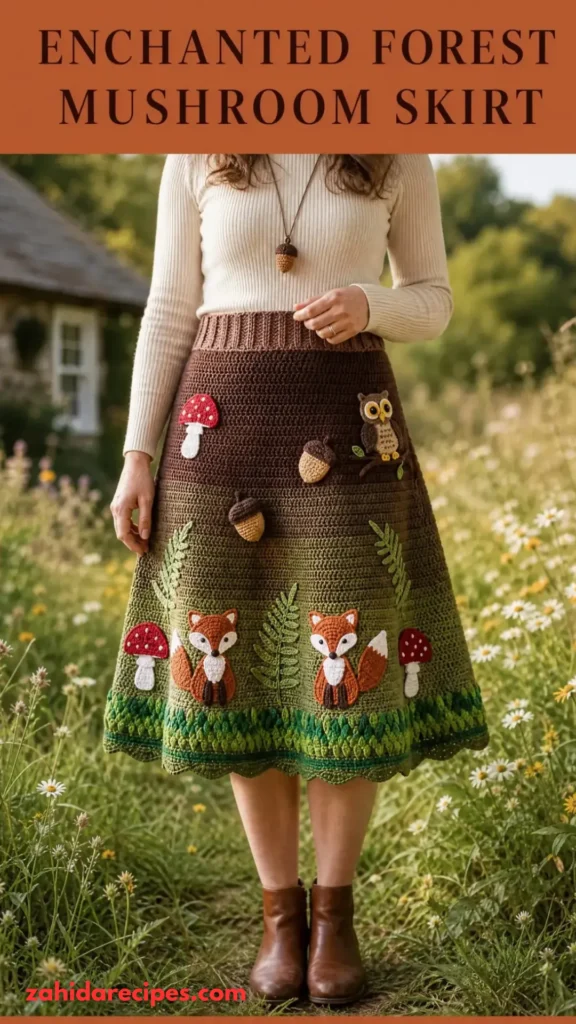
This design combines a simple crocheted skirt body with colorful mushroom appliqués and a pretty scalloped hem. You can customize the colors, adjust the length, and arrange the mushrooms however you like.
About This Pattern
The Enchanted Forest Mushroom Skirt is a made-to-measure crochet skirt worked from the waistband downward in joined rounds. The body uses half double crochet stitches for a soft, flexible fabric, while gradual increases create a gentle A-line shape.
Small crocheted mushrooms are made separately and sewn onto the finished skirt. This keeps the motifs crisp and allows you to choose their placement without interrupting the skirt’s construction.
- Skill level: Adventurous beginner to intermediate
- Construction: Top-down, worked in joined rounds
- Fit: Comfortable waist with a gently flared silhouette
- Style: Cottagecore, fairycore, woodland, whimsical
- Customization: Adjustable waist, length, colors, and motif placement
The sample instructions use a medium adult fit, with a waistband designed for approximately a 28–32-inch waist when worn with suitable elastic. Because crochet stretch varies, measure your own waist and use the fit instructions rather than relying on the sample size alone.
Materials You’ll Need
Yarn
Choose a smooth worsted-weight yarn, category 4, in cotton or a cotton-acrylic blend. Cotton provides excellent stitch definition, while a blend offers a little more softness and drape.
- Color A — Moss green: Approximately 350–450 yards (320–410 meters) for the skirt body.
- Color B — Cream: Approximately 50–80 yards (46–73 meters) for mushroom stems and decorative accents.
- Color C — Mushroom red: Approximately 40–60 yards (37–55 meters) for mushroom caps.
- Color D — Warm brown: Approximately 30–50 yards (27–46 meters) for earthy details and optional spots.
Allow 15% extra yarn if you plan to lengthen the skirt, make additional mushrooms, or adjust the fit.
Hooks and Notions
- 5.0 mm crochet hook for the skirt body
- 4.0 mm crochet hook for mushroom appliqués and details
- Flexible measuring tape
- Stitch markers
- Tapestry needle
- Scissors
- Approximately 1-inch-wide elastic for the waistband
- Sewing needle and matching thread
- Blocking mat and rustproof pins, if needed
Abbreviations and Terminology
This pattern uses US crochet terminology.
- ch — Chain: Yarn over and pull through the loop on your hook.
- sl st — Slip stitch: Insert the hook, yarn over, and pull through both the stitch and the loop on your hook.
- sc — Single crochet: Insert the hook, yarn over and pull up a loop, yarn over and pull through both loops.
- hdc — Half double crochet: Yarn over, insert the hook, yarn over and pull up a loop, yarn over and pull through all three loops.
- dc — Double crochet: Yarn over, insert the hook, yarn over and pull up a loop, yarn over and pull through two loops twice.
- inc — Increase: Work two stitches into the same stitch.
- st/sts — Stitch/stitches
- MR — Magic ring: Form an adjustable loop and crochet into it before pulling the loop closed.
- BLO — Back loop only: Work into the back loop of the stitch.
- FO — Fasten off: Cut the yarn and pull the tail through the final loop.
Important: The starting chain does not count as a stitch unless specifically stated. The chain 1 at the beginning of a skirt round is for height and does not count as a stitch.
Gauge
Using the 5.0 mm hook and Color A, work a swatch of 16 hdc stitches across 12 rows.
Your target gauge is approximately 4 inches (10 cm) across and 4 inches (10 cm) tall.
If your swatch is too large, try a smaller hook. If it is too small, try a larger hook. Wash and dry the swatch as you plan to care for the finished skirt before measuring it.
Gauge matters because it affects the waist fit, fabric weight, and amount of flare. A very loose stitch can make the skirt heavy and stretchy, while a tight stitch can make it stiff.
Enchanted Forest Mushroom Skirt Pattern Instructions
Part 1: Create the Waistband
The waistband is worked in rows to form a stretchy ribbed band. It is then joined into a circle.
Using Color A and the 5.0 mm hook:
Row 1: Ch 11. Hdc in the second ch from the hook and in each remaining ch. (10 hdc)
Row 2: Ch 1, turn. Hdc in BLO across. (10 hdc)
Rows 3–56: Repeat Row 2 until the ribbed band measures approximately 28 inches relaxed, or the length needed for your waist measurement after allowing for comfortable negative ease.
For a custom fit, wrap the band around your waist. It should fit securely without digging into your skin.
Fold the short ends together and join them using slip stitches or a tapestry needle. Keep the seam neat and flat.
Count: The waistband contains 10 hdc across each row. The number of rows determines its circumference.
Part 2: Build the Skirt Body
Rotate the waistband so you can crochet around one long edge. Use the 5.0 mm hook and Color A.
Round 1: Ch 1. Work 1 hdc into the side of each waistband row around the entire edge. Join with a sl st to the first hdc.
For the 56-row sample, you should have approximately 56 hdc. If your waistband has a different number of rows, use one hdc per row and adjust the count evenly if the edge puckers.
Round 2: Ch 1. Hdc in each st around. Join. (56 hdc)
Round 3: Ch 1. Repeat 6 hdc, inc around. Join. (64 hdc)
Round 4: Ch 1. Hdc in each st around. Join. (64 hdc)
Round 5: Ch 1. Repeat 7 hdc, inc around. Join. (72 hdc)
Round 6: Ch 1. Hdc in each st around. Join. (72 hdc)
The gradual increases create the beginning of the A-line silhouette. Keep the fabric relaxed as you work; you should not need to stretch it to complete each round.
Part 3: Continue the A-Line Shape
Continue using Color A.
Round 7: Ch 1. Hdc in each st around. Join.
Round 8: Ch 1. Repeat 8 hdc, inc around. Join. (80 hdc)
Round 9: Ch 1. Hdc in each st around. Join.
Round 10: Ch 1. Repeat 9 hdc, inc around. Join. (88 hdc)
Round 11: Ch 1. Hdc in each st around. Join.
Continue alternating one plain round with an increase round. On each increase round, add one to the number of hdc between increases. For example, the next increase round is 10 hdc, inc, followed by 11 hdc, inc on the following increase round.
For easier counting, place a marker at the beginning of each round and keep a written tally of the increases.
Work until the skirt measures approximately 16–18 inches from the top of the waistband for a knee-length sample. Adjust this measurement for your preferred length.
Sizing note: The sample counts are a construction guide rather than a universal size chart. Try the skirt on periodically, checking that the fabric falls smoothly from the hips. If it feels tight, add evenly spaced increases. If it flares too much, work more plain rounds between increase rounds.
Part 4: Add a Woodland Scalloped Hem
A scalloped hem gives the skirt a delicate, storybook finish.
Switch to Color B, or continue with Color A if you prefer a single-color border.
Border Round 1: Ch 1. Sc in each stitch around. Join with a sl st.
Border Round 2: Ch 1. Repeat skip 1 st, 5 dc in next st, skip 1 st, sl st in next st around.
If your stitch count does not divide evenly into the repeat, adjust the spacing near the end of the round so the scallops remain balanced.
Fasten off and weave in the ends.
The scallops should lie flat. If they curl dramatically, check your tension and consider using a slightly larger hook for the border.
Special Techniques: Crochet Mushroom Appliqués
The mushrooms are the main decorative feature of this design. Make three to seven mushrooms in different sizes and arrange them like a little woodland scene.
Small Mushroom Cap
Using Color C and the 4.0 mm hook:
Round 1: Make a MR and work 6 sc into the ring. Join. (6 sc)
Round 2: Ch 1. Work 2 sc in each st around. Join. (12 sc)
Round 3: Ch 1. Repeat sc in next st, inc around. Join. (18 sc)
Round 4: Ch 1. Repeat 2 sc, inc around. Join. (24 sc)
Fasten off, leaving a long tail for sewing.
The finished cap should form a small rounded disc. For a larger cap, add another increase round, spacing increases evenly.
Mushroom Stem
Using Color B:
Row 1: Ch 5. Sc in the second ch from the hook and across. (4 sc)
Rows 2–4: Ch 1, turn. Sc across. (4 sc)
Fasten off, leaving a sewing tail. Gently shape the stem into a narrow rectangle. For a wider mushroom, start with a longer chain.
Mushroom Spots
With Color B, use small embroidered stitches to add three to five spots to each red cap. Keep the spots small and irregular for a natural woodland appearance.
For a more subtle design, make brown mushrooms using Color D and cream stems. You can also crochet tiny green leaves to fill the spaces between the mushrooms.
Optional Tiny Leaf
Using Color B or a contrasting leaf-green shade:
Row 1: Ch 6. Sl st in the second ch from the hook, sc in the next ch, hdc in the next ch, dc in the next ch, and sl st in the final ch.
Fasten off, leaving a tail for sewing. Make a few leaves in different lengths to create variety.
Assembly and Finishing
Before attaching your motifs, lay the skirt flat on a clean surface.
- Arrange the mushrooms. Place them around the lower third of the skirt, leaving comfortable gaps between the designs.
- Create small clusters. A group of two or three mushrooms looks especially charming when paired with tiny leaves.
- Attach the stems. Sew the top of each stem underneath its mushroom cap.
- Sew the mushrooms to the skirt. Use the tapestry needle and small, secure stitches around the edges of each appliqué.
- Check the reverse side. Keep the stitching neat and avoid pulling the fabric tightly.
- Finish the waistband. Fold the upper edge inward to create an elastic casing, leaving a small opening. Thread the elastic through, overlap its ends, sew securely, and close the opening.
Use elastic that feels comfortable when you sit, walk, and bend. Check that the casing does not twist before closing it.
If you want a more elaborate fairycore skirt, add a few embroidered stars or tiny flowers between the mushroom clusters. Keep the decorations lightweight so the skirt hangs naturally.
Blocking and Care
Blocking helps even out the stitches and smooth the scalloped edge.
For cotton or cotton-blend yarn, gently wet the skirt in cool water with a mild detergent. Press out excess water without twisting the fabric, then roll it in a towel.
Lay the skirt flat on a blocking mat and shape the hem. Pin the scallops evenly if needed, then let the piece dry completely.
Avoid hanging the skirt while it is wet, as the weight of the yarn can stretch the fabric. Follow the yarn label for washing instructions, and store the skirt folded rather than hanging for long periods.
If you used acrylic yarn, avoid applying a hot iron directly to the fabric. Excessive heat can permanently damage synthetic fibers.
Fit and Troubleshooting Tips
The waistband feels too tight. Measure the waistband before joining it. Add rows to increase the circumference, or use a slightly stretchier elastic.
The skirt body looks too narrow. Add evenly spaced increases during the next round. Spread them around the skirt rather than placing them all in one area.
The skirt ruffles excessively. Too many increases can create unwanted waves. Work additional plain rounds before increasing again.
The hem curls upward. Check your border tension and try a larger hook for the scalloped round. Blocking may help if the curling is minor.
The mushroom appliqués look bulky. Use lighter yarn, smaller motifs, and flatter sewing stitches. Avoid adding too many layers of embroidery.
The skirt stretches after washing. Let it dry flat and avoid hanging it. If the body is too heavy, consider using a lighter cotton blend or making a shorter version.
You Might Also Like:
Final Thoughts
This Enchanted Forest Mushroom Skirt Free Crochet Pattern is a lovely way to bring a little woodland magic into your handmade wardrobe. Between the mossy green fabric, cheerful mushroom appliqués, and soft scalloped hem, every detail offers room to make the design your own.
Choose classic red-and-cream mushrooms, experiment with earthy browns, or create a dreamy pastel fairycore version. You can even scatter tiny leaves and flowers around the hem for a skirt that looks as though it came straight from an enchanted forest.
Most importantly, take your time with the fit and enjoy the process. Crochet is not a race, and a handmade garment deserves a little patience.
When your skirt is finished, share your creation with fellow crocheters, post a photo on Pinterest, or tell us which woodland colors you chose. I’d love to see how your version turns out!




Leave a Reply
You must be logged in to post a comment.