

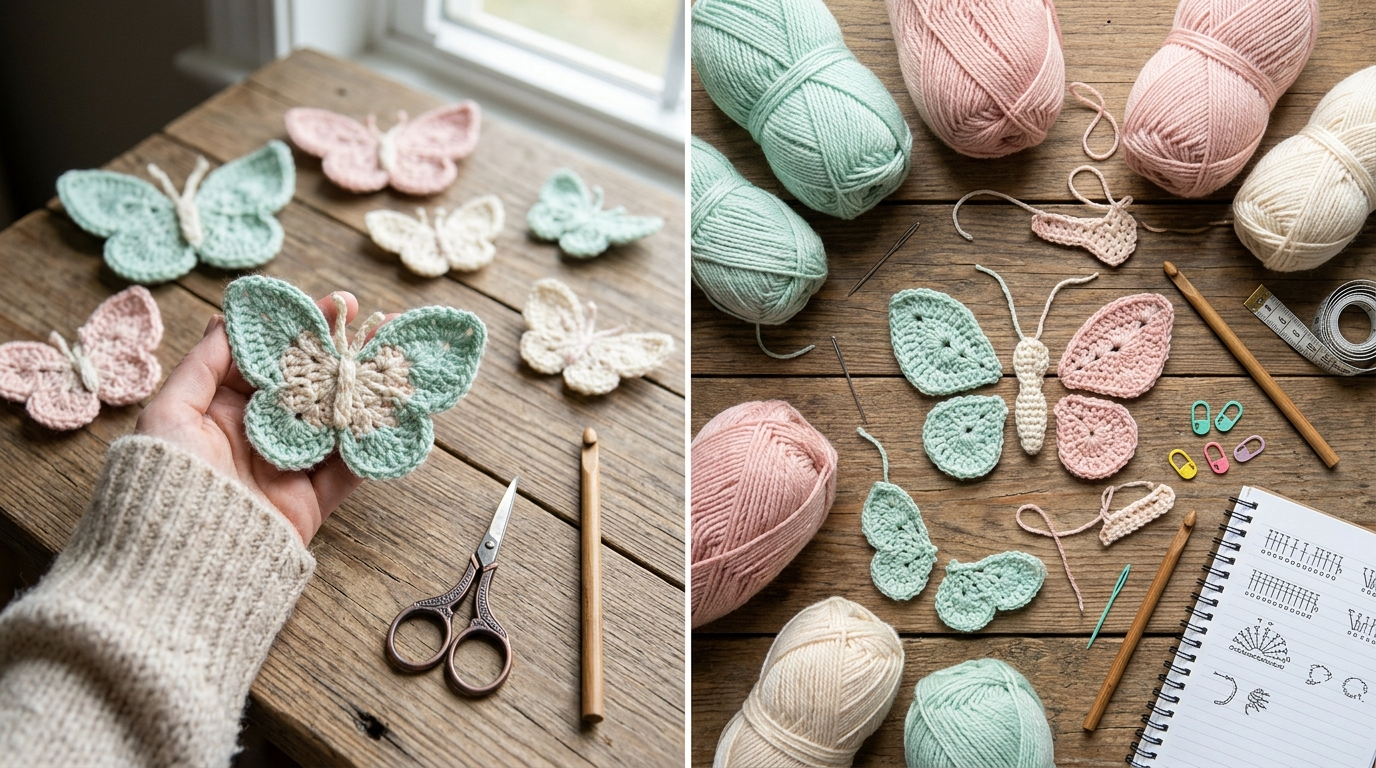
There is something special about combining soft pastel colors in a handmade crochet project. I have always loved the gentle look of mint green paired with blush pink. One feels fresh and delicate, while the other adds a warm, romantic touch. When I started experimenting with these two shades, I knew they would make a lovely little butterfly.
I wanted to create a butterfly that looked pretty enough to decorate a handmade gift but was also practical to use on clothing, accessories, nursery decorations, and spring-inspired projects. The design needed enough texture to make the wings interesting without becoming overly complicated.
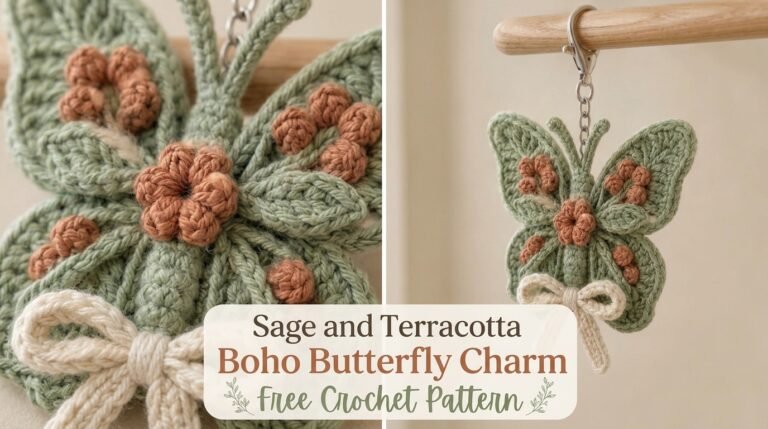
After experimenting with different wing shapes and stitch combinations, I settled on a four-wing butterfly with rounded upper wings, smaller lower wings, a raised body, and delicate antennae.
This Mint and Blush Butterfly Free Crochet Pattern is the result. It is a charming pastel crochet motif that you can make as a single applique or turn into a collection of colorful butterflies for your next creative project.
About This Mint and Blush Butterfly Crochet Pattern
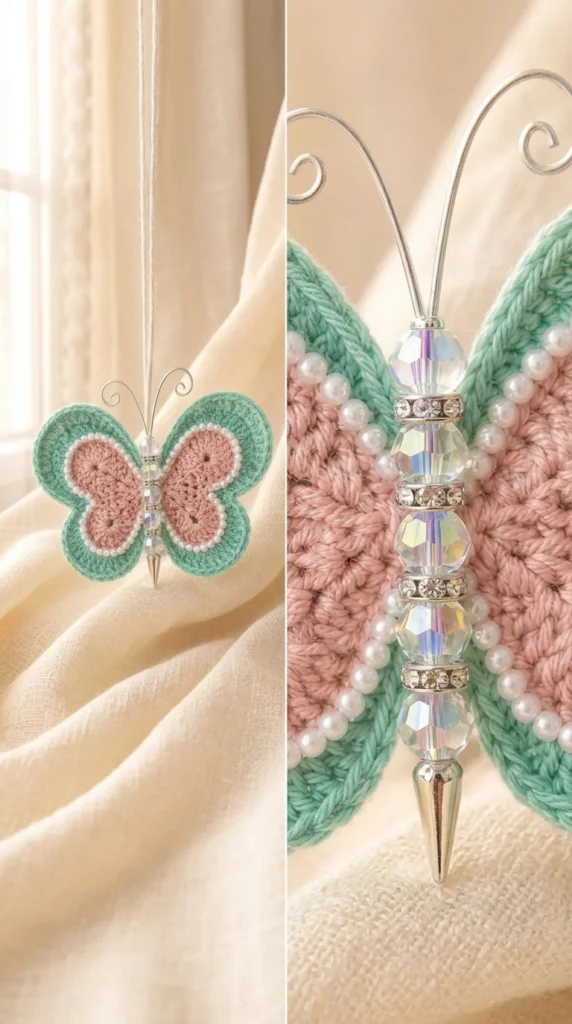
This butterfly is crocheted in separate sections and assembled to create a dimensional design.
The upper wings are slightly larger than the lower wings, giving the butterfly a natural silhouette. Mint green forms the main wing color, while blush pink creates decorative inner sections and soft edging.
The body is crocheted separately and attached down the center. Two small chain antennae complete the shape.
Skill Level: Advanced beginner to intermediate.
You should be comfortable with chain stitches, slip stitches, single crochet, half double crochet, double crochet, and working multiple stitches into the same space.
Finished Size: Approximately 4.5 inches (11.5 cm) wide and 3.5 inches (9 cm) tall using the recommended yarn and hook.
The size can vary depending on your tension and yarn thickness.
This is a decorative applique rather than a wearable garment. Its lightweight construction makes it suitable for decorating bags, hats, blankets, headbands, cushions, and handmade cards.
Materials You’ll Need
Yarn
Use lightweight cotton yarn for a neat shape and clearly defined stitches.
- Color A – Mint Green: Approximately 12 yards (11 meters). Used for the main wings and body.
- Color B – Blush Pink: Approximately 10 yards (9 meters). Used for the inner wing details and decorative edging.
- Color C – Soft Cream: Approximately 3 yards (2.75 meters). Optional, used for small decorative accents.
A DK-weight cotton yarn can also be used if you prefer a slightly larger butterfly. Allow approximately 15% extra yarn for gauge variation.
Crochet Hooks
- 3.0 mm crochet hook: Main butterfly pieces.
- 2.5 mm crochet hook: Optional, for a tighter body and antennae.
Additional Supplies
- Tapestry needle
- Small scissors
- Stitch markers
- Blocking mat
- Rust-resistant blocking pins
- Measuring tape
- Optional small sewing needle and matching thread
For a decorative brooch, you can also prepare a small pin backing.
Abbreviations and Terminology
This pattern uses US crochet terminology.
- ch: Chain. Yarn over and pull through the loop on your hook.
- sl st: Slip stitch. Insert the hook, yarn over, and pull through both the stitch and the loop on your hook.
- sc: Single crochet. Insert the hook, yarn over, pull up a loop, yarn over, and pull through both loops.
- hdc: Half double crochet. Yarn over, insert the hook, pull up a loop, yarn over, and pull through all three loops.
- dc: Double crochet. Yarn over, insert the hook, pull up a loop, yarn over and pull through two loops twice.
- tr: Treble crochet. Yarn over twice, insert the hook, pull up a loop, yarn over and pull through two loops three times.
- inc: Increase. Work two stitches into the same stitch.
- st/sts: Stitch/stitches.
- FO: Fasten off.
- RS: Right side.
- WS: Wrong side.
Important Notes:
- Turning chains do not count as stitches unless specifically stated.
- Instructions are written for right-handed crocheters.
- Work into the indicated stitches and spaces rather than guessing at the placement.
- Keep your tension relaxed around the curved wing sections.
Gauge
Gauge is not critical for this decorative butterfly, but consistent stitches will help the wings maintain their shape.
For a reference swatch, work 12 sc stitches across 12 rows using your 3.0 mm hook.
Your swatch should measure approximately 1.5 inches (3.8 cm) square.
If your stitches are too tight, try a 3.5 mm hook. If the fabric feels loose and floppy, move down to a 2.75 mm hook.
The finished butterfly should feel flexible but firm enough to hold its wing shape.
Main Pattern Instructions
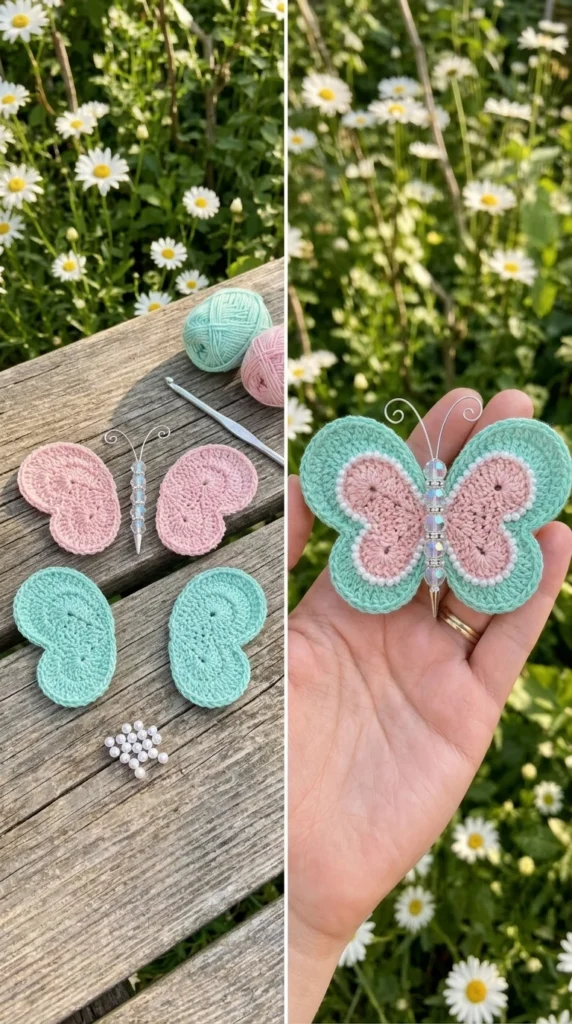
The butterfly is made from four individual wings, one central body, and two antennae.
You will crochet the upper and lower wings separately before joining everything together.
Part 1: Upper Butterfly Wings
Make two identical upper wings.
Use Color A (Mint Green).
Round 1: Make a magic ring. Ch 3 (counts as the first dc), work 9 dc into the ring. Pull the ring closed and join with a sl st to the top of the beginning ch-3.
Count: 10 dc.
Round 2: Ch 2 (does not count as a stitch). Work 2 hdc in the first stitch, 2 dc in the next stitch, 2 tr in each of the next 2 stitches, 2 dc in the next stitch, 2 hdc in each of the next 2 stitches, and 2 sc in each of the remaining 3 stitches.
Join with a sl st to the first hdc.
Count: 20 stitches.
Round 3: Ch 1. Work 1 sc in the first stitch, 2 sc in the next stitch, 1 hdc in the next stitch, 2 hdc in the following stitch, 1 dc in the next stitch, 2 dc in the following stitch, 1 tr in each of the next 4 stitches, 2 dc in the next stitch, 1 hdc in each of the next 2 stitches, and 1 sc in each remaining stitch.
Join with a sl st.
FO, leaving a long tail for assembly.
Your upper wing should have a rounded outer edge and a slightly pointed inner base.
Repeat for the second upper wing.
Part 2: Lower Butterfly Wings
Make two identical lower wings.
Use Color A (Mint Green).
Round 1: Make a magic ring. Ch 3, work 7 dc into the ring. Pull the ring closed and join with a sl st.
Count: 8 dc.
Round 2: Ch 1. Work 2 sc in the first stitch, 1 hdc in the next stitch, 2 hdc in the next stitch, 1 dc in each of the next 2 stitches, 2 hdc in the next stitch, and 1 sc in the final stitch.
Join with a sl st.
Count: 11 stitches.
Round 3: Ch 1. Work 1 sc in the first stitch, 2 sc in the next stitch, 1 hdc in each of the next 2 stitches, 2 dc in the following stitch, 1 dc in each of the next 2 stitches, 1 hdc in the next stitch, and 1 sc in each of the final 2 stitches.
Join with a sl st.
FO, leaving a sewing tail.
Repeat for the second lower wing.
Part 3: Blush Pink Wing Details
The blush pink sections create a soft contrast against the mint green base.
Make four small decorative sections, one for each wing.
Use Color B (Blush Pink).
Row 1: Ch 5. Work 1 sc in the second ch from the hook and 1 sc in each remaining chain.
Count: 4 sc.
Row 2: Ch 1, turn. Work 1 sc in the first stitch, 1 hdc in the next stitch, 1 dc in the next stitch, and 2 dc in the final stitch.
Count: 5 stitches.
Row 3: Ch 1, turn. Work 1 sc in the first stitch, 1 hdc in the next stitch, and 1 sc in each remaining stitch.
FO, leaving a sewing tail.
Make four pieces.
Gently shape each piece into a small curved accent. Sew one onto the center area of each mint wing.
You can position the accents slightly toward the outer edge for a more decorative butterfly appearance.
Part 4: Decorative Wing Edging
The edging adds definition to the butterfly wings and makes the finished motif look more polished.
Join Color B to the outer edge of an upper wing.
Round 1: Ch 1. Work 1 sc evenly around the wing, placing approximately one stitch into each stitch along the curved sections and adjusting the placement around the taller stitches.
At the pointed inner base, work 2 sc in the same area to keep the edge smooth.
Join with a sl st.
FO.
Repeat for the second upper wing and both lower wings.
Tip: Do not force the same number of edging stitches onto every wing. The important thing is to keep the fabric flat and the curves smooth.
Part 5: Crochet Butterfly Body
Use Color A (Mint Green).
Row 1: Ch 11. Work 1 sc in the second ch from the hook and in each remaining chain.
Count: 10 sc.
Row 2: Ch 1, turn. Work 1 sc in each stitch across.
Count: 10 sc.
Row 3: Ch 1, turn. Work 1 sc in each stitch across.
Count: 10 sc.
FO, leaving a long sewing tail.
The body should measure approximately 1.5 inches (3.8 cm) long.
Fold the piece lengthwise and sew the long edges together to create a slightly rounded center. Do not pull the seam too tightly.
This raised body will sit between the four wings.
Part 6: Butterfly Antennae
Use Color A or Color B.
Make two antennae.
Antenna 1: Ch 7. Sl st in the second ch from the hook and in each remaining chain.
FO, leaving a sewing tail.
Antenna 2: Repeat the same instructions.
The antennae should measure approximately 1 inch (2.5 cm) long.
You can make tiny decorative knots at the ends if you want a slightly more detailed appearance.
Special Techniques and Additional Elements
Creating Beautiful Butterfly Wing Curves
The combination of sc, hdc, dc, and tr stitches gives the butterfly its distinctive wing shape.
Shorter stitches create the lower curves, while taller stitches create the fuller upper edges.
When crocheting the wings, avoid pulling the stitches too tightly. Tight tension can make the wing edges curl inward and prevent the butterfly from lying flat.
If a wing looks slightly uneven, gently shape it with your fingers before blocking.
Adding Small Decorative Dots
For a little extra detail, you can add tiny blush pink dots to the mint sections.
Use Color B and your tapestry needle.
Bring the yarn through the fabric, make two or three small stitches in the same area, and secure the yarn on the WS.
Add two or three dots per wing.
Keep the placement balanced without making all four wings look overly crowded.
Optional Cream Accents
If you are using Color C (Soft Cream), add one tiny embroidered line or small French knot near the center of each pink wing detail.
This creates a delicate highlight that complements the mint and blush combination.
Assembly and Finishing
Lay all four wings on a flat surface with the right sides facing upward.
Position the two larger wings at the top, with their inner points facing toward the center.
Place the smaller wings underneath, angled slightly outward.
The upper wings should sit close together, leaving a narrow central gap for the body.
Step 1: Join the Wings
Using the long sewing tails, attach the inner edges of the upper wings to each other.
Repeat with the lower wings.
Next, sew the lower wings to the bottom inner edges of the upper wings.
Use small, neat stitches and keep the joins close to the center so they remain hidden beneath the body.
Step 2: Attach the Body
Position the crocheted body vertically down the center of the butterfly.
The top of the body should begin just below the antennae, while the lower end should reach the point where all four wings meet.
Sew it securely along the center.
Avoid stitching through the decorative pink sections.
Step 3: Attach the Antennae
Place both antennae at the top of the body.
Arrange them in a slight V shape, allowing them to curve outward naturally.
Sew the ends securely underneath the top of the body.
Step 4: Final Details
Check that all wing sections are securely attached.
Weave in the remaining yarn ends on the wrong side.
Gently spread the wings with your fingers to create a balanced shape.
Your Mint and Blush Butterfly is now complete!
Blocking and Care
Blocking is particularly helpful for this butterfly because it allows the wings to hold their rounded shape.
For cotton yarn, I recommend gentle wet blocking.
- Fill a small bowl with cool or lukewarm water.
- Add a little mild detergent suitable for delicate yarn.
- Submerge the butterfly briefly.
- Remove it carefully and press out excess water using a clean towel.
- Place it on a blocking mat.
- Arrange the four wings into their desired shape.
- Secure the outer edges with rust-resistant pins.
- Allow the butterfly to dry completely.
Do not twist or wring the motif.
If you use acrylic yarn, check the yarn manufacturer’s care instructions before applying steam. Excessive heat can permanently damage acrylic fibers.
For everyday care, gently hand wash when necessary and allow the butterfly to dry flat.
Fit and Troubleshooting Tips
Why Are My Butterfly Wings Curling?
Curling usually happens when your tension is too tight or the edging contains too few stitches.
Try using a slightly larger hook. You can also add a few evenly spaced stitches around the curved sections during edging.
Why Do My Wings Look Uneven?
Check that both upper wings have the same stitch counts and that both lower wings are worked using the same tension.
Blocking can help correct small differences.
Why Does My Butterfly Look Too Flat?
Make sure the central body is slightly raised rather than completely flat.
You can also add a small amount of gentle shaping to the wings before attaching them.
Can I Make a Larger Butterfly?
Yes! Use DK-weight yarn with a 3.5 mm hook or worsted-weight yarn with an appropriately sized hook.
Remember that the finished measurements and yarn requirements will increase.
Can I Change the Colors?
Absolutely.
Some lovely combinations include:
- Lavender and cream
- Peach and ivory
- Dusty rose and sage
- Baby blue and white
- Lemon yellow and soft pink
The wing construction works beautifully with many pastel color combinations.
Creative Ways to Use Your Crochet Butterfly
Once you have finished your butterfly, there are plenty of ways to enjoy it.
- Baby Blankets: Attach several butterflies to the corners of a handmade blanket.
- Hair Accessories: Sew one onto a soft crochet headband or hair clip.
- Tote Bags: Add a butterfly to the front of a plain cotton tote.
- Nursery Decorations: Use several butterflies to create a delicate hanging decoration.
- Greeting Cards: Attach a small butterfly to handmade birthday or thank-you cards.
- Cushions: Add a few butterflies to a decorative pillow for a spring-inspired look.
- Brooches: Attach a secure brooch backing to the wrong side.
If you plan to use the butterfly on baby items, make sure all decorative pieces are securely attached and avoid loose beads or small detachable embellishments.
Final Thoughts
I love how this little butterfly brings together two gentle colors and turns a small amount of yarn into something special.
The mint green wings create a fresh, delicate appearance, while the blush pink details add just enough warmth to make the design stand out. Although the butterfly is made from several individual pieces, the construction is manageable when you work through each section patiently.
I hope you enjoy making this Mint and Blush Butterfly Free Crochet Pattern as much as I enjoyed designing it.
Try making a single butterfly for a handmade gift, or crochet several in different pastel shades to decorate blankets, bags, clothing, and other accessories.
If you make one, I would love to see your color choices and finished creation. Share your project in the comments or save the pattern to Pinterest so you can find it again whenever inspiration strikes.
Happy crocheting!



Leave a Reply
You must be logged in to post a comment.