


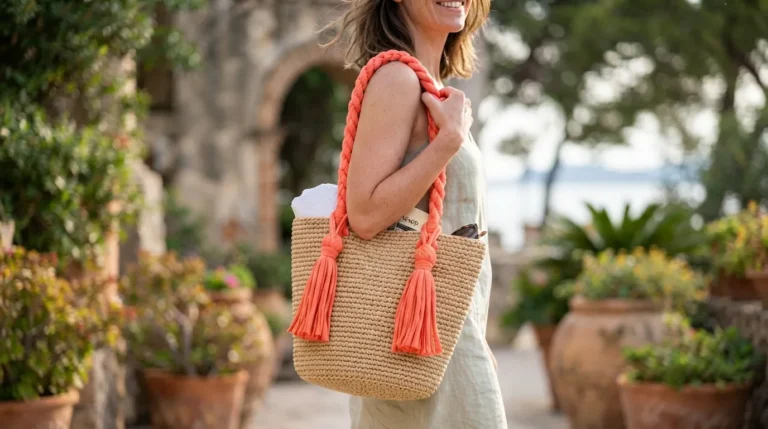
Some crochet projects are simply too pretty to leave sitting on a shelf. I wanted to create a bag that felt warm, natural, and a little bit different from the usual everyday crochet tote. Something with beautiful texture, earthy colors, and enough personality to become your favorite summer accessory.
Let’s make a bag that brings a little sunshine wherever you carry it!

About This Terracotta Sunburst Raffia Bag Pattern
This Terracotta Sunburst Raffia Bag is an intermediate-level crochet project featuring two matching circular sunburst panels joined to create a roomy handbag.
The circular motifs are worked from the center outward. Raised stitches create the sunburst texture, while the outer rounds establish a sturdy shape for the bag.
The sides and base are crocheted separately in solid terracotta raffia yarn. This construction helps the bag maintain its shape while providing enough room for everyday essentials.
Finished Bag Measurements
- Width: Approximately 13 inches (33 cm)
- Height: Approximately 11 inches (28 cm)
- Base depth: Approximately 3 inches (7.5 cm)
- Handle drop: Approximately 9 inches (23 cm)
The bag is designed for a casual summer look. You can carry it to the market, beach, picnic, or anywhere you need a practical handmade accessory.
Skill level: Intermediate
You should be comfortable with working in the round, double crochet, treble crochet, increases, and joining crochet pieces.
Because raffia yarn has less stretch than traditional cotton yarn, try to maintain an even but relaxed tension.
Materials You’ll Need
Yarn
Choose paper raffia yarn or a crochet-friendly raffia-style yarn.
- Color A – Terracotta: Approximately 250 meters (273 yards), raffia or raffia-blend yarn, medium weight.
- Color B – Warm Sand: Approximately 90 meters (98 yards), raffia or raffia-blend yarn, medium weight.
- Color C – Golden Ochre: Approximately 65 meters (71 yards), raffia or raffia-blend yarn, medium weight.
Allow 15% extra yarn for gauge variation and finishing adjustments.
Crochet Hooks
- 4.5 mm crochet hook for the sunburst motifs.
- 5 mm crochet hook for the bag body and base.
- 4 mm crochet hook for the top edging.
Notions
- Tapestry needle
- Stitch markers
- Sharp scissors
- Measuring tape
- Removable locking stitch markers
- Optional cotton fabric lining
- Optional magnetic bag closure
- Two sturdy bag handles or crochet-made handles
- Sewing needle and matching thread
Designer tip: Raffia can feel slightly stiff while working. Keep your stitches consistent and avoid pulling the yarn too tightly.
Abbreviations and Terminology
This pattern uses standard US crochet terminology.
| Abbreviation | Meaning |
|---|---|
| ch | Chain |
| sl st | Slip stitch |
| sc | Single crochet |
| hdc | Half double crochet |
| dc | Double crochet |
| tr | Treble crochet |
| st | Stitch |
| sts | Stitches |
| sp | Space |
| sk | Skip |
| rep | Repeat |
| rnd | Round |
| RS | Right side |
| WS | Wrong side |
| FO | Fasten off |
Stitch Explanations
- Chain (ch): Yarn over and pull through the loop on your hook.
- Slip stitch (sl st): Insert hook into a stitch, yarn over, and pull through both the stitch and loop on your hook.
- Single crochet (sc): Insert hook, yarn over and pull up a loop. Yarn over and pull through both loops.
- Half double crochet (hdc): Yarn over, insert hook, pull up a loop, then yarn over and pull through all three loops.
- Double crochet (dc): Yarn over, insert hook, pull up a loop, yarn over and pull through two loops twice.
- Treble crochet (tr): Yarn over twice, insert hook, pull up a loop, then work through two loops three times.
Important notes:
- Turning chains do not count as stitches unless stated otherwise.
- Join each completed round with a slip stitch.
- Stitch counts are written in parentheses.
- Work with consistent tension throughout the project.
Gauge
Gauge is important because raffia does not stretch as much as ordinary yarn.
Make a small swatch using the 5 mm hook. Work approximately 12 rows of single crochet.
Target gauge:
- 14 single crochet stitches = 4 inches (10 cm).
- 15 rows = 4 inches (10 cm).
If your swatch is too tight, move up one hook size.
If your stitches are too loose, move down one hook size.
Your finished bag should feel firm enough to support everyday items without becoming excessively stiff.
Main Pattern Instructions
The bag consists of:
- Two circular sunburst panels.
- One rectangular side and bottom strip.
- A reinforced top opening.
- Two sturdy handles.
- Optional lining and closure.
We will begin with the decorative sunburst panels.
1. Crochet the Sunburst Motif
Make two identical circular panels.
Use Color A (Terracotta), Color B (Warm Sand), and Color C (Golden Ochre).
The motif begins with a small center ring and expands through textured rounds.
Round 1: Center Ring
Using Color B and the 4.5 mm hook:
- Make a magic ring.
- Ch 3 (counts as first dc).
- Work 11 dc into the ring.
- Pull the ring closed.
- Join with sl st to the top of the beginning ch-3.
Count: 12 dc.
Round 2: Center Expansion
Continue with Color B.
- Ch 3.
- Work 1 dc into the same stitch.
- Work 2 dc into each remaining stitch.
- Join with sl st.
Count: 24 dc.
You should now have a neat, flat circular center.
Round 3: Golden Texture
Change to Color C.
- Ch 1.
- Work 1 sc in each stitch around.
- Join with sl st.
Count: 24 sc.
This round creates a subtle golden outline around the center.
Round 4: Sunburst Spokes
Change to Color A.
- Ch 3.
- Work 1 tr into the same stitch.
- Work 2 tr into each stitch around.
- Join with sl st.
Count: 48 tr.
The tall stitches begin forming the sunburst effect.
Round 5: Raised Texture
Ch 2.
Work 1 front post double crochet (FPdc) around the post of the next stitch.
Work 1 dc into the next stitch.
Repeat around.
Join with sl st.
Count: 48 stitches.
The raised stitches add depth and make the circular motif more interesting.
Round 6: Motif Expansion
- Ch 3.
- Work 1 dc into the next stitch.
- Work 2 dc into the following stitch.
- Repeat this sequence around.
- Join with sl st.
Count: 64 dc.
Round 7: Decorative Border
Change to Color B.
- Ch 1.
- Work 1 sc into each stitch around.
- Join with sl st.
- Fasten off.
Count: 64 sc.
Repeat all seven rounds to make the second circular panel.
Designer tip: Place both circles next to each other before continuing. Check that they have matching dimensions and that the centers are positioned consistently.
2. Crochet the Bag Side and Bottom Strip
Now we will create the rectangular section that connects the two sunburst panels.
This strip forms the bottom and side depth of the bag.
Use Color A and the 5 mm hook.
Foundation Chain
Ch 11.
Row 1
Sc in the second chain from the hook and in each remaining chain.
Ch 1 and turn.
Count: 10 sc.
Row 2
Sc across.
Ch 1 and turn.
Count: 10 sc.
Rows 3–60
Repeat Row 2 until the strip measures approximately 28 inches (71 cm).
Keep your tension even so the strip does not become wider or narrower.
Important: Measure the strip against the curved edge of your circular panels. Adjust the number of rows if needed so the strip fits around the outer circumference.
Fasten off, leaving a long sewing tail.
The finished strip should be approximately 3 inches (7.5 cm) wide.
3. Shape and Reinforce the Bag Opening
A neat top opening gives the bag a more polished finish.
Join Color A to the upper edge of one circular panel.
Round 1
- Ch 1.
- Work sc evenly around the upper edge of the panel.
- Keep the stitches evenly spaced.
- Join with sl st.
Round 2
- Ch 1.
- Work 1 sc into each stitch around.
- Join with sl st.
- Fasten off.
Repeat on the second panel.
These reinforced rounds provide a cleaner edge for attaching the bag handles.
4. Add the Sunburst Decorative Details
The sunburst design is already textured, but you can add a little extra definition using surface crochet.
Take Color C and a smaller 4 mm hook.
Insert your hook between the raised stitches near the center of the motif.
Make a slip stitch and continue working along the valleys between the raised sections, moving outward toward the border.
Repeat around the motif, creating decorative rays.
Do not pull the surface stitches too tightly.
This optional detail adds a beautiful golden highlight and emphasizes the sunburst appearance.
Repeat on the second panel.
5. Assemble the Terracotta Sunburst Raffia Bag
This is where all the pieces come together.
Place the first circular panel on your work surface with the right side facing upward.
Position the side and bottom strip along the outer edge.
Use stitch markers to hold everything in place.
Joining the First Panel
Using Color A:
- Insert your hook through the edge of the circular panel and the corresponding edge of the strip.
- Work slip stitches through both layers.
- Continue around the panel, easing the strip gently around the curved shape.
- Stop when the full circumference is joined.
Check that the strip is not twisted.
Joining the Second Panel
Place the second circular panel on the opposite side of the strip.
Make sure the right sides face outward.
Use the same joining method to attach the second panel.
Work slowly around the curved edges.
When both panels are attached, you should have a recognizable handbag shape with an open top.
Weave in the loose ends securely.
6. Crochet the Bag Handles
For a handmade look, you can crochet your own handles using the same terracotta yarn.
Make two handles.
Handle Foundation
Ch 61.
Row 1
Sc in the second chain from the hook and across.
Ch 1 and turn.
Count: 60 sc.
Row 2
Sc across.
Ch 1 and turn.
Count: 60 sc.
Row 3
Repeat Row 2.
Fasten off, leaving a long sewing tail.
Fold the handle lengthwise so the edges meet.
Sew the long edges together to form a sturdy tube.
Repeat for the second handle.
The finished handles should measure approximately 15 inches (38 cm) long before attachment.
Attach the Handles
Position the handles approximately 3 inches (7.5 cm) from each side seam.
Each handle end should overlap the top edge by approximately 1 inch (2.5 cm).
Use strong matching thread or raffia yarn to sew each handle securely.
Reinforce each attachment point several times.
Avoid relying on a single row of stitches because handles experience considerable pulling when the bag is filled.
7. Add the Final Top Edge
Join Color A to the top opening.
Round 1
- Ch 1.
- Work sc evenly around the entire opening, including the handle attachment areas.
- Join with sl st.
Round 2
- Ch 1.
- Work one reverse single crochet (crab stitch) in each stitch around.
- Join with sl st.
- Fasten off and weave in the ends.
This creates a firm, attractive edge that helps the bag maintain its shape.
Special Techniques and Additional Details
Front Post Double Crochet
The raised sunburst texture comes from working around the post of the stitch instead of inserting your hook through the top loops.
Yarn over, insert your hook from front to back and then back to front around the post, pull up a loop, and complete a regular double crochet.
This creates a raised vertical texture.
Surface Slip Stitch
Surface slip stitching is an easy way to add decorative lines to completed crochet fabric.
Insert your hook into the fabric from the front, pull up a loop, then continue moving along the surface.
Keep the tension relaxed.
Reinforcing the Handles
If you plan to carry heavier items, consider placing a narrow cotton webbing strip inside each crocheted handle.
This reduces stretching and gives the handles additional strength.
Assembly and Finishing
Before considering your Terracotta Sunburst Raffia Bag complete, take a few minutes to check the finishing details.
- Make sure both circular panels sit evenly.
- Check that the side strip is not twisted.
- Reinforce the handle attachment points.
- Secure all loose yarn ends.
- Check that the top opening is symmetrical.
- Trim any visible raffia strands carefully.
Optional Fabric Lining
A fabric lining is a lovely addition if you want to keep small belongings from slipping through the crochet stitches.
Cut two fabric pieces following the shape of the bag panels, leaving approximately ½ inch (1.25 cm) seam allowance.
Sew the pieces together along the sides and bottom.
Fold the upper edge inward and stitch neatly.
Place the lining inside the bag and hand-sew it to the inside of the crochet top edge.
You can also add a small interior pocket for keys or cards.
Optional Magnetic Closure
Attach a small magnetic snap to the center of the inner top edge.
Reinforce the snap with fabric backing to prevent the raffia stitches from pulling.
Blocking and Care
Raffia yarn needs gentler treatment than ordinary acrylic or cotton yarn.
For this bag, I recommend light shaping rather than aggressive wet blocking.
Shaping
Place the finished bag on a clean, flat surface.
Gently adjust the circular panels and side strip until the bag looks balanced.
If your raffia yarn label permits light moisture, use a barely damp cloth to help relax stubborn areas.
Allow the bag to dry completely in its natural shape.
Avoid excessive heat because some raffia fibers can become brittle or distorted.
Care Instructions
- Avoid machine washing.
- Spot-clean small marks with a slightly damp cloth.
- Keep the bag away from prolonged direct sunlight.
- Store it in a dry place.
- Do not hang the bag while it is wet or heavily loaded.
- Avoid folding the circular panels sharply.
For long-term storage, place tissue paper inside the bag to help maintain its shape.
Fit and Troubleshooting Tips

1. My Sunburst Motif Is Curling
If the circular panel starts curling upward, your stitches may be too tight or your increases may be insufficient.
Try using a slightly larger hook.
Check that you have completed all the increases in the pattern.
2. The Circular Panels Look Wavy
Too many increases can create ruffling.
Check your stitch counts carefully, particularly in Round 6.
If the panel still waves, try a smaller hook or relax your tension.
3. My Bag Looks Too Soft
Raffia should provide some natural structure, but loose stitches can make the bag sag.
Use a smaller hook for the side strip or add a fabric lining.
A firm base insert can also help.
4. The Side Strip Doesn’t Fit the Panels
This usually happens when the strip is too short or too long.
Measure the circumference of the finished panels and compare it with the strip before joining.
Add or remove rows as necessary.
5. The Handles Are Stretching
Raffia handles can stretch under weight.
Reinforce them with cotton webbing or a firm inner cord.
Keep heavy items to a minimum.
6. The Bag Looks Uneven
Check that the handles are placed at equal distances from the side seams.
Use stitch markers to identify the attachment points before sewing.
Customization Ideas
One of my favorite things about this design is how easily you can change its appearance.
Try a Different Color Palette
- Rust and cream for a warm autumn look.
- Terracotta and mustard for a bold sunburst effect.
- Natural beige and chocolate brown for a neutral everyday bag.
- Rust and dusty pink for a softer feminine style.
Adjust the Size
For a smaller handbag, use fewer rounds in both circular motifs and shorten the side strip accordingly.
For a larger tote, add another increase round to each motif and adjust the strip length to match the new circumference.
Remember that changing the motif size also changes the amount of yarn required.
Add Embellishments
- Wooden beads on the handles.
- A small raffia tassel.
- A decorative fabric lining.
- A handmade crochet flower.
- A leather-look label.
Keep embellishments lightweight so the bag retains its shape.
Final Thoughts
I love how this Terracotta Sunburst Raffia Bag brings together natural texture, warm earthy colors, and a beautiful circular design.
The raised sunburst stitches make the panels stand out, while the sturdy side construction and reinforced handles turn the decorative motifs into a practical everyday accessory.
If this is your first time working with raffia, take your time and enjoy the process. The material may feel a little different from ordinary crochet yarn, but the finished texture is absolutely worth the effort.
Most importantly, don’t be afraid to make this design your own. Change the colors, experiment with the handles, or add a little lining to suit your needs.
I hope you enjoy making your own Terracotta Sunburst Raffia Bag. If you create one, share your finished project, leave a comment, or save your favorite version on Pinterest.
Happy crocheting! ❤️


Leave a Reply
You must be logged in to post a comment.