


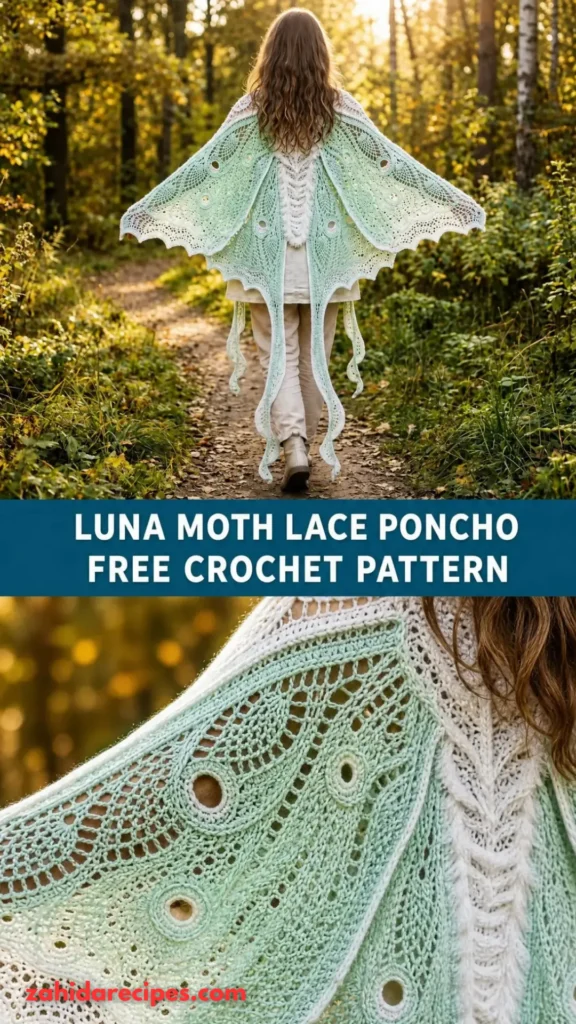
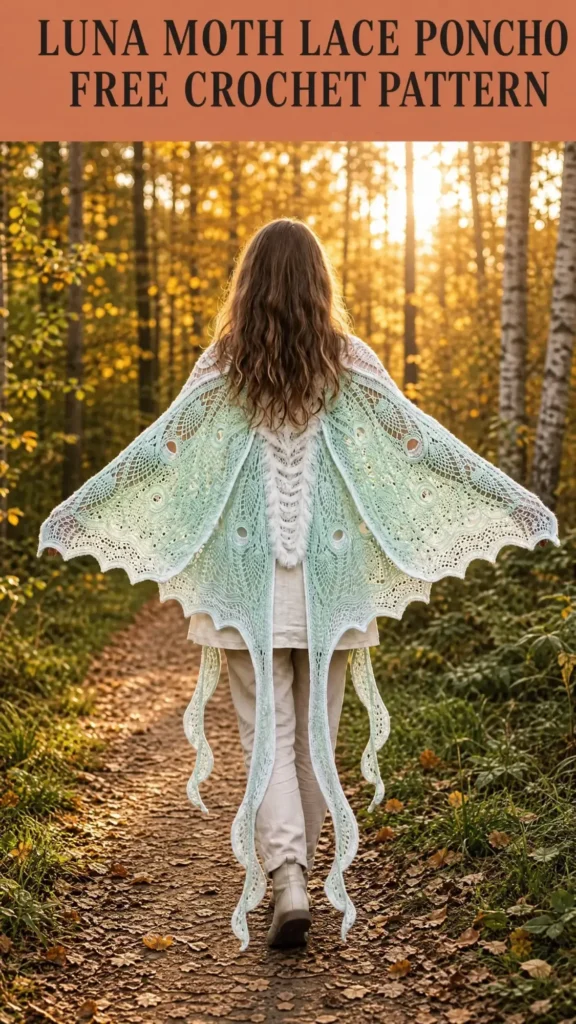
Some crochet projects feel special from the very first stitch. For me, the idea behind the Luna Moth Lace Poncho came from imagining something soft, airy, and a little magical. I wanted a garment that felt like wrapping yourself in moonlight, with delicate lacework and a graceful shape that moved beautifully when worn.
About This Luna Moth Lace Poncho Pattern
This poncho is constructed from two matching rectangular panels joined at the shoulders, leaving an opening for the head and neckline. The open lace pattern creates a lightweight fabric with an elegant, wing-like appearance.
The design uses double crochet stitches, chain spaces, and small shell clusters to create a repeating lace texture. A simple edging frames the neckline and lower hem without making the garment feel heavy.
- Skill level: Confident beginner to intermediate.
- Construction: Two rectangular panels joined at the shoulders and upper sides.
- Sizes: Small/Medium, Large/XL, and 2XL/3XL.
Finished Dimensions
- Small/Medium: Approximately 30 inches wide per panel and 26 inches long.
- Large/XL: Approximately 34 inches wide per panel and 28 inches long.
- 2XL/3XL: Approximately 38 inches wide per panel and 30 inches long.
These measurements are approximate and may vary with yarn, tension, and blocking.
Materials You’ll Need
- Yarn: Lightweight DK yarn, approximately 1,000–1,300 yards for Small/Medium, 1,300–1,600 yards for Large/XL, or 1,600–1,900 yards for 2XL/3XL.
- Color A: Approximately 90% of the total yarn in moonlight cream, pale sage, dusty lavender, or soft silver.
- Color B: Approximately 10% of the total yarn for optional contrasting edging.
- Main crochet hook: 4.5 mm.
- Edging hook: 4.0 mm.
- Stitch markers.
- Tapestry needle.
- Scissors.
- Measuring tape.
- Blocking mats and rust-resistant pins.
Choose a soft yarn with good drape. Cotton blends, bamboo blends, and lightweight acrylic yarns can all work well.
Allow 15% extra yarn if your tension tends to be loose or you plan to lengthen the poncho.
Abbreviations and Terminology
All instructions use US crochet terminology.
- ch: Chain. Yarn over and pull through the loop on your hook.
- sl st: Slip stitch. Insert the hook, yarn over, and pull through both the fabric and the loop on your hook.
- sc: Single crochet. Insert the hook, yarn over and pull up a loop, yarn over and pull through both loops.
- dc: Double crochet. Yarn over, insert the hook, pull up a loop, yarn over and pull through two loops twice.
- sk: Skip the indicated stitch or space.
- sp: Space.
- ch-sp: Chain space formed by one or more chains.
- st(s): Stitch(es).
- rep: Repeat.
- RS: Right side of the fabric.
- WS: Wrong side of the fabric.
- FO: Fasten off.
- shell: A group of five double crochet stitches worked into the same space.
- V-stitch: One double crochet, chain one, and one double crochet worked into the same space.
Turning chains do not count as stitches unless a step explicitly says they do.
Gauge
Before beginning, make a small swatch using the main hook.
Chain 24.
Row 1: Dc in the fourth chain from the hook and in each remaining chain. Turn.
Row 2: Ch 3, dc in each stitch across. Turn.
Repeat Row 2 until you have at least six rows.
Your target gauge is approximately 16 double crochet stitches and 8 rows per 4 inches before blocking.
Wash and block the swatch as you intend to treat the finished poncho.
If your swatch is too small, try a larger hook. If it is too large, try a smaller hook.
Because lace patterns stretch differently from solid fabric, use the swatch to check the feel and drape as well as the measurements.
Main Pattern Instructions
Step 1: Create the Foundation Panel
Make two identical rectangular panels.
- Small/Medium: Ch 122.
- Large/XL: Ch 138.
- 2XL/3XL: Ch 154.
These starting chains are intended as practical starting points. Because the lace repeat affects the finished width, check your first completed row and adjust the foundation chain if necessary to achieve your target panel width.
Row 1: Dc in the fourth chain from the hook. Dc in each remaining chain. Turn.
Row 2: Ch 3, dc in the next stitch and each stitch across. Turn.
Row 3: Ch 1, sc in the first stitch, *ch 3, sk the next 3 stitches, sc in the next stitch; rep from * across. Turn.
Row 4: Ch 3, work 3 dc into each ch-3 space across, working one dc into the final sc. Turn.
Row 5: Ch 1, sc in the first stitch, *ch 3, sk the next 3 dc, sc in the next dc; rep from * across. Turn.
These rows establish the open lace structure. The chain spaces create airy windows, while the groups of double crochet add enough substance to keep the fabric from feeling flimsy.
Step 2: Work the Luna Lace Repeat
The main lace section alternates open chain spaces with shell-like groups of stitches.
Row 6: Ch 3, work 2 dc into the first ch-3 space, *ch 2, work 3 dc into the next ch-3 space; rep from * across. Turn.
Row 7: Ch 1, sc in the first dc, *ch 3, sk the next 2 dc, sc in the next dc; rep across. Turn.
Row 8: Ch 3, work 3 dc into each ch-3 space across. Turn.
Row 9: Ch 1, sc in the first dc, *ch 3, sk the next 2 dc, sc in the next dc; rep across. Turn.
Row 10: Ch 3, work 3 dc into each ch-3 space across. Turn.
Repeat Rows 7–10 until the panel measures approximately 24 inches for Small/Medium, 26 inches for Large/XL, or 28 inches for 2XL/3XL.
Finish with a Row 8-style row so the top edge is relatively even for joining.
Important stitch-count note: The exact number of repeats depends on the foundation width and the spaces established in the first rows. Check that each row ends cleanly and that the number of lace spaces remains consistent. If your repeat does not align, undo the row and check that each chain space and skipped stitch has been worked as instructed.
Step 3: Add a Decorative Upper Edge
The upper edge will form part of the neckline and shoulder seams.
Row 1: Ch 1, sc evenly across the top edge, placing one stitch into each stitch and distributing additional stitches evenly where needed along the lace openings.
Row 2: Ch 1, sc in each stitch across. Turn.
Fasten off. Repeat for the second panel.
This firmer edge helps prevent the neckline from stretching excessively during wear.
Special Techniques and Additional Elements
Optional Shell Border
A shell border gives the poncho a soft, scalloped finish.
Join Color A or Color B at a lower corner.
Round 1: Ch 1, sc evenly around the lower perimeter, placing 3 sc in each corner. Join with a sl st to the first sc.
Round 2: Ch 1, sc in the first stitch, *sk 2 stitches, work 5 dc into the next stitch, sk 2 stitches, sc in the next stitch; rep from * around. Adjust the spacing near corners so the border lies flat. Join with a sl st.
Fasten off and weave in the ends.
If the border begins to ripple, remove a few stitches or use a smaller hook. If it pulls inward, add more evenly spaced stitches along the edge.
Optional Luna Moth Motif
For a small decorative moth, use a contrasting yarn and a 3.5 mm hook.
Body: Ch 9. Sc in the second chain from the hook and in each chain across. Fasten off, leaving a long tail.
Upper wings: Make two motifs. Ch 5 and join with a sl st to form a ring. Ch 3, work 4 dc into the ring, ch 2, sl st into the ring. Fasten off.
Lower wings: Make two motifs. Ch 4 and join with a sl st to form a ring. Ch 3, work 3 dc into the ring, ch 2, sl st into the ring. Fasten off.
Arrange the upper wings near the top of the body and the smaller wings below them. Sew the pieces together securely with the tapestry needle.
This is a simplified decorative moth motif rather than a detailed anatomical replica. You can add small embroidered antennae using a length of contrasting yarn.
Attach the motif to one shoulder or near the lower corner of the poncho. Avoid placing heavy embellishments in the middle of a delicate chain space.
Assembly and Finishing
Lay the two panels flat with their right sides facing upward.
Place them together so the top edges align.
Join the Shoulders
Measure inward from both outer edges and mark the shoulder seams.
For a starting fit, leave approximately 10–12 inches open in the center for the neckline. Adjust this opening to suit your head measurement and preferred neckline.
Join each shoulder from the outer edge toward the neckline using slip stitches or a tapestry needle and mattress stitch.
Try the poncho on before securing the final seam. The opening should sit comfortably around your neck without pulling.
Join the Upper Sides
With the poncho laid flat, measure down from each shoulder along the side edges.
Join approximately 8–12 inches of the upper side edges, depending on your desired arm openings.
Leave the remaining side edges open to create a flowing poncho shape.
For a more fitted appearance, extend the side seams slightly. For a loose, dramatic drape, keep the openings generous.
Weave in all yarn ends securely, taking care not to pull the lace fabric out of shape.
Finish the Neckline
Join yarn at the neckline and work one round of single crochet evenly around the opening.
Join with a slip stitch and fasten off.
If you prefer a softer neckline, work the round with a slightly larger hook. For a firmer edge, use the smaller edging hook.
Blocking and Care
Blocking makes a remarkable difference to lace crochet. It helps open the chain spaces, smooth uneven edges, and improve the garment’s drape.
For cotton, bamboo, or washable acrylic blends, follow the yarn label’s care instructions.
- Gently wash or dampen the poncho.
- Press out excess water without twisting the fabric.
- Lay it flat on blocking mats.
- Shape the panels and neckline to the intended measurements.
- Pin the edges in place without stretching the lace excessively.
- Allow the garment to dry completely before removing the pins.
Avoid applying direct high heat to acrylic yarn, as it can permanently damage the fibers.
Store the poncho folded rather than hanging it for long periods. The weight of the lace can gradually lengthen the garment on a hanger.
Fit and Troubleshooting Tips
My Lace Fabric Curls at the Edges
Check your turning chains and stitch placement. Blocking may help minor curling, but inconsistent stitch counts usually need correcting first.
The Poncho Feels Too Stiff
Try a larger hook or a yarn with more drape. A soft cotton-bamboo blend can produce a beautiful flowing result.
The Neckline Feels Too Tight
Unpick part of the shoulder seams and create a larger opening. Always try the garment on before finishing the seams permanently.
The Lower Edge Waves
Your edging may contain too many stitches. Remove the border and repeat it with fewer evenly spaced stitches.
I Want a Longer Poncho
Continue the four-row lace repeat until you reach your preferred length. Remember that blocking can change the final dimensions.
My Two Panels Are Different Sizes
Check your row counts and gauge. If necessary, block both panels to matching dimensions before assembly.
You Might Also Like:
- Monochrome Gray Granny Square Modern Tote Free Crochet Pattern
- Squirtle Blue Crochet Crop Top Free Crochet Pattern
- Monochrome Cream Granny Square Bag Free Crochet Pattern
- Golden Honey Granny Square Bag Free Crochet Pattern
Final Thoughts
The Luna Moth Lace Poncho is a lovely project for anyone who enjoys delicate texture, flowing silhouettes, and handmade garments with a little personality.
I especially love the way the open lace catches the light and creates a soft, wing-like effect. Choose a pale color for a moonlit look, dusty lavender for a romantic finish, or deep forest green for something dramatic.
Take your time with the repeats, check your measurements before joining the panels, and remember that blocking is part of the design process.
I hope this Luna Moth Lace Poncho Free Crochet Pattern inspires you to create something beautiful that you’ll be excited to wear. Enjoy every stitch, and don’t be afraid to make the design your own!
Pattern note: This is an original, proposed design, and the stitch counts and construction have not been physically tested. Before publishing it as a fully tested pattern, make a sample and verify the lace repeat, panel dimensions, yarn requirements, and assembly instructions.


Leave a Reply
You must be logged in to post a comment.