

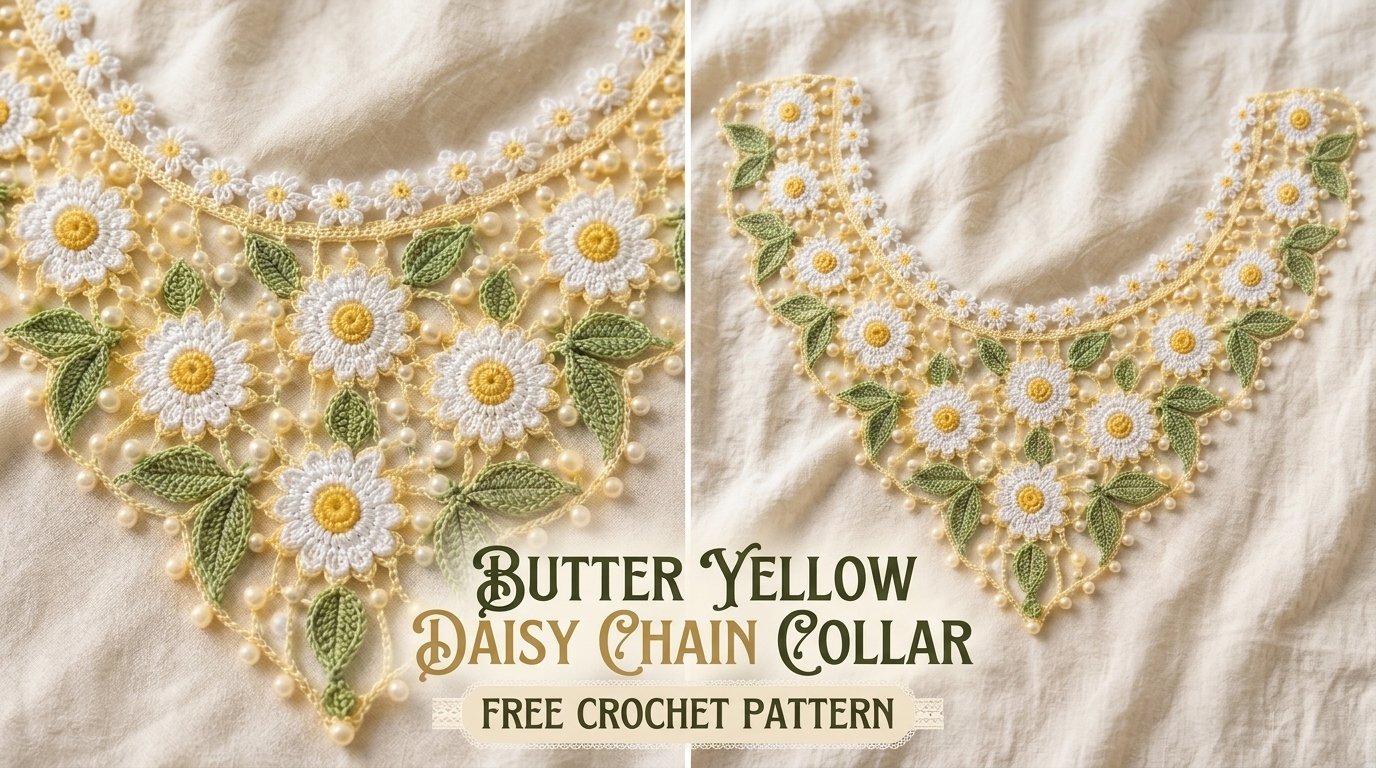
I still remember the exact afternoon the idea for this collar settled in. I was sorting through a box of leftover yarn and pulled out a single skein of soft butter yellow that somehow still smelled faintly of the spring market where I bought it. Outside the window the first daisies were opening along the fence line, small and bright against the still-cool grass. I held the yarn up to the light and thought, “What if the daisies could travel with me?”
That thought became a chain of tiny raised flowers linked by delicate bridges, just long enough to sit gently at the base of the neck. The result is this Butter Yellow Daisy Chain Collar—a light, removable piece that feels like wearing a bit of early summer. It is not a heavy statement necklace and not a full lace collar; it is something in between, soft enough to wear all day yet structured enough to keep its shape.
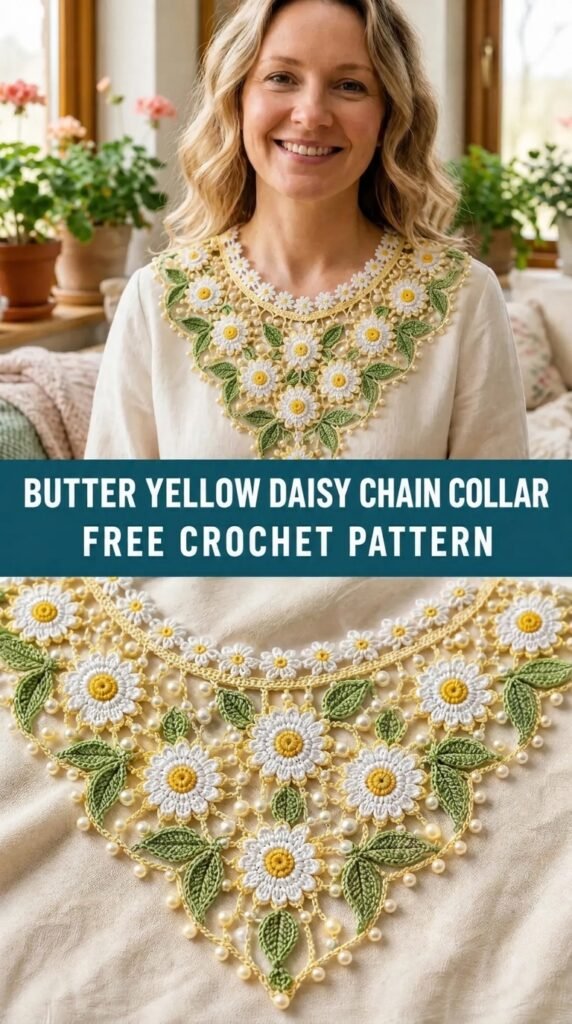
The finished collar measures approximately 16–18 inches (40.5–45.5 cm) around the inner neckline and sits about 2.5 inches (6.5 cm) deep at the front. It is designed for intermediate crocheters who are comfortable working in the round, joining motifs as they go, and keeping consistent tension on small petals.
About This Pattern
This collar is built from individual daisy motifs that are joined into a continuous chain as you crochet. Each daisy has a small raised center and six slightly cupped petals. Short chain bridges connect the flowers so the whole piece drapes in a gentle curve rather than hanging stiffly. A simple button-and-loop closure keeps it secure without bulk.
The construction is modular: you make one daisy, then immediately begin the next, joining it to the previous flower with a short chain. This method avoids a long, awkward seaming session at the end. The collar is worked primarily in one color so the texture of the petals becomes the main visual interest. A single contrast button in a slightly deeper yellow or soft gold finishes the look.
Skill level is intermediate. You should be comfortable with magic rings, working into chain spaces, and keeping even tension on small motifs. The stitches themselves are basic—single crochet, half double, double, and treble—but the small scale and frequent joining require focus.
Finished size is adjustable by adding or removing daisy units. The sample uses eleven daisies and sits comfortably on a 14–15 inch neck with a little ease. Larger or smaller necks simply need more or fewer flowers.
Materials You’ll Need
Yarn
- Color A (main): approximately 85–95 yards (78–87 m) of DK-weight cotton or cotton-blend yarn in butter yellow. Sample used a soft mercerized cotton that holds petal shape well. Allow 15 % extra for gauge variation and practice.
- Optional Color B (centers): 10–12 yards of the same weight in a slightly deeper gold or cream if you prefer two-tone daisies. The sample is worked entirely in one color.
Hooks
- 3.5 mm (E-4) for the daisy motifs and joining chains
- 3.25 mm (D-3) for the final neckline edge if you want a slightly firmer finish (optional)
Notions
- Tapestry needle
- 6–8 locking stitch markers
- One ½-inch (12–13 mm) button in a coordinating yellow or gold tone
- Blocking mat and rust-proof pins
- Spray bottle with water for wet blocking
Abbreviations and Terminology
All instructions use US crochet terminology.
- ch – chain
- sc – single crochet (insert hook, yarn over, pull up loop, yarn over, pull through both loops)
- hdc – half double crochet (yarn over, insert hook, yarn over, pull up loop, yarn over, pull through all three loops)
- dc – double crochet (yarn over, insert hook, yarn over, pull up loop, yarn over, pull through two, yarn over, pull through remaining two)
- tr – treble crochet (yarn over twice, insert hook, yarn over, pull up loop, yarn over and pull through two three times)
- sl st – slip stitch
- sp – space
- st(s) – stitch(es)
- rnd – round
- MR – magic ring (adjustable loop)
- FO – fasten off
Turning chains do not count as a stitch unless a step explicitly says they do. When working into a chain space, the entire space counts as one location for the required stitches.
Gauge
Make one complete daisy motif following the instructions below. After blocking, the daisy should measure approximately 1.75–1.9 inches (4.5–4.8 cm) across from petal tip to petal tip.
If your daisy is larger, go down half a millimeter in hook size. If it is smaller, go up half a millimeter. Consistent petal tension is more important than exact size; the collar will still drape nicely even if individual flowers vary by a few millimeters.
Main Pattern Instructions
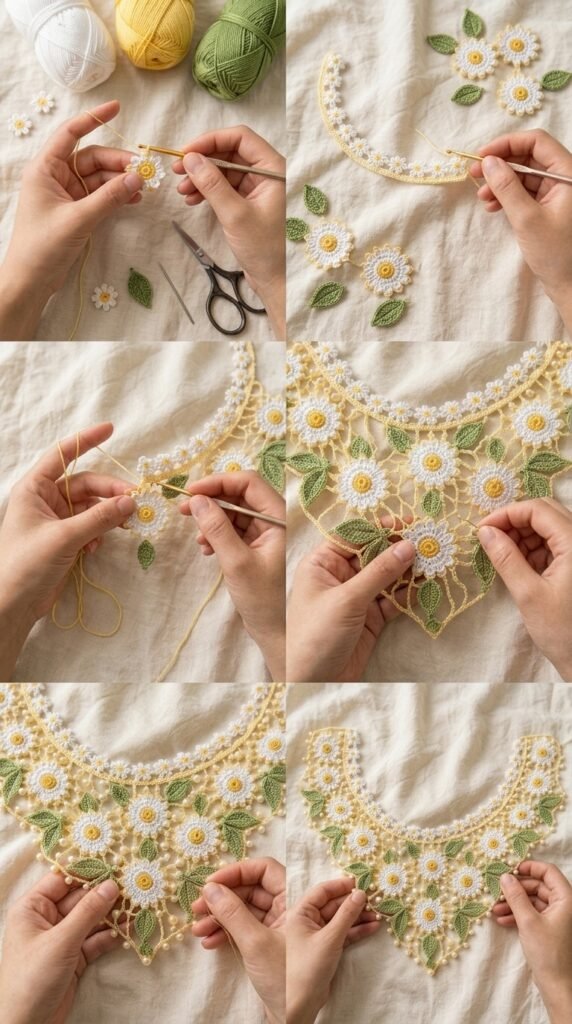
Daisy Motif (make 11 for the sample size)
Round 1 – Center
With Color A (or Color B if using contrast centers), make a magic ring.
Ch 1, work 6 sc into the ring. Pull the ring closed. Join with sl st to first sc. (6 sc)
Round 2 – Petal Bases
Ch 1, 2 sc in each st around. Join with sl st to first sc. (12 sc)
Round 3 – Petals
*Ch 3, (dc, tr, dc) in next st, ch 3, sl st in next st; repeat from * five more times. You will have six petals. Fasten off if working centers in contrast color and rejoin Color A for the next daisy. If working all in one color, do not fasten off; continue to the joining chain.
Count check after Round 3: six petals, each consisting of ch-3, (dc, tr, dc), ch-3, with a slip stitch between petals.
Joining the Daisies into a Chain
After completing the sixth petal of a daisy (except the first), do not fasten off.
Joining chain:
Ch 5.
Work Round 1 and Round 2 of the next daisy.
When you reach the first petal of the new daisy, work the petal as usual, but on the second ch-3 of that petal, join with a slip stitch into the corresponding outer chain of the previous daisy’s nearest petal (the petal that faces the new flower). Continue around the remaining five petals of the new daisy without further joins.
This creates a short, slightly arched bridge between flowers. The join sits at the outer edge of the petals so the centers remain free and the chain curves naturally.
Repeat until you have eleven daisies joined in a gentle arc. The first and last daisies remain free at their outer edges so you can add the closure later.
Stitch count note: After all joins are complete you should have ten joining bridges of 5 chains each and eleven complete daisy centers.
Neckline Edge (optional but recommended)
With the right side facing and the daisy centers pointing downward, attach yarn with a slip stitch to the outer edge of the first daisy’s free side.
Work evenly around the entire upper curve of the collar as follows:
*2 sc in each petal tip, 1 sc in each ch-3 space, 1 sc in each joining bridge chain; repeat from * across.
At the ends of the collar, work 2–3 extra single crochets to create a small tab for the button and loop.
If you prefer a firmer edge, switch to the 3.25 mm hook for this round only. Fasten off and weave in ends.
Special Techniques
Raised Petal Texture
The combination of a treble between two doubles inside each petal creates a gentle cup. If your petals look flat, try working the treble slightly looser than the doubles; the extra height will lift the center of the petal.
Invisible Joins Between Motifs
When you slip-stitch into the previous daisy’s petal during the joining step, insert the hook under both loops of the chain and pull the new yarn through firmly but not tightly. This keeps the join from creating a hard bump.
Button Loop
At one end of the neckline edge, chain 8–10 (test against your button). Slip stitch back into the same stitch to form a loop. Fasten off securely.
Assembly and Finishing
- Weave in all ends on the wrong side, taking care not to pull the petal tips out of shape.
- Sew the button to the opposite end of the collar, centered on the small tab created by the extra single crochets.
- Try the collar on and adjust the button placement if needed so it sits comfortably without gaping.
- Lightly steam or wet-block the piece (see next section).
No additional seaming is required; the joining method already connects every daisy.

Blocking and Care
Wet blocking gives the petals their final cupped shape and opens the joining bridges so the collar curves smoothly.
- Soak the collar for 10–15 minutes in cool water with a drop of mild wool wash if desired.
- Gently squeeze (do not wring) and roll in a towel to remove excess water.
- Pin the collar to a blocking mat in a gentle C-shape, stretching each petal tip outward just enough to define the shape. Pin the joining chains so they form soft arcs rather than straight lines.
- Allow to dry completely (usually 12–24 hours depending on humidity).
- Once dry, remove pins. The collar will hold its shape well.
Care notes: Hand wash in cool water, roll in a towel, and dry flat. Never hang the wet collar; the weight of the water can stretch the joining chains. Store flat or rolled loosely.
Fit and Troubleshooting Tips
- Collar sits too high or feels tight: Add one more daisy unit. Each additional daisy adds roughly 1.6–1.7 inches (4–4.3 cm) to the inner circumference.
- Collar feels too loose: Remove one daisy or use a slightly smaller hook for the joining chains only.
- Petals look uneven: Check that every petal begins and ends with the same number of chains and that the treble sits in the center stitch. Re-blocking usually evens minor differences.
- Joining bridges pull or pucker: Make the 5-chain bridges a little looser on the next attempt. You can also work a single crochet into each chain of the bridge on the neckline edge to stabilize them.
- Centers want to curl: After Round 1, tug the magic-ring tail firmly and weave it in opposite directions to lock the center flat.
FAQ’s
Can I make this collar longer for a deeper neckline?
Yes. Simply continue adding daisy units until the piece reaches the desired length. The pattern is fully modular.
What yarn substitutes work best?
Any DK-weight cotton, cotton-linen blend, or mercerized cotton will hold the petal shape well. Avoid very soft acrylics if you want crisp petals; they tend to flatten over time.
Is the pattern suitable for beginners?
The individual stitches are beginner-friendly, but the small scale, frequent joining, and need for consistent tension make it better suited to intermediate crocheters. Absolute beginners may prefer to practice a few separate daisy motifs first.
Can I use a different number of petals?
Six petals give the classic daisy look and fit the joining method cleanly. Five or seven petals are possible but will change the spacing of the bridges and may require adjusting the chain length between flowers.
How do I adjust for a child’s neck?
Make 7–8 daisy units instead of 11. Measure the child’s neck and aim for the finished inner circumference to be about 1 inch larger than the actual neck measurement for comfort.
Can the collar be worn as a necklace instead of a collar?
Yes. Simply leave off the neckline edge and the button, and add a longer chain or ribbon ties at each end. The daisy chain will then hang more like a floral necklace.
Final Thoughts
There is something quietly joyful about finishing a piece that began as a single skein of butter yellow and a handful of roadside daisies. When you fasten the last button and the little chain settles against your collarbone, it feels like carrying a small piece of spring with you.
I hope this Butter Yellow Daisy Chain Collar brings you the same soft pleasure it brought me while I designed it. Wear it over a simple blouse, pin it to a cardigan, or gift it to someone who needs a little extra sunshine. If you make one, I would love to see how your daisies turned out—feel free to share a photo in the comments or tag your project so others can find the free pattern too.
Happy stitching, and may your petals always stay gently cupped.


Leave a Reply
You must be logged in to post a comment.