Lavender Dream Granny Square Tote Free Crochet Pattern
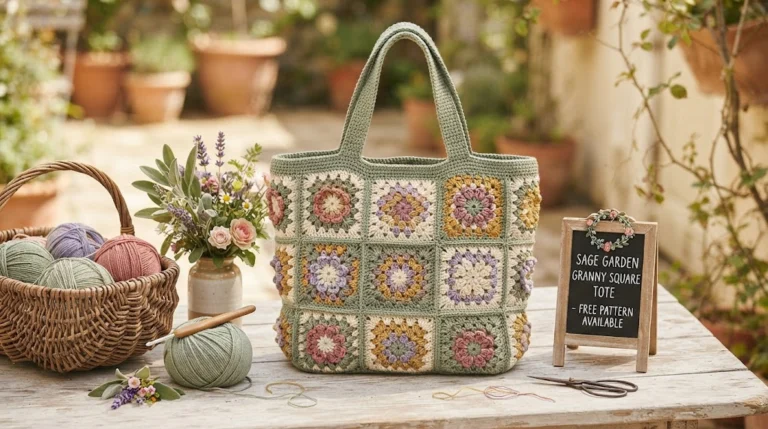
Ever wanted a tote that actually stands up straight and looks fancy at the same time? This Lavender Dream Granny Square Tote does exactly that. Classic granny squares in dreamy purple shades turn into a sturdy box-shaped bag you can haul to the market, library, or your next crochet meetup. Ready to dive in?
Why This Tote Steals the Show
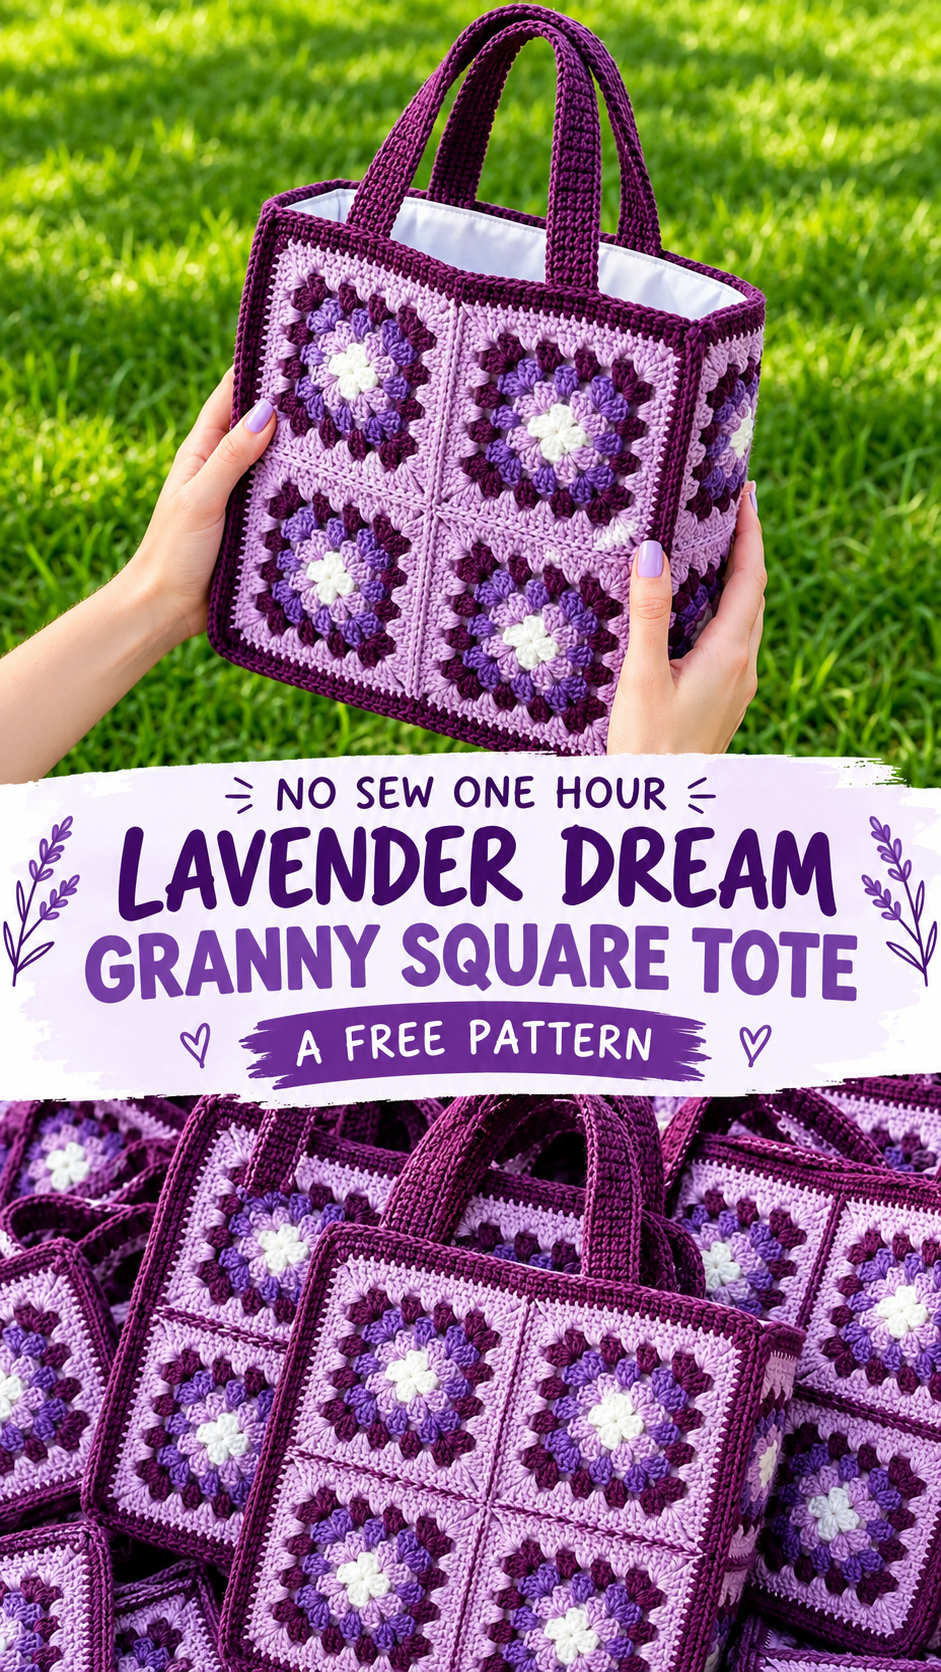
Picture this: soft white centers blooming into soft purples and deep plum edges. The whole bag keeps its shape thanks to a solid base and fabric lining. No floppy fabric disasters here.
You get twelve matching granny squares joined into panels, plus a double-crochet base that adds serious structure. The color shift from cream to lavender to plum gives it that polished look without any complicated stitches.
Honestly, this makes a killer gift. Or keep it for yourself after finishing a tough project. Who doesn’t deserve a pretty new bag?
What You Need to Get Started
Grab worsted weight cotton or cotton-blend yarn in five colors. Smooth yarn works best because it shows off the granny texture and helps the bag hold its boxy shape.
Here’s the yarn breakdown:
- Color A (Deep Plum): 320 yards for borders, handles, base, and joining
- Color B (Soft Pink-Lilac): 210 yards for the outer granny round
- Color C (Medium Lavender): 130 yards for the middle granny round
- Color D (Periwinkle Purple): 100 yards for the inner granny round
- Color E (White or Cream): 50 yards for the granny centers
Hook: US Size J/10 (6.0 mm)
Notions you’ll want:
- Yarn needle for weaving ends and seaming
- Scissors
- Straight pins or locking stitch markers
- 0.75 yard of cotton lining fabric in white or a matching color
- Matching thread plus a hand sewing needle or sewing machine
- Iron and pressing cloth for blocking
Yarn Tips That Actually Help
Lion Brand 24/7 Cotton in Plum, Lavender, Periwinkle, Lilac, and White is a solid pick. It has a nice sheen and keeps its shape. Paintbox Yarns Cotton DK or WeCrochet Dishie also work great.
Skip anything fuzzy or super stretchy. Those yarns hide the pretty granny texture and make the bag sag. Stick with smooth, plied cotton and you’ll thank yourself later.
Gauge, Size, and Skill Level
One finished granny square measures 6.25 inches (16 cm) square after blocking. The completed tote ends up about 13 inches wide by 13 inches tall by 4.5 inches deep, not counting the handles. Handles stick up about 10 inches above the top edge.
Gauge really matters here. All twelve squares need to match perfectly, so make a test square first. Trust me on this one.
This sits at intermediate level. You should know how to work granny squares in joined rounds, change colors, and do basic seaming. Finished a couple smaller projects already? You’re good to go.
Plan on 20 to 28 hours total. Roughly 12–15 hours for the squares, 3–4 for joining, 2–3 for the base, handles, and border, plus 3–5 for the lining.
Abbreviations and Special Stitches
Here’s every stitch you’ll meet, explained simply.
ch = chain (wrap yarn over hook, pull through loop)
sl st = slip stitch (insert hook, yarn over, pull through both loops at once)
sc = single crochet (insert hook, yarn over, pull up loop, yarn over, pull through both loops)
dc = double crochet (yarn over, insert hook, pull up loop, yarn over, pull through 2 loops, yarn over, pull through remaining 2 loops)
sp = space
ch-3 sp = chain 3 space (the corner space in granny squares)
ch-2 sp = chain 2 space (the side space in granny squares)
sk = skip
st(s) = stitch(es)
RS = right side
WS = wrong side
yo = yarn over
Special Stitches Made Easy
3-dc Cluster (3-dc cl): Yarn over, insert hook into the space, yarn over, pull up a loop, yarn over, draw through 2 loops (2 loops left). Do that two more times in the same space (4 loops on hook). Yarn over and pull through all 4 loops. Done!
Granny Corner Shell: Work (3-dc cl, ch 3, 3-dc cl) all into the same corner ch-3 space. That’s one full corner.
Granny Cluster Shell: Work (3-dc cl, ch 2, 3-dc cl) all into the same ch-2 space. That’s one side unit.
Step-by-Step Pattern Instructions
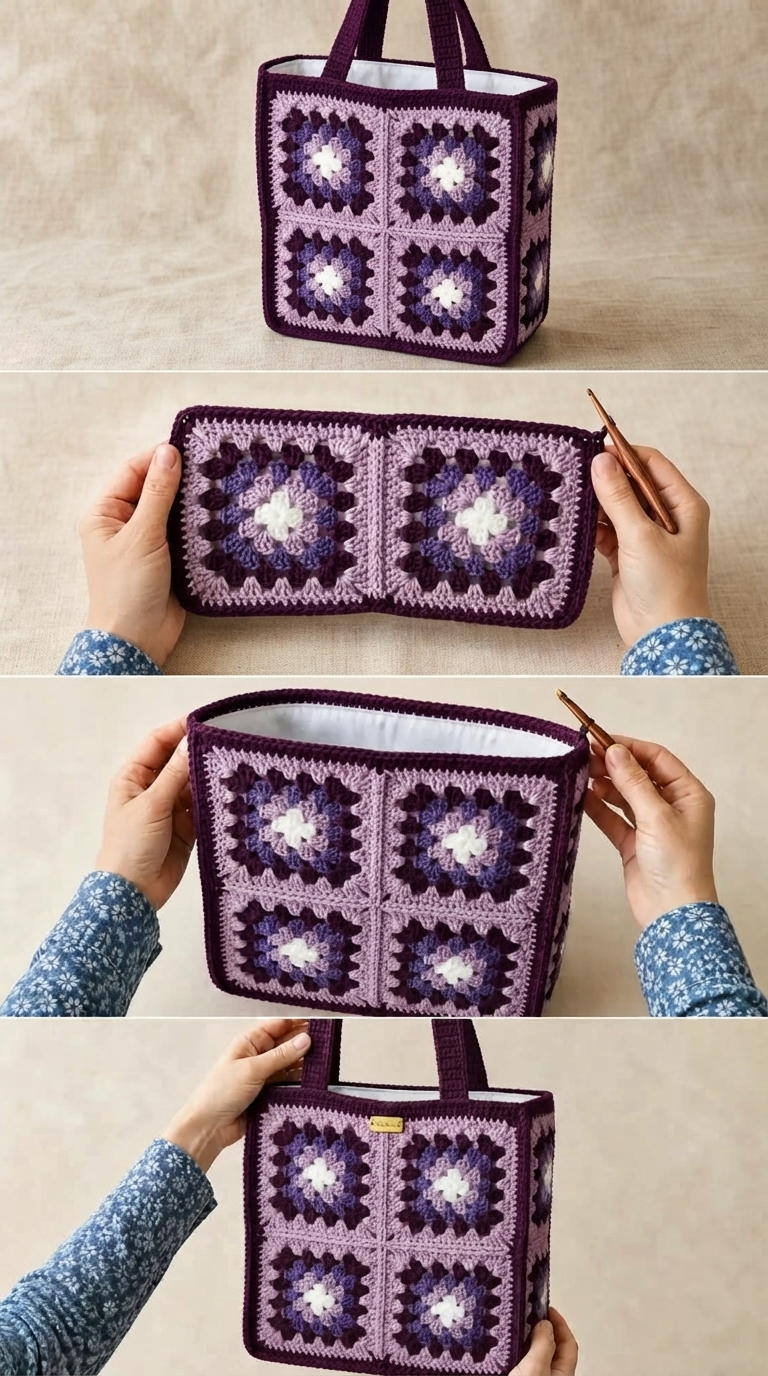
Time to make the magic happen. Follow these sections in order and you’ll have a bag that looks store-bought.
Section 1: Granny Squares (Make 12)
Each square has 4 rounds plus an edging round. Work Rounds 1 through 4 in Colors E, D, C, and B. Finish with Color A for the edging.
Round 1 (Color E):
Make a magic ring (or ch 4 and join with sl st to form a ring).
Ch 3 (counts as first dc of first cluster throughout). Work 2 more dc into the ring to complete the first 3-dc cl. Ch 3. [Work a 3-dc cl into the ring, ch 3] 3 times. Join with sl st to top of beginning ch-3. (4 clusters, 4 ch-3 corner spaces)
Fasten off Color E.
Round 2 (Color D):
Join Color D with a slip knot into any ch-3 corner space.
Ch 3, work 2 dc into same corner sp to complete first 3-dc cl. Ch 3. Work a 3-dc cl into same corner sp. (First corner complete.) Ch 2. [Work a Granny Corner Shell (3-dc cl, ch 3, 3-dc cl) into next ch-3 corner sp. Ch 2.] Rep 3 more times. Join with sl st to top of beginning ch-3. (8 clusters total)
Fasten off Color D.
Round 3 (Color C):
Join Color C with a slip knot into any ch-3 corner space.
Ch 3, work 2 dc into same corner sp to complete first 3-dc cl. Ch 3. Work a 3-dc cl into same corner sp. Ch 2. Work a Granny Cluster Shell (3-dc cl, ch 2, 3-dc cl) into the ch-2 side space from Round 2. Ch 2. [Work a Granny Corner Shell into next ch-3 corner sp. Ch 2. Work a Granny Cluster Shell into next ch-2 side sp. Ch 2.] Rep 3 more times. Join with sl st to top of beginning ch-3. (16 clusters total)
Fasten off Color C.
Checkpoint: After Round 3 you should see three clear color rings around that white center. Looking good?
Round 4 (Color B):
Join Color B with a slip knot into any ch-3 corner space.
Ch 3, work 2 dc into same corner sp to complete first 3-dc cl. Ch 3. Work a 3-dc cl into same corner sp. Ch 2. [Work a Granny Cluster Shell into next ch-2 sp. Ch 2.] 2 times. [Work a Granny Corner Shell into next ch-3 corner sp. Ch 2. [Work a Granny Cluster Shell into next ch-2 sp. Ch 2.] 2 times.] Rep 3 more times. Join with sl st to top of beginning ch-3. (24 clusters total)
Fasten off Color B.
Edging Round (Color A):
Join Color A with a slip knot into any ch-3 corner space.
Ch 3, work 2 dc into same corner sp to complete first 3-dc cl. Ch 3. Work a 3-dc cl into same corner sp. Ch 1. [Work a Granny Cluster Shell into next ch-2 sp. Ch 1.] 3 times. [Work a Granny Corner Shell into next ch-3 corner sp. Ch 1. [Work a Granny Cluster Shell into next ch-2 sp. Ch 1.] 3 times.] Rep 3 more times. Join with sl st to top of beginning ch-3. (32 clusters total)
Fasten off Color A. Weave in all ends.
Block every square to 6.25 inches (16 cm) square before you join anything. This step makes joining so much smoother.
Section 2: Joining Squares Into Panels
Lay out your squares like this:
Front and Back Panels: 4 squares each in a 2×2 grid
Side Panels: 2 squares each stacked vertically
Hold two squares with RS together (WS facing out). Using Color A, work slip stitches through both matching ch-1 spaces and cluster tops along the shared edge. One slip stitch per space and stitch. At corners, work one slip stitch through both corner ch-3 spaces together.
For each 2×2 panel, join the top row side to side first, then the bottom row, then join the two rows along the middle edge.
Flip the panels right side out when finished. The seams should lie almost flat and nearly disappear.
Section 3: Base Panel
This solid base gives the bag its sturdy bottom.
Foundation Chain: With Color A, ch 47.
Row 1 (RS): Dc in 4th ch from hook (ch 3 counts as first dc) and in each ch across. (45 dc)
Turn.
Rows 2 through 7: Ch 3, turn. Dc in each dc across, working in the top 2 loops. (45 dc each row)
Base Panel Edging Round: Ch 1, do not turn. Work 1 sc in each dc across the top edge (45 sc). At corner, work 3 sc. Work 1 sc in the end of each row down the side (7 sc). At corner, work 3 sc. Work 1 sc in each foundation chain across the bottom (45 sc). At corner, work 3 sc. Work 1 sc in the end of each row up the other side (7 sc). At corner, work 3 sc. Join with sl st to first sc. (116 sc total)
Fasten off. Block to 13 inches by 4.5 inches.
Section 4: Assembling the Bag Shell
Join the four panels in a big rectangle using the same Flat Slip Stitch Seam along the vertical edges.
Step 1: Seam the right edge of the front panel to the left edge of the right side panel.
Step 2: Seam the right edge of the right side panel to the left edge of the back panel.
Step 3: Seam the right edge of the back panel to the left edge of the left side panel.
Step 4: Seam the right edge of the left side panel to the left edge of the front panel to close the tube.
Turn right side out. You now have a neat rectangular tube.
Step 5: Attach the base panel by slip stitching the base edging to the bottom edge of the tube, matching stitches as you go.
Section 5: Top Border
Join Color A at any point along the top opening.
Round 1: Ch 1. Work 1 sc in each stitch and chain space around the top opening, putting 3 sc into outer corners and 1 sc into the inner junctions. Join with sl st. (116 sc)
Round 2: Ch 1. Sc in each sc around. Join with sl st. (116 sc)
Round 3: Ch 3 (counts as dc). Dc in each sc around. Join with sl st to top of ch-3. (116 dc)
Round 4: Ch 1. Sc in each dc around. Join with sl st. (116 sc)
Fasten off and weave in ends.
Section 6: Handles (Make 2)
Foundation Chain: With Color A, ch 73.
Row 1: Dc in 4th ch from hook and in each ch across. (71 dc) Turn.
Rows 2 through 4: Ch 3, turn. Dc in each dc across. (71 dc each row)
Work one round of sc edging around the whole handle strip, putting 3 sc at each corner. Fasten off.
Fold the handle in half lengthwise. Whip stitch the two long edges together so you get a double-thick strap.
Attach the handles centered on the front and back panels. Space the ends about 4 inches apart and overlap the top border by 1.5 inches. Sew them down with a strong box stitch so they stay put for years.
Adding the Fabric Lining
Cut these pieces from your cotton fabric (all include 0.5 inch seam allowance):
- Front and Back: two pieces, 14 inches by 14 inches each
- Sides: two pieces, 5.5 inches by 14 inches each
- Base: one piece, 14 inches by 5.5 inches
Sew the side edges together to make a tube. Attach the base. Press the seams. Fold the top edge down 0.75 inch and press again.
Slip the lining into the bag with wrong sides together. Hand sew it to the inside of the top border with a neat whip stitch.
Blocking and Care Tips
Wet block every square before joining. Pin them to exactly 6.25 inches square and let them dry completely.
For washing, hand wash in cool water with gentle detergent. Don’t wring it out. Roll it in a towel, reshape, and dry flat with a towel stuffed inside. Skip the dryer and never hang it.
Related Articles:
- Lavender Fields Purple Floral Tote Free Crochet Pattern
- Mustard Yellow Daisy Tote Free Crochet Pattern
- Monochrome Minimalist Jellyfish Free Crochet Pattern
Final Thoughts
You just built a bag that looks sharp and works hard. Classic granny squares plus a smart structure and lining equal a tote you’ll reach for constantly. The color changes keep the process fun, and watching those squares turn into a finished bag feels pretty awesome.
Go grab your yarn and start those first few rounds. Once you finish, you’ll wonder why you waited so long. Happy crocheting!