

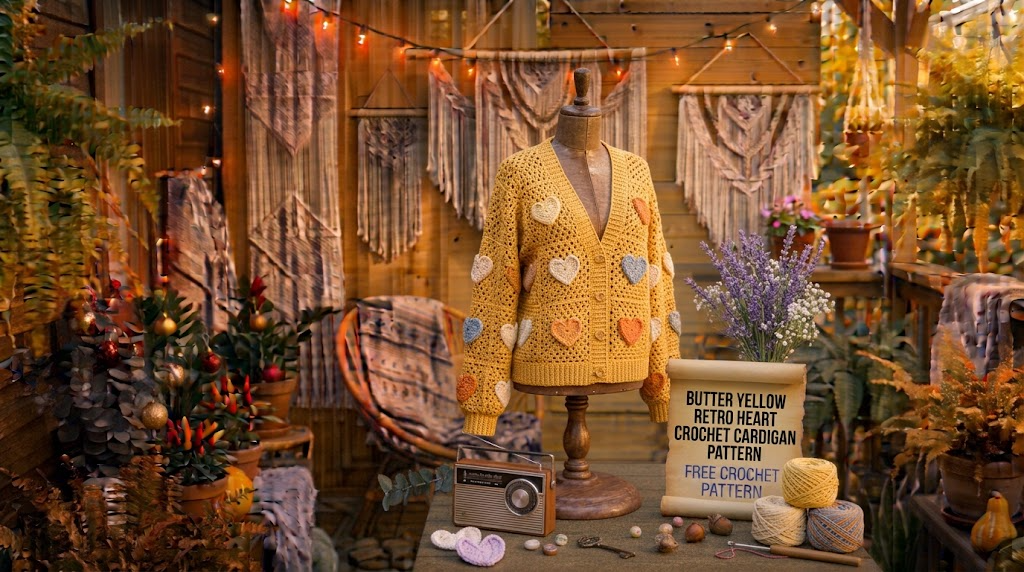
There is something about butter yellow that makes handmade clothing feel especially cheerful. It is softer than bright sunshine yellow, warmer than pale cream, and has a beautiful vintage quality that reminds me of cozy handmade sweaters from the past.
I wanted to create a cardigan that felt playful without looking overly complicated. I imagined a relaxed silhouette, slightly dropped shoulders, comfortable sleeves, and little retro hearts scattered across a soft yellow background. The heart details needed to stand out, but the cardigan itself had to remain wearable enough for everyday outfits.
After experimenting with different textures and color combinations, I settled on a simple double crochet fabric with separate heart motifs, finished with neat ribbed edges. The result is the Butter Yellow Retro Heart Crochet Cardigan Pattern, a charming handmade layer that combines nostalgic details with a comfortable modern fit.
Whether you wear it over a white T-shirt, a floral dress, or your favorite jeans, this cardigan adds a lovely handmade touch to your wardrobe.
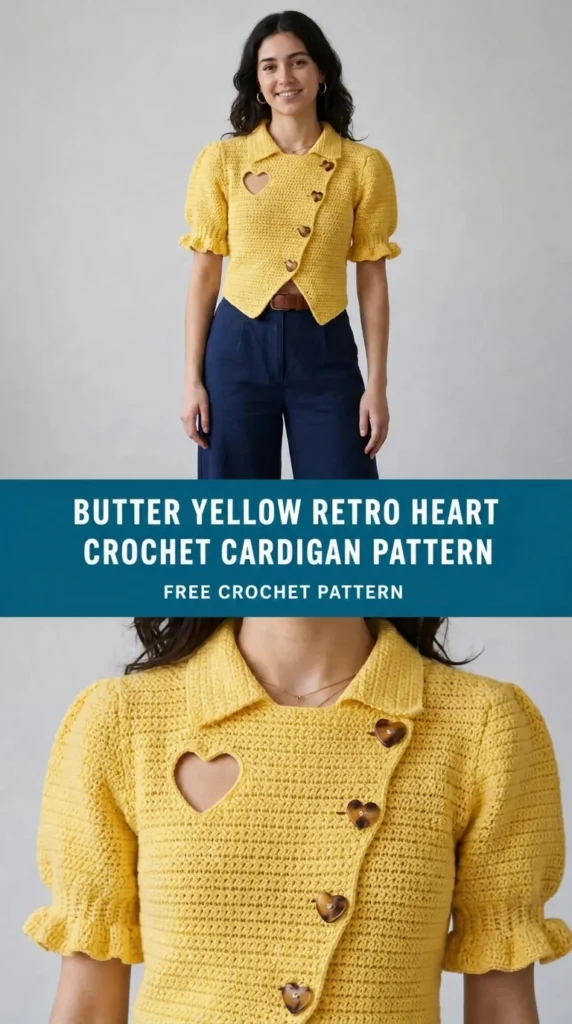
About This Butter Yellow Retro Heart Crochet Cardigan Pattern
This cardigan is worked in separate rectangular pieces: one back panel, two front panels, and two sleeves. The pieces are seamed together before adding the front bands, cuffs, and lower hem.
The main fabric uses double crochet stitches, creating a flexible texture with enough density to support the decorative heart appliqués.
The hearts are crocheted separately in contrasting colors and sewn onto the cardigan after assembly. This approach makes it easier to control their placement and gives each motif a slightly raised appearance.
Skill Level: Advanced beginner to intermediate.
You should be comfortable with basic crochet stitches, changing yarn colors, counting rows, sewing crochet pieces together, and working simple increases and decreases.
Finished Measurements
| Size | Bust | Length | Sleeve Length |
| S | 36 in | 21 in | 17 in |
| M | 40 in | 22 in | 18 in |
| L | 44 in | 23 in | 19 in |
| XL | 48 in | 24 in | 19 in |
| 2XL | 52 in | 25 in | 20 in |
The cardigan is designed with approximately 4–6 inches of positive ease for a relaxed vintage fit.
Materials You’ll Need
Yarn
Choose a soft, medium-weight yarn with good stitch definition. A cotton-acrylic blend or smooth acrylic yarn works especially well.
Use DK or light worsted yarn, approximately weight 3.
| Color | Purpose | Size S–M | Size L–XL | Size 2XL |
| A – Butter Yellow | Main cardigan | 1,200 yd | 1,500 yd | 1,800 yd |
| B – Dusty Pink | Heart motifs | 60 yd | 75 yd | 90 yd |
| C – Cherry Red | Heart motifs | 60 yd | 75 yd | 90 yd |
| D – Cream | Heart details and trim | 50 yd | 60 yd | 70 yd |
| E – Soft Brown | Optional heart details | 25 yd | 30 yd | 35 yd |
Allow 15% extra yarn for gauge variation, longer sleeves, or additional decorative motifs.
Crochet Hooks
- 4.5 mm crochet hook: Main cardigan fabric.
- 4 mm crochet hook: Heart motifs and ribbed edges.
- 3.5 mm crochet hook: Optional tighter decorative details.
Additional Supplies
- Tapestry needle.
- Stitch markers.
- Measuring tape.
- Sharp scissors.
- Blocking mats and rust-resistant pins.
- Four or five buttons, approximately ¾ inch.
- Sewing needle and matching thread.
- Removable stitch markers for sleeve placement.
Abbreviations and Terminology
All instructions use US crochet terminology.
| Abbreviation | Meaning |
| ch | Chain |
| sl st | Slip stitch |
| sc | Single crochet |
| hdc | Half double crochet |
| dc | Double crochet |
| inc | Increase |
| dec | Decrease |
| st | Stitch |
| sts | Stitches |
| sp | Space |
| sk | Skip |
| rep | Repeat |
| RS | Right side |
| WS | Wrong side |
| FO | Fasten off |
Chain (ch): Yarn over and pull through the loop on your hook.
Slip Stitch (sl st): Insert the hook into the stitch, yarn over, and pull through both the stitch and loop on the hook.
Single Crochet (sc): Insert the hook, yarn over and pull up a loop, yarn over and pull through both loops.
Half Double Crochet (hdc): Yarn over, insert the hook, pull up a loop, yarn over and pull through all three loops.
Double Crochet (dc): Yarn over, insert the hook, pull up a loop, yarn over and pull through two loops twice.
Increase (inc): Work two stitches into the same stitch.
Decrease (dec): Work two stitches together to reduce the stitch count.
Important Notes
- Turning chains do not count as stitches unless stated otherwise.
- Count your first and last stitches carefully.
- Work the cardigan panels with consistent tension.
- Place heart motifs on the right side of the finished cardigan.
- Check measurements before joining the pieces.
Gauge
Gauge is important because it determines the finished cardigan measurements.
Using the 4.5 mm hook and main butter yellow yarn, work a double crochet swatch.
Gauge: 16 dc stitches × 10 rows = 4 × 4 inches.
To make your swatch:
- Chain 19.
- Work dc into the fourth chain from the hook.
- Continue working dc across.
- Chain 3 and turn.
- Work dc across each row.
- Continue until the swatch measures approximately 4 inches tall.
- Measure the center 4-inch section.
If you have more than 16 stitches across 4 inches, move up one hook size.
If you have fewer than 16 stitches, move down one hook size.
Wash and dry your swatch before measuring if you plan to wash the cardigan regularly.
Main Pattern Instructions
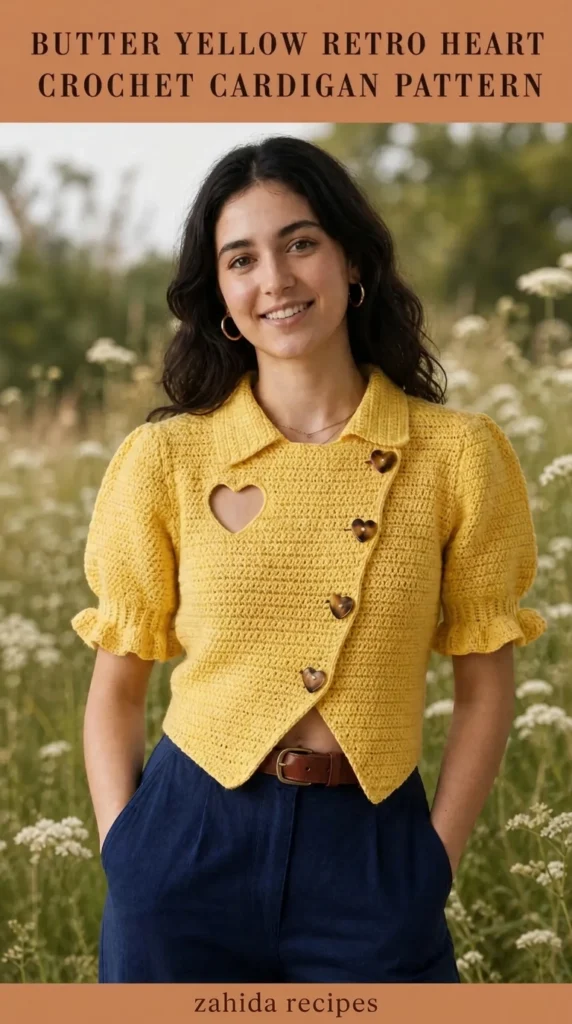
1. Back Panel
The back panel is a simple rectangular piece worked from the bottom upward.
For this example, the instructions use size M. Adjust the foundation chain according to your desired finished measurements.
Foundation: Ch 83.
Row 1: Dc in the fourth ch from hook and in each remaining ch. (80 dc)
Row 2: Ch 3, turn, dc in each st across. (80 dc)
Rows 3–48: Repeat Row 2.
The panel should measure approximately 20 inches wide and 22 inches long.
Starting Stitch Counts for Other Sizes
| Size | Foundation Chain | First Row Stitch Count |
| S | 75 | 72 |
| M | 83 | 80 |
| L | 91 | 88 |
| XL | 99 | 96 |
| 2XL | 107 | 104 |
Fasten off and weave in the ends.
2. Left Front Panel
The front panels are narrower than the back panel to create the cardigan opening.
For size M:
Foundation: Ch 43.
Row 1: Dc in the fourth ch from hook and across. (40 dc)
Row 2: Ch 3, turn, dc in every stitch. (40 dc)
Rows 3–48: Repeat Row 2.
Fasten off.
3. Right Front Panel
Repeat the left front panel instructions.
Make sure both front panels have the same number of rows and identical measurements.
Panel count for size M:
- Back: 80 dc.
- Left front: 40 dc.
- Right front: 40 dc.
The two front panels together provide the same approximate width as the back panel.
4. Shoulder and Armhole Preparation
Lay the back panel flat with the right side facing upward.
Place both front panels on top, with their outer edges aligned with the back panel edges.
Leave an opening of approximately 7 inches on each side at the top for the armholes.
Join the shoulder sections using a mattress stitch or slip stitch seam.
For size M, join approximately 9 inches at each shoulder, leaving the remaining center section open for the neckline.
Try the cardigan against your body or a garment with a similar fit before completing the seams.
Crochet Sleeves
The sleeves are worked from the cuff upward in rounds, creating a comfortable shape with gentle increases.
Make two identical sleeves.
Sleeve Cuff
Using butter yellow yarn and a 4 mm hook:
Foundation: Ch 29.
Row 1: Sc in the second ch from hook and across. (28 sc)
Row 2: Ch 1, turn, sc in BLO across. (28 sc)
Rows 3–28: Repeat Row 2.
Join the short ends using slip stitches to form a cuff.
Sleeve Body
Switch to the 4.5 mm hook.
Round 1: Ch 2, work 36 dc evenly around the cuff edge. Join with sl st.
Round 2: Ch 2, dc around. Join.
Round 3: Ch 2, dc around. Join.
Round 4: Ch 2, dc in first 9 sts, 2 dc in next st, repeat this increase placement evenly four times around. (40 dc)
Rounds 5–20: Work dc evenly around.
For a gently tapered sleeve, decrease one stitch at each side every fourth round if desired.
Continue until the sleeve measures approximately 17–18 inches from the cuff.
Fasten off, leaving a long tail for sewing.
Repeat for the second sleeve.
Creating the Retro Heart Crochet Motifs
The heart motifs are the most recognizable feature of this cardigan.
I recommend using dusty pink, cherry red, and cream for a playful vintage color palette.
Make approximately 8–10 hearts depending on your size and preferred placement.
Small Crochet Heart
Use a 4 mm hook and your chosen heart color.
Round 1:
- Make a magic ring.
- Ch 3.
- Work 3 tr into the ring.
- Work 3 dc into the ring.
- Ch 1.
- Work 1 tr into the ring.
- Ch 1.
- Work 3 dc into the ring.
- Work 3 tr into the ring.
- Ch 3.
- Sl st into the ring.
Pull the magic ring tight.
You should now see two rounded upper lobes and a pointed lower section.
Fasten off and weave in the ends.
Medium Heart
For a slightly larger motif, use a 4.5 mm hook.
Repeat the small heart pattern, then work a round of sc evenly around the outside edge.
Work 2 sc into the bottom point and 3 sc into the center dip to maintain the heart shape.
Fasten off.
Optional Decorative Center
For a retro embroidered appearance, use cream yarn to add a small line of surface slip stitches down the center of selected hearts.
You can also add tiny embroidered dots using soft brown yarn.
Avoid bulky embellishments that could make the cardigan uncomfortable.
Joining the Cardigan Pieces
Before sewing everything together, lay the cardigan flat and check that all edges line up.
Step 1: Sew the Side Seams
Place the front panels against the back panel with right sides together.
Starting at the bottom, sew upward using a mattress stitch.
Stop approximately 7 inches below the shoulders to leave the armholes open.
Repeat on the other side.
Step 2: Attach the Sleeves
Fold each sleeve in half to find the center point.
Match the center of the sleeve cap with the shoulder seam.
Pin the sleeve evenly around the armhole.
Sew using a mattress stitch.
Repeat for the second sleeve.
Step 3: Close the Sleeve Seams
Turn the cardigan inside out.
Align the sleeve edges and sew from the cuff toward the underarm.
Secure the yarn carefully at the underarm to prevent holes.
Retro Heart Placement
This is where the cardigan starts to develop its personality.
I prefer an arrangement that looks balanced but not overly symmetrical.
For size M, try this placement:
- Three hearts on the left front panel.
- Three hearts on the right front panel.
- Two hearts across the upper back.
- One or two small hearts near the lower back.
Leave approximately 2–3 inches between neighboring motifs.
Use removable stitch markers to position each heart before sewing.
Attach the hearts using a tapestry needle and matching yarn. Sew around the entire outer edge with small, even stitches.
Do not pull the yarn too tightly, as this can distort the heart shape or gather the cardigan fabric.
Ribbed Hem, Cuffs, and Front Border
The ribbed finishing gives the cardigan a polished, vintage-inspired appearance.
Bottom Hem
Attach butter yellow yarn at the lower edge.
Row 1: Ch 1, sc evenly across the bottom edge.
Row 2: Ch 1, turn, sc in BLO across.
Repeat Row 2 until the ribbing measures approximately 2 inches.
Fasten off.
Front Button Bands
Using the 4 mm hook, attach yarn at the bottom of the right front opening.
Row 1: Ch 1, work sc evenly up the front edge, around the neckline, and down the opposite front edge.
Row 2: Ch 1, turn, sc across.
Rows 3–5: Repeat Row 2.
For the buttonhole band, mark four or five evenly spaced button positions.
On the selected row, work:
- Sc to the buttonhole position.
- Ch 2.
- Skip 2 sts.
- Continue sc across.
On the next row, work 2 sc into each chain-2 space.
Finish with one neat row of sc.
Sleeve Cuffs
If you prefer a more substantial cuff, add another 4–6 rounds of sc BLO around each sleeve opening.
Keep the tension relaxed enough for your hands to pass through comfortably.
Adding Buttons
Choose wooden, cream, or pearl-style buttons to complement the butter yellow yarn.
For a soft vintage look, I particularly like small wooden buttons.
Sew the buttons onto the opposite front band from the buttonholes.
Check that each button aligns with its corresponding opening before securing it.
Blocking and Care
Blocking helps the cardigan settle into its final shape.
For acrylic or cotton-acrylic yarn, check the yarn label before applying heat.
Wet Blocking
- Fill a basin with cool or lukewarm water.
- Add a small amount of gentle wool wash or mild detergent.
- Submerge the cardigan.
- Allow it to soak for approximately 10–15 minutes.
- Lift it carefully and press out excess water without twisting.
- Roll it inside a clean towel.
- Lay it flat on blocking mats.
- Gently adjust the sleeves, front edges, and hem.
- Allow it to dry completely.
Do not hang the cardigan while wet because its weight can stretch the fabric.
For acrylic yarn, avoid direct high heat. Steam only if the yarn manufacturer permits it, and keep the iron or steamer away from direct contact with the fibers.
Care Instructions
- Hand wash gently or use a delicate machine cycle if the yarn label permits.
- Use cool water.
- Avoid harsh bleach.
- Dry flat.
- Store folded rather than hanging.
- Keep buttons and heart appliqués secure by checking their stitching occasionally.
Fit and Troubleshooting Tips
1. My Cardigan Is Too Wide
If your cardigan feels oversized, check your gauge first. A loose gauge can add several inches to the finished garment. Use a smaller hook if your swatch has too few stitches per 4 inches.
2. The Sleeves Feel Too Tight
Add more stitches when beginning the sleeve body. You can also add one increase round every three or four rounds until you reach your preferred upper-arm circumference.
3. My Heart Motifs Look Uneven
Check that you are working the same number of stitches on both sides of the heart. Block each motif lightly before attaching it.
4. The Front Edges Curl
Work an additional row of single crochet along the front opening. Keep your tension consistent and avoid pulling the yarn too tightly.
5. The Cardigan Looks Too Short
Add extra double crochet rows to the back and front panels before assembly. For a longer cardigan, add approximately 2 inches to each panel.
6. The Shoulders Feel Bulky
Use a mattress stitch instead of a thick slip stitch seam. A flatter seam helps the cardigan sit more comfortably across the shoulders.
Final Thoughts
The Butter Yellow Retro Heart Crochet Cardigan is a lovely project for anyone who enjoys colorful handmade clothing with a little nostalgic charm.
I especially love how the soft yellow background allows the heart motifs to become the main attraction without making the cardigan feel too busy. The combination of simple double crochet panels, comfortable ribbing, and decorative hearts creates a piece that feels both playful and timeless.
You can experiment with different heart colors, add more motifs across the back, or keep the design minimal with just a few pink and red accents.
Most importantly, take your time with the sizing, motif placement, and finishing. Those small details make a handmade cardigan feel special.
I hope you enjoy making your own Butter Yellow Retro Heart Crochet Cardigan Pattern. If you create one, share your finished cardigan, favorite color combinations, and project photos with other crochet lovers. Your version might inspire someone else to pick up a hook and make something beautiful!
Happy crocheting! 💛


Leave a Reply
You must be logged in to post a comment.