

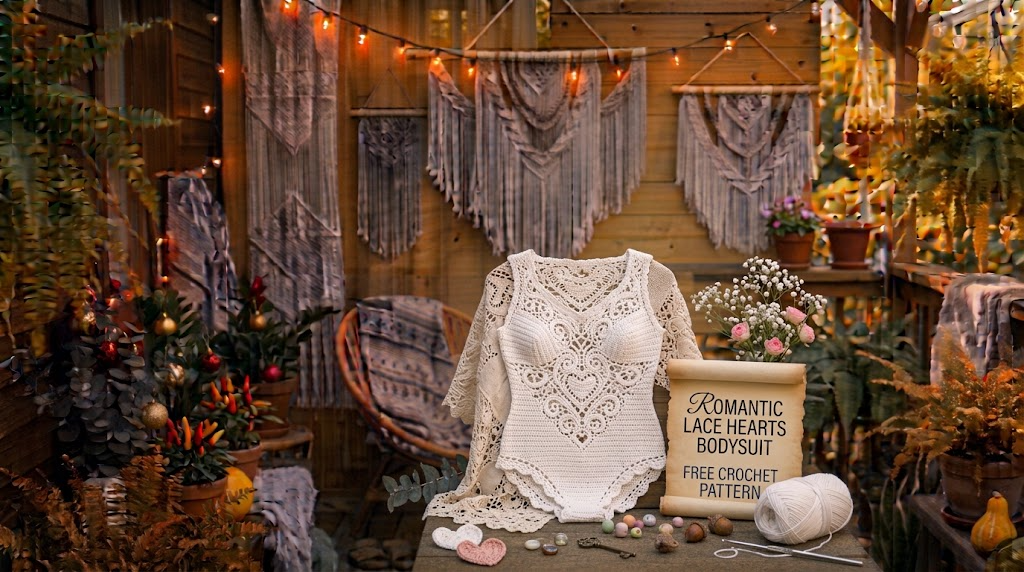
There is something special about crochet clothing that combines delicate details with a beautiful fit. I have always loved romantic lace patterns, especially designs that use small repeating motifs to create something eye-catching without feeling overly complicated. When I started planning this Romantic Lace Hearts Bodysuit, I wanted a garment that felt feminine, lightweight, and comfortable enough to wear on warm days.
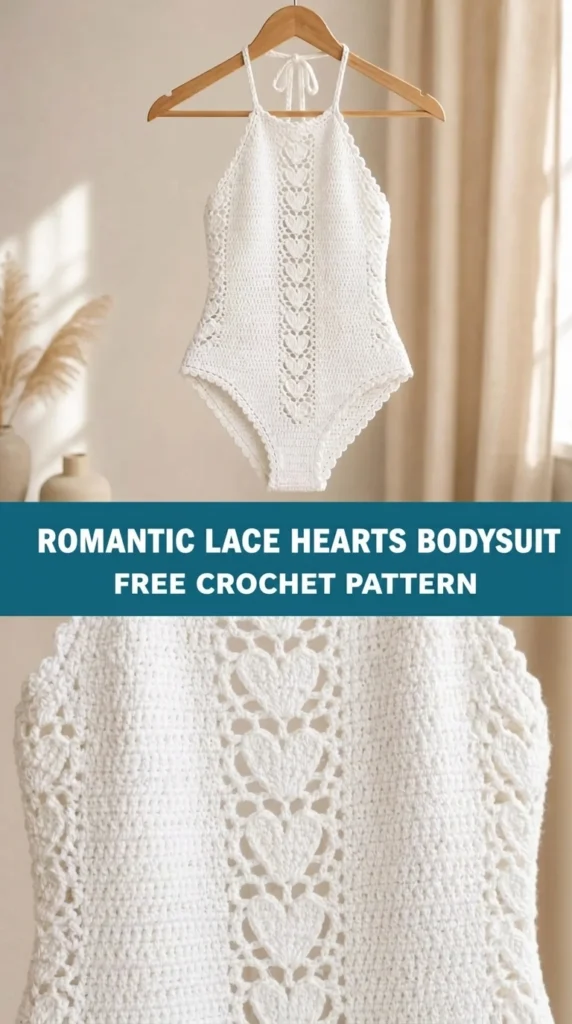
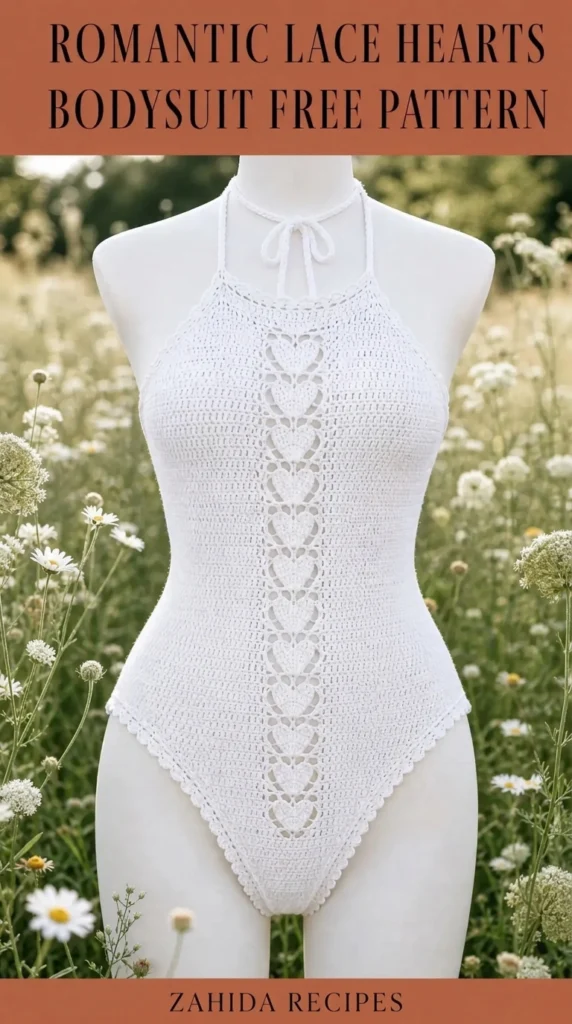
My favorite part of this design is the little heart-inspired lace texture. Instead of attaching separate hearts, the pattern creates heart-like shapes through carefully arranged chain spaces, double crochet stitches, and small shell details. The result is an airy fabric with a lovely romantic appearance.
This bodysuit is designed with a shaped front, a matching back panel, adjustable shoulder straps, and a practical crotch closure. If you enjoy making wearable crochet projects, this Romantic Lace Hearts Bodysuit Free Crochet Pattern is a lovely project to add to your collection.
About This Romantic Lace Hearts Bodysuit Pattern
This bodysuit is worked in separate front and back panels, which are shaped individually before being joined at the sides and shoulders.
The main fabric features a repeating heart-inspired lace stitch. The open spaces create a lightweight texture, while the surrounding stitches help the fabric maintain its shape.
The lower section is designed with a fitted silhouette and a simple crotch extension. Adjustable shoulder straps make it easier to personalize the fit.
Skill Level: Intermediate
Construction: Two panels, joined at the sides and shoulders, with separately crocheted crotch extensions.
Pattern Features:
- Romantic heart-inspired lace stitch.
- Shaped bust and waist.
- Adjustable shoulder straps.
- Soft scalloped neckline.
- Comfortable leg openings.
- Snap-button crotch closure.
Finished Sizes: XS, S, M, L, and XL.
| Size | Bust | Waist | Hip |
| XS | 30–32 in | 24–26 in | 32–34 in |
| S | 33–35 in | 27–29 in | 35–37 in |
| M | 36–38 in | 30–32 in | 38–40 in |
| L | 39–41 in | 33–35 in | 41–43 in |
| XL | 42–44 in | 36–38 in | 44–46 in |
The lace fabric has natural stretch, but crochet does not behave exactly like knitted fabric. I recommend measuring your body and checking your gauge before beginning.
Materials You’ll Need
Yarn
Choose a soft cotton or cotton-blend yarn that feels comfortable against your skin.
- Color A – Blush Pink: 350–450 yards (320–412 meters), lightweight DK cotton yarn. Used for the main bodysuit.
- Color B – Soft Ivory: 30–40 yards (27–37 meters), DK cotton yarn. Optional for decorative heart details and edging.
Allow approximately 15% extra yarn if your gauge varies or you plan to lengthen the bodysuit.
Crochet Hooks
- 3.5 mm crochet hook for the main lace fabric.
- 3.0 mm crochet hook for neckline, leg openings, and edging.
Additional Materials
- Tapestry needle.
- Stitch markers.
- Measuring tape.
- Scissors.
- Three small sew-on snap buttons.
- Sewing needle and matching thread.
- Blocking mat and rustproof pins.
Abbreviations and Terminology
This pattern uses US crochet terminology.
| Abbreviation | Meaning |
| ch | Chain |
| sc | Single crochet |
| hdc | Half double crochet |
| dc | Double crochet |
| sl st | Slip stitch |
| sk | Skip |
| sp | Space |
| ch-sp | Chain space |
| rep | Repeat |
| RS | Right side |
| WS | Wrong side |
| st(s) | Stitch(es) |
| FO | Fasten off |
Special Stitch Instructions
Single Crochet (sc): Insert hook into the indicated stitch, yarn over, pull up a loop, yarn over, and pull through both loops.
Half Double Crochet (hdc): Yarn over, insert hook, pull up a loop, yarn over, and pull through all three loops.
Double Crochet (dc): Yarn over, insert hook, pull up a loop, yarn over and pull through two loops, then yarn over and pull through the remaining two loops.
V-Stitch: Work (dc, ch 2, dc) into the same indicated space.
Heart Lace Cluster: Work 3 dc, ch 2, and 3 dc into the same chain space. This creates a small decorative fan that forms part of the heart-inspired pattern.
Scallop: Work 5 dc into the same stitch or space.
Turning chains do not count as stitches unless a step explicitly says otherwise.
Gauge
Gauge is important because this is a fitted garment.
Using the 3.5 mm crochet hook, work the heart lace pattern for approximately 12 rows.
After lightly blocking, a 4 × 4-inch (10 × 10 cm) section should measure approximately:
- 18 stitches across.
- 10 pattern rows high.
If your swatch is too small, try a larger hook. If it is too loose, use a smaller hook.
Always check your gauge before starting the garment.
Main Pattern Instructions
1. Front Bodysuit Panel
The front panel begins at the waist and gradually increases toward the bust.
Choose the foundation chain according to your size:
| Size | Foundation Chain |
| XS | 62 |
| S | 68 |
| M | 74 |
| L | 80 |
| XL | 86 |
Row 1: Work 1 dc into the fourth chain from the hook. Work 1 dc in each remaining chain. Turn.
Row 2: Ch 3, dc in the next 2 stitches, ch 2, sk 2 stitches, dc in the next 3 stitches. Repeat across the row. Turn.
Row 3: Ch 3, dc in each dc stitch. Work 2 dc into each ch-2 space. Turn.
Row 4: Ch 3, dc in the next stitch, ch 2, sk 2 stitches, work a V-stitch into the next stitch, ch 2, sk 2 stitches, dc in the next 3 stitches. Repeat the established lace sequence across.
Row 5: Ch 3, work 2 dc into each V-stitch center space, then dc across the remaining stitches and spaces.
These rows establish the repeating heart-inspired lace texture.
Creating the Heart Lace Pattern
For the following rows, use the following repeat:
- Work the solid double crochet sections as established.
- Work one Heart Lace Cluster into each designated ch-2 space.
- Separate clusters with the chain spaces shown in Row 4.
- Keep the number of motif spaces consistent across the row.
Repeat the lace sequence until the panel measures approximately 9 inches from the waist.
For larger sizes, continue the established repeat until the panel reaches the desired waist-to-bust measurement.
Count Check: The number of heart lace clusters should remain consistent between pattern repeats. Any increases should be placed evenly at the outer edges.
2. Shape the Bust
The upper front panel needs gentle shaping to create a comfortable neckline and bust area.
Shaping Row 1: Ch 3, dc across to the final 3 stitches, work 2 dc in the next stitch, dc in the final 2 stitches.
Shaping Row 2: Ch 3, work the established heart lace pattern across without increasing.
Repeat these two rows as needed, placing increases only at the outer edges.
Once the panel reaches the desired bust width, stop increasing.
Continue straight until the front panel reaches the underarm measurement.
3. Create the Neckline
The neckline is divided into two sections to form the front opening.
Mark the center of the panel.
Work across the first half of the stitches, leaving the center stitches unworked. Fasten off.
Rejoin yarn to the second half and work the matching section.
Continue working each shoulder section separately for approximately 3 inches, or until the neckline reaches your preferred depth.
Keep the lace pattern aligned wherever possible.
4. Back Bodysuit Panel
The back panel is worked in the same general way as the front, but with a slightly higher neckline for additional coverage.
Use the same foundation chain for your selected size.
Row 1: Dc across the foundation chain.
Row 2: Ch 3, work the established lace repeat.
Row 3: Work the heart lace clusters into the designated chain spaces.
Continue repeating the lace pattern until the back panel reaches the underarm measurement.
Shape the upper back by working straight rows, then divide the shoulder sections to match the front panel.
For a more supportive fit, keep the back neckline approximately 1–1.5 inches higher than the front neckline.
5. Crochet the Lower Bodysuit Section
The lower section creates the fitted brief-style shape.
Work the front and back lower extensions separately before joining them.
Front Crotch Extension
Join yarn at the center bottom edge of the front panel.
Row 1: Ch 1, sc evenly across the lower edge. Turn.
Row 2: Ch 1, sc across. Turn.
Row 3: Ch 1, sc2tog, sc across until the final 2 stitches, sc2tog. Turn.
Repeat Row 3 every second row until the extension measures approximately 3 inches.
Back Crotch Extension
Join yarn at the bottom center of the back panel.
Work the same construction, increasing the extension length to approximately 3.5 inches for additional coverage.
Check the length against your body measurements before joining.
Join the Crotch
Place the front and back extensions together with the right sides facing.
Use slip stitches or mattress stitch to join the center edges.
Keep the seam flat and avoid pulling the yarn too tightly.
6. Leg Opening Edging
Join yarn around one leg opening.
Round 1: Ch 1, work sc evenly around the opening. Join with sl st.
Round 2: Ch 1, work hdc around. Join.
Round 3: Ch 1, work (sc, ch 2, sk 1 stitch) around. Join.
Repeat for the second leg opening.
The small chain spaces create a delicate decorative edge while helping the openings maintain their shape.
Special Techniques and Decorative Details
Romantic Heart Motif
To add a more recognizable heart detail, crochet two small motifs using Color B.
Round 1: Make a magic ring. Ch 3, work 3 dc, 3 hdc, ch 1, 1 dc, ch 1, 3 hdc, 3 dc, and ch 3. Join with sl st into the ring.
Pull the magic ring closed.
Round 2: Ch 1, work sc evenly around the heart shape, placing 2 sc in the curved sections and 3 sc in the bottom point. Join and fasten off.
Make two motifs.
Sew one heart near each upper side of the front bodysuit, keeping both motifs at the same height.
Scalloped Neckline
Using the smaller hook, join yarn at one neckline corner.
Round 1: Work sc evenly around the neckline and shoulder edges.
Round 2: Work 5 dc into every fifth stitch, skipping the next 2 stitches between scallops.
Adjust the spacing slightly around curves so the neckline lies flat.
Adjustable Shoulder Straps
Make two straps.
Ch 7.
Row 1: Sc in the second chain from the hook and across. Turn.
Row 2: Ch 1, sc across. Turn.
Repeat until each strap measures approximately 10–12 inches.
Attach one end of each strap to the front shoulder corners. Use adjustable button loops or sew the back ends at your preferred position.
Assembly and Finishing
Before joining the main panels, lay them flat and compare their measurements.
- Align the front and back panels with right sides facing.
- Match the shoulder edges carefully.
- Join the shoulders using mattress stitch.
- Join the side seams, leaving the armhole openings unseamed.
- Attach the crotch extensions securely.
- Add the leg edging.
- Attach the adjustable shoulder straps.
- Sew the decorative heart motifs onto the front.
- Attach three small snap buttons to the crotch opening.
I recommend trying the bodysuit on before permanently sewing the straps and snap closures. This gives you an opportunity to adjust the fit.
Blocking and Care
Blocking makes a noticeable difference in lace crochet garments.
For cotton yarn, gently soak the finished bodysuit in cool water with a small amount of mild detergent.
Remove excess water by pressing the garment between clean towels. Never twist or wring the fabric.
Lay it flat on a blocking mat and gently arrange the lace openings.
Use rustproof pins to maintain the neckline, waist, and leg shapes.
Allow the garment to dry completely before removing the pins.
Everyday Care
- Hand wash in cool water.
- Avoid bleach and harsh detergents.
- Dry flat in the shade.
- Do not hang the garment while wet.
- Store folded rather than hanging.
Fit and Troubleshooting Tips
The lace fabric feels too loose: Try a smaller hook or a firmer cotton yarn.
The neckline curls: Add another round of single crochet before working the scalloped edging.
The bodysuit feels too short: Add rows to the waist section before shaping the bust.
The leg openings feel tight: Replace the final edging round with a looser single crochet round.
The heart motifs look uneven: Pin both motifs in place before sewing and measure their distance from the neckline.
The side seams feel bulky: Use mattress stitch and avoid pulling the joining yarn too tightly.
The bodysuit feels too revealing: Add a lightweight cotton lining or wear it over suitable undergarments.
Final Thoughts
I love how this Romantic Lace Hearts Bodysuit brings together delicate crochet texture, feminine details, and a flattering silhouette. The heart-inspired lace pattern gives the fabric its personality, while the adjustable straps and shaped panels make the finished garment feel more thoughtfully constructed.
If this is your first fitted crochet garment, take your time with the measurements and try the pieces on as you work. Small adjustments can make a big difference in the finished fit.
You can experiment with soft ivory, dusty rose, lavender, cream, or classic black to create completely different looks. I especially love the idea of a blush pink version with tiny ivory heart motifs.
I hope you enjoy making this Romantic Lace Hearts Bodysuit Free Crochet Pattern as much as I enjoyed designing it. Don’t forget to share your finished creation, save your favorite color combinations on Pinterest, and inspire another crocheter to make something beautiful!
Happy crocheting!




Leave a Reply
You must be logged in to post a comment.