

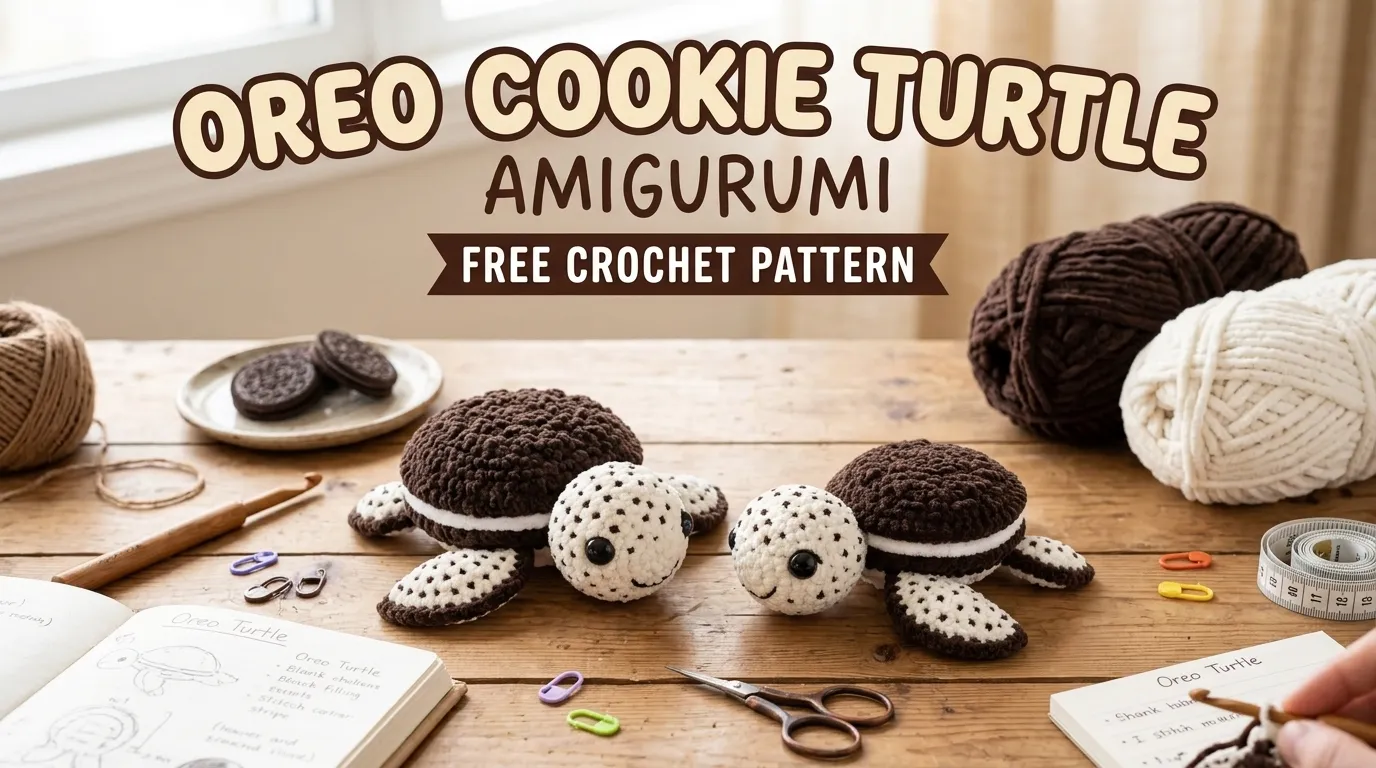
This Oreo Cookie Turtle Amigurumi is a fun project for crocheters who enjoy making miniature stuffed animals with creative details. The pattern uses basic amigurumi techniques, simple color changes, and a few decorative touches to bring the cookie-inspired design to life.
Let’s grab our yarn and make this little chocolate-loving turtle!
About This Oreo Cookie Turtle Amigurumi Pattern
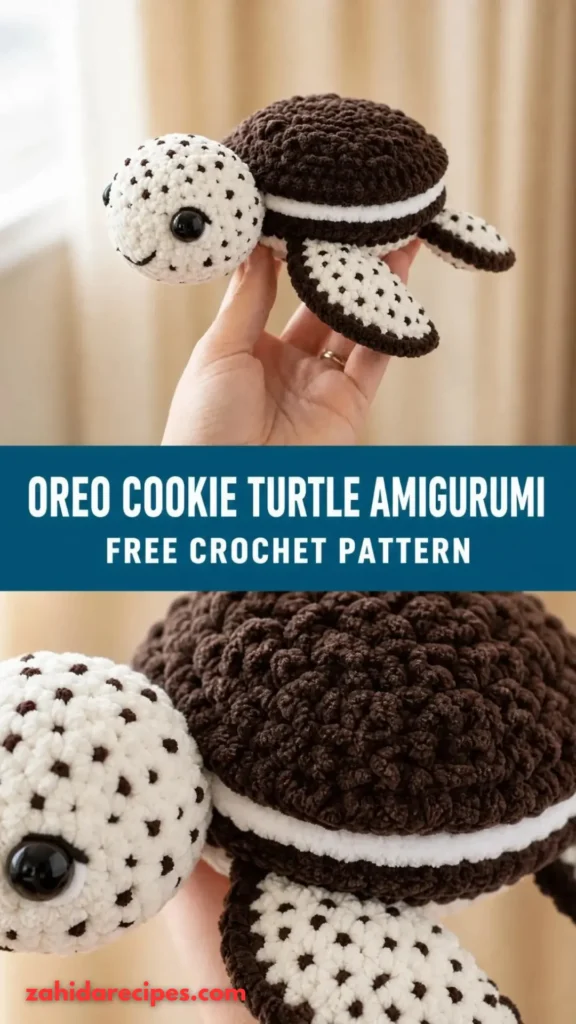
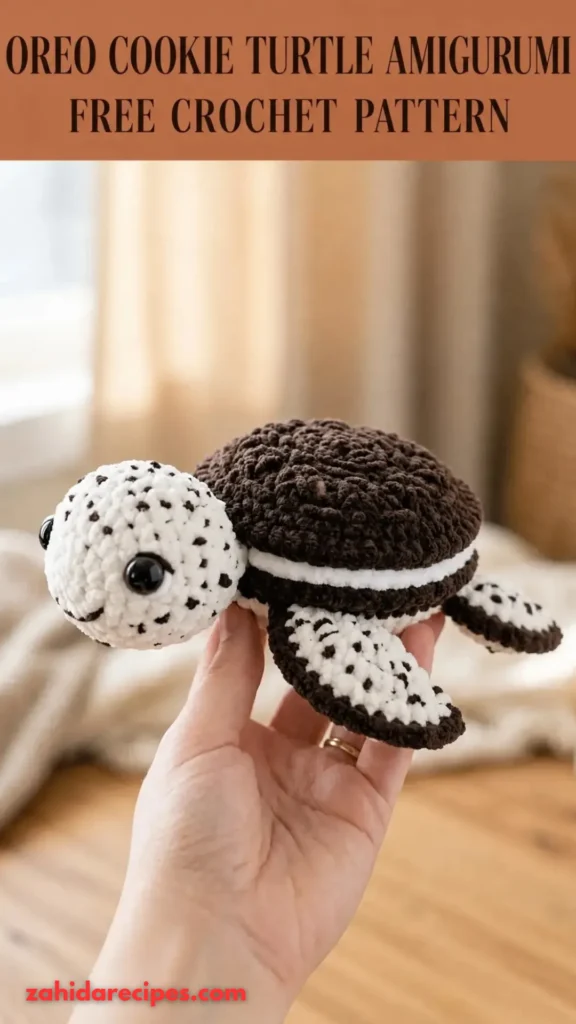
This pattern creates a small turtle with a rounded sandwich-cookie shell inspired by the classic chocolate-and-cream combination.
The turtle is worked in separate pieces and assembled at the end. You’ll crochet two dark cookie panels, a white cream center, four flippers, a small head, and a tiny tail.
The shell is the main attraction. Two dark brown or nearly black circular panels sandwich a white crochet layer, creating the appearance of a chocolate cookie filled with cream.
The finished turtle measures approximately 5 inches (12.5 cm) long and 4.5 inches (11.5 cm) wide, depending on your yarn, hook, and tension.
Skill Level: Confident beginner to intermediate.
You should be comfortable working in continuous rounds, increasing, decreasing, and sewing amigurumi pieces together. The individual components are beginner-friendly, but careful assembly makes all the difference.
Materials You’ll Need
Yarn
Use DK or light worsted-weight cotton or acrylic yarn.
- Color A – Cookie Black: Approximately 45–50 yards (41–46 meters) for the top and bottom shell panels.
- Color B – Cream White: Approximately 20–25 yards (18–23 meters) for the filling and decorative details.
- Color C – Warm Gray or Light Beige: Approximately 15–20 yards (14–18 meters) for the head, flippers, and tail.
You can also use black yarn for the head and flippers if you want the entire turtle to resemble a chocolate cookie.
Allow approximately 15% extra yarn for gauge variation.
Crochet Hooks
- 2.5 mm crochet hook for tightly stitched amigurumi pieces.
- 3 mm crochet hook for decorative details, if needed.
Additional Supplies
- Polyester fiberfill stuffing.
- Two 6 mm black safety eyes.
- Tapestry needle.
- Stitch markers.
- Scissors.
- Black embroidery thread.
- White embroidery thread.
- Pins for positioning pieces.
- Optional white felt for additional cookie decoration.
Safety note: If making this turtle for a child under three, embroider the eyes instead of using safety eyes. Always follow appropriate toy-safety requirements.
Abbreviations and Terminology
This pattern uses US crochet terminology.
| Abbreviation | Meaning |
|---|---|
| MR | Magic ring |
| ch | Chain |
| sc | Single crochet |
| inc | Increase (2 sc in one stitch) |
| dec | Invisible decrease |
| sl st | Slip stitch |
| hdc | Half double crochet |
| dc | Double crochet |
| BLO | Back loops only |
| FLO | Front loops only |
| st(s) | Stitch(es) |
| rnd | Round |
| FO | Fasten off |
Stitch Explanations
- Magic Ring (MR): Make an adjustable loop, crochet into it, and pull the yarn tail to close the center.
- Single Crochet (sc): Insert hook, yarn over, pull up a loop, yarn over again, and pull through both loops.
- Increase (inc): Work two single crochet stitches into the same stitch.
- Invisible Decrease (dec): Insert hook through the front loops of the next two stitches, yarn over, pull through both loops, yarn over, and pull through both loops on the hook.
- Slip Stitch (sl st): Insert hook into the stitch, yarn over, and pull through the stitch and the loop on your hook.
- Half Double Crochet (hdc): Yarn over, insert hook, pull up a loop, yarn over, and pull through all three loops.
- Double Crochet (dc): Yarn over, insert hook, pull up a loop, yarn over and pull through two loops, then yarn over and pull through the remaining two loops.
Important: Work in continuous rounds unless instructed otherwise. Do not join rounds with slip stitches. Use a stitch marker to identify the first stitch of each round.
Turning chains are not required for the main amigurumi pieces.
Gauge
Gauge is not critical for this project, but tight stitches are essential.
For a good starting point, aim for approximately 22 single crochet stitches and 24 rounds in a 4-inch (10 cm) square using your chosen yarn and a 2.5 mm hook.
Your stuffing should not be visible through the stitches.
If your fabric has noticeable gaps, switch to a smaller hook. If the stitches feel too tight and difficult to work into, try a slightly larger hook.
Main Pattern Instructions
1. Crochet the Top Oreo Cookie Shell
Make 1 using Color A – Cookie Black.
This circular piece forms the upper chocolate cookie layer. Keep your stitches even so the shell lies flat.
Round 1: Make 6 sc into a magic ring. (6)
Round 2: Inc in each stitch around. (12)
Round 3: Repeat (sc, inc) around. (18)
Round 4: Repeat (2 sc, inc) around. (24)
Round 5: Repeat (3 sc, inc) around. (30)
Round 6: Repeat (4 sc, inc) around. (36)
Round 7: Repeat (5 sc, inc) around. (42)
Round 8: Repeat (6 sc, inc) around. (48)
Round 9: Repeat (7 sc, inc) around. (54)
Round 10: Repeat (8 sc, inc) around. (60)
Round 11: Sc around in BLO. (60)
Round 12: Sc around normally. (60)
FO and leave a long sewing tail.
The BLO round creates a subtle ridge that gives the cookie shell a more defined edge.
2. Crochet the Bottom Oreo Cookie Shell
Make 1 using Color A – Cookie Black.
Repeat Rounds 1–10 of the top shell.
Round 11: Sc around in BLO. (60)
Round 12: Sc around normally. (60)
Round 13: Repeat (9 sc, inc) around. (66)
FO and weave in the short yarn end.
The bottom panel is slightly wider to provide a little extra space around the cream filling.
3. Crochet the White Cream Filling
Make 1 using Color B – Cream White.
This piece sits between the two dark cookie panels.
Round 1: Make 6 sc into a magic ring. (6)
Round 2: Inc in each stitch around. (12)
Round 3: Repeat (sc, inc) around. (18)
Round 4: Repeat (2 sc, inc) around. (24)
Round 5: Repeat (3 sc, inc) around. (30)
Round 6: Repeat (4 sc, inc) around. (36)
Round 7: Repeat (5 sc, inc) around. (42)
Round 8: Repeat (6 sc, inc) around. (48)
Round 9: Repeat (7 sc, inc) around. (54)
Round 10: Repeat (8 sc, inc) around. (60)
Round 11: Sc around. (60)
FO, leaving a long sewing tail.
The cream filling should look like a slightly raised circular cushion. You can add a small amount of stuffing before closing the shell, but avoid making it too puffy.
4. Crochet the Turtle Head
Make 1 using Color C – Warm Gray or Light Beige.
The head is worked in continuous rounds from the nose toward the back.
Round 1: Make 6 sc into a magic ring. (6)
Round 2: Inc in each stitch around. (12)
Round 3: Repeat (sc, inc) around. (18)
Round 4: Repeat (2 sc, inc) around. (24)
Rounds 5–7: Sc around. (24)
Round 8: Repeat (2 sc, dec) around. (18)
Round 9: Sc around. (18)
Insert the safety eyes between Rounds 5 and 6, approximately 6 stitches apart.
Begin stuffing firmly but gently.
Round 10: Repeat (sc, dec) around. (12)
Round 11: Dec around. (6)
FO and close the remaining opening.
Make sure the eyes are symmetrical before finishing the head.
Embroider the Face
Using black embroidery thread:
- Add a small curved smile beneath the eyes.
- Add two tiny nostril details near the front of the face if desired.
- Use a little pink or blush-colored yarn to create subtle cheeks.
Keep the facial details simple. The cookie shell is already doing plenty of talking!
5. Crochet the Four Turtle Flippers
Make 4 using Color C – Warm Gray or Light Beige.
These little flippers should be slightly flattened rather than completely round.
Round 1: Make 6 sc into a magic ring. (6)
Round 2: Inc in each stitch around. (12)
Round 3: Repeat (sc, inc) around. (18)
Round 4: Sc around. (18)
Round 5: Repeat (sc, dec) around. (12)
Round 6: Sc around. (12)
Lightly stuff the rounded end only.
Round 7: Flatten the opening and crochet through both layers using 6 sc.
FO, leaving a long sewing tail.
Repeat until you have four matching flippers.
The flippers should have a soft oval shape, with a wider outer end and a narrow attachment point.
6. Crochet the Tiny Turtle Tail
Make 1 using Color C.
Round 1: Make 4 sc into a magic ring. (4)
Round 2: Sc around. (4)
Round 3: Repeat (sc, inc) twice. (6)
Round 4: Sc around. (6)
FO, leaving a long tail for sewing.
Do not stuff the tail. Its small pointed shape should remain flexible.
Special Techniques and Decorative Details
Adding the Oreo Cookie Texture
A plain black circle already looks like a cookie, but a few small decorative details make it much more convincing.
Using white embroidery thread, add tiny decorative dashes and simple geometric marks across the top shell.
You can also create small raised dots with French knots or tiny embroidered circles.
For a more traditional sandwich-cookie appearance, keep the decoration subtle rather than covering the entire shell.
Creating a Raised Cream Edge
To emphasize the white filling, use Color B and work a decorative round around the exposed edge.
Attach white yarn near the seam between the shell panels.
Decorative Round: Work 1 sc in each available stitch around the visible cream edge. Join with a sl st and FO.
If the cream layer is already firmly secured, skip this step rather than forcing additional stitches into a tight seam.
Optional Chocolate Cookie Crumbs
For an extra playful finish, use a small amount of dark brown embroidery thread to add a few tiny crumb details around the top shell.
Keep them spaced apart so the surface still looks neat.
Assembly and Finishing
This is where your Oreo Cookie Turtle Amigurumi finally comes together!
Take your time with assembly. Good placement makes a huge difference in how professional the finished toy looks.
Step 1: Position the Cream Filling
Place the white cream circle between the two dark cookie panels.
Align the centers and pin the pieces together.
The white layer should be visible around the edge, creating the classic sandwich-cookie effect.
Step 2: Join the Cookie Shell
Using Color A, sew the top and bottom shell panels together around their outer edges.
As you sew, catch the cream layer between them.
Before closing the final section, add a small amount of polyester stuffing if needed.
Do not overstuff. The shell should remain rounded but relatively flat.
Secure the seam and weave in the yarn ends.
Step 3: Attach the Turtle Head
Place the head at one end of the shell.
Position it so approximately one-third of the head extends beyond the cookie edge.
Pin it in place and sew securely through the base of the head and the shell seam.
The face should point slightly upward.
Step 4: Attach the Four Flippers
Place two flippers on each side of the shell.
- Front flippers: Attach near the head, slightly angled outward.
- Back flippers: Attach near the opposite end, angled slightly backward.
Make sure the turtle sits evenly when placed on a flat surface.
Sew each flipper securely.
Step 5: Attach the Tail
Position the tiny tail at the back center of the shell.
Sew it securely and hide the yarn ends inside the body.
Step 6: Final Details
Check the face, shell, cream filling, and flipper placement.
Add any remaining embroidery details.
Gently shape the turtle with your hands, smoothing the stuffing and adjusting the shell until everything looks balanced.
Your Oreo-inspired turtle is finished!
Blocking and Care
Amigurumi generally requires very little blocking, especially when made with cotton or acrylic yarn.
If your shell panels look slightly uneven, gently shape them with your fingers before assembly.
For cotton yarn, you can lightly mist the individual shell panels and pin them into a circular shape until dry.
Avoid soaking a fully stuffed amigurumi toy.
Care Instructions
- Hand wash gently in cool water.
- Use a mild detergent.
- Avoid twisting or squeezing the toy.
- Press excess water out with a clean towel.
- Allow it to dry completely on a flat surface.
- Never hang the turtle while wet.
- Avoid high-temperature ironing or direct heat.
If you used safety eyes, embroidered details, or delicate embellishments, take extra care during washing.
Fit and Troubleshooting Tips
Even a tiny crochet turtle can have a few personality issues. Here are some simple fixes.
Why Is My Cookie Shell Curling?
Your stitches may be too tight, or you may not have enough increases.
Check your stitch counts after every increase round. If the shell still curls, try a slightly larger hook.
Why Does My Shell Look Wavy?
Too many increases can create ruffles.
Make sure you’re following the exact increase spacing. Each increase round should add six stitches.
Why Is the White Cream Filling Hidden?
The filling may be too small or positioned too deeply between the cookie panels.
Center it carefully and make sure a narrow white edge remains visible around the shell.
Why Does My Turtle Look Uneven?
The flippers may be attached at different heights.
Pin all four flippers before sewing. Check the turtle from the front, back, and sides.
Can I Make My Turtle Bigger?
Absolutely!
Use worsted-weight yarn with a 3.5 mm hook for a larger turtle. You may need additional yarn and slightly more stuffing.
For a smaller keychain version, use fine cotton yarn and a smaller hook. Make sure all stitches remain tight.
Can I Use Different Colors?
Of course! Try these combinations:
- Classic Oreo: Black, white, and light gray.
- Chocolate Mint: Dark brown, mint green, and white.
- Strawberry Cream: Pink, white, and chocolate brown.
- Golden Cookie: Golden yellow, cream, and beige.
You can even create an entire cookie turtle family!
Final Thoughts
I hope you had as much fun making this Oreo Cookie Turtle Amigurumi as I had imagining this little cookie-inspired creature!
I love crochet projects that combine familiar things in unexpected ways. A tiny turtle with a chocolate sandwich-cookie shell is definitely one of those designs that makes people smile.
The best part is that you can customize the colors, facial expression, and shell decorations to give every turtle its own personality.
Make one as a cute handmade gift, use a smaller version as a desk companion, or create several in different cookie flavors.
If you make this free Oreo Cookie Turtle Amigurumi crochet pattern, I’d love to see your finished creation. Share your project, show off your color combinations, and let your little cookie turtle find its way into the world!
Happy crocheting! ❤️





Leave a Reply
You must be logged in to post a comment.