

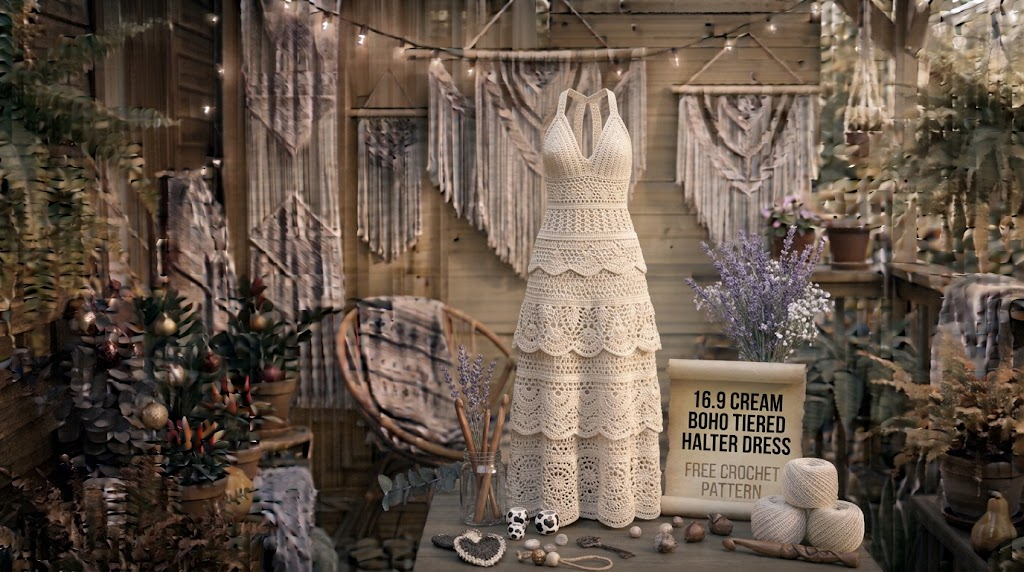
There is something special about a cream crochet dress. It has that effortless bohemian feeling that works beautifully for summer afternoons, beach holidays, outdoor celebrations, and relaxed weekend outings. I wanted to create a dress that felt feminine and comfortable without looking overly complicated.
When designing this piece, I imagined a fitted halter-style bodice paired with a softly flowing skirt. I also wanted each skirt layer to have its own gentle texture, so the finished dress would move beautifully instead of feeling like one heavy piece of crochet fabric.
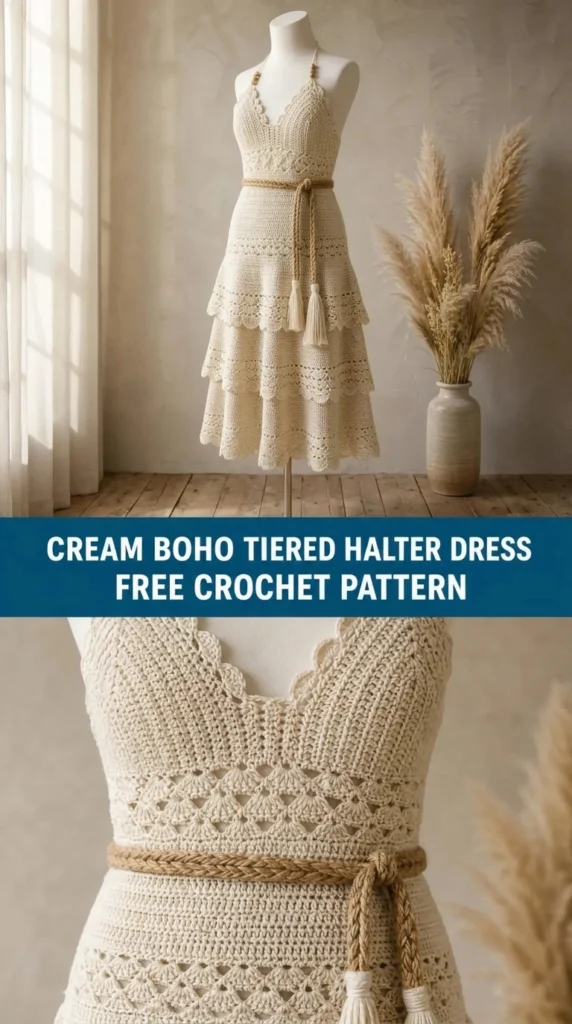
That inspiration became the Cream Boho Tiered Halter Dress Free Crochet Pattern. It features an adjustable halter neckline, a flattering fitted waist, three flowing skirt tiers, and delicate shell details that give it a romantic handmade finish.
About This Pattern
This cream boho crochet dress is worked from the top down, beginning with the halter bodice. The upper section is shaped with increases to create two triangular cups that join at the center front.
After completing the bodice, you will crochet the waist section and begin expanding the skirt. Three separate visual tiers create the flowing silhouette.
The dress combines solid stitches for coverage with open lace sections for breathability.
Skill Level: Intermediate
You should be comfortable with basic crochet stitches, working in rows and rounds, increasing, decreasing, and following stitch repeats.
Finished Sizes:
- Small: Bust 32–34 inches
- Medium: Bust 36–38 inches
- Large: Bust 40–42 inches
- XL: Bust 44–46 inches
Finished Length: Approximately 42–46 inches from the top edge to the hem, depending on size and desired skirt length.
The dress is designed with approximately 1–2 inches of negative ease through the bodice. The skirt has a relaxed, flowing fit.
Materials You’ll Need
Yarn
Choose a soft cotton or cotton-blend yarn to achieve comfortable drape and breathable fabric.
- Color A – Cream: Approximately 1,200–1,500 yards (1,097–1,372 meters), DK-weight cotton yarn.
- Color B – Optional Warm Ivory: Approximately 100–150 yards (91–137 meters) for decorative edging.
For the cleanest bohemian appearance, I recommend using one consistent cream shade throughout.
Allow 15% extra yarn for gauge variation, longer skirts, or additional edging.
Crochet Hooks
- 3.5 mm hook: Bodice and fitted waist.
- 4.0 mm hook: Main skirt and tier sections.
- 3.0 mm hook: Optional decorative edging.
Notions
- Tapestry needle
- Stitch markers
- Measuring tape
- Scissors
- Blocking mat
- Rust-resistant blocking pins
- Optional lightweight lining fabric
- Optional removable bra cups
Abbreviations and Terminology
All instructions use US crochet terminology.
- ch: Chain. Yarn over and pull through the loop.
- sl st: Slip stitch. Insert hook, yarn over, and pull through both loops.
- sc: Single crochet. Insert hook, yarn over, pull up a loop, yarn over, and pull through both loops.
- hdc: Half double crochet. Yarn over, insert hook, pull up a loop, yarn over, and pull through all three loops.
- dc: Double crochet. Yarn over, insert hook, pull up a loop, yarn over and pull through two loops twice.
- tr: Treble crochet. Yarn over twice, insert hook, pull up a loop, then work through two loops three times.
- sk: Skip the indicated stitch.
- sp: Space.
- st(s): Stitch(es).
- rep: Repeat.
- RS: Right side.
- WS: Wrong side.
- BLO: Back loop only.
- FO: Fasten off.
Shell: Work 5 dc into the same stitch or space.
V-stitch: Work 1 dc, ch 1, and 1 dc into the same stitch.
Turning chains do not count as stitches unless a step explicitly says they do.
Gauge
Gauge is important because the fitted bodice needs to sit securely without stretching excessively.
Using a 3.5 mm hook:
- 18 dc = 4 inches
- 10 rows = 4 inches
Make a small swatch using double crochet stitches.
Wash and dry your swatch before measuring because cotton yarn can relax after washing.
If your swatch is wider than 4 inches, try a smaller hook. If it is narrower, move up one hook size.
Main Pattern Instructions

Part 1: Triangle Halter Bodice
The bodice consists of two matching triangular cups.
Use Color A and the 3.5 mm hook.
Make two cups.
Row 1: Ch 4. Work 2 dc into the fourth chain from the hook. Turn. (3 dc)
Row 2: Ch 2. Work 2 dc into the first stitch, dc across to the final stitch, and work 3 dc into the final stitch. Turn. (7 dc)
Row 3: Ch 2. Work 2 dc into the first stitch, dc across to the final stitch, and work 3 dc into the final stitch. Turn. (11 dc)
Row 4: Repeat Row 3. (15 dc)
Row 5: Repeat Row 3. (19 dc)
Row 6: Repeat Row 3. (23 dc)
Continue increasing in the same way until the cup measures approximately:
- Small: 6.5 inches wide
- Medium: 7 inches wide
- Large: 7.5 inches wide
- XL: 8 inches wide
The triangular shape develops naturally through the increases at both outer edges.
Fasten off the first cup.
Make the second cup in exactly the same way.
Part 2: Joining the Cups
Place both cups with the right sides facing upward.
Position them side by side, with the inner edges touching.
Using the 3.5 mm hook:
Joining Row: Attach yarn to the outer edge of the first cup. Work sc evenly across the lower edge of the first cup, ch 2, then work sc evenly across the lower edge of the second cup.
The chain-2 space creates a small separation at the center front.
Fasten off.
Try the bodice against your body or a well-fitting top. Adjust the spacing between cups if necessary before continuing.
Part 3: Bodice Edging
Join Color A at the upper edge of either cup.
Round 1: Ch 1. Work sc evenly around both cups, including the center joining area. Place 3 sc at each cup point to keep the edges smooth. Sl st to the first sc.
Round 2: Ch 1. Work hdc around the neckline and upper edges. Sl st to join.
Keep the stitches even without pulling tightly.
Part 4: Halter Neck Straps
The straps are made separately and attached to the upper corners of the cups.
Make two straps.
Row 1: Ch 5. Hdc in the second chain from the hook and across. Turn. (4 hdc)
Rows 2–45: Ch 1, hdc across. Turn.
Adjust the strap length according to your body and preferred neckline height.
Attach one strap securely to the upper corner of each cup.
For a comfortable fit, make a small fitting check before weaving in the ends.
Part 5: Fitted Waistband
Join yarn to the bottom edge of the joined bodice.
Using the 3.5 mm hook:
Round 1: Ch 2. Work dc evenly across the lower bodice edge. Join with sl st.
Round 2: Ch 2. Work dc in each stitch around. Join.
Round 3: Ch 2. Work dc in BLO around. Join.
Round 4: Ch 2. Work dc in each stitch around. Join.
Repeat Round 4 until the waistband measures approximately 2.5 inches.
The BLO round creates a subtle horizontal ridge that separates the fitted bodice from the skirt.
Cream Boho Tiered Halter Dress Skirt Pattern
The skirt is worked in joined rounds from the waistband downward.
Change to the 4.0 mm hook for improved drape.
Part 6: First Skirt Section
Round 1: Ch 2. Work 2 dc into every fifth stitch around, placing one dc in each remaining stitch. Join.
This creates a gentle increase for the first skirt section.
Round 2: Ch 2. Work dc in every stitch around. Join.
Round 3: Ch 2. Work the following repeat:
- Dc in the next 3 stitches.
- Ch 1.
- Sk 1 stitch.
Repeat around and join.
Round 4: Ch 2. Work dc in every dc and 1 dc in every chain space. Join.
Repeat Rounds 3 and 4 four times.
The alternating solid and open rows create a lightweight lace texture.
Part 7: First Tier
The first tier adds fullness without making the dress overly bulky.
Round 1: Ch 2. Work 2 dc into every fourth stitch around. Join.
Round 2: Ch 2. Dc in every stitch around. Join.
Round 3: Ch 2. Work the following shell repeat:
- Sk 2 stitches.
- Work 5 dc into the next stitch.
- Sk 2 stitches.
- Sc in the next stitch.
Repeat around. Adjust the final repeat slightly if needed to fit the round evenly.
Round 4: Sl st to the center dc of the next shell. Ch 3. Work 4 dc into the same shell center. Sc into the next shell center.
Repeat around to create another decorative shell round.
The raised shells form a soft scalloped texture that gives the dress its romantic boho character.
Part 8: Second Skirt Section
Work another section of solid and lace stitches.
Round 1: Ch 2. Dc in every stitch around. Join.
Round 2: Ch 2. Dc in the next 4 stitches, ch 1, sk 1 stitch. Repeat around. Join.
Round 3: Ch 2. Dc in every dc and chain space. Join.
Round 4: Repeat Round 2.
Round 5: Repeat Round 3.
Continue until the section measures approximately 5–6 inches.
For a more flowing dress, add one or two additional lace repeats.
Part 9: Second Tier
Increase the stitch count to create the next skirt layer.
Round 1: Ch 2. Work 2 dc into every fifth stitch around. Join.
Round 2: Ch 2. Dc in each stitch around. Join.
Round 3: Ch 2. Work a shell pattern using the following repeat:
- Sk 2 stitches.
- Work 5 dc into the next stitch.
- Sk 2 stitches.
- Sc in the next stitch.
Repeat around.
Round 4: Ch 2. Dc in every stitch around, working 3 dc into the center stitch of each shell group where needed to maintain fullness.
This produces a decorative transition between the second and final skirt sections.
Special Techniques and Additional Elements
Part 10: Third Tier and Final Skirt
The final tier should feel airy and full.
Round 1: Ch 2. Work 2 dc into every fourth stitch around. Join.
Round 2: Ch 2. Dc in every stitch around. Join.
Round 3: Ch 3. Work 1 tr in the next stitch, ch 1, sk 1 stitch. Repeat around. Join.
Round 4: Ch 2. Work dc in every treble crochet and chain space. Join.
Repeat Rounds 3 and 4 twice.
Continue with plain dc rounds until the dress reaches your preferred length.
For a standard maxi-style finish, the complete skirt should measure approximately 32–36 inches from the waistband.
Part 11: Decorative Shell Hem
Use the 3.0 mm or 3.5 mm hook.
Round 1: Ch 1. Work sc evenly around the bottom edge. Join.
Round 2: Ch 1. Sk 1 stitch, work 5 dc into the next stitch, sk 1 stitch, sc into the next stitch.
Repeat around.
This creates a delicate scalloped hem that complements the tiered skirt.
Fasten off and weave in all ends.
Part 12: Optional Waist Tie
A crochet waist tie can make the dress easier to adjust.
Ch 180–220, depending on your preferred tie length.
Sl st into the second chain from the hook and across.
Fasten off.
Weave the tie through the waistband stitches, keeping both ends centered at the back or front.
Tie it into a soft bow.
Assembly and Finishing
Lay the dress flat and check that both bodice cups are symmetrical.
Use your tapestry needle to secure the straps and any loose joining sections.
Check the tier transitions. They should sit evenly around the skirt without twisting.
If you want additional decoration, consider adding a small number of wooden beads to the strap ends. Make sure they are attached securely and do not interfere with comfortable wear.
For extra coverage, a lightweight cream-colored cotton lining can be sewn into the bodice and upper skirt. This is especially helpful if you use an open lace stitch pattern.
Try the dress on before completing the final finishing steps. Check the neckline, waist placement, and skirt length.
Blocking and Care
Cotton yarn responds beautifully to gentle wet blocking.
Fill a basin with cool water and a small amount of mild detergent. Submerge the dress and allow it to soak for approximately 10–15 minutes.
Gently squeeze out excess water without twisting.
Lay the dress flat on a clean towel and roll it to remove additional moisture.
Transfer it to a blocking mat and arrange the bodice, tiers, and scalloped hem into their intended shapes.
Allow the dress to dry completely before wearing.
Care Tips:
- Hand wash in cool water when possible.
- Use mild detergent.
- Avoid harsh wringing.
- Dry flat.
- Never hang the dress while wet because the cotton skirt can stretch under its own weight.
- Store folded rather than hanging for long periods.
Fit and Troubleshooting Tips
The bodice feels too loose: Use a smaller hook or reduce the number of increase rows slightly. Check your bust measurement before making both cups.
The cups curl at the edges: Your tension may be too tight. Try a larger hook and check the increase placement.
The skirt looks too narrow: Add additional increase stitches at the beginning of the tier sections.
The skirt ruffles excessively: Too many increases may be creating unnecessary fullness. Remove an increase round or distribute the increases more gradually.
The tiers look uneven: Use stitch markers to divide each round into four equal sections. Check the number of stitches before beginning the next tier.
The halter straps feel uncomfortable: Increase their width by adding one or two stitches to the starting chain.
The lace looks too open: Use a smaller hook or add a lining underneath the dress.
Final Thoughts
I love how this Cream Boho Tiered Halter Dress combines a simple fitted halter bodice with a beautifully flowing, layered skirt. The cream color keeps the design timeless, while the shell details and lace sections give it that relaxed handmade bohemian character.
Although this project takes patience, especially when working through the different skirt tiers, the finished dress is worth the effort. You can customize the length, adjust the straps, add a waist tie, or keep everything simple for a more understated look.
I hope you enjoy making this Cream Boho Tiered Halter Dress Free Crochet Pattern as much as I enjoyed designing it. If you create your own version, share your finished dress in the comments or save your favorite progress photos on Pinterest.
Happy crocheting! ❤️


Leave a Reply
You must be logged in to post a comment.