


There’s something magical about jellyfish. They float through the water like tiny underwater lanterns, with their delicate tentacles trailing behind them. I’ve always loved their dreamy appearance, especially the way certain jellyfish seem to glow in the dark.
That was the inspiration behind this Glow in the Dark Jellyfish Amigurumi. I wanted to create something soft, playful, and a little magical. Instead of making an ordinary jellyfish plushie, I decided to use glow-in-the-dark yarn for the tentacles and decorative details.
The result is an adorable little ocean friend that looks charming during the day and develops a beautiful luminous effect after absorbing light. If you enjoy making cute amigurumi toys, this project is a fun addition to your crochet collection!
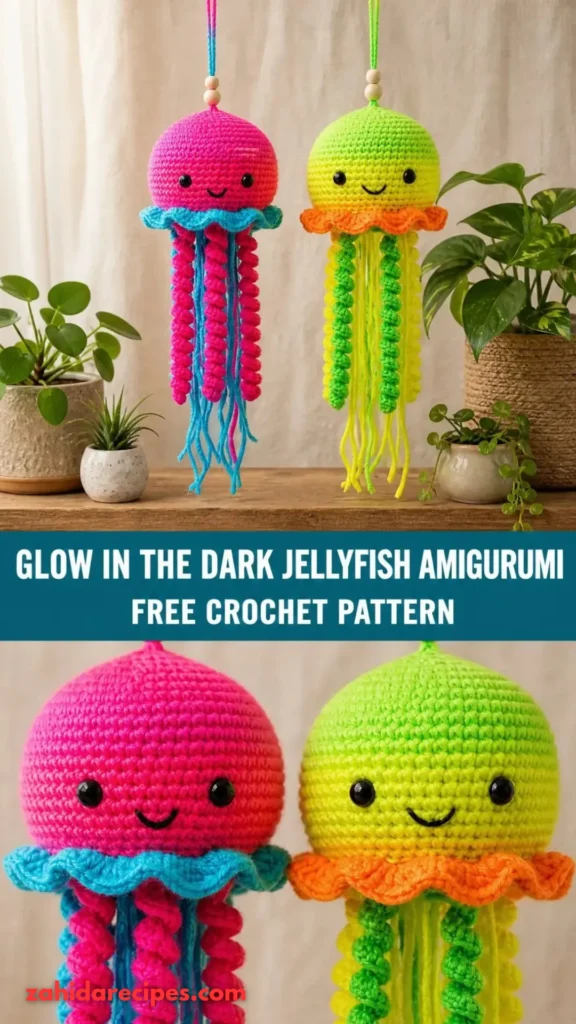
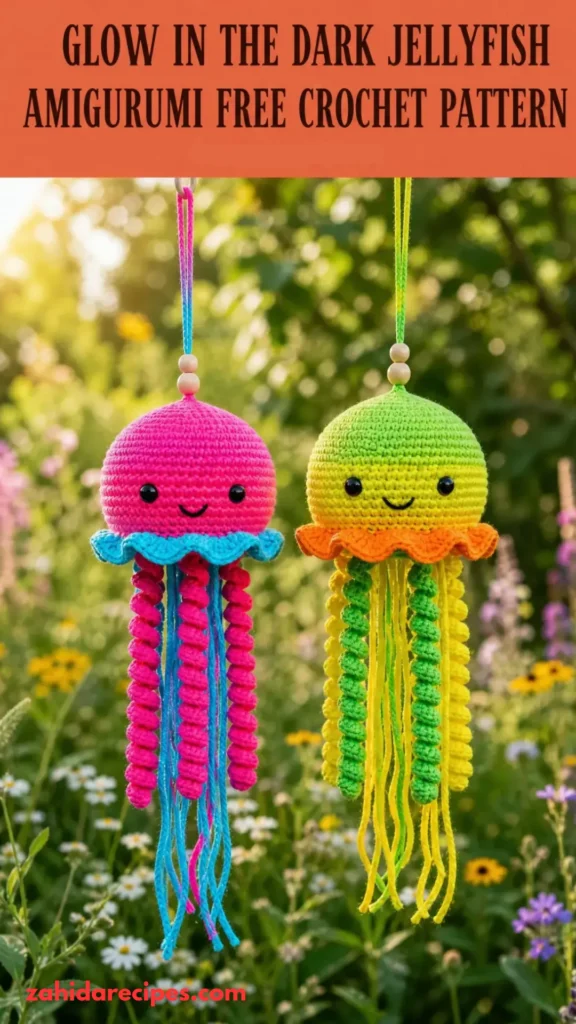
This jellyfish amigurumi features a rounded dome-shaped head, a soft white underside, embroidered facial details, and several curly tentacles.
The body is crocheted in continuous rounds, starting at the top and gradually increasing before working downward. The underside is completed separately and attached after stuffing. The tentacles are made individually and secured around the lower edge.
The special feature is the luminous yarn. You can use glow-in-the-dark yarn for the tentacles or combine regular cotton yarn with luminous strands for a subtle glowing effect.
- Skill Level: Beginner to intermediate.
- Finished Size: Approximately 6–7 inches tall, including tentacles.
- Construction: Crocheted dome, separate underside, individual tentacles, and embroidered facial features.
The finished jellyfish is soft and lightweight, making it suitable as a decorative plushie, handmade gift, or ocean-themed nursery decoration. If you’re making it for a young child, avoid loose beads and plastic safety eyes.
Materials You’ll Need
Yarn
- Color A – Lavender: Approximately 45 yards of worsted-weight cotton yarn for the upper dome.
- Color B – White: Approximately 25 yards of worsted-weight cotton yarn for the underside.
- Color C – Glow Yarn: Approximately 35–45 yards of glow-in-the-dark yarn for the tentacles.
- Color D – Pale Pink: Small amount of cotton yarn for cheek details.
For a stronger glowing effect, choose dedicated luminous yarn rather than ordinary white yarn. Some glow yarns contain different luminous materials and vary in brightness and charging time.
Allow approximately 15% extra yarn if your tension tends to be loose or you plan to make longer tentacles.
Crochet Hooks
- 3.5 mm crochet hook for the main body.
- 3.0 mm crochet hook for smaller tentacles if needed.
- 2.5 mm crochet hook for tighter decorative details.
Additional Supplies
- Polyester fiberfill stuffing.
- Tapestry needle.
- Stitch markers.
- Scissors.
- Black embroidery thread.
- Pink embroidery thread.
- Row counter (optional).
- Pins for positioning the tentacles.
Abbreviations and Terminology
This pattern uses US crochet terminology.
| Abbreviation | Meaning |
|---|---|
| MR | Magic ring |
| ch | Chain |
| sc | Single crochet |
| inc | Increase (2 sc in one stitch) |
| dec | Invisible decrease |
| sl st | Slip stitch |
| BLO | Back loop only |
| FLO | Front loop only |
| st | Stitch |
| sts | Stitches |
| rnd | Round |
| FO | Fasten off |
Stitch Explanations
Magic Ring (MR): Make an adjustable loop, crochet the required stitches into it, and pull the yarn tail to close the center.
Single Crochet (sc): Insert the hook into the stitch, yarn over, pull up a loop, yarn over again, and pull through both loops.
Increase (inc): Work two single crochet stitches into the same stitch.
Invisible Decrease (dec): Insert the hook through the front loop of each of the next two stitches, yarn over, pull through both front loops, then yarn over and pull through the remaining two loops.
Slip Stitch (sl st): Insert the hook into the stitch, yarn over, and pull through both the stitch and the loop on your hook.
Back Loop Only (BLO): Work into the back loop of the stitch instead of both loops.
Front Loop Only (FLO): Work into the front loop of the stitch instead of both loops.
Important: Work in continuous rounds unless instructed otherwise. Do not join rounds with a slip stitch. Use a stitch marker to identify the first stitch of every round.
Turning chains are not needed for the main amigurumi body.
Gauge
Gauge isn’t extremely important for this decorative project, but your stitches should be tight enough that stuffing cannot escape.
For a small gauge swatch, crochet approximately 18 single crochet stitches across 20 rows using your 3.5 mm hook.
Your swatch should measure approximately 4 × 4 inches.
If your stitches look loose or you can see stuffing through the fabric, switch to a smaller hook.
If your fabric feels stiff and difficult to crochet, try a slightly larger hook while maintaining a reasonably tight fabric.
Main Pattern Instructions
Part 1: Crochet the Jellyfish Dome
The dome creates the rounded top of your jellyfish. We’ll use lavender yarn for a soft underwater-inspired appearance.
With Color A (Lavender), begin with a magic ring.
Round 1: Work 6 sc into MR. (6)
Round 2: Inc in each stitch around. (12)
Round 3: Repeat (1 sc, inc) around. (18)
Round 4: Repeat (2 sc, inc) around. (24)
Round 5: Repeat (3 sc, inc) around. (30)
Round 6: Repeat (4 sc, inc) around. (36)
Round 7: Repeat (5 sc, inc) around. (42)
Round 8: Repeat (6 sc, inc) around. (48)
At this point, your work should resemble a flat circular shape.
Round 9: Sc in each stitch around. (48)
Round 10: Sc in each stitch around. (48)
Round 11: Sc in each stitch around. (48)
Round 12: Sc in each stitch around. (48)
Round 13: Sc in each stitch around. (48)
Round 14: Sc in each stitch around. (48)
The dome should now begin curving downward.
Round 15: Repeat (6 sc, dec) around. (42)
Round 16: Sc in each stitch around. (42)
Round 17: Repeat (5 sc, dec) around. (36)
Round 18: Sc in each stitch around. (36)
Round 19: Repeat (4 sc, dec) around. (30)
Before continuing, gently shape the dome with your fingers.
The top should be rounded rather than pointed. Add a little stuffing if you prefer a firmer head, but leave enough room for attaching the underside.
Round 20: Repeat (3 sc, dec) around. (24)
Round 21: Repeat (2 sc, dec) around. (18)
FO, leaving a long tail for sewing if you are attaching a separately crocheted underside.
Part 2: Crochet the White Underside
The underside creates the soft bell-like appearance of the jellyfish.
With Color B (White), make a magic ring.
Round 1: Work 6 sc into MR. (6)
Round 2: Inc in each stitch around. (12)
Round 3: Repeat (1 sc, inc) around. (18)
Round 4: Repeat (2 sc, inc) around. (24)
Round 5: Repeat (3 sc, inc) around. (30)
Round 6: Repeat (4 sc, inc) around. (36)
Round 7: Repeat (5 sc, inc) around. (42)
Round 8: Repeat (6 sc, inc) around. (48)
Round 9: Sc in each stitch around. (48)
FO, leaving a long sewing tail.
The underside should be a flat, slightly curved circular panel. It will sit beneath the lavender dome.
Part 3: Crochet the Curly Tentacles
This is my favorite part of the project!
The tentacles are what make the jellyfish look playful and give it that recognizable floating underwater appearance.
We’ll make eight tentacles in total:
- Four longer curly tentacles.
- Four shorter curly tentacles.
Use Color C (Glow Yarn).
Long Curly Tentacles – Make 4
Step 1: Ch 26.
Step 2: Starting in the second chain from the hook, work 2 sc into every chain.
Step 3: Continue along the chain until the end.
Your crochet strip should naturally curl into a spiral.
FO, leaving a long tail for sewing.
Short Curly Tentacles – Make 4
Step 1: Ch 18.
Step 2: Starting in the second chain from the hook, work 2 sc into every chain.
Step 3: Continue to the end of the chain.
FO, leaving a long tail for sewing.
Adjusting the Tentacle Shape
If your tentacles curl too tightly, try working only 2 sc into selected chains rather than every chain.
If they remain too straight, use a slightly smaller hook or increase the number of stitches per chain.
For a more natural jellyfish appearance, vary the direction of the curls when attaching the tentacles.
Special Techniques and Additional Elements
Adding a Glow-in-the-Dark Effect
The luminous tentacles are the main attraction of this design.
To get the best result:
- Use yarn specifically labeled glow-in-the-dark.
- Expose the finished tentacles to bright light before displaying the jellyfish in darkness.
- Follow the manufacturer’s instructions for charging the yarn.
- Test a small sample before completing the project.
Some glow yarns appear nearly white or pale green during daylight but produce a greenish or bluish glow in darkness.
The strength and duration of the glow depend on the yarn composition, thickness, and exposure to light.
You can also add a few small luminous surface-crochet details around the dome.
Adding Decorative Surface Details
For an extra magical appearance, use your glow yarn to add small decorative lines.
With a tapestry needle, carefully embroider a few tiny stars or curved lines across the lavender dome.
Keep the decorations small and evenly spaced.
Avoid making the surface too busy. The tentacles should remain the main feature.
Embroidering the Face
A cute face gives this jellyfish its personality.
Use black embroidery thread.
- Place two eyes on the front of the dome.
- Keep approximately 5–6 stitches between the eyes.
- Embroider each eye using a few small horizontal stitches.
- Add a tiny curved smile between the eyes.
- Use pink thread to create two small cheek details.
Position the face before attaching the underside so you can easily secure the embroidery knots inside the body.
For a toy intended for a young child, embroidered facial features are preferable to small detachable accessories.
Assembly and Finishing
Now comes the exciting part: bringing all the individual pieces together!
Step 1: Attach the Underside
Place the white circular panel beneath the lavender dome.
Align the outer edges carefully.
Using your tapestry needle and the long white yarn tail, sew the two pieces together with small, even stitches.
Leave a small opening for stuffing.
Step 2: Add Stuffing
Gently fill the dome with polyester fiberfill.
Start with small amounts and distribute the stuffing evenly.
Avoid packing it too tightly because the dome should retain its soft, rounded shape.
Close the remaining opening with your tapestry needle.
Weave in the yarn ends securely.
Step 3: Position the Tentacles
Arrange the tentacles around the lower edge of the white underside.
I recommend alternating long and short tentacles.
- Long tentacle.
- Short tentacle.
- Long tentacle.
- Short tentacle.
Repeat around the entire lower edge.
Pin everything in place before sewing.
This makes it easier to check the spacing and ensure that the jellyfish looks balanced.
Step 4: Sew the Tentacles
Use the long yarn tails to attach each tentacle securely.
Sew the top of each tentacle to the underside, making several small stitches through the base.
Make sure the tentacles hang freely rather than pointing upward.
Once all eight are attached, gently adjust their curls using your fingers.
Step 5: Final Facial Details
Check the placement of the eyes, smile, and cheeks.
If necessary, add a few extra stitches to make the facial expression clearer.
Finally, weave in all remaining yarn ends.
Your Glow in the Dark Jellyfish Amigurumi is complete!
Blocking and Care
Amigurumi usually doesn’t need traditional blocking.
However, you can gently shape the dome and tentacles with your hands after completing the project.
If your yarn is cotton, lightly steam the tentacles from a safe distance only if the yarn manufacturer’s instructions permit it. Never place a hot iron directly against glow yarn.
Cleaning Instructions
To keep your jellyfish looking lovely:
- Spot-clean small marks with a damp cloth.
- Hand-wash gently when the yarn label allows.
- Use mild detergent.
- Avoid twisting or squeezing the plushie.
- Dry flat on a clean towel.
- Never hang the jellyfish while wet.
- Avoid high-temperature drying.
Glow-in-the-dark yarn may lose some luminous performance if exposed to unsuitable cleaning chemicals or excessive heat. Always follow its care label.
Fit and Troubleshooting Tips
1. My Jellyfish Dome Looks Too Flat
Your dome may need additional shaping.
Check your increase rounds and make sure you’re working the correct number of stitches.
You can also add a little more stuffing to create a rounded appearance.
2. Stuffing Is Showing Through the Stitches
Your hook may be too large.
Try a 3.0 mm hook instead of 3.5 mm and maintain consistent tension.
3. My Tentacles Aren’t Curling
Make sure you’re placing two single crochet stitches into each chain.
If the tentacles are still too straight, try a smaller hook.
4. The Jellyfish Looks Uneven
Uneven tentacle placement can make the entire toy look unbalanced.
Pin the tentacles around the underside before sewing them permanently.
5. The Glow Isn’t Very Bright
Glow yarn needs exposure to light before it produces a visible glow.
Try charging it under a bright light source according to the manufacturer’s instructions.
Remember that glow brightness naturally fades over time and varies between yarn types.
6. I Want a Larger Jellyfish
You can use bulky yarn and a larger hook to create a bigger plushie.
Keep your stitches tight enough to prevent stuffing from showing.
You can also increase the tentacle length by adding more chains.
Final Thoughts
I absolutely love how this Glow in the Dark Jellyfish Amigurumi combines a cute handmade plushie with a little bit of nighttime magic.
The rounded lavender dome, embroidered smile, and curly luminous tentacles create a charming ocean-inspired design that feels special without requiring complicated techniques.
You can experiment with different colors, make the tentacles longer, or create an entire family of jellyfish in different shades.
If you make this free crochet pattern, I’d love to see your finished jellyfish! Share your creation, save the pattern to Pinterest, and let your imagination take you somewhere magical beneath the sea.
Happy crocheting!



Leave a Reply
You must be logged in to post a comment.