


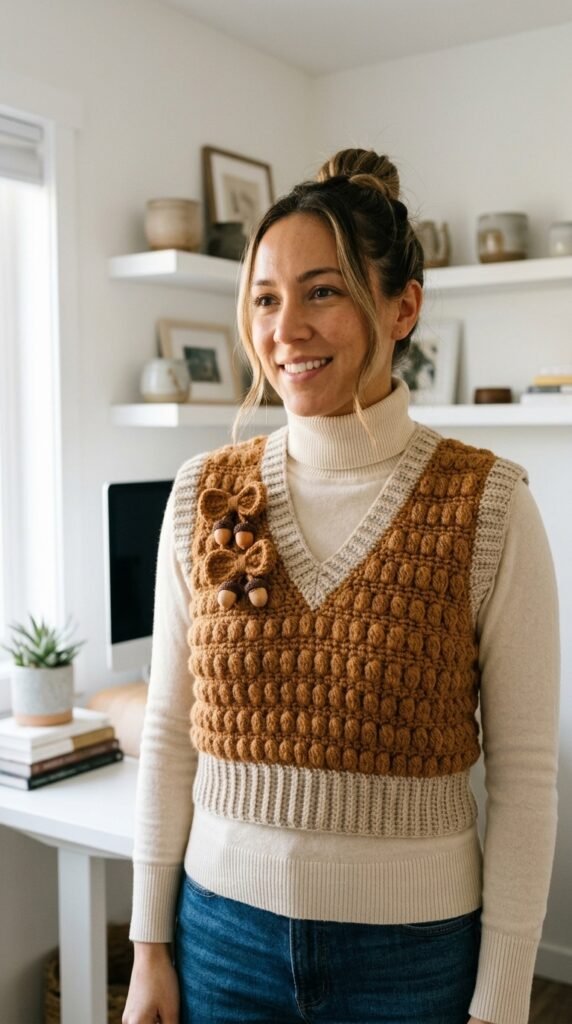
Fall layering just got a serious upgrade. This caramel autumn bow crochet vest gives you all the cozy texture of a chunky sweater without the sleeve drama that always gets in the way of your coffee cup or phone. Those little acorn bows? Pure seasonal charm without screaming “pumpkin spice everything.” Ready to make something that looks store-bought but feels completely you?
Why You’ll Love This Crochet Vest Pattern
Bobble stitches create that raised, almost knitted texture that photographs like a dream and feels amazing against a turtleneck. The ribbed edges in a softer contrast color give the whole piece a finished, polished look that hides any wonky seams. And those bows? They’re the detail that makes people stop and ask where you bought it.
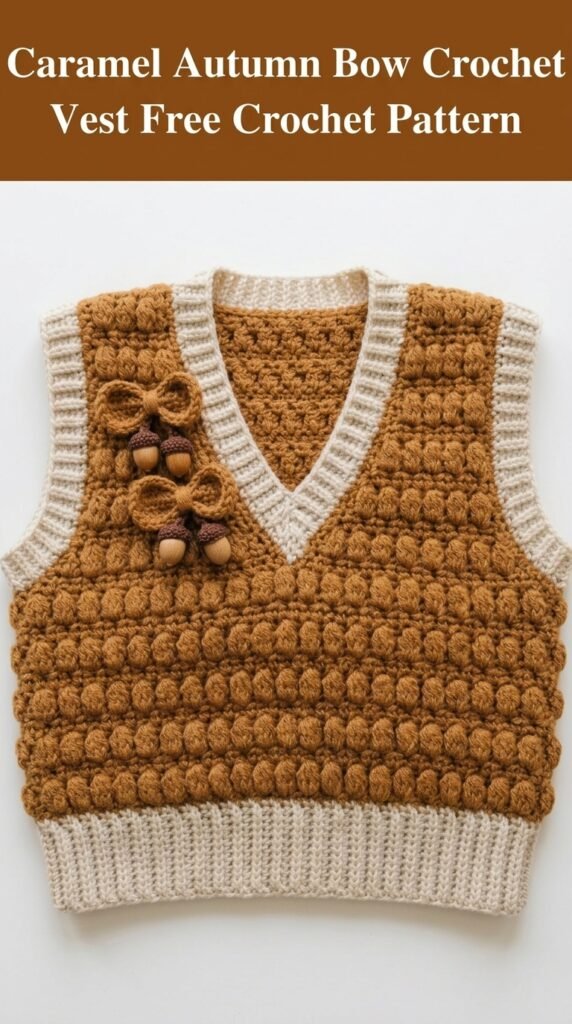
You get a wearable project that works up faster than a full sweater, uses yarn you probably already have in your stash, and still feels special enough for apple-picking photos. IMO, it’s the perfect “look at me being productive this weekend” project.
Skill Level
Intermediate — but hear me out. If you can single crochet without looking at your hands and you’re willing to try a new stitch, you’ve got this. The bobble looks fancy. It’s really just a cluster of half-finished double crochets pulled together. Once you nail the first few, the rest of the rows fly by.
Finished Measurements
Bust: Around 36–38 inches (great for Small to Medium with a little positive ease)
Length: About 21 inches from shoulder to hem
Armhole depth: Roughly 9.5 inches
Want it longer or wider? Easy. Add or subtract a couple of pattern repeats. This pattern is forgiving like that.
Materials Needed
Grab two colors that play nice together. Think warm caramel for the main body and a soft oatmeal or cream for the ribbing. Soft acrylic or a light wool blend works best — you want good stitch definition so those bobbles pop.
- Color A (Caramel): About 420 yards worsted weight
- Color B (Oatmeal): About 160 yards worsted weight
- Size H/8 (5.0 mm) hook for the body
- Size G/6 (4.0 mm) hook for the ribbing if you like it tighter
- Tapestry needle, stitch markers, scissors, measuring tape
- A handful of small wooden or plastic beads for the acorn tops (six is plenty)
Nothing exotic. Most of this is probably already sitting in your yarn bin.
Gauge
16 stitches and 12 rows = 4 inches in the bobble pattern.
Yes, you have to swatch. A vest that fits like a crop top or a tent is nobody’s idea of a win. Make a 5-inch square, measure the center 4 inches, and adjust your hook if needed. Your future self will thank you.
Abbreviations and Stitch Definitions
Here’s everything you’ll actually use, no fluff:
- ch – chain
- sc – single crochet
- dc – double crochet
- hdc – half double crochet
- bob – bobble: work 5 incomplete dcs in the same stitch, yarn over and pull through all 6 loops at once
- sl st – slip stitch
- BLO – back loop only
- sk – skip
- st(s) – stitch(es)
- rep – repeat
That’s the whole toolbox. Master the bobble once and the rest is just rhythm.
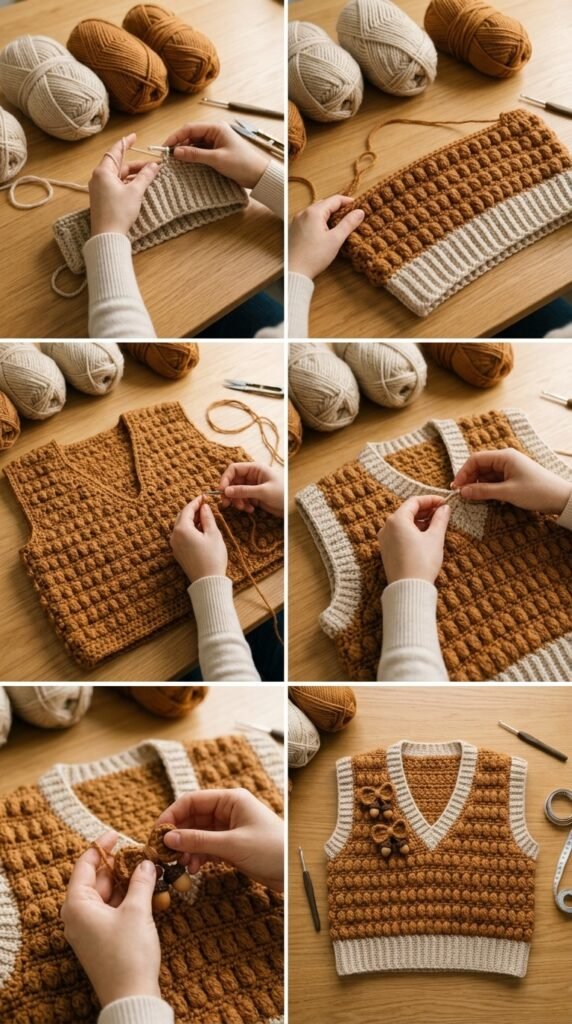
Step by Step Crochet Pattern Instructions
We’re building this in pieces: back, two fronts, then ribbing and bows. Work the body in Color A with the larger hook unless noted.
Back Panel
Start at the bottom and work up. Chain a foundation that gives you about 72 stitches after the first row. Alternate rows of single crochet with rows that place bobbles every other stitch. Shift the bobbles on the next bobble row so they nestle between the previous ones. Keep going until the piece measures roughly 15–16 inches before you shape the armholes.
For the armholes, slip-stitch across the first handful of stitches on each side, then continue the pattern while decreasing a stitch at each edge every other row for a few rows. Once the width feels right for your shoulders, work even to the desired length and fasten off.
Front Panel (Make 2)
Each front starts with a shorter foundation chain — about half the back width. Work the same bobble pattern up to the same height as the back before shaping. On the armhole side you’ll decrease just like the back. On the neck edge you’ll start decreasing a bit later so you get a gentle V. Work until the shoulder edge matches the back, then fasten off. Mirror the shaping for the second front.
Ribbed Hem Band
Switch to Color B and the smaller hook. Chain a short strip (around 10 stitches) and work back-and-forth in single crochet through the back loop only. Make the strip long enough to stretch comfortably around the entire bottom edge of the vest. The ribbing should have a nice spring to it.
V-Neck Ribbing
Same idea, slightly narrower strip. Work two pieces long enough to run from the center front point up to the shoulder and around the back neck. You’ll sew them in later so the join at the V looks clean.
Armhole Ribbing (Make 2)
Even narrower strips this time. Work until each one fits snugly around the armhole opening. Join into a ring before sewing so the seam sits under the arm where nobody notices.
Assembly Instructions
Block every piece first. Seriously. A quick spray and pin to measurements turns “homemade” into “did you buy that?”
- Seam the shoulders with a tidy mattress or whip stitch in Color A.
- Join the side seams from hem up to the underarm.
- Pin and sew the hem ribbing around the bottom, stretching it just enough to lie flat.
- Attach the V-neck ribbing starting at the center front point, going up one side, across the back, and down the other.
- Sew the armhole ribbing rings in place.
Weave in every end like your life depends on it. Future you will not want to deal with loose tails later.
Acorn Bow Embellishments
These little guys are what make the vest feel like autumn instead of just “brown sweater.”
Bow (Make 3)
Chain a short rectangle in Color A, work a few rows of double crochet, then fasten off with a long tail. Fold the rectangle in half lengthwise, pinch the center, and wrap the tail tightly around the middle several times. Secure with a couple of stitches so the bow holds its shape.
Acorn Cap
Start with a magic ring and work a few rounds of single crochet, increasing until you have a shallow cup. Work one round in the back loop only to create a neat edge. Stuff a small bead inside and stitch the opening closed. Sew one acorn to the center of each bow.
Position the three finished bows evenly along the right front neckline and stitch them down securely. Done.
Helpful Tips for Success
Keep your bobbles relaxed. Tight ones look more like knots than texture. Count stitches after every bobble row — it’s shockingly easy to lose one. And yes, blocking really does change everything. Customize the fit by adding or subtracting pairs of stitches or extra pattern repeats. This vest wants to fit you, not the other way around.
Care Instructions
Hand wash in cool water with a mild detergent. Squeeze gently — never wring. Lay flat on a towel to dry. Hanging a wet crochet garment is a one-way ticket to stretched-out regret. Fold it for storage instead of hanging.
Share Your Makes
I genuinely can’t wait to see your version. Forest green and cream? Deep burgundy and oatmeal? Go wild. This pattern photographs beautifully, so get ready for the compliments. Whether you’re making it for yourself or as a gift, you’re putting real warmth into every stitch.
Tag me or drop a photo wherever you hang out online. Your makes keep the rest of us inspired.
You Might Also Like
- Lavender Butterfly Baby Cardigan Free Crochet Pattern
- Baby Blue Ribbon Crochet Vest Free Crochet Pattern
- Fox Woodland Hooded Baby Poncho Free Crochet Pattern
- Easter Bunny Hooded Poncho Free Crochet Pattern
FAQ’s
Can a confident beginner really make this?
Yes. The bobble is the only new skill, and once you work a few rows you’ll wonder why it ever seemed intimidating. Take it slow on the first panel and you’ll be fine.
What if I want a larger size?
Add chains in multiples of two at the start and extra pattern repeats for length. The construction is straightforward enough that sizing up is mostly just more of the same.
Do I have to use acrylic?
Nope. A soft wool blend or cotton-acrylic mix works great too. Just pick something with clear stitch definition so the bobbles stand out.
How long does this usually take?
Most people finish in a couple of focused weekends. The body is the bulk of the work; the ribbing and bows go surprisingly fast.
Can I skip the acorn bows?
You can, but why would you? They’re the detail that makes the whole vest feel intentional and seasonal. If beads aren’t your thing, a simple yarn pom or leaf motif works too.
Final Thoughts
There you have it — a cozy, textured, slightly whimsical fall vest that feels like a hug without the bulk. Grab your caramel yarn, queue up a good show, and start chaining. You’re going to love wearing this one. Happy crocheting!



Leave a Reply
You must be logged in to post a comment.