

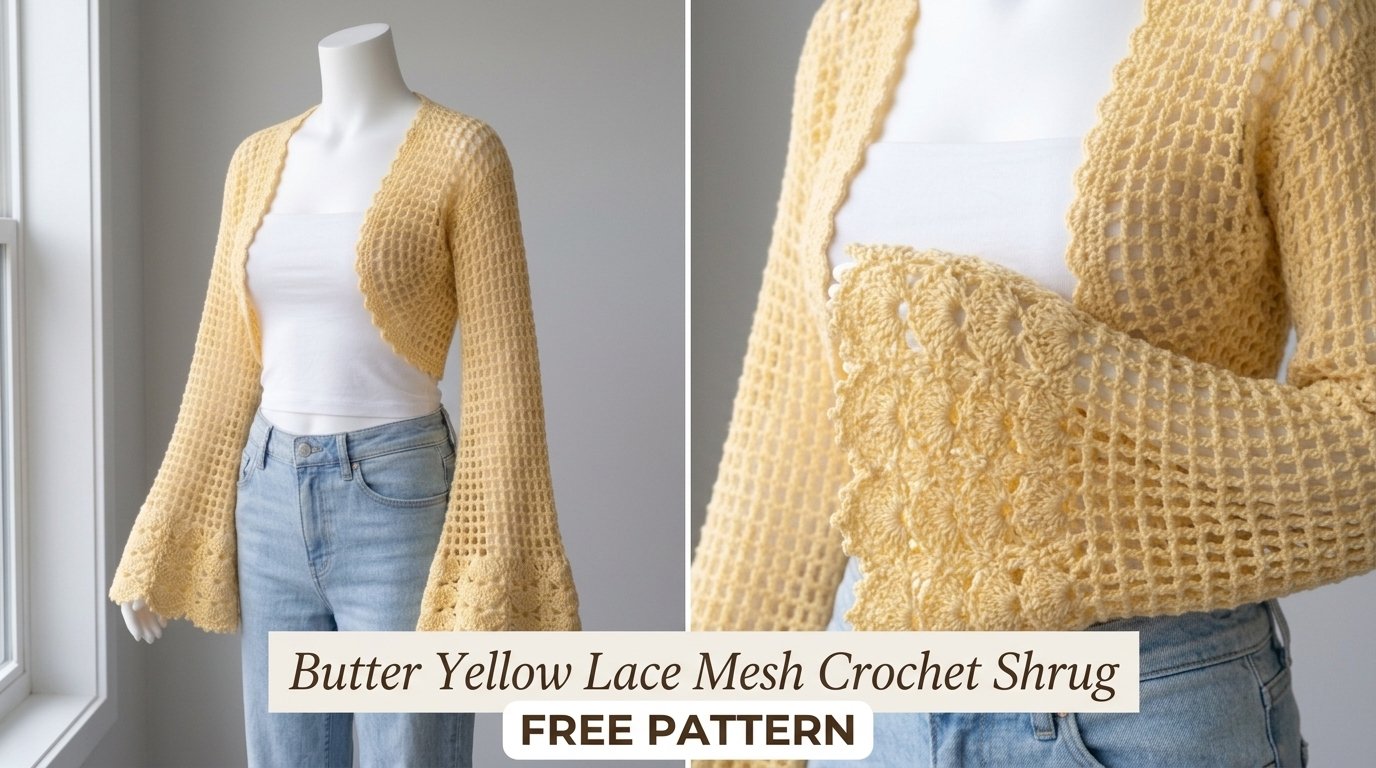
Ready to whip up a lightweight lace mesh shrug that screams sunny days and effortless style? This butter yellow beauty features an open grid mesh body, dramatic bell sleeves, and pretty shell edging that looks way fancier than the basic stitches actually are. If you can chain and double crochet, you are already halfway there. Grab your hook and let’s make something that layers perfectly over tanks, dresses, or whatever you throw on when the weather can’t decide.
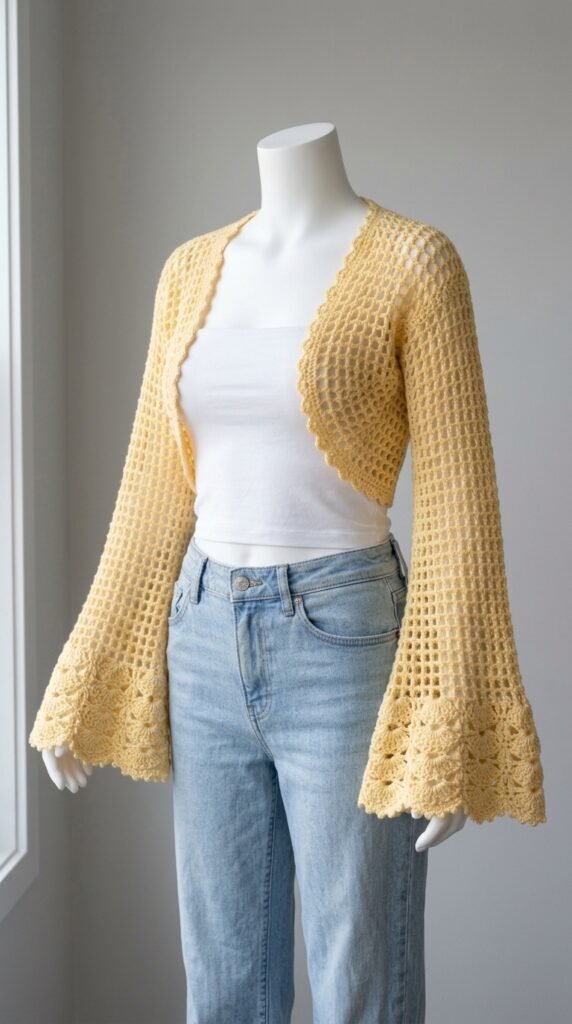
About This Butter Yellow Lace Mesh Crochet Shrug Pattern
Picture those awkward in-between days when a full sweater feels like overkill but bare shoulders leave you chilly. This cropped lace mesh shrug solves that problem without adding bulk. The open stitch pattern keeps it breathable, and the length hits right around the natural waist so it pairs cleanly with almost anything.
Butter yellow gives the whole piece a soft, warm glow that works for spring through early fall. Of course you can swap the color. Soft sage, dusty rose, or even crisp white would change the entire vibe. The real magic sits in the contrast: a simple mesh body meets those eye-catching shell borders and flared sleeves. It looks polished even if this is your first wearable project.
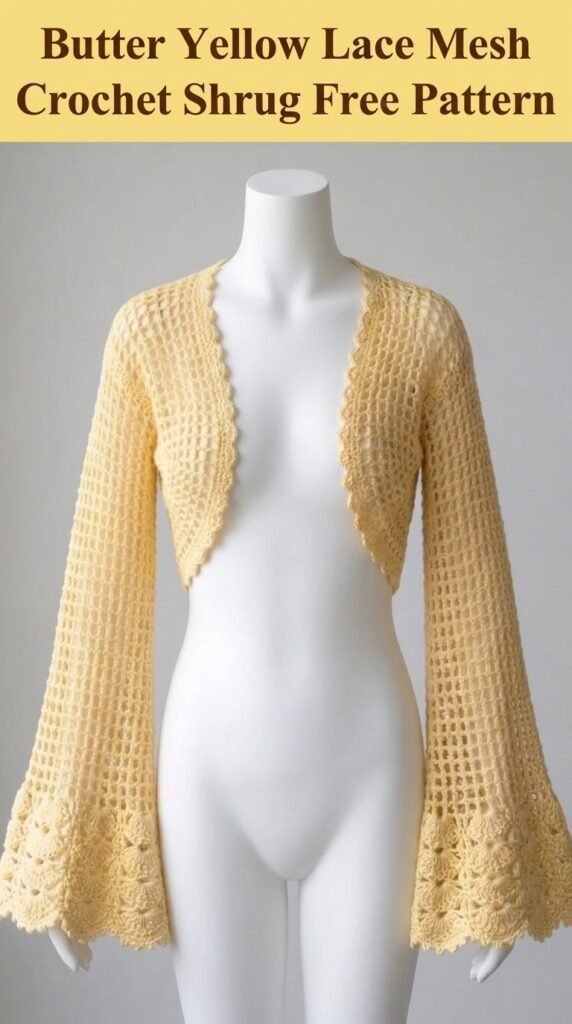
You work the body as one big rectangle, fold it, seam the sides, then add the sleeves and edging. No complicated shaping. Just steady rhythm and a few strategic increases for those bell cuffs.
Skill Level
Call this beginner-friendly with a couple of intermediate moments. If you have finished a scarf or a simple blanket and feel solid with double crochet, you can handle this. The mesh section repeats the same two moves over and over. Once the pattern clicks, it becomes almost meditative.
The shell borders ask for a bit more focus, but they use the exact same stitches you already know. You just group them. Take it row by row and you will be fine.
Materials Needed
Yarn: Plan on 800 to 1000 yards of light worsted weight (Category 3). Cotton or a cotton blend gives the best drape and lets the mesh open up nicely. A slight sheen, like mercerized cotton, makes the butter yellow pop even more.
Hook: Start with a 5.0 mm (H/8) for the mesh body. Keep a 4.5 mm (7) nearby in case the shells feel too loose. Tension can shift when you switch from open mesh to denser shells.
Notions:
- Tapestry needle for weaving ends
- At least four stitch markers
- Measuring tape
- Scissors
That’s the whole list. No fancy extras required.
Gauge
Gauge actually matters here because this is a garment. Aim for 4 chain-1 spaces and 8 rows equaling 4 inches in the mesh pattern.
Chain 22 and work the mesh for about 12 rows. Measure the center, ignore the edges. Too small? Go up a hook size. Too big? Drop down. Five minutes spent on a swatch saves hours of frogging later.
Finished Measurements
This version targets Small/Medium with notes for tweaking.
- Bust: roughly 34 to 38 inches (open front with 2 to 4 inches of ease)
- Length from shoulder to hem: about 14 inches
- Sleeve length from underarm: around 18 inches including the bell cuff
- Bell cuff circumference: approximately 14 inches
Want it roomier or longer? The customization section covers that.
Abbreviations and Stitch Definitions
Let’s clear the language so nothing trips you up mid-row.
Ch = Chain. Yarn over, pull through the loop. Foundation and spaces live here.
Sl st = Slip stitch. Insert hook, yarn over, pull through both the stitch and the loop on the hook. Great for joining without adding height.
Sc = Single crochet. Insert, yarn over, pull up a loop, yarn over, pull through both loops. Short and tidy.
Dc = Double crochet. Yarn over, insert, yarn over, pull up a loop (three loops), yarn over, pull through two, yarn over, pull through the last two. This is the workhorse of the mesh.
Ch-1 sp = Chain-1 space. That little gap under the chain. You work into the gap, not the chain itself.
Shell = Five double crochets worked into the same stitch or space. Instant drama.
Sk = Skip. Just pass over whatever the pattern tells you to skip.
Special Techniques
Working into chain spaces: Stick your hook into the gap below the chain, not into the chain stitch. Cleaner holes, less fuss.
Joining in the round: Slip stitch to the top of the turning chain, then chain up for the next round. Simple and secure.
Increasing for bell sleeves: Extra stitches land at regular intervals. The pattern tells you exactly where so the flare stays even.
Pattern Notes
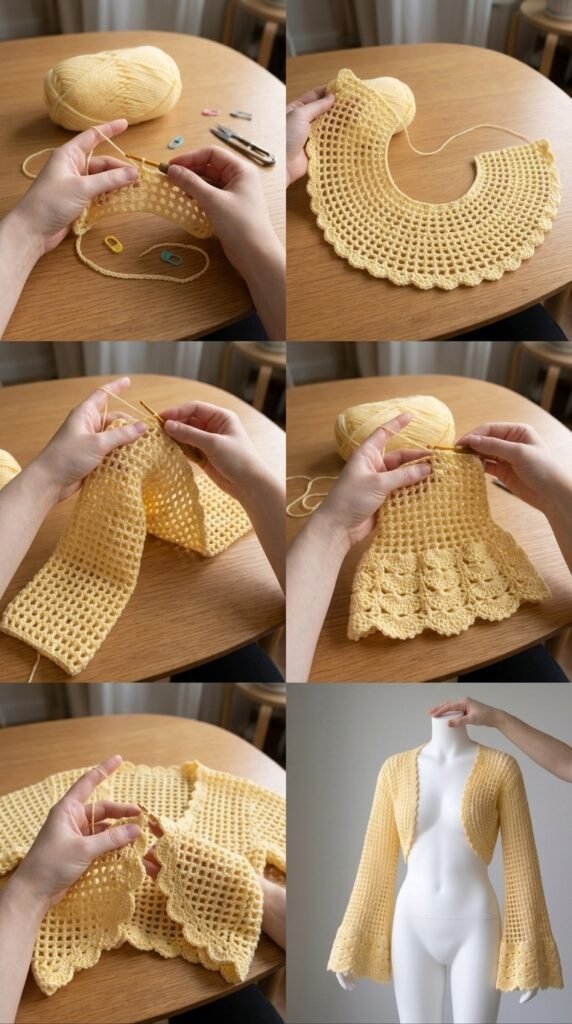
You work the body flat as one long rectangle, fold it, and seam the sides while leaving armhole openings. Sleeves get worked directly into those openings in the round. Edging comes last along every open edge. Turning chain always counts as the first double crochet. Keep that in mind so your stitch counts stay honest.
Crochet Pattern Instructions
Time to make fabric. The body is one big rectangle that later becomes the back and both fronts.
Body Panel (Worked Flat)
Foundation Row: Chain 122.
Row 1: Double crochet in the 4th chain from the hook (those skipped chains count as your first dc). *Chain 1, skip 1 chain, double crochet in the next chain.* Repeat from * across. Turn. You should have 60 double crochets and 59 chain-1 spaces.
Row 2: Chain 4 (counts as dc plus ch 1), skip the first dc, double crochet in the next dc, *chain 1, skip the chain-1 space, double crochet in the next dc.* Repeat across, ending with a double crochet in the top of the turning chain. Turn. Same stitch count.
Rows 3 through 52: Repeat Row 2. Your rectangle should measure about 26 inches wide and 14 inches tall. That gives you enough for the back plus both fronts when folded.
Fasten off and weave in the ends.
Assembling the Body
Fold the rectangle in half widthwise with wrong sides together. The fold becomes your shoulder line.
Mark the armholes: from the fold, measure down 8 inches on each side and place a stitch marker. From the bottom edge, measure up 6 inches and place another marker. The space between them (about 8 inches) is your armhole.
Using a tapestry needle and matching yarn, whip stitch or mattress stitch the front and back together from the bottom edge up to the lower armhole marker. Leave the armhole open. Repeat on the other side. Do not seam the top edge. That stays open for the front of the shrug.
Sleeves (Worked in the Round)
Join yarn at the underarm seam with a slip stitch, right side facing. Chain 3 (counts as first dc).
Round 1: Work 48 double crochets evenly around the armhole opening. Join with a slip stitch to the top of the chain-3.
Round 2: Chain 4 (dc plus ch 1), skip the next dc, double crochet in the next, *chain 1, skip 1 dc, double crochet in the next.* Repeat around. Join. You now have 24 dc and 24 chain-1 spaces.
Rounds 3 through 12: Keep the mesh going: chain 4, double crochet in the next dc, *chain 1, double crochet in the next.* Join each round. The sleeve should measure about 6 inches from the armhole.
Bell Increase Section
Now add the drama.
Round 13 (Increase): Chain 3, double crochet in the same stitch, double crochet in the chain-1 space, *2 double crochets in the next dc, double crochet in the chain-1 space.* Repeat around. Join. You should have 72 double crochets.
Round 14: Return to mesh: chain 4, skip 1 dc, double crochet in the next, *chain 1, skip 1, double crochet in the next.* Join. 36 dc and 36 spaces.
Rounds 15 through 18: Work even in the mesh pattern.
Round 19 (Second Increase): Chain 3, double crochet in the same stitch, double crochet in the chain-1 space, double crochet in the next dc, *2 double crochets in the next dc, double crochet in the chain-1 space, double crochet in the next dc.* Repeat around. Join. 96 double crochets.
Rounds 20 through 22: Mesh again: chain 4, skip 1, double crochet in the next, repeat around. Join. 48 dc and 48 spaces.
Shell Cuff Border
This is the part that makes people ask if you bought it.
Round 23: Chain 1, single crochet in the same stitch, skip 2 dc, 5 double crochets in the next dc (shell), skip 2 dc, *single crochet in the next, skip 2, 5 double crochets in the next, skip 2.* Repeat around. Join. 8 shells and 8 single crochets.
Round 24: Chain 3, 2 double crochets in the same single crochet, single crochet in the center of the next shell, *5 double crochets in the next single crochet, single crochet in the center of the next shell.* Repeat, ending with 2 double crochets in the first single crochet. Join.
Round 25: Repeat Round 23, placing single crochets in the centers of the shells and shells in the single crochets.
Fasten off and weave in ends. Repeat the entire sleeve for the other armhole.
Front and Neckline Edging
Join yarn at the bottom right front corner, right side facing.
Round 1: Chain 1 and single crochet evenly all the way up the front, around the back neck, and down the other front. Put 3 single crochets in each corner so they lie flat. Join.
Round 2: Chain 1, single crochet in the same stitch, skip 2, 5 double crochets in the next, skip 2, *single crochet in the next, skip 2, 5 double crochets in the next, skip 2.* Adjust at the corners if needed. Join.
Round 3: Chain 3, 2 double crochets in the same single crochet, single crochet in the center of the next shell, *5 double crochets in the next single crochet, single crochet in the center of the next shell.* Repeat around. Join.
Fasten off.
Bottom Hem Edging
Join at one side seam along the bottom edge. Single crochet evenly around the entire hem. Then work the same shell pattern: single crochet, skip 2, 5 double crochets, skip 2, repeat. Join and fasten off. Weave in every last end.
Finishing Your Butter Yellow Lace Mesh Crochet Shrug
Blocking transforms the whole thing. For cotton, wet blocking is ideal.
- Soak in lukewarm water with a drop of wool wash for 15 minutes.
- Gently squeeze out water. Do not wring.
- Roll in a clean towel to pull more moisture.
- Lay flat on a blocking mat or towels.
- Pin the shells so they fan out evenly.
- Let it dry completely (24 to 48 hours).
The mesh opens up, stitches even out, and those shells finally sit pretty. Worth every minute.
Customization Ideas
Want more length? Add rows to the body panel before you assemble. Every 4 rows adds roughly an inch.
Prefer shorter sleeves? Stop after Round 12, skip the increases, and add the shell cuff right away.
Need a larger size? Add chains to the foundation in multiples of 4. Eight extra chains per size up is a good starting point. Adjust armhole placement accordingly.
Solid sleeves instead of mesh? Just work double crochet without the chain spaces for a warmer, denser look.
IMO the color is the easiest way to make it yours. Try a soft sage or a deep terracotta and watch the whole personality shift.
Troubleshooting Common Issues
Mesh looks uneven: Make sure you are working into the chain spaces, not the chains. Double-check that you are not adding or dropping stitches.
Shells cup or curl: Tension is probably tight. Try a half-size larger hook just for the shell rounds.
Front edges wave: Blocking usually fixes this. If it still waves after blocking, you may have too many stitches in the edging.
Armholes feel tight: Add a round of single crochet around the opening before starting the sleeve mesh. Instant extra room.
Why This Crochet Shrug Pattern Works
The mesh is basically double crochet and chain repeated until the rectangle is done. Once the rhythm settles, you can almost crochet on autopilot while watching a show. The construction stays simple: one flat piece, a couple of side seams, then sleeves and edging. No weird shaping charts to decode.
Those bell sleeves look like they required advanced skills, but they are just two increase rounds and a shell border. You already know every stitch. That is the best kind of project: impressive results from straightforward moves.
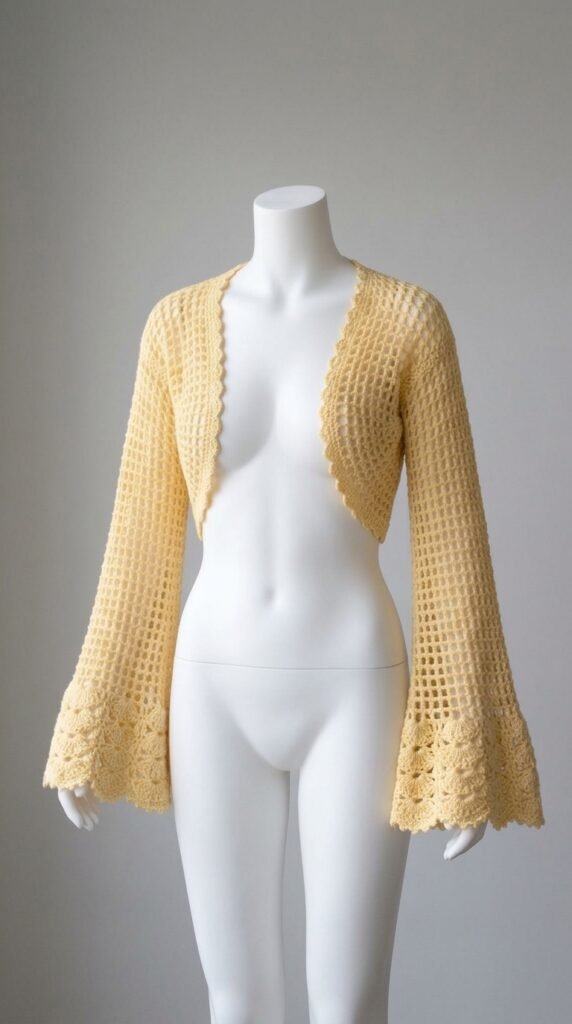
FYI, the open mesh keeps it light enough for warm weather yet still gives that little layer of coverage most of us want. Pair it with a tank and jeans or throw it over a sundress. Either way it earns its place in the closet.
You Might Also Like
- Ivory Pearl Lace Dress Crochet Pattern
- Cream Ivory Bridal Lace Maxi Skirt Free Crochet Pattern
- Lavender Cottage Babydoll Dress Free Crochet Pattern
- Monochrome Cream Bell Sleeve Crochet Dress Free Pattern
FAQ’s
Can a true beginner make this shrug?
If you are comfortable with chain and double crochet, yes. The mesh section is repetitive once you get the first few rows down. Take the shell borders slowly and you will be fine.
How much yarn do I really need?
Most people use between 800 and 1000 yards of light worsted. Buy an extra skein if you tend to crochet tightly or plan to lengthen the body.
Will the mesh stretch out of shape?
Cotton or cotton-blend yarn holds its structure well after blocking. Avoid super stretchy acrylic if you want the shrug to keep its shape over time.
Can I make the sleeves less flared?
Absolutely. Skip one or both increase rounds and go straight to the shell cuff. You still get a pretty edge without the full bell.
How do I wash the finished shrug?
Hand wash in cool water with a gentle detergent, then reshape and lay flat to dry. The shells will thank you.
Final Thoughts
There you have it: a butter yellow lace mesh shrug that looks polished, wears light, and only asks for stitches you already know. The open body, the shell borders, and those dramatic yet easy bell sleeves come together without drama. Cast on that foundation chain, settle into the mesh rhythm, and enjoy the process. When you finally put it on, you will wonder why you waited so long to make one. Happy crocheting.




Leave a Reply
You must be logged in to post a comment.