

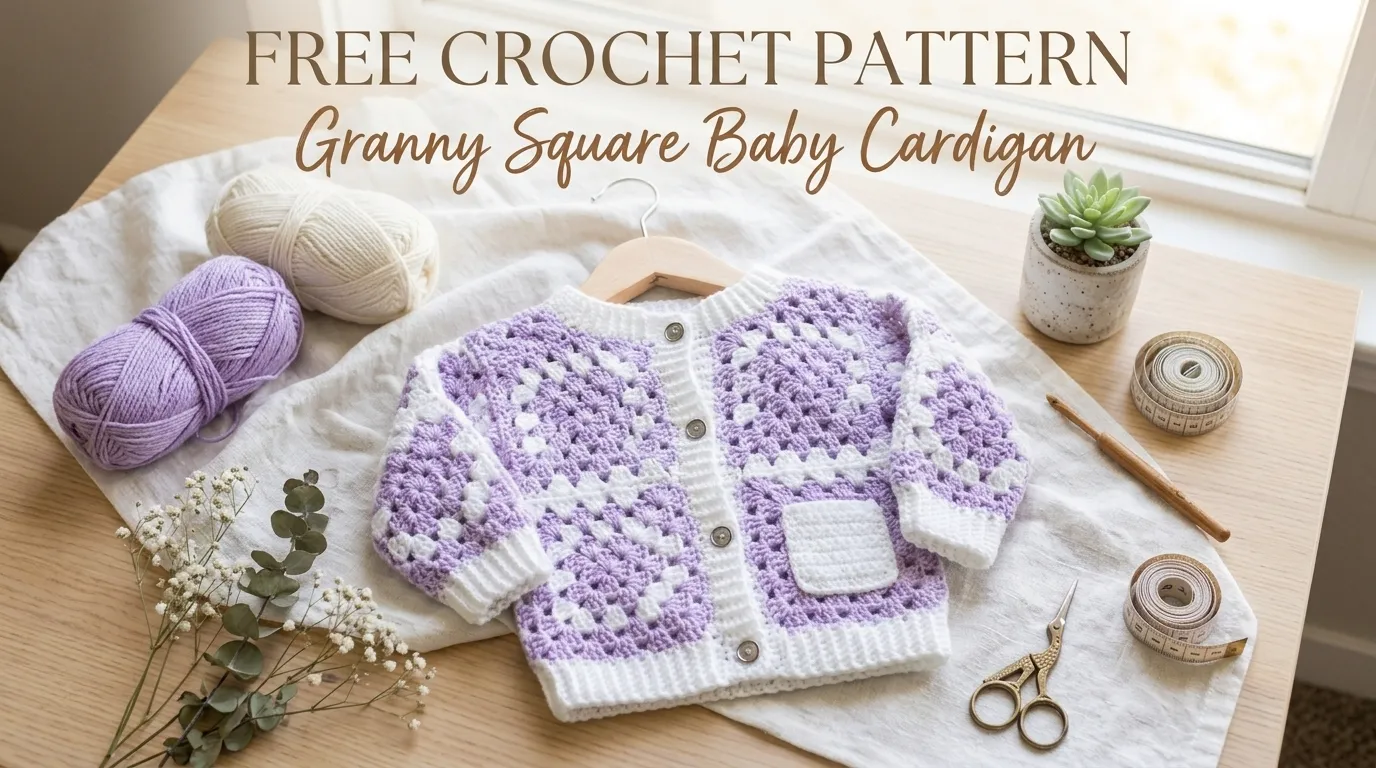
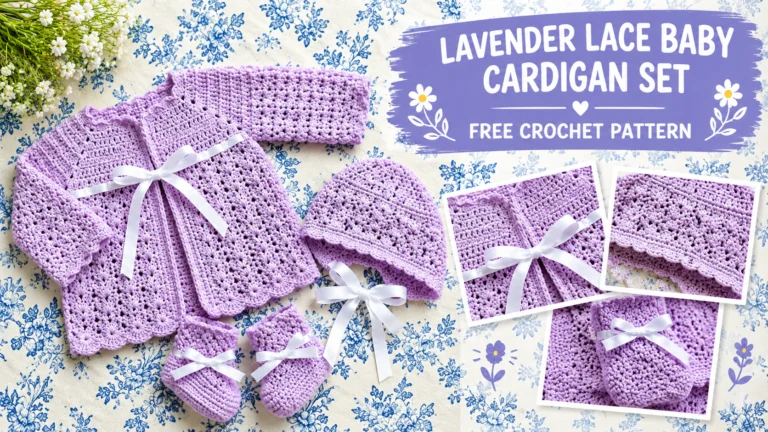
Baby gifts rarely get cuter than this one. This tiny cardigan is built from lavender granny squares with crisp white edges, plus a little pocket and five buttons. It looks fancy, but every piece starts as a simple square. Ready to turn a pile of squares into a real sweater?
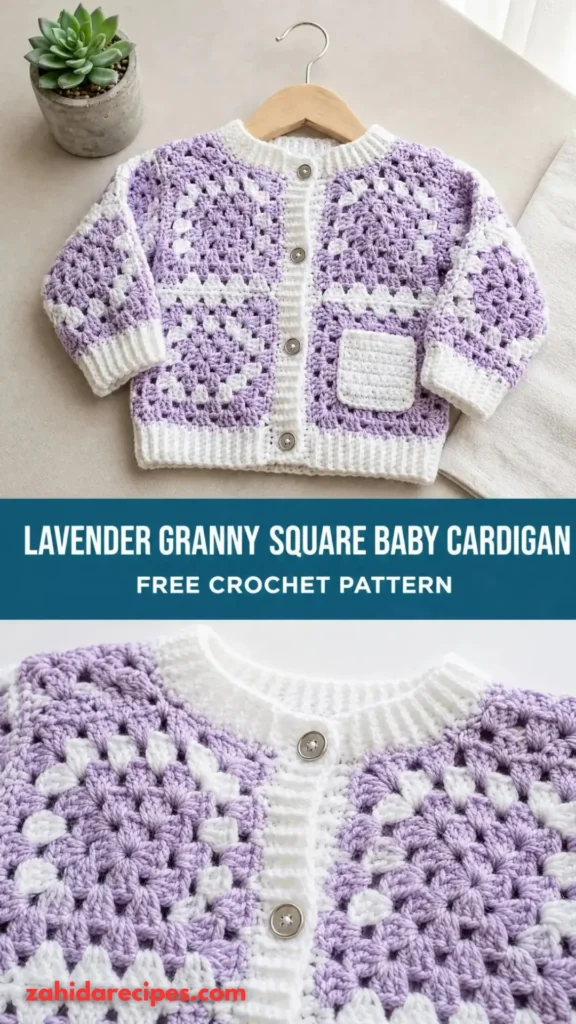
Why You Will Love This Cardigan
Think of this cardigan as a puzzle made of squares. You crochet 27 granny squares, join them into flat panels, attach tube-shaped sleeves, and finish everything with ribbing. Once you see the layout, it feels surprisingly easy.
The color plan is just as easy. Lavender fills the middle of every square, and white wraps around the outside and trims all the edges. The result looks neat and modern without any fuss.
Skill level: Intermediate. You need to know how to make granny squares, join them as you go, work ribbing, and pick up stitches along an edge. Clean joins and even tension make the biggest difference.
Time needed: About 12 to 18 hours if you already crochet well. Work on it for a few evenings each week and you will finish in roughly two weeks.
Finished Size
This cardigan fits babies around 6 to 12 months and has a relaxed, roomy shape.
- Chest (buttoned): about 20 inches (51 cm)
- Shoulder to hem: about 11 inches (28 cm)
- Underarm to cuff: about 6.5 inches (16.5 cm)
Supplies, Gauge and Stitch Guide
Pull everything together before you start. Running out of white yarn halfway through the ribbing is a special kind of pain.
What to Buy
- Yarn weight: Worsted (category 4)
- Lavender (MC): about 350 yards (320 m)
- White (CC): about 200 yards (183 m)
- Hook for squares: US G-6 (4.0 mm)
- Hook for ribbing and bands: US F-5 (3.75 mm)
- Buttons: 5 buttons, each about 3/4 inch (19 mm) wide
- Extras: A yarn needle for seams and ends, at least 6 stitch markers, and scissors
Yarn Picks
- Lion Brand Pound of Love: This acrylic yarn goes in the washing machine and comes in lilac and white. That makes it a smart choice for baby clothes.
- Paintbox Yarns Simply DK: Hold two strands together for sharp stitch definition. It also offers a lavender that comes very close to what you need.
- Cascade 220 Superwash: Pick this one if you like natural fiber and soft drape. It is also machine washable.
Any smooth worsted yarn that matches the gauge works fine. Skip fuzzy or bumpy yarns, because they hide the granny square design.
Gauge (Please Do Not Skip)
Granny squares: A finished 4-round square should measure 4 inches x 4 inches (10 cm x 10 cm) after blocking.
Small errors grow fast here. If each square is off by 0.25 inch, your whole cardigan ends up about 1 inch off.
Ribbing: 16 sc and 18 rows make a 4 inch x 4 inch (10 cm x 10 cm) piece on the F-5 hook, worked in the back loop only.
Crochet a swatch first. If your square comes out small, use a bigger hook. If it comes out large, use a smaller one.
Abbreviations
- BLO – back loop only. Put your hook under just the back loop of the stitch.
- ch – chain
- dc – double crochet. Yarn over, insert hook, pull up a loop, then yarn over and pull through 2 loops two times.
- MC – main color (lavender)
- CC – contrast color (white)
- rnd – round
- RS – right side
- sc – single crochet. Insert hook, pull up a loop, yarn over and pull through both loops.
- sk – skip
- sl st – slip stitch. Insert hook, then pull a loop through the stitch and the loop on your hook in one move.
- sp – space
- st(s) – stitch(es)
- WS – wrong side
- yo – yarn over
Special Stitches
- Granny Cluster: Work 3 dc into the same space. Every square uses this stitch over and over.
- Standing Double Crochet: Put a slip knot on your hook and yarn over. Insert the hook into the space you need, pull up a loop, yarn over and pull through 2 loops, then yarn over and pull through the last 2 loops. This lets you start a new round without a bulky turning chain.
- BLO Single Crochet Ribbing: Insert your hook under only the back loop of the next stitch. Yarn over, pull up a loop, yarn over again, and pull through both loops. Doing this on every row builds stretchy ridges.
Pattern Notes
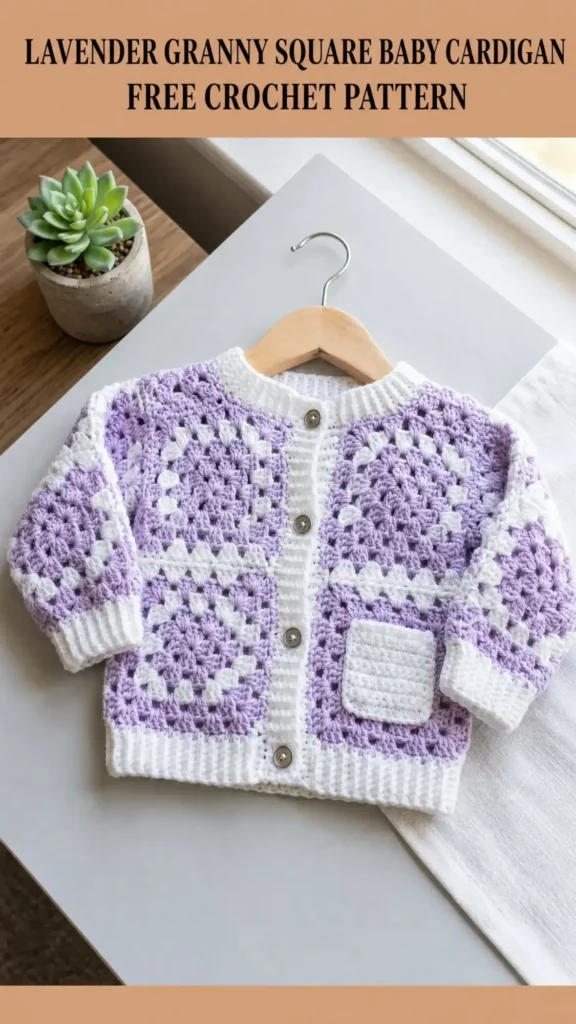
- Each square has 4 rounds and measures 4 inches. The back uses 10 squares (5 across, 2 down). Each front uses 4 squares (2 across, 2 down). Each sleeve uses 4 squares (2 across, 2 down) and becomes a tube. One extra square makes the pocket. Total: 27 squares.
- You join squares during Round 4 with the join-as-you-go method (JAYG). The steps appear a little further down.
- Colors for every square: Rounds 1, 2 and 3 use MC (lavender). Round 4 uses CC (white).
- In ribbing, start each row with ch 1. That chain does NOT count as a stitch.
- Weave in the ends on the wrong side of each square before you join anything. FYI, you will thank yourself later.
Making the 27 Granny Squares
Yes, 27 squares sounds like a lot. Put on a good show and let your hook do the work.
Start with MC and make a magic ring. You can also chain 4 and close it with a slip stitch if you like that better.
Round 1 (MC): Ch 3 (this counts as your first dc). Work 2 dc into the ring and ch 2. Then work (3 dc into the ring, ch 2) 3 times. Close the round with a sl st in the top of the starting ch-3. Fasten off MC. (4 clusters, 4 ch-2 corner spaces)
Round 2 (MC): Join MC with a standing dc in any ch-2 corner sp. Work 2 more dc in that same sp, ch 2, then 3 dc in the same sp, and ch 1. Now repeat this corner 3 times: work 3 dc in the next ch-2 corner sp, ch 2, 3 dc in the same sp, ch 1. Close with a sl st in the top of the first standing dc. Fasten off MC. (8 clusters, 4 ch-2 corner spaces, 4 ch-1 side spaces)
Round 3 (MC): Join MC with a standing dc in any ch-2 corner sp. Work 2 more dc in that sp, ch 2, 3 dc in the same sp, and ch 1. Work 3 dc in the next ch-1 sp, then ch 1. Repeat this whole sequence 3 times: 3 dc in the next ch-2 corner sp, ch 2, 3 dc in the same sp, ch 1, 3 dc in the next ch-1 sp, ch 1. Close with a sl st in the top of the first standing dc. Fasten off MC. (12 clusters, 4 ch-2 corner spaces, 8 ch-1 side spaces)
Round 4 (CC, border round): Join CC with a standing dc in any ch-2 corner sp. Work 2 more dc in that sp, ch 2, 3 dc in the same sp, and ch 1. Next, work 3 dc in the next ch-1 sp and ch 1, two times in a row. Repeat this whole sequence 3 times: 3 dc in the next ch-2 corner sp, ch 2, 3 dc in the same sp, ch 1, then (3 dc in the next ch-1 sp, ch 1) twice. Close with a sl st in the top of the first standing dc. Fasten off CC. (16 clusters, 4 ch-2 corner spaces, 12 ch-1 side spaces)
Quick check: After light blocking, each square should measure 4 inches x 4 inches. If it does not, change your hook size and make another one.
How to Join as You Go (JAYG)
Use this trick on Round 4 whenever a new square touches a finished one. Here is how it works along the shared sides:
Work each cluster until you reach the final yarn-over pull-through. Let the loop slip off your hook for a moment. Push your hook from the front through the matching ch-1 or ch-2 space on the finished square. Grab the loose loop, pull it through, and keep going as usual.
At a corner shared by two squares: ch 1, sl st into the ch-2 corner of the finished square, then ch 1.
At a corner shared by three or four squares: ch 1, sl st through every shared corner space already in place, then ch 1.
Pro tip: Practice this join on two spare squares first. IMO, five minutes of practice saves a lot of frogging.
Joining Squares into the Body and Sleeves
Now your pile of squares starts to look like a cardigan. This part feels great.
Back Panel
Lay out 10 squares in 5 columns and 2 rows. Join them with JAYG along every shared side. The finished back measures about 20 inches wide x 8 inches tall.
Front Panels
For each front, lay out 4 squares in 2 columns and 2 rows, then join them with JAYG. Each front measures about 8 inches wide x 8 inches tall.
Shoulder Seams
Place the back and the right front together with wrong sides facing. Thread CC on your yarn needle and whipstitch (or sl st) the top 8 inches of the back’s right edge to the top edge of the right front. That covers 2 squares. Do the same on the left side. The middle 4 inches of the back’s top edge stay open to form the back neckline.
Quick check: Each armhole opening should now measure about 8 inches deep.
Sleeves (Make 2)
Step 1: Crochet 4 squares and join them into a flat 2×2 panel with JAYG.
Step 2: Fold the panel so the two 2-square-tall edges meet. Use CC to sl st the short side edges together and form a tube. This seam sits under the arm.
Step 3: Line up the open top edge of the tube with the armhole. Hold the wrong sides together and sl st through both layers all the way around the armhole with CC.
Repeat for the second sleeve.
Ribbing, Bands and Pocket
Ribbing gives your cardigan a clean, shop-bought look. Grab your F-5 hook for every edge in this section.
Hem Ribbing
With the RS facing, join CC to the bottom-right corner of the right front using a sl st.
Row 1 (RS): Ch 1. Work 1 sc in each dc and 1 sc in each ch-1 sp along the bottom edge of both fronts and the back. (80 sc)
Row 2 (WS): Ch 1, turn, sc BLO in every sc. (80 sc)
Keep repeating Row 2 until the ribbing is 1.5 inches (4 cm) tall.
Final Row: Ch 1, turn, sl st in every st across. Fasten off.
Cuffs (Make 2)
Join CC to the bottom edge of one sleeve tube.
Setup Row: Ch 1. Work 1 sc in each dc and 1 sc in each ch-1 sp around the opening. (32 sc)
Row 1 (RS): Ch 1, sc BLO in every sc. (32 sc)
Row 2 (WS): Ch 1, turn, sc BLO in every sc. (32 sc)
Repeat Row 2 until the cuff is 1.5 inches tall. Sew the short edges together and fasten off.
Neckline
With the RS facing, join CC at the top-right corner of the right front, right at the shoulder seam.
Setup Round: Ch 1. Work sc evenly around the whole neckline opening. (48 sc)
Row 1: Ch 1, turn, sc BLO in every sc. (48 sc)
Row 2: Ch 1, turn, sc BLO in every sc. (48 sc)
Repeat Row 2 until the neckline ribbing is 1 inch tall. Fasten off.
Button Band (Right Front)
With the RS facing, join CC at the bottom-right corner of the right front hem.
Row 1 (RS): Ch 1. Work sc evenly up the full front edge. (40 sc)
Rows 2-5: Ch 1, turn, sc BLO in every sc. (40 sc)
Fasten off.
Buttonhole Band (Left Front)
With the RS facing, join CC at the top-left corner of the neckline ribbing.
Row 1 (RS): Ch 1. Work sc evenly down the full front edge. (40 sc)
Row 2 (WS): Ch 1, turn, sc BLO in every sc. (40 sc)
Row 3 (Buttonhole Row, RS): Ch 1, turn. Sc BLO in the first 3 sc. Then work (ch 2, sk 2 sc, sc BLO in the next 6 sc) 4 times. Finish with ch 2, sk 2 sc, and sc BLO in the last 3 sc. (5 buttonholes)
Row 4 (WS): Ch 1, turn. Sc BLO in each sc, and work 2 sc into every ch-2 buttonhole space. (40 sc)
Row 5 (RS): Ch 1, turn, sc BLO in every sc. (40 sc)
Fasten off.
Patch Pocket
Make 1 more granny square using the square instructions above.
Edging: With the F-5 hook and CC, work 1 row of sc around three sides (the two sides and the bottom). Put 3 sc in each corner. Leave the top edge alone. Fasten off.
Ribbed top: Join CC at the top-right corner. Ch 1 and sc BLO across the top edge (about 12 sc). Then work 3 more rows of sc BLO to make a ribbed top. Fasten off.
Placing it: Pin the pocket on the lower right front. Center it side to side and keep the bottom about 0.5 inch above the hem ribbing. Whipstitch the sides and bottom in place, and leave the ribbed top open.
Buttons, Blocking and Sizing
You have reached the home stretch. A few buttons and a gentle wash, and this cardigan is ready for its big day.
Sewing on the Buttons
Mark 5 spots on the button band that line up with the buttonholes. Put the top button at the neckline and the bottom button just above the hem. Space the other three evenly in between. Sew each one on tightly with doubled CC or matching thread.
Blocking
First, weave in any loose ends on the wrong side. Run each tail in at least two directions so it stays put.
Wet blocking gives the best shape. Soak the cardigan in cool water, press out the extra water in a clean towel (never wring it), and lay it flat on a blocking mat. Pin it to the right size and let it dry fully.
Using acrylic yarn? Steam blocking works well too. Hold a steam iron about 1 inch above the fabric and do not touch it down. Pin the piece flat until it cools.
Washing and Storage
Acrylic and superwash wool can go in the machine on a gentle, cool cycle. Dry the cardigan flat. Fold it or lay it flat in a drawer, because a hanger can stretch the shoulders.
Making It Bigger or Smaller
Babies change size fast, so here are easy ways to adjust.
- Newborn (16 inch chest): Use 8 squares for the back (4 across, 2 down). Keep 4 squares for each front and 4 for each sleeve. Cut the ribbing stitch counts down to match. Total: 25 squares.
- 12-24 months (22 inch chest): Add one more column to the back (6 across x 2 down = 12 squares). Leave the fronts and sleeves as they are.
- Longer body: Add a third row of squares before you start the hem ribbing.
- Longer sleeves: Add a third row to each sleeve tube before you work the cuffs.
You Might Also Like:
- Coral Peach Tropical Barrel Bag Free Crochet Pattern
- Navy Blue Anchor Nautical Backpack Free Crochet Pattern
- Blush Ombre Camellia Crochet Dress Free Crochet Pattern
- Coastal Blue Crochet Bralette Free Crochet Pattern
Final Thoughts
This cardigan blends cozy granny square charm with clean, modern edges. You also practice useful skills like joining squares, picking up stitches, and working tidy ribbing. Best of all, you end up with a gift that carries real love in every stitch.
Thanks for picking this pattern from Sumara Patterns! If you make one, share a photo with us. Save the pattern to your Pinterest board so you can find it fast, and leave a comment to tell us how it turned out. Happy crocheting!



Leave a Reply
You must be logged in to post a comment.