

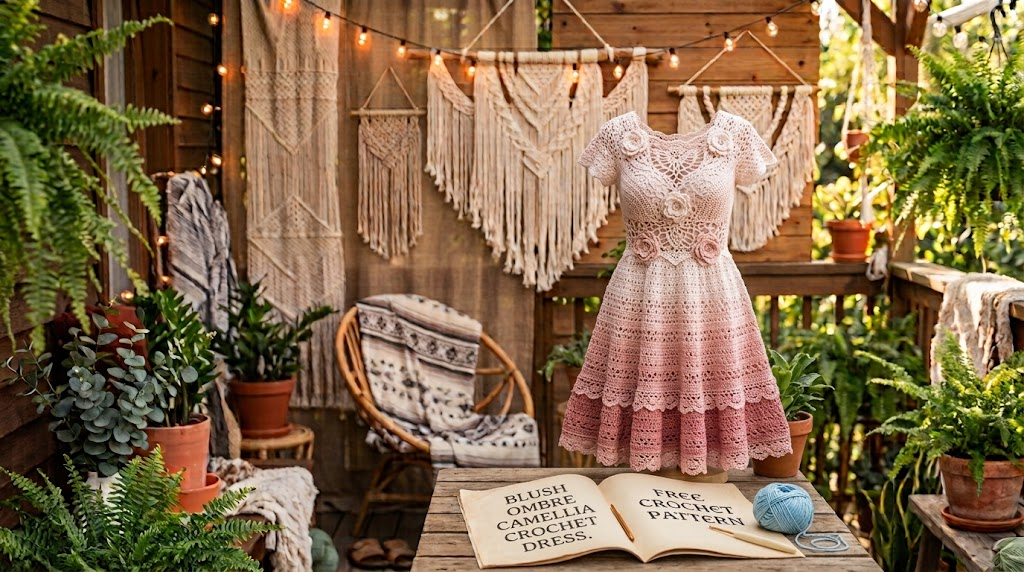
Picture this: a fitted cotton bodice, a floaty diamond mesh waist, and then a skirt covered in dozens of rolled camellia roses that fade from ivory to deep pink. Sounds dreamy, right? This Blush Ombre Camellia Crochet Dress is a free pattern that turns that picture into something you can actually wear. Fair warning, though: those 78 roses won’t make themselves. Grab your cotton and let’s talk through the whole thing.
What Makes This Dress Special
The construction here is genuinely clever. You start with a close-fitting camisole bodice worked in joined rounds, then simple decreases pull it in at the waist. Below that, an open diamond mesh section gives the dress an airy, romantic transition before the skirt begins.
The real magic happens at the skirt. Each camellia rose starts as a long shell strip, then gets rolled into a dimensional flower. Those roses sit in five ombre rows, shifting from ivory at the top through blush, light pink, and medium rose pink, and finishing with deep pink at the hem.
FYI, the finished dress measures about 32 inches around the bust, 28.5 inches at the waist, and 31 to 32 inches long, not counting the straps. It’s designed for 0 to 2 inches of negative ease at the bust, so it fits best on a 32 to 34 inch bust.

Skill Level and Time Commitment
Let’s be honest with each other. This is an advanced beginner to intermediate project, and patience is the real star of the show, especially during rose-making.
You should feel comfortable with joined rounds, steady gauge, simple decreases, chain loop mesh, making lots of motifs, and hand sewing applique pieces down securely. Plan for 32 to 45 hours of work. Your rose speed will decide where you land on that range.
Worth it? IMO, absolutely. But don’t say I didn’t warn you.
Materials You Will Need
For yarn, reach for fingering to light sport weight cotton or a cotton-bamboo blend, about 1,650 to 1,950 yards total. Pick something firm and smooth so the bodice holds its shape and the rose edges stay crisp.
Here’s the color breakdown:
- Ivory/cream: 360 yards
- Blush: 420 yards
- Light pink: 380 yards
- Medium rose pink: 380 yards
- Deep pink: 300 yards
- Extra for swatch/seaming: 150 yards
Good yarn options include Scheepjes Catona, Hobbii Rainbow Cotton 8/4, or Paintbox Cotton 4 Ply. Any smooth cotton or cotton blend that matches gauge and makes roses around 2.75 inches across will work fine.
For hooks, use a US C/2.75 mm for the bodice and a US D/3.25 mm for the roses if you need it to match motif size. You’ll also want removable stitch markers, a tapestry needle, a sewing needle with matching thread, 1.5 to 2 yards of soft blush tulle, 1/4 inch elastic for waist support, optional lining fabric, a measuring tape, and pins.
Gauge (Please Don’t Skip This)
Gauge matters a lot for a fitted dress. Here’s what you’re aiming for:
- Bodice single crochet: 18 sc and 20 rounds = 4 inches
- Diamond mesh: 8 ch-5 loops and 10 rounds = 4 inches
- Rose motif: one finished rose = 2.75 inches across
Swatch and match gauge before you start. Your yarn, tension, hook size, and finishing style all change the result, so you may need small tweaks to get close to the sample.
Abbreviations and Special Techniques
This pattern uses US crochet terms. Quick refresher on the stitches:
- Single crochet (sc): insert hook in stitch, yarn over and pull up a loop, yarn over and draw through both loops.
- Double crochet (dc): yarn over, insert hook, pull up a loop, yarn over and draw through 2 loops, yarn over and draw through the last 2 loops.
- Chain (ch): yarn over and pull through the loop on your hook.
- Slip stitch (sl st): insert hook, yarn over, pull through both the stitch and the loop in one motion.
- Single crochet two together (sc2tog): pull up a loop in the next stitch, pull up a loop in the following stitch, yarn over and draw through all 3 loops. That’s one decrease.
- Magic ring (MR): an adjustable starting loop for working in the round.
- Skip (sk) and space (sp): pass over a stitch without working it, or the gap made by chains.
- Back loop only (BLO) / Front loop only (FLO): work into just that loop of the stitch.
UK crocheters, heads up: US sc equals UK dc, and US dc equals UK tr.
Three Techniques to Learn Before You Start
Invisible join: cut the yarn, pull the tail through the last stitch, thread it on a needle, insert under both loops of the first stitch of the round, then back down into the center of the last stitch. Tighten gently and it imitates a stitch top for a seamless finish.
Diamond mesh loop: work ch 5, skip the instructed stitches or previous loop, then sc in the next stitch or ch-5 space. Keep every loop relaxed and even. Tight mesh shortens the torso and distorts the rose rows.
Camellia rose strip: a long shell strip rolled into a round camellia. Keep the starting end tight for the center and let the outer shells open gently. Sew through the base several times so the rose stays flat.
Bodice Instructions
Work the bodice in joined rounds. The ch 1 at the start of a sc round does not count as a stitch. Join each round with a sl st to the first sc, and place a marker at the beginning of the round plus each quarter point.
- Foundation: ch 145, taking care not to twist, join with sl st to first ch. (144 base ch)
- Rounds 1–20: ch 1, sc in each ch or st around, join. (144 sc)
- Round 21: ch 1, [sc in next 34 sts, sc2tog] 4 times, join. (140 sc)
- Round 22: ch 1, sc in each st around, join. (140 sc)
- Round 23: ch 1, [sc in next 33 sts, sc2tog] 4 times, join. (136 sc)
- Round 24: ch 1, sc in each st around, join. (136 sc)
- Round 25: ch 1, [sc in next 32 sts, sc2tog] 4 times, join. (132 sc)
- Round 26: ch 1, sc in each st around, join. (132 sc)
- Round 27: ch 1, [sc in next 31 sts, sc2tog] 4 times, join. (128 sc)
- Round 28: ch 1, sc in each st around, join. Do not fasten off. (128 sc)
Checkpoint: your bodice should measure about 32 inches around the bust edge, 28.5 inches at the waist, and 5.5 to 5.75 inches tall.
Top Edging and Straps
Join yarn at the upper back. Work 1 round of sc evenly around the top edge, placing 1 sc in each foundation chain, then fasten off with an invisible join.
For each strap, join at the front strap marker, ch 74, sl st to the matching back marker, turn, and sl st in each ch back to the front. Repeat for the second strap. Adjust strap length before weaving in ends, and try the dress on if you can to nail the fit.
Diamond Mesh Midsection
Work the mesh from the waist edge downward. The 128 stitch waist divides into 32 chain loop repeats.
- Round 1: ch 1, [ch 5, sk 3 sts, sc in next st] 32 times, join with sl st into first ch-5 sp. (32 loops)
- Round 2: ch 1, sc in same ch-5 sp, [ch 5, sc in next ch-5 sp] 31 times, ch 5, join to first sc. (32 loops)
- Rounds 3–7: repeat Round 2. (32 loops)
- Round 8: ch 1, [sc in next ch-5 sp, ch 3] 32 times, join. This firms up the lower edge. (32 ch-3 sps)
- Round 9: ch 1, 4 sc in each ch-3 sp around, join. (128 sc)
Checkpoint: the mesh panel should measure about 3 inches tall, and the waist edge stays at 28.5 inches around.
Waist Support and Tulle Underskirt
Cut elastic to fit your waist comfortably and sew it into a ring. On the inside of the dress, whipstitch the elastic just above the mesh seam, catching only the backs of stitches so no thread shows on the outside.
For the tulle, cut 2 to 3 layers, each 24 inches long. Gather the upper edge to match the waist, then sew the gathered tulle to the inside waist/mesh seam. Trim the hem after the roses go on.
Camellia Rose Motif
You’ll make 78 roses total: 26 ivory/cream, 16 light pink, 18 medium rose pink, and 18 deep pink. Each finished rose measures about 2.75 inches across. Use the same hook for all roses unless one color works up noticeably bigger or smaller.
- Step 1: ch 73. (73 ch)
- Step 2: sc in 2nd ch from hook and in each ch across, turn. (72 sc)
- Step 3: ch 3, 2 dc in first sc, [sk next sc, 3 dc in next sc] 35 times, sk next sc, sl st in last sc. Fasten off leaving a long tail. (36 shells)
- Step 4: roll from the first shell to form a tight center, keeping the lower edge flat. Sew through the base from side to side several times. (1 rose)
Rose Shaping Tips
Steam lightly before sewing if petals curl too much. For a flatter applique, tack each outer shell to the layer below. For a fuller 3D look, tack only the lower edge and let the petal tops lift.
And don’t stress if your first few roses look a bit wonky. You’ll find your rhythm after the first dozen or so. Promise.
Ombre Placement Guide
Here’s how the five rows stack up:
- Row A (ivory): 12 roses on the upper waist row
- Row B (ivory to blush): 14 roses slightly below Row A, offset halfway
- Row C (light pink): 16 roses at mid skirt, offset
- Row D (medium rose pink): 18 roses on the lower skirt
- Row E (deep pink): 18 roses at the hem, the densest color
Skirt Assembly Step by Step
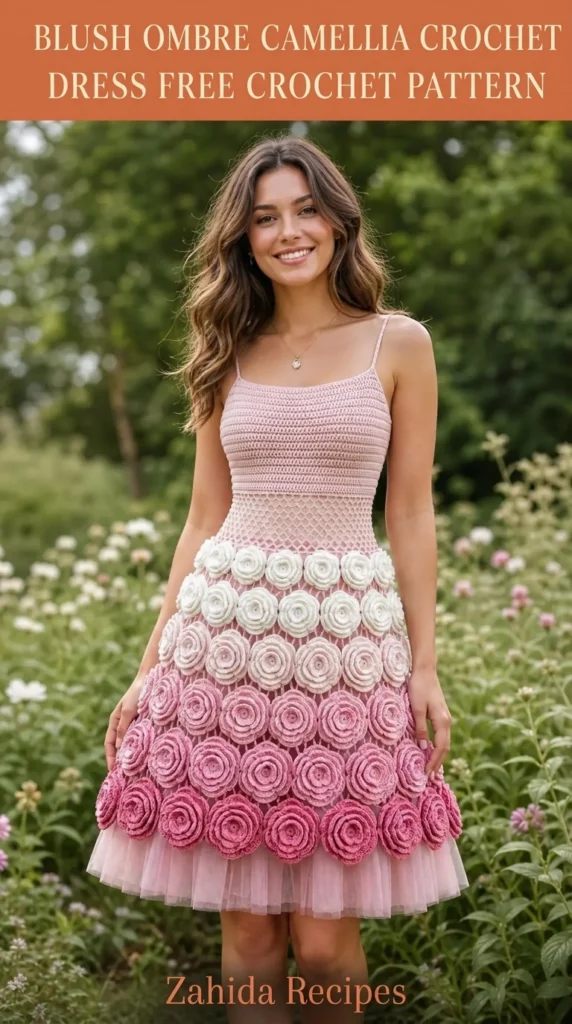
Lay the dress flat over a dress form or padded surface and pin all the roses before you sew a single one. Stagger each row so the roses nest between the ones above. Upper rows sit closer together, and the hem row can overlap the tulle edge slightly for a scalloped finish.
- Mark center front, center back, and side points on the mesh/tulle skirt.
- Pin Row A: 12 ivory roses evenly around the top of the skirt, about 0.75 inches below the mesh edge.
- Pin Row B: 14 roses below Row A, offset between the upper roses.
- Pin Row C: 16 light pink roses, keeping spacing even and letting the skirt flare.
- Pin Row D: 18 medium rose pink roses below Row C.
- Pin Row E: 18 deep pink roses along the lower edge, letting the lower petals create the scalloped hem.
- Sew each rose through the base only, catching the crochet mesh and tulle together every few roses.
Checkpoint: when pinned, the skirt should flare smoothly from about 33 inches around the upper rose row to roughly 50 inches around the lower rows. No row should pull tight or ripple sharply.
Size Customization
- Bust/waist: add or remove foundation stitches in multiples of 8. Every 8 stitches changes the circumference by about 1.75 inches at gauge. Keep the waist count divisible by 8 for the mesh.
- Length: add bodice rounds before shaping for a longer torso, or add tulle length plus an extra rose row for a longer skirt.
- Rose count: for larger skirts, add 2 roses to each lower row. For smaller skirts, remove 2 roses from the lower two rows first. Always pin before sewing.
- Straps: chain more or fewer stitches, try the dress on, then sl st back along the chain.
Troubleshooting Common Issues
- Bodice too loose: go down a hook size or remove 8 foundation stitches.
- Bodice too tight: go up a hook size or add 8 foundation stitches.
- Mesh pulls in: work the chain loops more loosely, or use a larger hook for the mesh only.
- Rose row ripples: remove 2 roses from that row or overlap the petals less.
- Rose row gaps: add 2 roses to that row or sew the roses closer together.
- Tulle looks uneven: trim the hem after all roses are sewn, then steam gently.
Blocking, Finishing, and Care
Steam the bodice lightly from the wrong side. Don’t flatten the roses. Hold the steam above the surface and shape the petals with your fingers. Weave in all ends securely, and add a lining if you’ll wear the dress without a slip.
To care for it, hand wash cold with mild detergent. Press the water out in a towel but never wring. Dry flat on a towel or dress form, reshape the roses while damp, and store it flat or lightly hung with support at the waist so the skirt doesn’t stretch.
A Note for Left-Handed Crocheters
Work the instructions exactly as written. Your rounds travel in the opposite direction, but the shaping, motif count, and placement all stay the same. For the ombre skirt, pin all the roses first, then sew, so the visual direction of the rows stays balanced.
Related Articles:
- Butter Yellow Puff Stitch Shoulder Top Free Pattern
- Buttercream Yellow Sunshine Crochet Boots Free Pattern
- Sage Green Boho Crop Top Free Crochet Pattern
Final Thoughts
Yes, this dress is a big undertaking. Seventy-eight roses is no joke. But take your time, enjoy the process, and you’ll end up with a genuinely stunning piece that people will refuse to believe you made by hand.
If you found this walkthrough helpful, save it to your Pinterest boards so it’s waiting for you when you’re ready to start. And if you make the dress, I’d love to hear about it in the comments. Your photos and feedback mean the world.
Happy crocheting, and may your roses roll perfectly on the first try. (Or at least the third.)


Leave a Reply
You must be logged in to post a comment.