

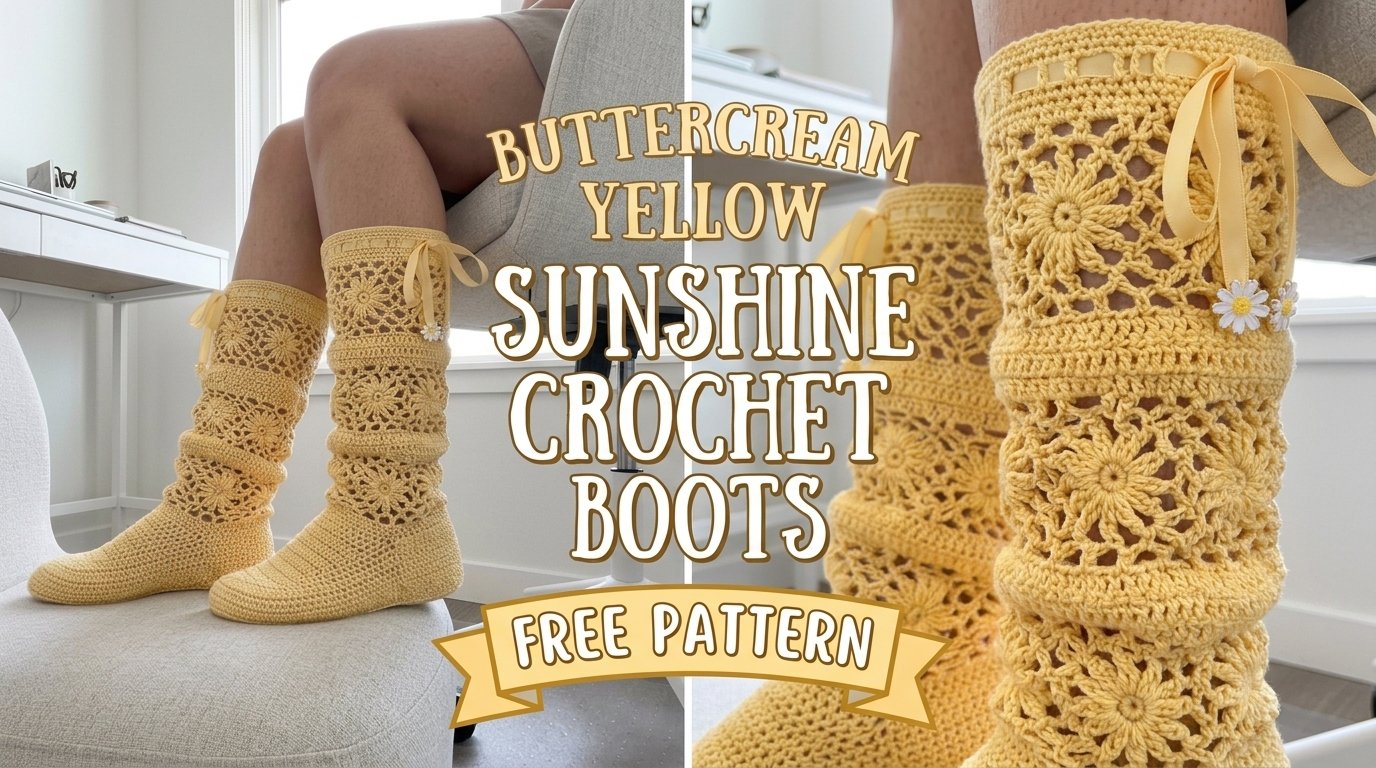
I’ve always wanted a pair of knee-high crochet boots that look runway-ready yet feel like the coziest slippers ever. These buttercream yellow sunshine boots deliver exactly that: a solid, comfortable foot paired with lacy floral granny squares climbing the leg. The open texture keeps them breathable, the ribbon tie adds a sweet finishing touch, and the whole design feels both vintage and fresh. Ready to make a pair that actually gets compliments?
Why You’ll Love This Crochet Boots Pattern
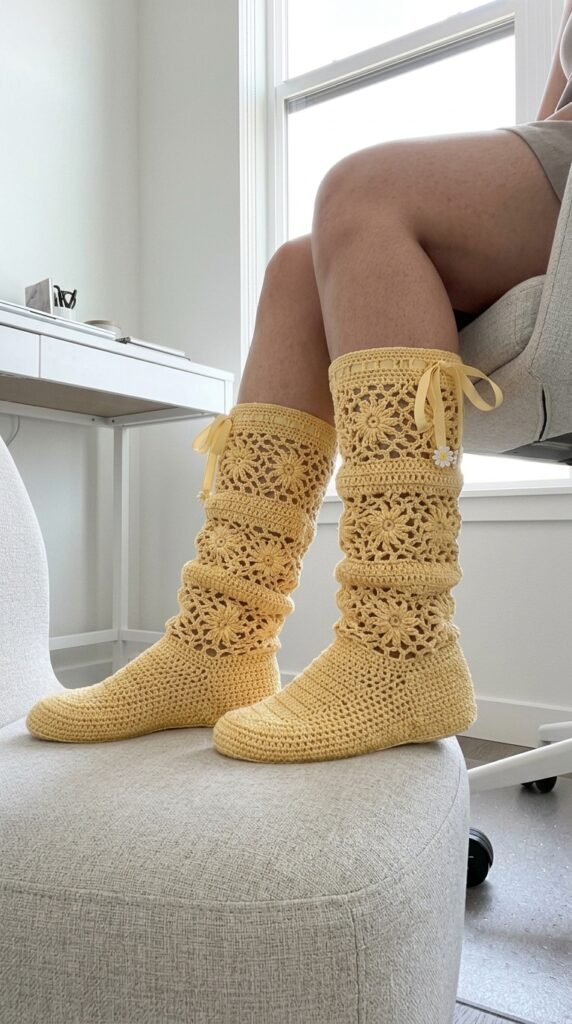
This pattern mixes solid sock-style construction with decorative floral squares so the project never gets boring. You build a dense, fitted foot first, then switch to those pretty daisy-centered granny squares for the leg. The result feels structured where it needs to be and airy where it counts.
What makes these boots special:

- Comfortable fitted foot with smooth, dense fabric
- Lacy floral granny square panels for breathability and style
- Ribbon drawstring for an adjustable calf fit
- Soft, slouchy leg that flatters every shape
- Striking vintage look with modern wearability
This is an intermediate pattern. If you already know granny squares and basic slipper shaping, you can handle it. I break every step down so nothing feels overwhelming.
Materials Needed
Gather these before you start and the process stays smooth.
Yarn:
- 400–450 yards of worsted weight yarn in buttercream yellow
- 100% cotton or a cotton blend gives the best structure and breathability
- Look for smooth yarns with good stitch definition
Hook:
- 4.0 mm (G/6) for the main work
- 3.5 mm (E/4) for tighter sections if needed
Notions:
- Tapestry needle
- At least four stitch markers
- About 1 yard of 3/8-inch satin ribbon per boot
- Optional small daisy charms
- Scissors
- Measuring tape
Gauge:
- 16 stitches and 18 rows = 4 inches in single crochet
- One floral granny square measures about 4 inches across
Check your gauge. These need to fit real feet.
Stitch Abbreviations and Definitions
Here’s every stitch you’ll meet:
- ch = chain
- sl st = slip stitch
- sc = single crochet
- hdc = half double crochet
- dc = double crochet
- tr = treble crochet
- ch-sp = chain space
- sk = skip
- inc = increase
- dec = decrease (sc2tog)
Nothing exotic—just the classics used in a pretty way.
Pattern Notes Before You Begin
This pattern is written for a women’s size medium (US 7–8). Foot length lands around 9.5 inches and total height from sole to top edge sits near 14 inches.
To adjust size, add or remove rounds in the foot and rows in the toe. For the leg, simply add or drop one horizontal band of granny squares.
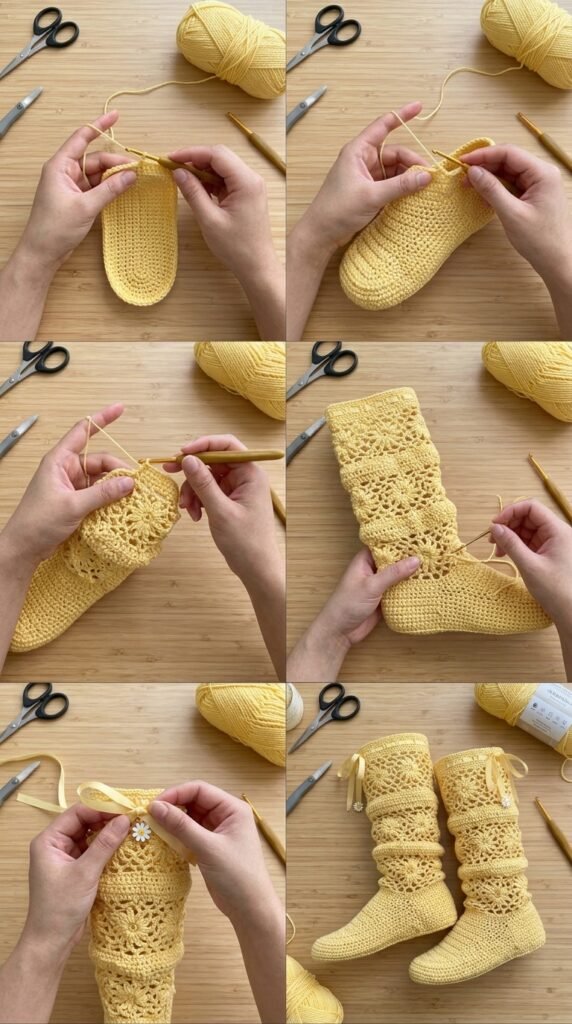
Construction happens in clear sections:
- Toe and foot (worked flat, then seamed)
- Heel shaping
- Ankle ribbing
- Floral granny squares made separately
- Assembly and finishing
- Ribbon drawstring
Make both boots at the same time if you can. Completing each section for both keeps tension consistent and prevents “one boot looks different” syndrome.
The Pattern: Buttercream Yellow Sunshine Crochet Boots
Work through the parts in order and the boots practically assemble themselves.
Part 1: Toe Section
Start with a foundation chain and work rows of single crochet, increasing at both ends to shape a rounded toe. Continue until the piece measures about 3.5 inches long and curves nicely around the toes. Keep the edges even so the later seaming stays clean.
Part 2: Foot Section
Continue straight from the toe with even rows of single crochet. Build the top of the foot until it reaches the right length for your size (around 4.5 inches for the sample). Do not fasten off—you’ll move right into the sole next.
Part 3: Sole
Work a separate sole piece starting with a longer foundation chain. Shape it with a few increases, then decrease at the heel end for a comfortable curve. Leave a long tail for seaming. This separate sole gives a slightly cushioned, sturdy bottom.
Part 4: Assembling the Foot
Lay the sole right side up. Position the toe-and-foot piece on top, matching the rounded toe to the sole’s front. Whip stitch all around the perimeter, easing the fabric around the curves. Take your time at the toe—it needs gentle coaxing to sit flat. Turn right side out and you suddenly have a real boot foot.
Part 5: Ankle Ribbing
Join yarn at the center back of the foot opening and work even rounds of single crochet around the ankle. After several rounds, add an eyelet round with chain spaces for the ribbon. Finish with a few more solid rounds. This ribbed section creates a snug transition and keeps the boots from sliding down.
Part 6: Floral Granny Squares (Make 8 per boot)
These daisy-centered squares are the showstoppers. Start with a magic ring and work a round of double crochet for the center. Then create elongated petals using chains and treble crochets. Work behind the petals to build the square border with clusters and corner increases. Each finished square should measure about 4 inches. Make eight per boot (sixteen total).
Leave long tails for easy joining later.
Part 7: Assembling the Leg
Arrange the eight squares into four horizontal rows of two. Join the squares side by side into strips, then stack and join the strips vertically. Finally join the side edges to form a tube. Keep all flower centers facing the same direction for a polished look.
Slip the completed leg tube over the ankle ribbing so the bottom edge overlaps slightly. Whip stitch the tube securely to the ribbing. Suddenly the boots look tall and dramatic.
Part 8: Top Edging and Ribbon
Work a clean single crochet border around the top edge, then add an eyelet round for the ribbon, and finish with one more solid round. Cut an 18-inch length of satin ribbon and weave it through the top eyelets. Tie a soft bow at the front or side. You can also add a shorter ribbon through the ankle eyelets if you want extra adjustability.
Finishing Touches
Weave in every end carefully, working them back through several stitches and reversing direction for security. A light wet block helps the granny squares lay flat and evening out the fabric. Stuff the boots with plastic bags or towels while they dry so they keep their shape. Optional daisy charms on the ribbon ends add a little extra sunshine.

You Might Also Like
- Cream and Tan Two-Tone Crochet Boots Free Pattern
- Blush Peach Openwork Crochet High Tops Free Pattern
- Cream and Gold Shimmer Crochet Sneakers Free Pattern
- Midnight Navy Blue Peplum Crochet Top Free Pattern
FAQ’s
How long does one pair usually take?
Most intermediate crocheters finish a pair in 12–18 hours. The squares work up quickly once you get the petal rhythm, and the foot sections are straightforward single crochet.
Can I make these taller or shorter?
Yes. Add or remove one full horizontal band of granny squares for the leg. For the foot, simply adjust the number of rows in the foot section.
Will the openwork leg stretch out?
Cotton yarn holds its shape well. The ribbed ankle and ribbon ties keep everything in place, so the boots stay put even with the lacy texture.
Do I need to line the foot?
Not necessary for indoor wear. If you want extra durability or a smoother feel against bare feet, a thin fabric sole liner works nicely.
Can beginners tackle this pattern?
Confident beginners who have already made granny squares and simple slippers should be fine. Take it one section at a time and the process stays manageable.
What other colors look good?
Soft pastels, classic cream, or even a cheerful coral all work beautifully. The daisy centers look especially pretty against a slightly deeper background color.
Final Thoughts
You now have a complete guide to buttercream yellow sunshine crochet boots that feel cozy and look special. Start with the solid foot, build those pretty floral squares, join everything carefully, and finish with the ribbon ties. Once you slip them on you’ll understand why these boots become instant favorites. Grab your yellow yarn and start the first square—your future self will thank you every time you pad around the house looking fabulous.


Leave a Reply
You must be logged in to post a comment.