

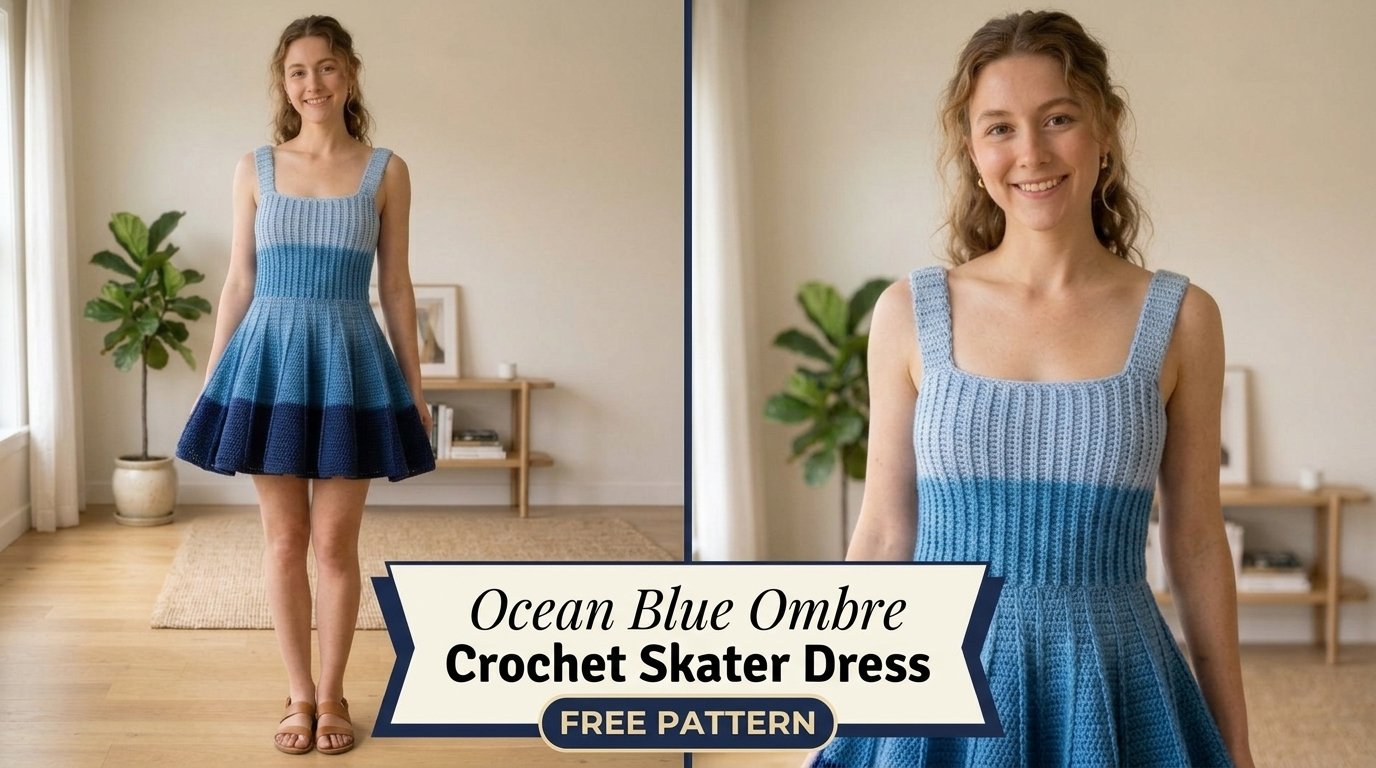
I still remember the exact afternoon the idea for this dress arrived. I was standing at the edge of the boardwalk watching the tide pull colors across the water—deep navy near the horizon, shifting through sapphire, then soft aqua where the waves finally broke on the sand. The light kept changing and every shade felt alive. I went home that evening, pulled every blue yarn I owned out of the closet, and started sketching.
What came out of those sketches is the Ocean Blue Ombre Crochet Skater Dress. It has a smooth, fitted bodice that sits close without clinging, a gentle waistline that flares into a full, twirl-friendly skirt, and a soft ombre that moves from deep ocean at the hem up through mid-tones into a lighter seafoam at the neckline. The fabric has beautiful drape, the kind that moves when you walk and settles into soft folds when you sit.
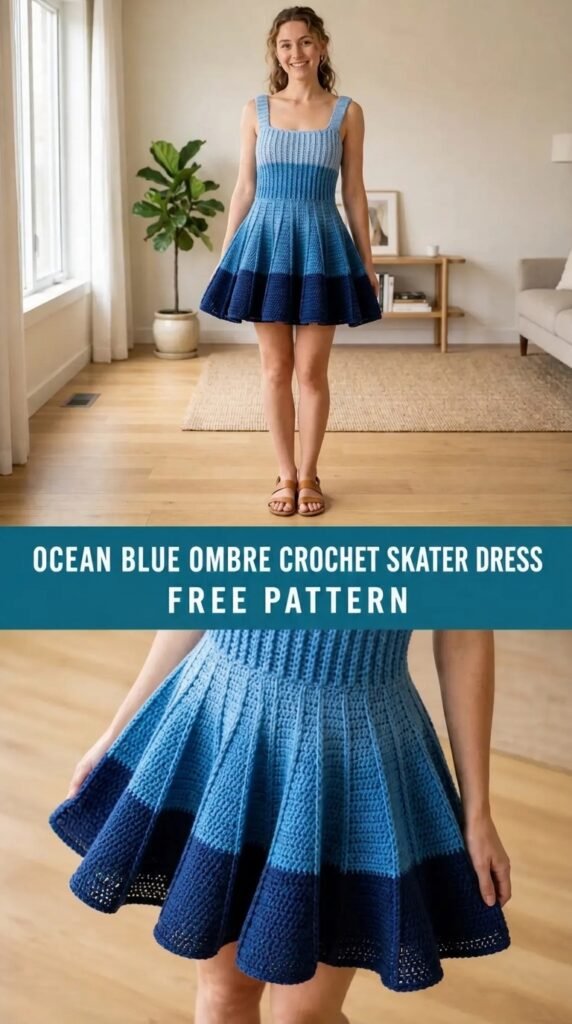
This is an intermediate pattern. The stitches themselves are familiar—mostly double crochet with some simple increases and a light lace edging—but the shaping and the color changes require attention. If you are comfortable reading stitch counts and adjusting for gauge, you will be fine. I want to be upfront: the skirt uses a lot of yarn and takes time, but every round feels rewarding as the flare grows.
About This Pattern
The dress is worked top-down in one piece. You begin at the neckline, shape the bodice with short rows and strategic increases, create a defined waist, then expand the skirt with evenly spaced increase rounds. The ombre is achieved by changing yarn every few inches rather than every row, which keeps the color flow smooth and natural. Finished measurements are given for sizes XS through 2XL with a relaxed fit through the hips and a skirt that falls approximately mid-thigh to just above the knee depending on your height and blocking.
The fabric has moderate drape. It is not stiff, nor is it overly soft and clingy. Once blocked, the skirt holds its shape while still moving freely. I designed it to be worn with a simple slip or bike shorts underneath if you prefer more coverage, though the stitch density is solid enough for most settings.
Materials You’ll Need
Yarn
I used a light worsted / DK weight cotton-blend that softens beautifully after washing and has excellent stitch definition. You will need five shades for the ombre effect. Approximate totals (allow 15% extra for gauge variation and personal length adjustments):
- Color A (deep ocean navy): 350–420 yards
- Color B (rich medium blue): 320–390 yards
- Color C (bright sapphire): 300–370 yards
- Color D (soft aqua): 280–350 yards
- Color E (pale seafoam / near-white): 250–320 yards
Total yardage ranges from approximately 1,500 yards for the smallest size to 1,850 yards for the largest. Choose a yarn with good recovery so the bodice keeps its shape.
Hooks
- 4.0 mm (G) for the bodice and upper skirt
- 4.5 mm (7) for the lower skirt and final edging (the slightly larger hook softens the drape)
Notions
- Tapestry needle
- Stitch markers (at least 8, locking style preferred)
- Scissors
- Measuring tape
- Blocking mats and pins (or rust-proof T-pins)
- Optional: matching thread and a few small clear beads if you want to weight the hem slightly
Abbreviations and Terminology
All instructions use US crochet terminology.
- ch – chain
- sc – single crochet (insert hook, yarn over, pull up loop, yarn over, pull through both loops)
- hdc – half double crochet (yarn over, insert hook, yarn over, pull up loop, yarn over, pull through all three loops)
- dc – double crochet (yarn over, insert hook, yarn over, pull up loop, yarn over, pull through two loops, yarn over, pull through remaining two loops)
- inc – increase (work 2 dc in the same stitch)
- sk – skip
- sl st – slip stitch
- st(s) – stitch(es)
- sp – space
- rep – repeat
- RS – right side
- WS – wrong side
Turning chains do not count as a stitch unless a step explicitly says they do. When you see “dc in each st around,” you are working into the top of the previous round’s stitches, not into the chain spaces unless directed.
Gauge
Work a 6-inch square in double crochet using the 4.0 mm hook and Color C.
Target: 16 dc and 9 rows = 4 inches after light blocking.
If your swatch is smaller than 4 inches, go up a hook size. If it is larger, go down. Gauge is especially important in the bodice so the neckline and armholes sit correctly. The skirt is more forgiving, but matching gauge will keep the overall proportions balanced.
Main Pattern Instructions
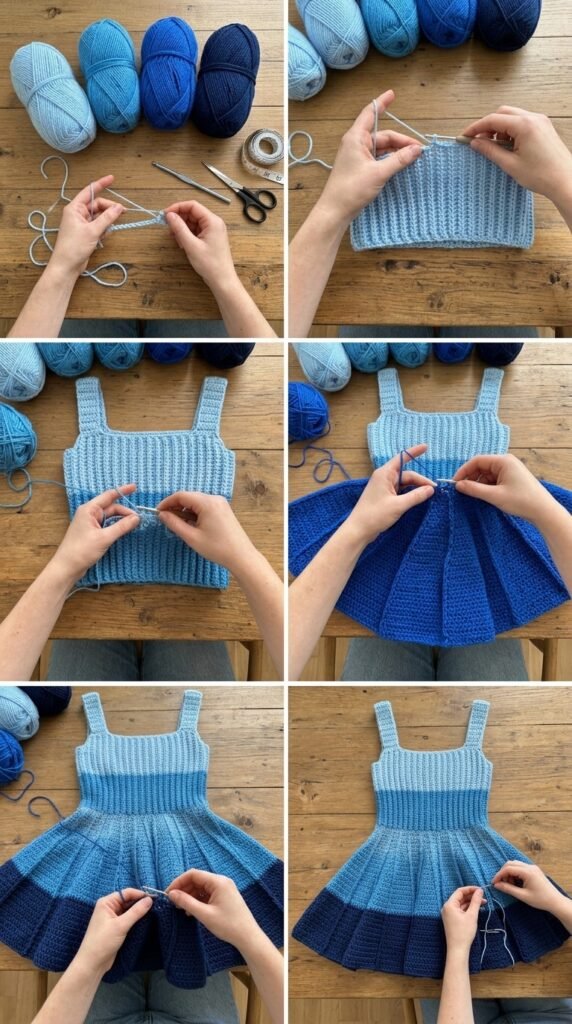
Bodice (All Sizes)
Begin with Color E (pale seafoam) and the 4.0 mm hook.
Foundation: Ch 90 (100, 110, 120, 130, 140) for sizes XS (S, M, L, XL, 2XL). Join with sl st to first ch, being careful not to twist. Place marker in the join.
Round 1: Ch 2 (does not count as st), dc in each ch around. Join with sl st to first dc. Count: 90 (100, 110, 120, 130, 140) dc.
Round 2: Ch 2, dc in each st around. Join.
Rounds 3–5: Repeat Round 2.
You now have a simple tube. We will shape the neckline and armholes with short rows and increases.
Neckline shaping (short rows):
Still with Color E.
Short Row 1: Ch 2, dc in next 20 (22, 24, 26, 28, 30) sts, turn.
Short Row 2: Ch 2, dc across the same 20 (22, 24, 26, 28, 30) sts, turn.
Short Row 3: Ch 2, dc in next 25 (27, 30, 32, 35, 37) sts (this includes previous short-row stitches plus additional ones), turn.
Short Row 4: Ch 2, dc across those same stitches, turn.
Continue in this manner, adding 5–6 stitches each pair of short rows until you have worked across roughly half the circumference. Then work one full round to even everything out:
Round 6: Ch 2, dc in every st around, working into the ends of the short rows as needed so the fabric lies flat. Join. Place markers at the four “corners” that will become the underarm points—roughly at ¼, ½, ¾, and the join.
Armhole Openings
Round 7: Ch 2, *dc to 3 sts before marker, ch 8 (9, 10, 11, 12, 13) for underarm, sk next 6 (7, 8, 9, 10, 11) sts (these form the armhole base), dc to next marker; rep from * once more, then dc to end. Join.
You have created two armhole openings. The remaining stitches form the front and back of the bodice.
Rounds 8–12: Ch 2, dc in each dc and each ch of the underarm chains around. Join.
At this point the bodice should reach approximately to the underbust or just above the natural waist, depending on your torso length. Try it on. If you need more length, add 1–3 more rounds of plain dc before continuing.
Waist Definition
Switch to Color D (soft aqua).
Round 13: Ch 2, *dc in next 4 sts, dc2tog; rep from * around, adjusting the last few stitches if needed so the count divides evenly. Join. This gentle decrease draws the fabric in at the waist.
Rounds 14–16: Ch 2, dc in each st around. Join.
Skirt – Beginning the Flare
Change to the 4.5 mm hook and Color C (bright sapphire).
Round 17: Ch 2, *dc in next 5 sts, inc; rep from * around. Join.
Round 18: Ch 2, dc in each st around. Join.
Round 19: Ch 2, *dc in next 6 sts, inc; rep from * around. Join.
Round 20: Ch 2, dc in each st around. Join.
Continue this pattern: one increase round followed by one plain round, adding one extra stitch between increases each time (next increase round will be dc in next 7, inc, then dc in next 8, inc, and so on).
Work until the skirt reaches the desired length before the final color changes. For a classic skater length that hits mid-thigh to just above the knee, most makers stop after 18–24 total skirt rounds, depending on size and personal preference. Measure as you go—try the dress on and check the flare and length in a mirror.
Color Changes Through the Skirt
To create the ocean ombre:
- Work approximately the first third of the skirt length with Color C.
- Switch to Color B (rich medium blue) for the middle third.
- Finish the remaining length with Color A (deep ocean navy).
Make color changes at the beginning of a round by fastening off the old color and joining the new color with a standing dc, or by carrying the yarn up the inside if you prefer fewer ends. Weave in ends as you go so the inside stays neat.
Final Skirt Rounds and Edging
Once you reach the desired length, work 2–3 plain rounds in Color A with no increases so the hem settles.
Edging Round 1: Ch 1, sc in each st around. Join.
Edging Round 2: Ch 1, *sc in next st, ch 3, sk 2 sts; rep from * around. Join with sl st to first sc.
Edging Round 3: Sl st into first ch-3 space, ch 1, *(sc, hdc, dc, hdc, sc) in same ch-3 space, sc in next sc; rep from * around. Join and fasten off.
This simple shell edging gives a soft, finished look that echoes wavelets at the hem.
Special Techniques
Standing Double Crochet (for clean color changes)
Make a slip knot on the hook, yarn over, insert hook into the indicated stitch, yarn over and pull up a loop (3 loops on hook), yarn over and pull through two loops, yarn over and pull through remaining two loops. This starts a new color without a visible chain.
Invisible Join
After the last stitch of a round, cut yarn leaving a 6-inch tail. Pull the tail through the final loop. Thread the tail onto a tapestry needle, skip the first stitch of the round, insert the needle under both loops of the second stitch from front to back, then insert the needle back into the center of the last stitch you made (where the tail first came through). Pull gently until the join matches the height of the surrounding stitches. Weave in the end.
Assembly and Finishing
Because the dress is worked in one piece, there is almost no seaming.
- Weave in every end securely on the wrong side, following the path of the stitches for at least an inch in two directions.
- Check the armhole openings. If they feel too large or too small, you can add a simple single-crochet border around each armhole using Color E for a polished look: join yarn at the underarm, sc evenly around, joining with sl st.
- Optional neckline finish: work one round of sc around the original foundation chain in Color E for a clean edge.
No additional assembly is required. The dress is ready for blocking.
Blocking and Care
Wet-block the finished dress for the best drape and to even out the stitches.
Fill a clean basin with lukewarm water and a small amount of wool wash or mild detergent. Submerge the dress and let it soak for 15–20 minutes. Gently squeeze (do not wring) to remove excess water. Roll the dress in a large towel and press to absorb more moisture.
Lay the dress flat on blocking mats. Shape the bodice to the finished measurements, then gently stretch the skirt outward so the flare is even all the way around. Pin the hem in place, keeping the edge smooth. Allow to dry completely—this can take 24–36 hours depending on humidity and yarn content.
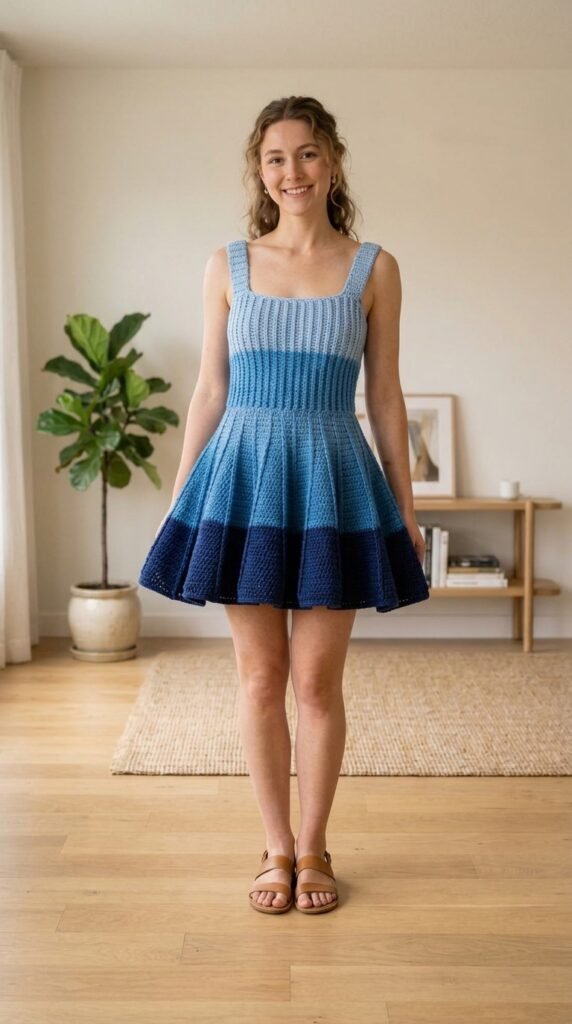
Once dry, remove the pins. The fabric will have softened and the ombre will look even more blended.
Care: Hand wash in cool water, roll in a towel to remove moisture, and dry flat. Never hang a wet cotton or cotton-blend dress; the weight of the water can stretch the bodice and lengthen the skirt unevenly. Store folded rather than on a hanger for long periods.
Fit and Troubleshooting Tips
- Bodice feels too tight or too loose: Adjust the number of foundation chains in multiples of 2 and recalculate the increase spacing. You can also add or remove plain rounds before the waist decrease.
- Skirt cups or ruffles unevenly: This usually means the increases are not evenly spaced. Count carefully and place markers every 10–12 stitches on increase rounds until the rhythm becomes automatic.
- Color changes look abrupt: Work the last two rounds of one color and the first two rounds of the next color with a slightly looser tension, or alternate the two colors for one round before fully switching.
- Armholes gaping: Add a round of sc around the armhole edge, decreasing 2–4 stitches evenly if needed.
- Dress shorter or longer than expected after blocking: Cotton yarns often grow a little with wet blocking. If you want a shorter finished length, stop the skirt 1–2 inches earlier than your target measurement.
If your gauge is slightly off but the bodice still fits, you can continue; the skirt is more forgiving. Always try the dress on at the end of the bodice and again midway through the skirt so you can make length adjustments before investing more yarn and time.
You Might Also Like
- Butter Yellow Sunshine Fairy Top Free Crochet Pattern
- Camel Tan Shearling Edge Crochet Cardigan Free Pattern
- Monochrome Lace Mandala Halter Free Crochet Pattern
- Mint Green Woven Bag on Vanity Free Pattern
FAQ’s
What skill level is this pattern?
This is an intermediate pattern. You should already be comfortable with double crochet, working in the round, basic increases and decreases, and changing colors cleanly. Short-row shaping and tracking stitch counts are the main skills required.
Can I use a different yarn weight?
Yes, but you will need to adjust your hook size and recalculate stitch counts to match the finished measurements. A true DK or light worsted cotton or cotton-blend gives the best drape and stitch definition for this design. Avoid very stiff or very fuzzy yarns.
How do I make the dress longer or shorter?
For a longer skirt, simply continue the increase pattern (one increase round followed by one plain round) until you reach the length you want, then finish with 2–3 plain rounds and the edging. For a shorter version, stop earlier. Always try the dress on as you work so you can check the length against your body.
Can I make this in a solid color instead of ombre?
Absolutely. Use the total yardage listed and work the entire dress in one color. The shaping and construction stay exactly the same.
How long does this project usually take?
Most intermediate crocheters finish the dress in 25–40 hours, depending on size, personal speed, and how many color changes they make. The skirt is the most time-consuming section.
Is the dress see-through?
With the recommended gauge and a cotton or cotton-blend yarn, the fabric is dense enough for most wearers. If you prefer more coverage or plan to wear it without a slip, you can go down half a hook size for a tighter fabric or line the skirt with a lightweight fabric slip.
What if my armholes feel too large or too small?
You can easily adjust them. After the dress is finished, work a round or two of single crochet around each armhole, decreasing a few stitches evenly if the opening is too big, or adding a few chain spaces if it feels tight.
Do I need to block the dress?
Yes. Blocking is strongly recommended. It evens out the stitches, softens the fabric, sets the flare of the skirt, and helps the ombre colors blend more naturally. Wet-blocking gives the best results with the suggested yarn.
Final Thoughts
There is something deeply satisfying about watching the ocean colors grow under your hook. The first time I tried the finished dress on and spun in a slow circle, the skirt lifted and settled like a wave. I hope you feel that same little rush when yours is complete.
Take your time with the color transitions and the blocking—they are what turn a simple skater shape into something that feels special. When you finish, I would love to see how your ocean turned out. Leave a comment, share a photo, or tag your project so others can find inspiration too.
Happy stitching. May your dress move with every step and remind you of the water that started it all.



Leave a Reply
You must be logged in to post a comment.