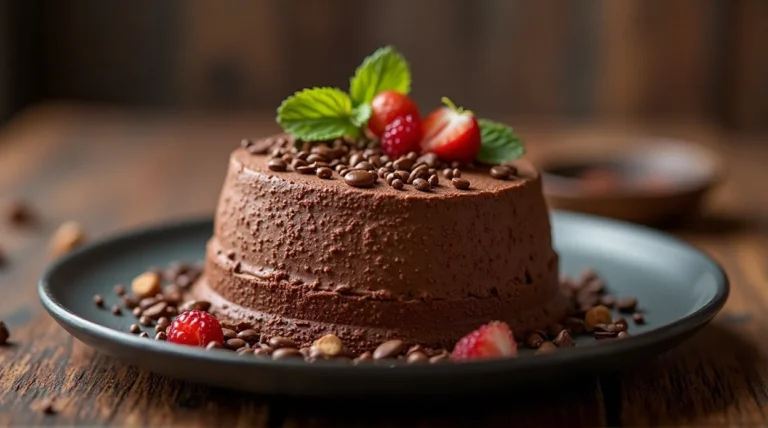
Whipped Chocolate Mousse Cups Recipe
So you want dessert… but not the kind that requires 15 steps, 3 pans, and a mild emotional breakdown halfway through? Same here. 😅
Enter whipped chocolate mousse cups Recipe —the kind of dessert that looks like you spent hours being a pastry genius, when in reality you were just casually whipping things in a bowl while scrolling your phone. Smooth, airy, chocolatey perfection in a cup. Honestly, it’s giving effortless elegance.
Why This Recipe is Awesome
Let me hype you up for a second—this recipe is a total win.
- Ridiculously easy: No baking, no stress, no “why did this collapse?” moments.
- Fancy vibes, minimal effort: Serve these in little cups and suddenly you’re hosting a 5-star dessert situation.
- Chocolate overload (in a good way): It’s rich, creamy, and basically melts in your mouth.
- Perfect for any occasion: Date night? Family dinner? Midnight craving? Covered.
And best of all? It’s almost impossible to mess up. I said almost—we’ll get to that later.
Ingredients You’ll Need
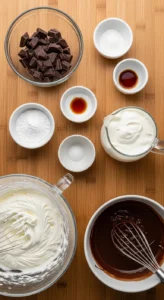
- 200g dark chocolate – the star of the show (go for good quality, trust me)
- 1 cup heavy cream (chilled) – for that dreamy whipped texture
- 2 tbsp powdered sugar – just enough sweetness
- 1 tsp vanilla extract – tiny but mighty flavor boost
- A pinch of salt – don’t skip it, it makes chocolate pop
- Optional toppings:
- Whipped cream
- Chocolate shavings
- Fresh berries
- Crushed cookies
Pro tip: The better your chocolate, the better your mousse. This is not the time for mystery chocolate hiding in your cupboard since 2019.
🍫 The Ultimate No-Bake Dessert Ebook 🍓
30 mouthwatering no-bake recipes you can whip up in minutes — creamy cheesecakes, fruity parfaits, chocolatey bars, and more!
- ⚡Quick & easy — no oven required
- 📖30 recipes + bonus treat
- 🍓Chocolate, fruit, nutty & refreshing flavors
- ✨Beautifully designed, instant download
Step-by-Step Instructions
- Melt the chocolate
Break the chocolate into pieces and melt it using a double boiler or microwave (short bursts, stir in between). Keep it smooth, not scorched. Burnt chocolate = heartbreak. - Let it cool slightly
Don’t pour hot chocolate into whipped cream unless you want chocolate soup. Let it cool until warm, not hot. - Whip the cream
In a chilled bowl, whip the heavy cream with powdered sugar and vanilla until soft peaks form. Soft peaks = fluffy and light, not stiff like cement. - Fold in the chocolate
Gently fold the melted chocolate into the whipped cream. Take your time—this is not a wrestling match. You want to keep that airy texture. - Add a pinch of salt
Just a tiny pinch. It won’t make it salty—it’ll make it taste like a chocolate dream. - Spoon into cups
Divide the mousse into serving cups or glasses. Try not to eat it all straight from the bowl (no promises). - Chill and set
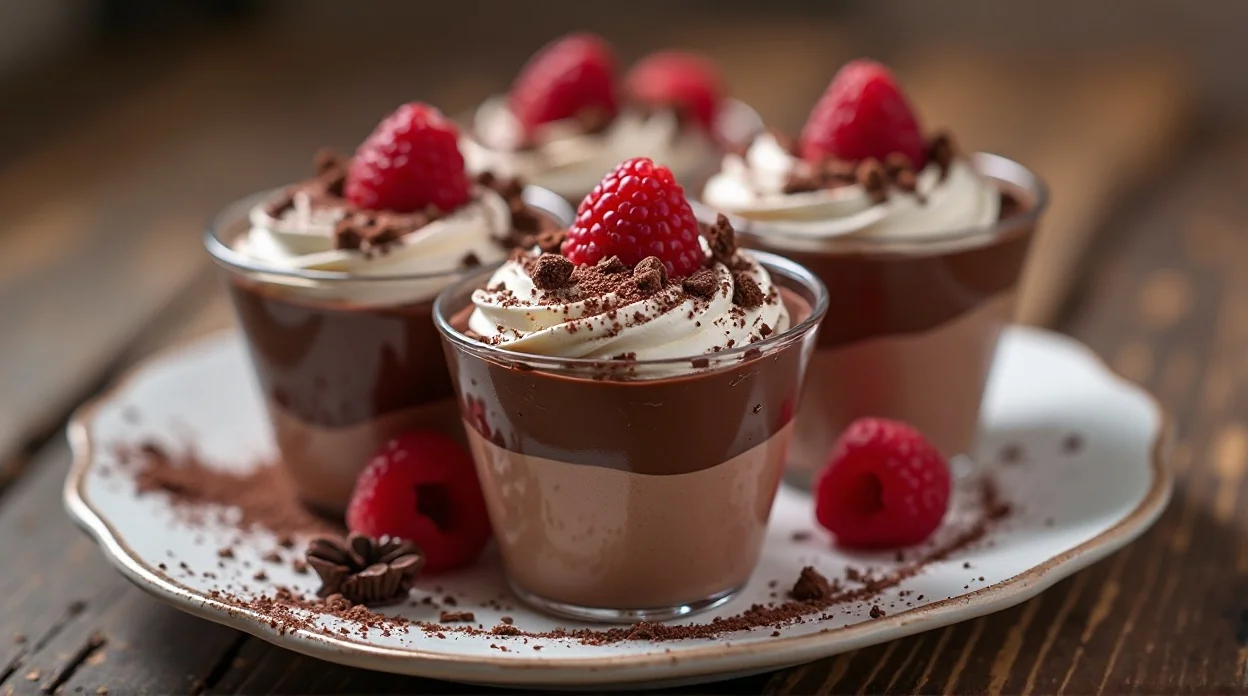
Refrigerate for at least 1–2 hours. This helps it firm up into that classic mousse texture. - Decorate & serve
Top with whipped cream, berries, or chocolate shavings. Or all three. Go big or go home.
Common Mistakes to Avoid
- Using hot chocolate in the mix
You’ll deflate the whipped cream instantly. Result? Sad, dense mousse. Let it cool a bit. - Overwhipping the cream
If your cream turns grainy, congrats—you made butter. Keep it soft and fluffy. - Mixing too aggressively
Folding gently is key. Treat it like a delicate situation, not a gym workout. - Skipping the chill time
I know, patience is hard. But skipping this step gives you pudding, not mousse. Big difference. - Cheap chocolate choices
Quality matters here. IMO, this is where you don’t cut corners.
Alternatives & Substitutions
- Milk chocolate instead of dark
Sweeter and less intense. Great if you’re not a dark chocolate fan. - Dairy-free version
Use coconut cream instead of heavy cream. It adds a slight coconut flavor, but honestly? It works. - Sugar swap
Honey or maple syrup can work, but it slightly changes the texture. Still tasty though. - Flavor twists
Add espresso powder for a mocha vibe or orange zest for a citrusy kick. Fancy, right? - Extra indulgence
Layer the mousse with crushed cookies or brownie bits. Basically a dessert within a dessert.
You can also try this lovely Recipe: Stuffed Bell Peppers Recipe
FAQ (Frequently Asked Questions)
Can I make this ahead of time?
Absolutely! In fact, it’s better that way. Make it a day ahead and let it chill—flavor gets even richer.
Can I freeze chocolate mousse?
You can, but it changes the texture slightly. It becomes more like a frozen dessert than mousse. Still good, just different.
Can I use whipped topping instead of real cream?
Technically, yes… but real whipped cream hits different. If you can, stick with the real deal.
Why is my mousse not fluffy?
You probably overmixed or used chocolate that was too hot. Gentle folding + patience = fluffy perfection.
Can I add gelatin for firmness?
You can, but honestly, it’s not needed here. This recipe already sets beautifully in the fridge.
Can kids make this recipe?
Yes! Just supervise the chocolate melting part. Everything else is basically fun mixing.
Final Thoughts
And there you have it—whipped chocolate mousse cups that look fancy, taste incredible, and require minimal effort. This is the kind of dessert that makes people think you’ve got serious kitchen skills… and honestly, we’re not correcting them. 😌 So grab your spoon, whip up a batch, and enjoy every creamy, chocolatey bite. Whether you’re impressing guests or just treating yourself after a long day, this dessert has your back.
Now go make it—and try not to eat it all before it hits the fridge. No judgment if you do, though.
Whipped Chocolate Mousse Cups Recipe
Ingredients
Method
- Melt chocolate chips gently using a microwave or double boiler; let cool slightly.
- Whip heavy cream with sugar and vanilla until soft peaks form.
- In another bowl, beat egg whites with a pinch of salt until stiff peaks form.
- Fold melted chocolate into whipped cream gently.
- Fold in egg whites carefully to keep mixture light and airy.
- Spoon mousse into serving cups.
- Chill for at least 2 hours until set.
- Garnish with whipped cream or chocolate shavings before serving.
Notes
- Fold gently to maintain an airy texture.
- Use good-quality chocolate for the best flavor.
- Chill well for a firm, silky consistency.
DID YOU MAKE THIS EASY RECIPE?
If you have, then share it with us by sending a photo. We’re excited to see what you’ve made 🙂