

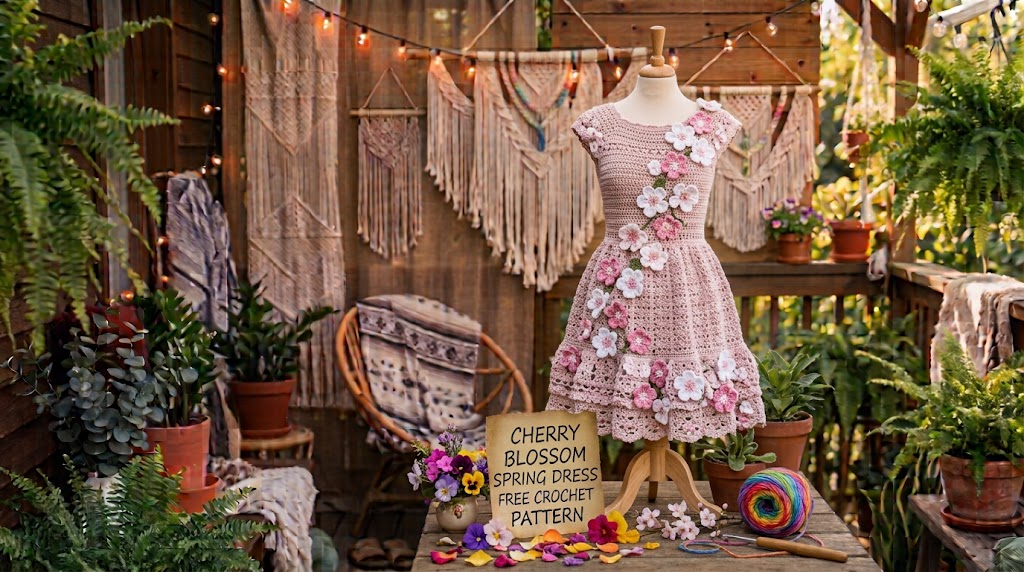
Want a free crochet dress pattern that feels like pure spring magic? This cherry blossom spring dress features a softly faded bodice, a full pleated skirt with scalloped hem, and hand-crocheted blossoms on surface branches. It is designed for child size 4 and works up into a romantic yet practical little dress that can handle playground time as well as special occasions.
The finished chest measures about 22 inches with 0–1 inch of positive ease. Bodice height is 6.4 inches, skirt length from the waist is 13 inches, and total dress length lands between 19.5 and 20.5 inches depending on strap adjustment. Most makers finish it in 18–26 hours, with the applique work taking the largest share of time.
Why This Dress Looks More Complicated Than It Is
The construction stays logical. You crochet two identical flat bodice panels, seam the sides, add straps, then pick up stitches at the waist and work the skirt downward in joined rounds. The cherry blossoms and branches are added at the very end as surface crochet and sewn motifs. If you are comfortable with garment gauge, basic seaming, and working in the round, you can complete this project.
Skill level is intermediate mainly because of the need for consistent gauge and neat applique placement rather than complex stitches.
Materials for the Cherry Blossom Spring Dress
Yarn (sport weight or light DK cotton/bamboo blend)
Total 760–860 yards
- Color A (cream): 220 yards
- Color B (blush): 470 yards
- Color C (white): 35 yards
- Color D (pale pink): 45 yards
- Color E (brown): 30 yards
- Small amount of yellow for flower centers
Hook: US E/4 (3.5 mm) or size needed to match gauge
Notions: Removable stitch markers, tapestry needle, pins, measuring tape, blocking mat, optional ⅜-inch button for the back
Good yarn choices that give clear stitch definition and enough drape: Scheepjes Catona, Paintbox Yarns Cotton DK, or Hobbii Rainbow Cotton 8/6. Any smooth sport or light DK yarn that meets gauge will work.
Gauge That Matters
Bodice: 18 stitches and 20 rows = 4 inches in extended single crochet after blocking
Skirt: 18 hdc and 14 rounds = 4 inches after blocking
Both stitch and row gauge affect the final fit. Swatch both fabrics before starting.
Stitches and Special Techniques
- esc (extended single crochet): Insert hook, yarn over, pull up a loop, yarn over and pull through one loop only, yarn over and pull through both remaining loops. This creates the denser, slightly taller fabric used for the bodice.
- hdc, sc, dc, and slip stitch as usual
- Small 5-petal blossom: Magic ring, then (ch 2, 2 dc, ch 2, slip stitch) five times. Close the ring and add a yellow center.
- Tiny bud: Chain 3, work 3 hdc in the third chain from the hook, slip stitch into the same chain.
- Surface branch: With brown yarn on the right side, slip stitch along pinned guidelines, keeping tension relaxed so the fabric does not pucker.
UK crocheters: US sc = UK dc, US hdc = UK htr, US dc = UK tr.
How to Make the Bodice Panels
Make two identical panels. Begin with Color A for the first 8 rows. Then fade: alternate one row A and one row B for rows 9–14. Finish rows 15–32 in Color B only.
Foundation: Chain 51. Extended single crochet in the second chain from the hook and in each chain across (50 esc).
Rows 2–32: Chain 1, turn, esc in each stitch across (50 esc).
After light blocking each panel should measure about 11 inches wide and 6.4 inches tall. Two panels joined create a 22-inch circumference.
Side Seams, Top Edging, and Straps
Place the panels right sides together. Seam the side edges from the lower edge upward for 5.25 inches, leaving the top 1.15 inches open for arm comfort. Turn right side out.
Join Color A at center back and single crochet evenly around the entire top edge (aim for 112 sc). The top edge should measure 22–23 inches and lie flat.
For each strap: Chain 37. Single crochet in the second chain and across (36 sc). Work two more rows of single crochet. Pin the straps on the wearer or a dress form—2.25 inches from each front side seam and 2 inches from each back side seam—then sew securely.
Building the Skirt and Scalloped Hem
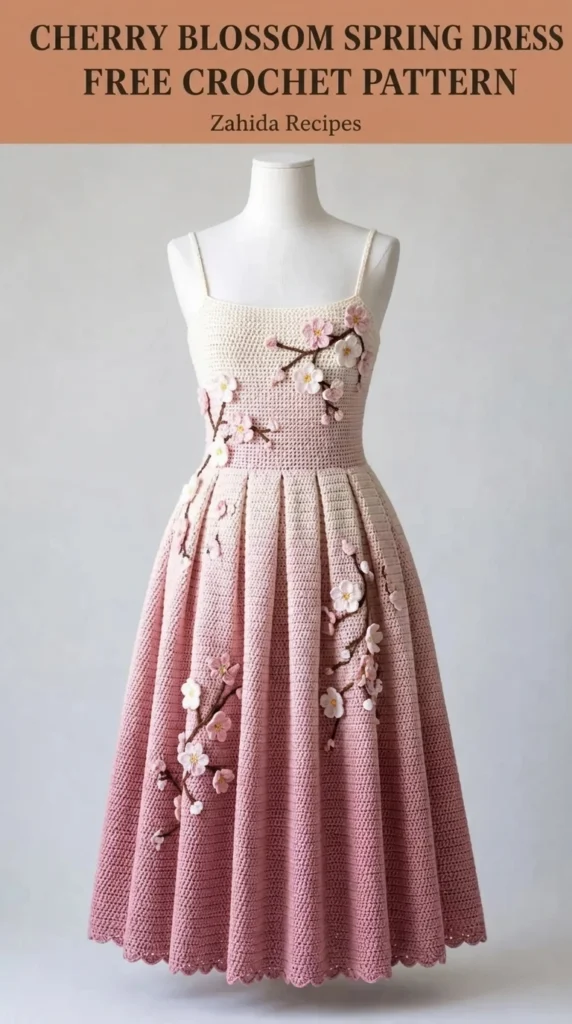
Join Color B at the center-back waist. Work 100 single crochet evenly around the lower bodice edge.
Next round: Work 2 hdc in each stitch (200 hdc).
Continue in hdc for a total of 45 rounds. The skirt should measure about 13 inches from the waist and 44 inches around the lower edge before the hem.
Scalloped hem: Single crochet in the first stitch, skip 1, 5 dc in the next stitch, skip 1; repeat around. This creates 50 scallops.
At the waist, mark every 10 stitches. Pinch a shallow vertical fold at each marker for the first 3 inches of skirt depth and steam lightly through a cloth to set soft pleats.
Adding the Cherry Blossom Appliques
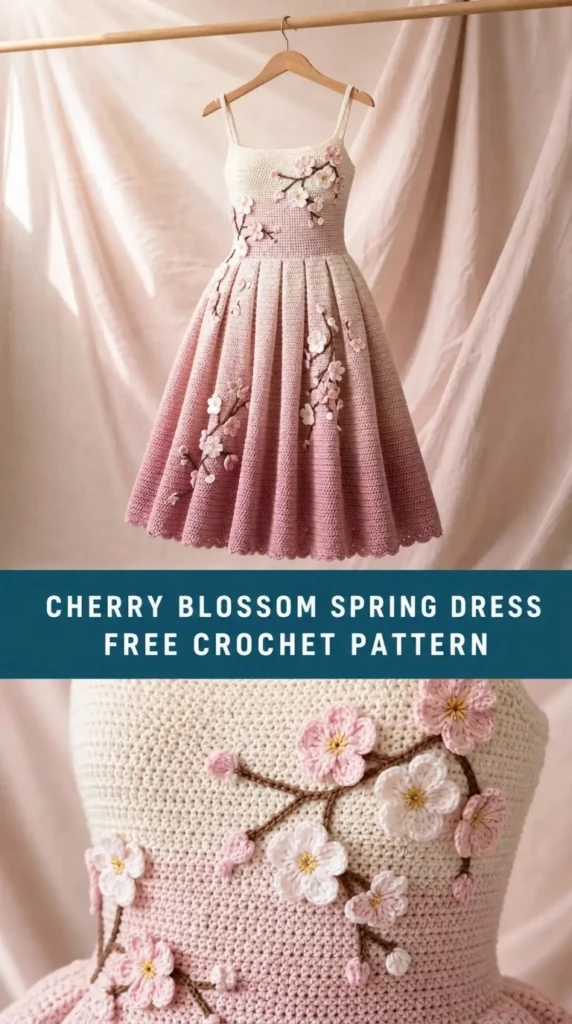
Make 12 small 5-petal blossoms (6 white, 6 pale pink) and 16 tiny buds in pale pink.
Surface-crochet five brown branches: two across the upper bodice, one sweeping from lower left skirt toward center, one on the right skirt, and one small branch on the back skirt.
Sew the blossoms and buds along the branches. A typical layout places a cluster of five blossoms at upper right bodice, three at upper left, three along the lower front skirt branch, and one on the back skirt, with remaining buds at the branch tips. Adjust placement by measuring from center front and back so the design sits evenly on your finished dress.
Finishing, Blocking, and Care
Weave in ends on the wrong side. Wet block or steam block through a pressing cloth, shaping the top edge square and opening the skirt fullness evenly. Secure the strap ends firmly. An optional small button and thread loop at center back adds extra security.
Hand wash in cool water with mild detergent. Roll in a towel, do not wring, and lay flat to dry while reshaping straps, folds, and blossoms. Store flat or lightly folded to protect the appliques.
Quick Size Adjustments
- Chest: Add or subtract 4 stitches per bodice panel for about 0.9 inch change in total circumference.
- Bodice height: Add or remove rows before seaming (5 rows ≈ 1 inch).
- Strap length: Pin on the wearer; 4 chains change length by about 0.9 inch.
- Skirt length: Add or remove hdc rounds before the scallop (3–4 rounds ≈ 1 inch). Keep the final round a multiple of 4 for the scallops.
Common Issues and Fixes
| Problem | Simple Fix |
| Bodice too wide | Use a smaller hook or remove stitches in pairs from each panel |
| Bodice too short | Add rows before seaming |
| Skirt ripples at waist | Reduce the second-round increases |
| Branches pucker | Surface crochet more loosely or sew chain lengths instead |
Related Articles:
- Baby Blue Bunny Easter Barrel Bag Free Crochet Pattern
- Soft Lavender Chunky Knit Sweater Free Crochet Pattern
- Teal Bohemian Bobble Bag Free Crochet Pattern
FAQ’s
Is the cherry blossom spring dress free crochet pattern suitable for beginners?
The individual stitches are straightforward, but consistent garment gauge, seaming, and neat applique placement make it better suited to intermediate makers or confident beginners ready for a structured garment.
What size does this pattern make?
Child size 4. Finished chest is approximately 22 inches with 0–1 inch of positive ease. Total length is 19.5–20.5 inches depending on strap adjustment.
How long does the dress usually take?
Most makers finish in 18–26 hours. The applique branches and blossoms take the largest share of that time.
Can I use a different yarn weight?
Sport or light DK is recommended so the skirt has good drape and the bodice keeps its texture. If you substitute, match both gauges carefully and check the finished measurements.
Do the cherry blossoms have to be pink and white?
No. You can change the blossom colors to match any palette as long as the brown branches and yellow centers still show clearly.
Can I sell finished dresses made from this free pattern?
Check the designer’s terms on the original page. Many free patterns allow finished items to be sold with credit given to the designer.



Leave a Reply
You must be logged in to post a comment.