


The Strawberry Garden Party Dress looks impressive because the details are deliberate: a fitted single-crochet bodice, a full double-crochet skirt with pressed pleats, trailing surface-crochet vines, and hand-sewn strawberries and blossoms. The free pattern gives you the construction. These tips help intermediate makers get a better fit, cleaner pleats, secure appliques, and a finished dress that hangs the way it should.
Start with Accurate Gauge and Fit
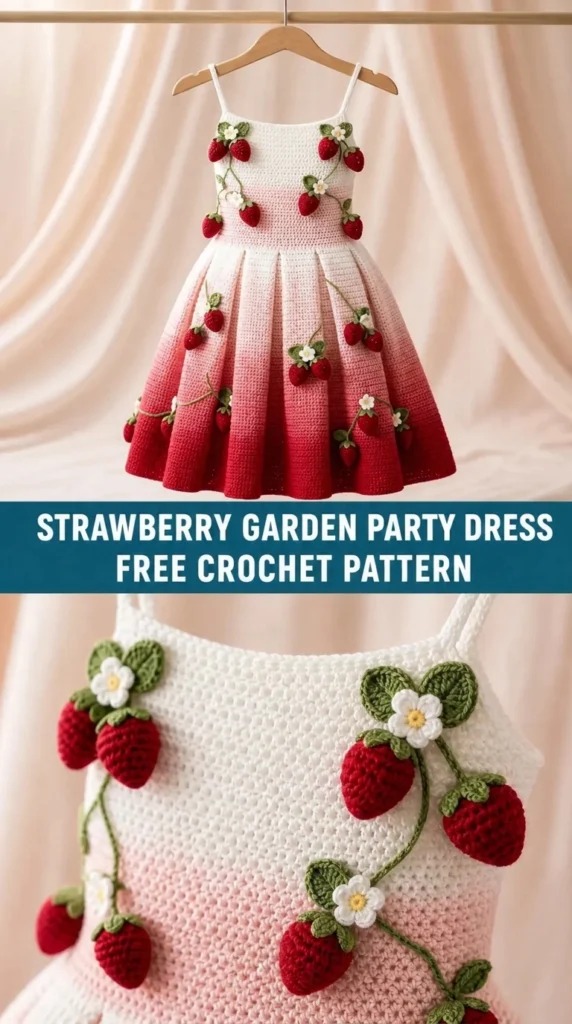
This is a fitted garment with 0–1 inch of positive ease at the bust. Gauge is not optional.
Swatch in both single crochet (bodice) and double crochet (skirt). Wash or steam the swatch the same way you will finish the dress, then measure after it dries. You need 16 sc and 18 rows in 4 inches for the bodice, and 14 dc and 8 rows in 4 inches for the skirt.
The starting chain sets the circumference. At the given gauge, 136 chains create a 34-inch finished bust. For a different size, multiply your desired finished bust measurement by 4 and round to a multiple of 4. Example: 36-inch bust needs 144 chains. Keep the same multiple of 4 so the skirt increases stay balanced.
Try the bodice on (or on a dress form) before you start the skirt. The upper and lower circumference should both measure about 34 inches for the sample size. Depth after Round 24 should be roughly 5.3 inches before edging.
Optional but useful: sew a short length of ¼-inch elastic inside the upper back between the strap points. It keeps the back from stretching during wear without changing the look.
Creating and Setting the Pleats
The skirt fullness comes from planned increase rounds. After the skirt is finished, the vertical pleats are what give it that garden-party movement.
Steam the vertical pleats at every 14 stitches of the upper skirt. This creates about 17 pleats that open toward the hem. Pin them while the fabric is still slightly damp, then let the dress dry completely on a form or hanger so the pleats set.
If the skirt ruffles too much at the hem, block the pleats deeper and use less steam near the lower edge. If you want less fullness overall, you can omit the final increase round (Round 26) and work the remaining rounds even.
Keep the side-seam markers in place through finishing. They make it much easier to place vines and appliques symmetrically later.
Making Firm, Consistent Appliques
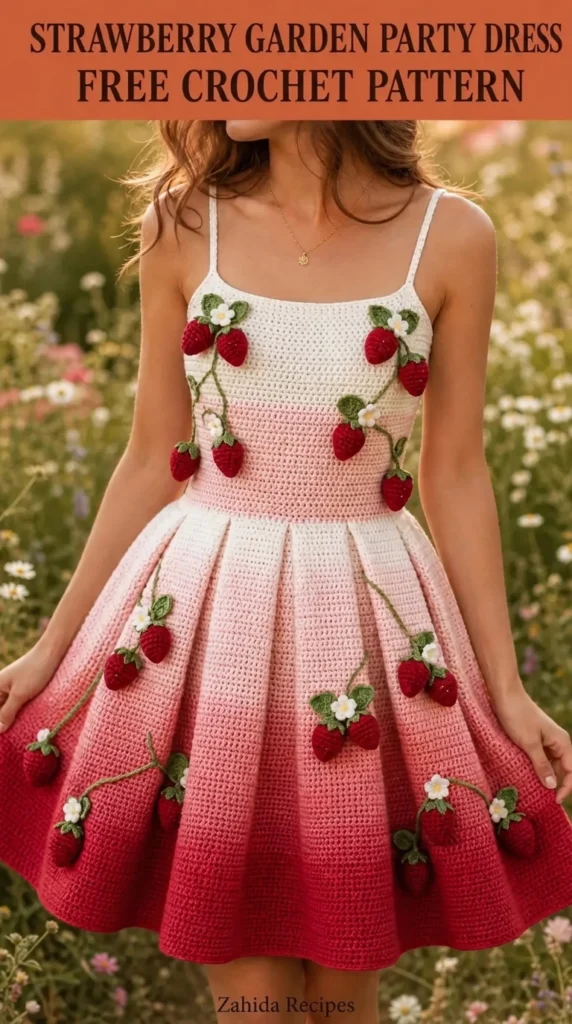
The strawberries, leaves, and blossoms are small, but they need to hold their shape.
Use a slightly smaller hook (3.5 mm) for the motifs if your usual tension is soft. Strawberries should measure about 1.1–1.3 inches tall. Stuff them lightly if you want a bit of dimension, then embroider the seed dots. The leaf caps and small leaves should sit flat against the berry without curling.
Blossoms are quick: five small petals worked into a magic ring with a yellow center. Make extras—you will use 8 blossoms and 30–36 leaves across the dress.
Sew every applique with several small anchor stitches. Weave the ends into the back of the motif itself rather than through large areas of the dress fabric. This keeps the right side clean and the motifs secure.
Surface Vines That Do Not Pucker
Surface slip-stitch vines look delicate only when the tension is relaxed. Hold the green yarn behind the fabric and keep the stitches loose enough that the fabric stays flat. If the vines pull or pucker, remove them and restitch with a larger hook or looser tension.
Pin all strawberries and blossoms first. Then work the vines so each stem ends neatly at a motif. On the front bodice, create two mirrored trails from the upper outer edges toward the center waist. On the back, use shorter trails. On the skirt, place heavier berries toward the lower half so the fabric hangs smoothly, and leave 2–3 inches between large clusters.
Keep the vines curved rather than straight. Straight lines look stiff; gentle curves look natural.
Blocking Order That Protects the Details
- Weave all main-garment ends on the wrong side.
- Steam or wet-block the bodice flat without stretching.
- Pin the skirt pleats and steam lightly. Let dry fully.
- Attach the straps and work the upper edging.
- Pin vines, berries, leaves, and blossoms. Check balance from front, side, and back before sewing.
When you steam near the appliques, cup your hand around each strawberry so the steam softens the surrounding fabric without flattening the motif. Let the dress dry on a form so the pleats stay vertical.
Common Problems and Quick Fixes
- Bodice too loose → recheck gauge; subtract stitches in multiples of 4 if needed.
- Skirt too full or ruffled → deeper pleats or omit the last increase round.
- Vines pucker → restitch with looser tension.
- Appliques sag → smaller hook for motifs and more anchor stitches.
- Upper edge ripples → drop a hook size for the edging rounds.
- Upper edge pulls inward → add a few extra single crochets evenly across the front edge only.
Related Articles:
- Peachy Keen Candy Bolster Pillow Free Crochet Pattern
- Ocean Breeze Bow Handbag Free Crochet Pattern
- Peachy Coral Jellyfish Toilet Paper Cozy Free Crochet Pattern
Final Checklist Before You Wear or Gift It
- Bodice circumference and depth match your measurements.
- Pleats are set and dry.
- Straps are sewn flat and the top edging lies smoothly.
- Vines are loose and curved.
- All strawberries, leaves, and blossoms are firmly anchored.
- Ends are invisible on the right side.
- Dress has been blocked and dried on a form.
The free Strawberry Garden Party Dress pattern already gives you a clear path. These extra steps—accurate gauge, careful pleating, secure appliques, and thoughtful blocking—turn a pretty project into a statement piece that looks intentional and wears well. Use the same habits on your next applique garment and the difference will show the moment you put it on.



Leave a Reply
You must be logged in to post a comment.