


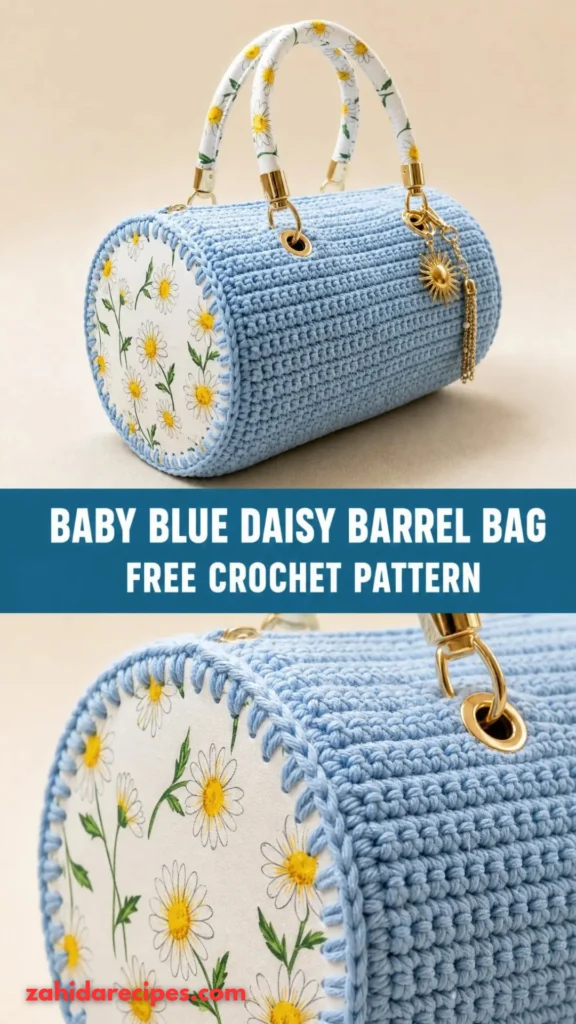
Some crochet projects are simply impossible to resist, and this Baby Blue Daisy Barrel Bag is one of them. I wanted to create something that felt cheerful, feminine, and practical without looking too complicated. The kind of bag you could carry to a weekend market, a coffee date, or a sunny afternoon outing.
The inspiration came from the combination of soft baby blue yarn and little white daisies. There’s something so sweet about that color pairing! I experimented with a rounded barrel silhouette, adding textured crochet stitches to give the bag structure while keeping its handmade charm.
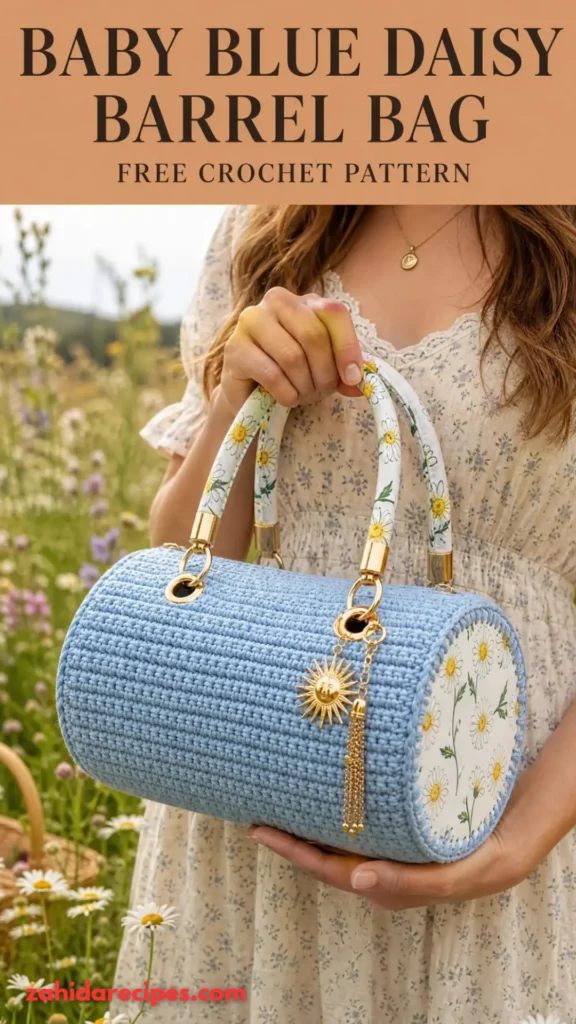
The finished design features a roomy cylindrical body, a sturdy base, decorative daisy appliqués, and comfortable crochet handles. If you love floral accessories, this Baby Blue Daisy Barrel Bag Free Crochet Pattern is a delightful project to add to your handmade collection.
About This Baby Blue Daisy Barrel Bag Pattern
This bag is crocheted using a combination of basic stitches and textured construction techniques.
The main body is worked in joined rounds from a circular base upward. Once the body reaches the desired height, the upper edge is reinforced before the handles are attached.
Small white daisy motifs are crocheted separately and sewn onto the finished bag.
Skill Level: Intermediate
Construction: Bottom-up, in joined rounds.
Finished Measurements:
- Length: Approximately 10 inches (25.5 cm)
- Height: Approximately 7 inches (18 cm)
- Width: Approximately 6 inches (15 cm)
- Handle drop: Approximately 5 inches (12.5 cm)
The finished bag is roomy enough for a small wallet, phone, sunglasses, keys, and a few everyday essentials.
The design is intentionally soft but structured. Using a firm cotton yarn and a slightly smaller hook helps prevent the bag from stretching too much during use.
Materials You’ll Need
Yarn
Choose 100% cotton yarn for a neat stitch definition and durable finish.
- Color A – Baby Blue: Approximately 280 yards (256 meters), worsted-weight cotton. Used for the bag body, base, upper edge, and handles.
- Color B – White: Approximately 45 yards (41 meters), worsted-weight cotton. Used for daisy petals.
- Color C – Golden Yellow: Approximately 15 yards (14 meters), worsted-weight cotton. Used for flower centers.
Allow approximately 15% extra yarn if your tension varies or you prefer a larger bag.
Crochet Hooks
- 4.0 mm crochet hook for the main bag.
- 3.5 mm crochet hook for daisy motifs.
- 3.5 mm hook for tighter handle construction, if needed.
Additional Supplies
- Tapestry needle
- Stitch markers
- Sharp scissors
- Measuring tape
- Sewing needle and matching thread
- Optional magnetic snap closure
- Optional cotton fabric lining
- Blocking mat and rust-resistant pins
Abbreviations and Terminology
All instructions use US crochet terminology.
| Abbreviation | Meaning |
| ch | Chain |
| sl st | Slip stitch |
| sc | Single crochet |
| hdc | Half double crochet |
| dc | Double crochet |
| inc | Increase: work 2 stitches in one stitch |
| sc2tog | Single crochet 2 stitches together |
| st(s) | Stitch(es) |
| sp | Space |
| rnd | Round |
| rep | Repeat |
| sk | Skip |
| FO | Fasten off |
| BLO | Back loop only |
| FLO | Front loop only |
Single Crochet (sc): Insert the hook into the stitch, yarn over, pull up a loop, yarn over, and pull through both loops.
Half Double Crochet (hdc): Yarn over, insert the hook, pull up a loop, yarn over, and pull through all three loops.
Double Crochet (dc): Yarn over, insert the hook, pull up a loop, yarn over and pull through two loops, yarn over and pull through the remaining two loops.
Slip Stitch (sl st): Insert the hook, yarn over, and pull through both the stitch and the loop on your hook.
Increase (inc): Work two stitches into the same stitch.
Single Crochet Two Together (sc2tog): Insert the hook into the first stitch and pull up a loop. Insert into the next stitch and pull up another loop. Yarn over and pull through all three loops.
Back Loop Only (BLO): Work into the back loop of each stitch rather than both loops.
Turning chains do not count as stitches unless specifically stated.
Gauge
Gauge is especially important for this barrel bag because a loose fabric can cause the body to stretch and lose its shape.
Using the 4.0 mm hook:
- 16 sc = 4 inches (10 cm)
- 18 rounds of sc = 4 inches (10 cm)
Make a small swatch before beginning.
If your swatch is larger than the measurements above, switch to a smaller hook. If it is smaller, try a larger hook.
Your fabric should feel firm but not stiff.
Main Pattern Instructions
Part 1: Crochet the Circular Base
Use Color A (Baby Blue) and a 4.0 mm hook.
The base is worked in continuous rounds. Place a stitch marker in the first stitch of every round so you can easily track your progress.
Round 1: Make a magic ring. Ch 1, work 8 sc into the ring. Pull the ring closed. (8 sts)
Round 2: Work 2 sc in each stitch around. (16 sts)
Round 3: Sc in next stitch, 2 sc in next stitch. Repeat around. (24 sts)
Round 4: Sc in next 2 sts, 2 sc in next stitch. Repeat around. (32 sts)
Round 5: Sc in next 3 sts, 2 sc in next stitch. Repeat around. (40 sts)
Round 6: Sc in next 4 sts, 2 sc in next stitch. Repeat around. (48 sts)
Round 7: Sc in next 5 sts, 2 sc in next stitch. Repeat around. (56 sts)
Round 8: Sc in next 6 sts, 2 sc in next stitch. Repeat around. (64 sts)
Round 9: Sc in next 7 sts, 2 sc in next stitch. Repeat around. (72 sts)
Round 10: Sc in next 8 sts, 2 sc in next stitch. Repeat around. (80 sts)
Round 11: Sc in next 9 sts, 2 sc in next stitch. Repeat around. (88 sts)
Round 12: Sc in next 10 sts, 2 sc in next stitch. Repeat around. (96 sts)
Slip stitch into the first stitch and fasten off if you prefer to join the base to the body separately. Otherwise, continue directly into the next section.
Base measurement: Approximately 6 inches (15 cm) in diameter.
Part 2: Build the Barrel Body
The body is worked upward from the circular base.
For a clean transition, work the first round into the back loops only.
Round 13: Ch 1. Working in BLO, sc in each stitch around. Join with sl st. (96 sts)
Round 14: Ch 1. Sc in each stitch around. Join. (96 sts)
Round 15: Ch 1. Sc in next stitch, hdc in next stitch. Repeat around. Join. (96 sts)
Round 16: Ch 1. Hdc in next stitch, sc in next stitch. Repeat around. Join. (96 sts)
Round 17: Ch 1. Sc in each stitch around. Join. (96 sts)
Repeat Rounds 15–17 until the bag measures approximately 6½ inches (16.5 cm) from the bottom.
Continue working even rounds of sc until the body measures approximately 7 inches (18 cm).
The alternating sc and hdc texture creates subtle horizontal variation without making the bag too bulky.
Count check: Every body round should contain 96 stitches.
Part 3: Reinforced Top Edge
A neat upper edge helps the bag maintain its shape and gives the handles a stronger attachment area.
Round 1: Ch 1. Sc in each stitch around. Join. (96 sts)
Round 2: Ch 1. Work sc in BLO around. Join. (96 sts)
Round 3: Ch 1. Sc in each stitch around. Join. (96 sts)
Fasten off and weave in the ends.
The finished opening should remain flexible enough to access your belongings comfortably.
Special Techniques: Crochet Daisy Appliqués
The little daisies are the main decorative feature of this bag.
I recommend making five flowers: one larger flower for the center front and four smaller flowers arranged around it.
You can also make additional daisies for a more playful floral arrangement.
Large Daisy Motif
Use a 3.5 mm hook.
Center:
With Color C (Golden Yellow), make a magic ring.
Round 1: Ch 1, work 10 sc into the ring. Join with sl st. (10 sts)
Fasten off.
Petals:
Join Color B (White) to any stitch.
Ch 3, work 2 dc into the same stitch, ch 3, sl st into the same stitch.
Repeat in each of the remaining nine stitches.
You will have 10 rounded petals.
Fasten off and leave a long sewing tail.
Small Daisy Motif
Make four smaller flowers.
Center:
With Color C, make a magic ring.
Round 1: Ch 1, work 8 sc into the ring. Join with sl st. (8 sts)
Fasten off.
Petals:
Join Color B to any stitch.
Ch 2, work 2 hdc into the same stitch, ch 2, sl st into the same stitch.
Repeat around to create eight small petals.
Fasten off, leaving a sewing tail.
Daisy Placement
Arrange the large daisy in the center of the front panel.
Place two small daisies above and below it, then position the remaining two toward the left and right sides.
Keep approximately ½–¾ inch between the flowers.
Pin the motifs temporarily before sewing them down.
Use a tapestry needle and the white yarn tails to attach the petals. Use yellow yarn to secure the centers.
Avoid pulling the sewing yarn too tightly, as this can distort the bag fabric.
Crochet Handles
The bag uses two sturdy integrated-style crochet handles attached separately.
Make both handles in Color A.
Foundation: Ch 61.
Row 1: Sc in the second chain from the hook and in each remaining chain. (60 sts)
Row 2: Ch 1, turn. Sc in each stitch across. (60 sts)
Row 3: Ch 1, turn. Sc in BLO across. (60 sts)
Row 4: Ch 1, turn. Sc in each stitch across. (60 sts)
Row 5: Ch 1, turn. Sc in each stitch across. (60 sts)
Fasten off, leaving a long sewing tail.
Fold the handle lengthwise so the edges meet. Whipstitch the long edges together to create a firm, rounded strap.
Repeat for the second handle.
The finished handles should measure approximately 15 inches (38 cm) long before attachment.
Handle Attachment
Position the handles evenly on the front and back sides of the bag.
For each handle:
- Mark two attachment points approximately 2 inches apart.
- Center the handle over the corresponding side of the bag.
- Overlap each handle end with the top edge by approximately 1 inch.
- Sew securely using a tapestry needle and matching yarn.
Make several reinforcing passes through the handle and bag fabric.
Check that both handles sit at the same height before finishing.
Assembly and Finishing
Now comes the fun part: bringing all the details together.
1. Arrange the Flowers
Place the large daisy in the center of the front panel.
Arrange the smaller flowers around it in a balanced pattern.
Pin them temporarily and check the design from a short distance. Sometimes a tiny adjustment makes the whole bag look more polished.
2. Sew the Flowers
Use the yarn tails to attach each daisy.
Secure the yellow centers with small stitches and make sure every petal lies flat.
3. Attach the Handles
Sew the two handles securely to the reinforced upper edge.
Check that the handles are not twisted.
4. Weave in Ends
Use a tapestry needle to weave all remaining yarn ends through several stitches on the wrong side.
Trim the excess yarn carefully.
5. Add Optional Lining
If you want extra support, add a lightweight cotton lining.
Cut a piece of fabric slightly larger than the bag’s finished body, allowing approximately ½ inch for seams.
Sew the lining into a cylindrical shape with a circular bottom.
Fold the upper edge inward and hand-sew it just below the crochet opening.
A lining is especially useful if you plan to carry heavier everyday items.
Blocking and Care
Cotton yarn benefits from gentle blocking.
Fill a basin with cool water and a small amount of mild detergent.
Submerge the finished bag and gently press out excess water. Avoid twisting or wringing the fabric.
Lay the bag flat on a clean towel and roll it gently to remove additional moisture.
Place it on a blocking mat, shape the barrel body, and adjust the daisy petals individually.
Allow the bag to dry completely before using it.
Care recommendations:
- Hand wash in cool water.
- Use mild detergent.
- Avoid bleach.
- Never hang the bag while wet.
- Dry flat and reshape the body as needed.
- Store away from direct sunlight for long periods.
If you add a fabric lining, follow the care instructions for the lining material too.
Fit and Troubleshooting Tips
My Bag Base Is Curling
A curling base usually means your tension is too tight or the increases are insufficient.
Check your stitch count after every round. If the base still curls, try a larger hook or remake the swatch with slightly looser tension.
The Bag Body Is Floppy
A floppy body often comes from loose stitches or a soft yarn.
Try a smaller hook and use firm cotton yarn. Adding a fabric lining can also improve the finished structure.
My Bag Looks Too Wide
Check the base measurement before continuing upward.
If the diameter is larger than approximately 6 inches, consider using a smaller hook or reducing the number of increase rounds while maintaining a suitable stitch count for your desired shape.
The Daisy Petals Curl
If your petals curl inward, your stitches may be too tight.
Use a slightly larger hook for the flowers and gently shape each petal during blocking.
The Handles Stretch
Cotton can stretch under weight.
For extra strength, sew the handle ends with several rows of reinforcing stitches. You can also insert a narrow cotton cord inside each handle before closing the seam.
How Can I Make the Bag Bigger?
Increase the circular base by adding additional increase rounds.
For every additional round, increase the stitch count by eight stitches, following the established circular increase formula.
Work the body evenly after reaching your desired base diameter.
Remember that a larger base requires additional yarn and may need longer handles.
Final Thoughts
There is something special about making a bag that looks like a little piece of summer.
The soft baby blue color, cheerful white daisies, and rounded barrel shape make this crochet accessory feel fresh and timeless. I especially love how the raised floral motifs stand out against the textured blue body.
This Baby Blue Daisy Barrel Bag Free Crochet Pattern is a lovely project for anyone who enjoys combining practical accessories with sweet handmade details.
Take your time with the flowers, check your stitch counts, and don’t worry if your first daisy isn’t perfectly shaped. Handmade pieces are supposed to have a little personality!
I’d love to see how your version turns out. Try experimenting with different flower arrangements or adding a pretty fabric lining to make the design your own.
Happy crocheting! 🌼


Leave a Reply
You must be logged in to post a comment.