

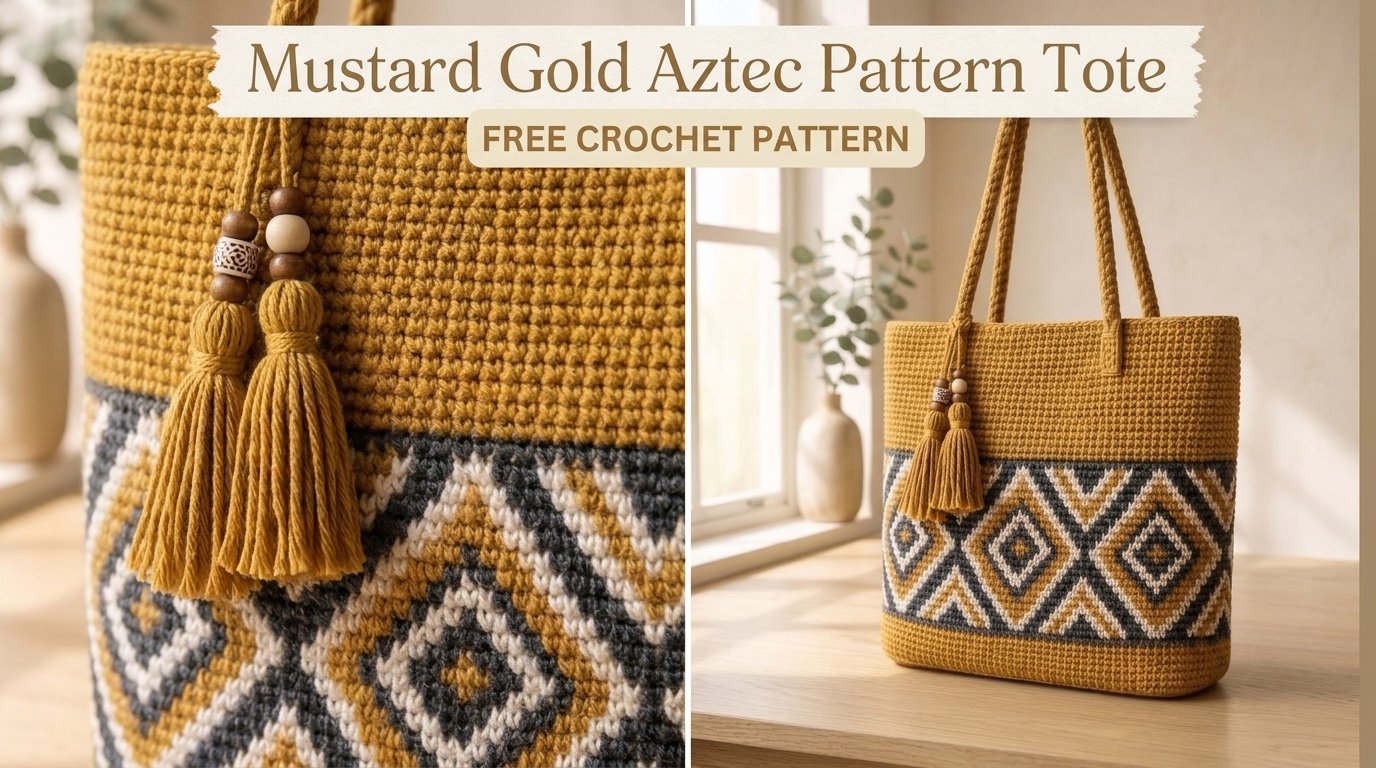
I still remember the exact afternoon the idea for this tote took shape. I was sorting through a pile of leftover worsted cotton when a deep mustard gold skein caught the late sunlight. It looked like warm desert sand at golden hour. A few days earlier I had been flipping through old Southwestern textiles and kept stopping at the bold, stepped geometric borders. Something about those strong angles and repeating diamonds felt right for a bag that needed to carry real weight—books, a market haul, or a weekend project.
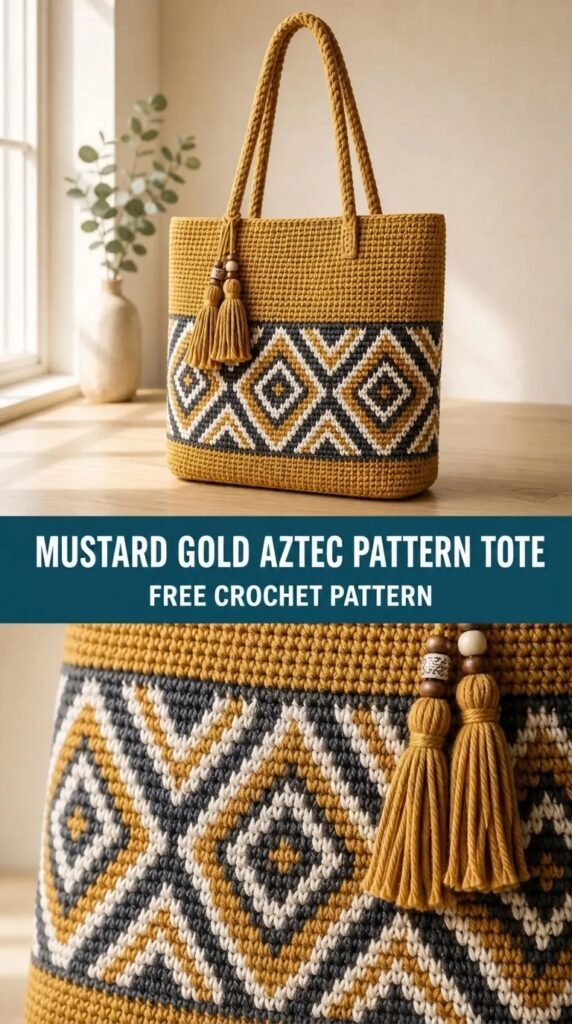
I wanted a tote that looked intentional rather than busy, so I limited the palette to mustard gold as the main field and three supporting colors for the Aztec bands. The result is structured, graphic, and surprisingly quick once the color sequence clicks. This is the Mustard Gold Aztec Pattern Tote, and I’m happy to share the full free pattern with you.
About This Pattern
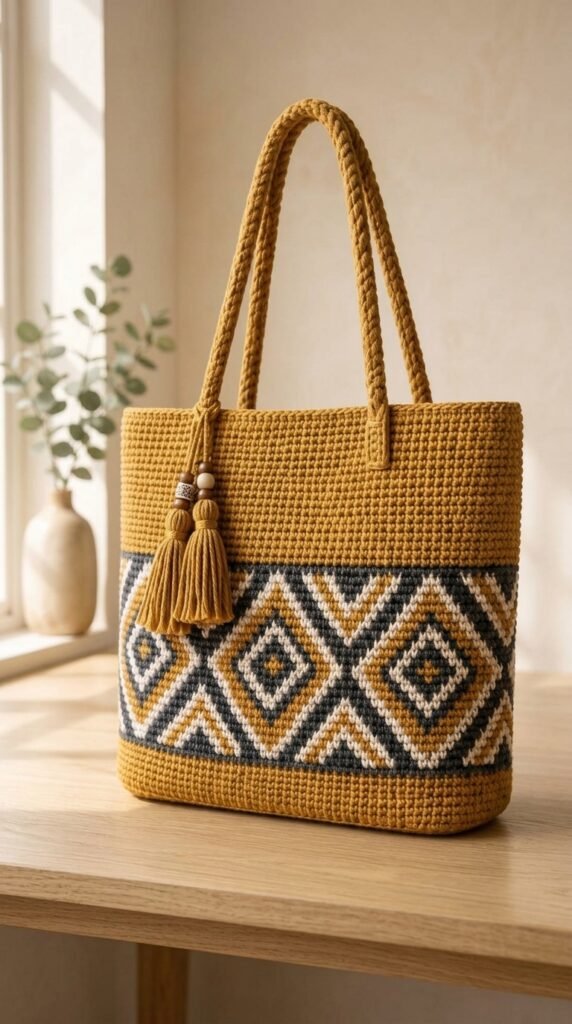
This tote is worked from the bottom up in the round using single crochet tapestry technique for the geometric bands. The base is solid mustard, the mid-section carries two wide Aztec-inspired stripes, and the upper body returns to solid color before the handles are added. The fabric is dense and holds its shape well without lining, though you can add a simple fabric liner if you prefer extra structure.
Skill level is intermediate. You should be comfortable with single crochet, color changes, and carrying yarn. The colorwork is charted and written, so you can follow whichever method feels easier. Finished measurements after blocking: approximately 14 inches wide × 15 inches tall (excluding handles) with a 4-inch deep base. Handles measure about 22 inches long each.
The drape is firm rather than floppy, which is exactly what you want in a everyday tote. The geometric bands create visual weight low on the bag so it sits nicely when filled.
Materials You’ll Need
Yarn (worsted weight cotton or cotton-blend recommended for structure)
- Color A (Mustard Gold): 420 yards / 385 meters
- Color B (Deep Terracotta): 110 yards / 100 meters
- Color C (Cream or Natural): 95 yards / 87 meters
- Color D (Charcoal or Black): 80 yards / 73 meters
Allow 15% extra for gauge variation and swatching.
Hooks
- 4.5 mm (US 7) – main body and handles
- 4.0 mm (US G/6) – optional for tighter base if your tension is loose
Notions
- Stitch markers (at least 4)
- Tapestry needle
- Scissors
- Optional: fabric for lining and sewing needle if you choose to line the bag
- Blocking mats and pins or a steamer
Abbreviations and Terminology
All instructions use US crochet terminology.
- ch – chain
- sc – single crochet: insert hook into stitch, yarn over, pull up a loop, yarn over, pull through both loops on hook
- sl st – slip stitch: insert hook into stitch, yarn over, pull through stitch and loop on hook
- st(s) – stitch(es)
- rnd – round
- rep – repeat
- BLO – back loop only
- RS – right side
- WS – wrong side
Turning chains do not count as a stitch unless a step explicitly says they do. When changing colors in tapestry crochet, work the last yarn-over of the previous stitch with the new color. Carry the unused yarn loosely along the wrong side and crochet over it to hide it.
Gauge
Work a 4 × 4 inch swatch in single crochet using Color A and the 4.5 mm hook.
Target gauge: 16 sc and 18 rows = 4 inches.
If your swatch is larger, drop to a 4.0 mm hook. If it is smaller, try a 5.0 mm hook. Accurate gauge matters here because the colorwork bands rely on consistent stitch height.
Main Pattern Instructions
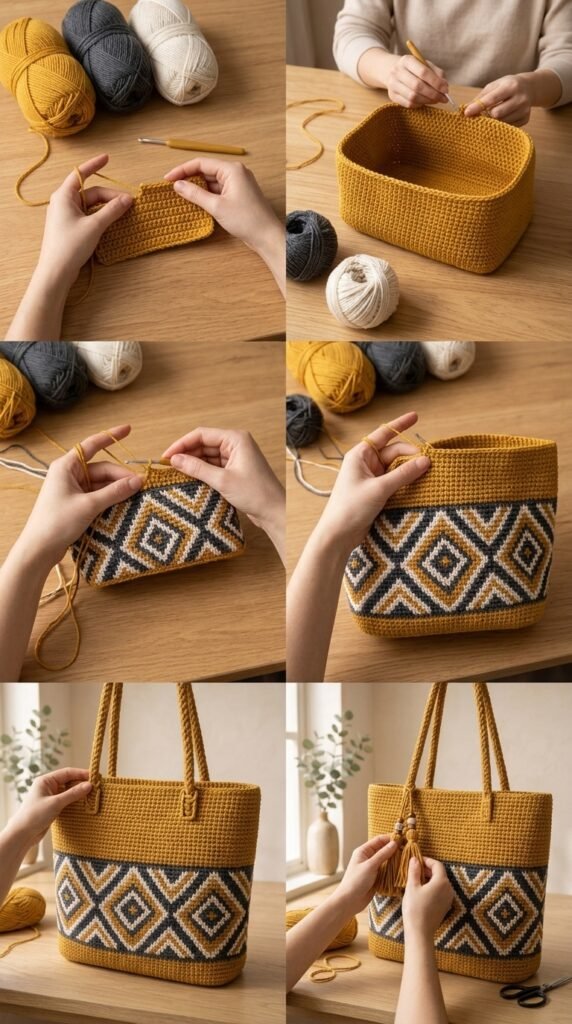
Base
With Color A and 4.5 mm hook, ch 45.
Row 1 (RS): Sc in 2nd ch from hook and in each ch across. (44 sc)
Turn.
Rows 2–18: Ch 1, sc in each st across. Turn.
At the end of Row 18 the piece should measure approximately 11 inches wide × 4 inches tall. Do not fasten off.
Joining for Body (Working in the Round)
Rnd 1: Ch 1, sc in each of the 44 sts across the top of the base. Place a marker in the first st. Working down the short side, work 18 sc evenly along the edge. Sc in each of the 44 foundation chains across the bottom. Work 18 sc evenly up the remaining short side. Join with sl st to first sc. (124 sc)
You now have a continuous oval base. From this point forward the tote is worked in continuous rounds. Move the marker up each round to mark the beginning.
Rnds 2–8: Sc in each st around. (124 sc)
First Aztec Band
The geometric band is worked over 14 rounds. Follow either the written instructions or the chart sequence below. Color changes happen within the round; carry the unused colors.
Chart Key (repeat across the 124 stitches):
The motif repeats every 31 stitches. Work the 31-st sequence four times around.
Written Color Sequence for Band 1 (Rnds 9–22)
Rnd 9: With A, sc 3; with B, sc 2; with A, sc 4; with C, sc 2; with A, sc 4; with B, sc 2; with A, sc 4; with D, sc 2; with A, sc 4; with B, sc 2; with A, sc 2. Repeat from * three more times. (124 sc)
Rnd 10: With A, sc 2; with B, sc 4; with A, sc 2; with C, sc 4; with A, sc 2; with B, sc 4; with A, sc 2; with D, sc 4; with A, sc 2; with B, sc 4; with A, sc 1. Repeat sequence adjusted to maintain 124 sts. (Full written expansion available in the detailed rows below for the first two repeats so you can see the flow.)
To keep the article clear, here is the expanded sequence for the first half of Rnd 10 so the pattern is unambiguous:
With A, sc 2; B, sc 4; A, sc 2; C, sc 4; A, sc 2; B, sc 4; A, sc 2; D, sc 4; A, sc 2; B, sc 4; A, sc 2; B, sc 4; A, sc 2; C, sc 4; A, sc 2; B, sc 4; A, sc 2; D, sc 4; A, sc 2; B, sc 4; A, sc 2. Continue the same 31-st logic around, ending with A sc to complete 124.
Rnd 11: Shift the motif one stitch to the right for the classic stepped Aztec look.
With A, sc 1; B, sc 6; A, sc 1; C, sc 6; A, sc 1; B, sc 6; A, sc 1; D, sc 6; A, sc 1; B, sc 6; A, sc 1. Adjust final stitches so total remains 124.
Rnd 12: Continue the step:
With B, sc 8; A, sc 1; C, sc 8; A, sc 1; B, sc 8; A, sc 1; D, sc 8; A, sc 1; B, sc 8; A, sc 1. Complete the round.
Rnd 13: Peak of the first diamond set.
With B, sc 10; C, sc 10; B, sc 10; D, sc 10; B, sc 10. Finish with A or the next color in sequence so the total is 124.
Rnds 14–15: Mirror the previous rows in reverse order to close the first set of diamonds, returning gradually to solid A.
Rnds 16–22: Work the second, slightly offset diamond row using the same color logic but starting the motif two stitches later so the bands interlock rather than stack directly. Keep carrying yarns neatly on the WS.
At the end of Rnd 22, cut Colors B, C, and D, leaving 6-inch tails. Weave them in later.
Rnds 23–30: With Color A only, sc in each st around. (124 sc)
Second Aztec Band
Repeat the exact color sequence of Rnds 9–22 once more for the upper geometric band (Rnds 31–44). This creates visual balance without making the bag feel heavy.
Rnds 45–52: With Color A only, sc in each st around. (124 sc)
Upper Edge and Handle Placement
Rnd 53: Sc in each st around. Place four markers evenly spaced: two at the side “seams” (the short ends of the original base) and two centered on the long sides. These mark the handle attachment points.
Rnds 54–56: Sc in each st around, moving markers up.
Do not fasten off. You will attach the handles next.
Handles
Each handle is worked as a long, dense strip that is then sewn securely to the marked points.
Handle (make 2)
With Color A and 4.5 mm hook, ch 8.
Row 1: Sc in 2nd ch from hook and in each ch across. (7 sc)
Turn.
Rows 2–90: Ch 1, sc in each st across. Turn.
The strip should measure approximately 22–23 inches long. Fasten off, leaving a long tail for sewing.
Optional reinforcement: Fold the handle lengthwise and work a row of sc through both layers to create a thicker, more durable strap. This is recommended if you plan to carry heavier items.
Attaching the Handles
Position one end of the first handle at a long-side marker, overlapping the top edge by about 1.5 inches on the inside of the bag. Using the long tail and tapestry needle, sew securely through both the handle and the top three rounds of the bag body, working back and forth several times. Repeat for the other end of the same handle at the opposite long-side marker, making sure the handle is not twisted.
Repeat the entire process with the second handle on the remaining two markers. Check that both handles are the same length and sit evenly before weaving in the final ends.
Assembly and Finishing
Weave in all remaining ends on the wrong side, taking care to secure the colorwork tails so they do not pull through to the right side. If any carried yarns feel loose, gently tug the fabric and re-weave those sections.
Optional lining: Cut a piece of cotton fabric approximately 15 × 30 inches. Fold and sew side seams to create a pouch that matches the interior dimensions of the tote. Insert the lining, turn the top edge under, and hand-stitch it just below the top round of the crochet fabric. This step is purely optional; the dense single-crochet fabric is sturdy enough for most everyday use without it.
Blocking and Care
Lightly steam-block the finished tote or wet-block it if your cotton yarn responds well to water. Pin the base flat and the sides straight so the geometric bands sit evenly. Allow to dry completely.
Care: Hand wash in cool water with mild detergent. Do not wring. Roll in a towel to remove excess water, then reshape and dry flat. Never hang a wet tote by the handles; the weight of the water can stretch them. With proper care the mustard gold will keep its rich tone and the geometric bands will stay crisp for years.
Fit and Troubleshooting Tips
- If the body cups inward, your tension is tighter than gauge. Go up a hook size for the solid sections.
- If the colorwork bands look stretched or the stitches gap, your carried yarns are too tight. Loosen the float and work more stitches over the carried strand.
- Handles stretching: Reinforce them by folding and stitching as described, or work the handle strips with a smaller hook.
- Uneven motifs: Count every round. The 31-stitch repeat must stay consistent; a single missed or extra stitch will throw the diamonds off for the rest of the band.
- Color dominance: If one contrast color looks stronger than intended, try carrying it slightly looser so it sits lower in the stitch.
FAQ’s
Can I use acrylic yarn instead of cotton?
Yes, but the bag will have a softer, less structured feel. Cotton (or a cotton-blend) holds the geometric shape better and is more durable for everyday carrying. If you use acrylic, consider adding a fabric lining for extra stability.
How do I adjust the size of the tote?
To make it wider, start with a longer foundation chain (keep it an odd number and adjust the side stitches proportionally so the total stitch count remains divisible by 31 for the motif). To make it taller, simply add more solid rounds of Color A between or after the Aztec bands. Keep the handle length the same or lengthen them slightly for a larger bag.
I’m new to tapestry crochet. Any tips for cleaner color changes?
Always change color on the last yarn-over of the previous stitch. Carry the unused yarn loosely and crochet over it so it stays hidden on the wrong side. Give a gentle tug on the carried yarn after every few stitches to keep the fabric from puckering, but never pull it tight.
Do the handles need to be reinforced?
For light use they are fine as written. If you plan to carry heavy books, produce, or a laptop, fold each handle lengthwise and work a row of single crochet through both layers. This creates a much stronger strap and only takes a few extra minutes.
Can I make the bag with only two colors instead of four?
Absolutely. Use Color A as the main field and one contrast color for all the geometric elements. The stepped diamond look still reads clearly, just with a simpler, more graphic appearance.
Is a lining necessary?
No. The dense single-crochet fabric is sturdy enough on its own for most purposes. Add a lining only if you want a smoother interior, extra durability, or a finished look when the bag is open.
What if my stitch count drifts during the colorwork rounds?
Stop and count at the end of every round. The motif is a 31-stitch repeat worked four times (124 stitches total). If you are off by even one stitch, the diamonds will shift and the pattern will no longer align. It is much easier to frog a single round than to correct a whole band later.
How should I block the finished tote?
Steam-blocking works beautifully with cotton. Hover the iron or steamer over the fabric (do not press hard) and pin the base and sides straight while the fibers relax. Let it dry completely before removing the pins. Avoid hanging the bag while it is damp.
You Might Also Like
- Lavender Cream Granny Square Tote Free Crochet Pattern
- Sage Green Botanical Leaf Tote Bag Free Crochet Pattern
- Earthy Neutrals Granny Square Tote Free Crochet Pattern
- Christmas Poinsettia Granny Square Tote Free Crochet Pattern
Final Thoughts
There is something deeply satisfying about watching the stepped diamonds form under your hook, especially when the mustard gold field makes every contrasting stitch pop. This tote has already become my go-to market bag and the one I grab when I need something that looks polished but can still take a beating.
I hope yours brings the same quiet pleasure. When you finish, I would love to see how the colors look in your hands—drop a photo in the comments or tag your project so others can find inspiration too. Happy stitching, and may your next project be just as geometric and golden.



Leave a Reply
You must be logged in to post a comment.