


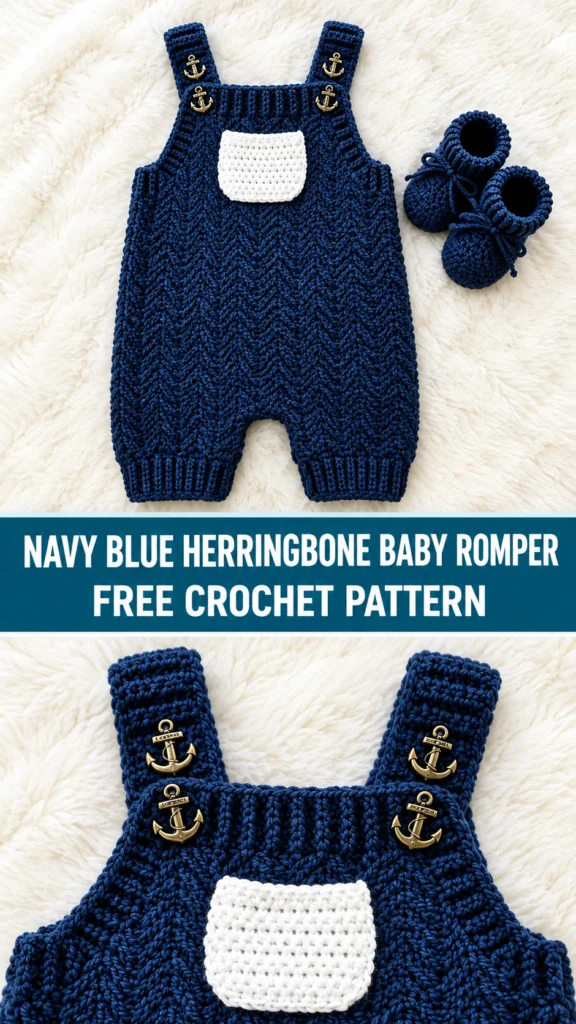
I’ve been chasing that high-end boutique texture for a baby romper, and the herringbone stitch finally delivered. Dense diagonal weave, practical snaps-free dressing, and those little anchor buttons that seal the nautical vibe—this navy blue number checks every box. Parents keep asking where they can buy it. Now you get to make it yourself.
About This Baby Romper Crochet Pattern
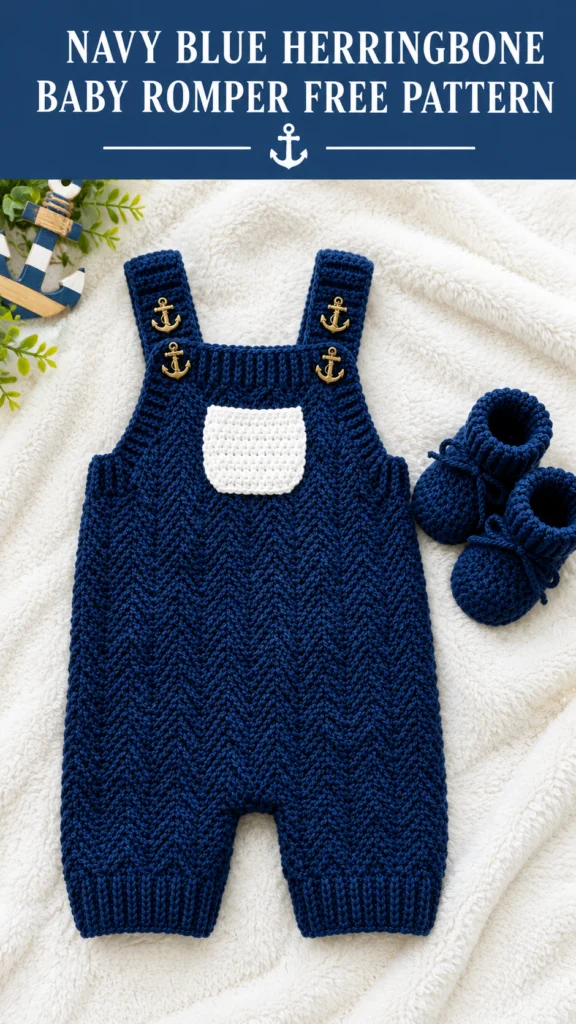
This navy blue romper showcases a dense herringbone half double crochet texture that looks like woven fabric. You work a front panel, a back panel, two shoulder straps, and a small contrast pocket. Everything stays flat until the final seams.
The bib section sits at the top of the front panel with squared armhole cutouts. Ribbed trim finishes the edges, and decorative anchor buttons add the perfect nautical touch. Matching booties appear in the photos but work as a separate project.
Finished size for 0 to 3 months:
- Chest circumference: 16 inches (40.5 cm)
- Total length from shoulder to crotch: 13 inches (33 cm)
- Leg opening circumference: 8 inches (20.5 cm)
- Strap length: 5.5 inches (14 cm)
Size customization notes appear at the end if you need to go bigger.
Skill Level
This sits at intermediate level. The herringbone half double crochet needs consistent tension, and you handle multiple pieces, armhole shaping, seaming, ribbed edging in rounds, and button attachment.
If you already feel comfortable with basic shaping and stitch counts, you can manage it. Still, make a practice swatch first. Trust me on that one.
Time estimate: 12 to 18 hours total across a few sessions. That includes swatching, all the pieces, blocking, and finishing.
Materials You Will Need
Yarn:
- Main Color (MC): Worsted weight (Category 4) in navy blue, 280 to 320 yards
- Contrast Color (CC): Worsted weight in white or cream, about 25 yards
Hooks:
US Size J-10 (6.0 mm) for the main body
US Size I-9 (5.5 mm) for ribbed trim and pocket
Notions:
4 anchor-shaped shank buttons (¾ inch / 18–20 mm), yarn needle, at least 6 stitch markers, scissors, rust-proof pins for blocking.
Yarn Suggestions
Lion Brand Pound of Love works beautifully—100% acrylic, machine washable, soft, and one skein covers multiple projects. Paintbox Yarns Simply DK used doubled gives excellent stitch definition for the herringbone. For an heirloom version, try We Are Knitters The Wool in Peruvian wool, but remember it needs hand washing only.
Choose a smooth yarn. Fuzzy or high-halo yarns hide the diagonal texture. Always swatch and match gauge before you start.
Gauge (Do Not Skip This)
Gauge is non-negotiable for a fitted garment. Wrong gauge means a romper that simply will not fit a 0–3 month baby.
With MC and J-10 hook in herringbone half double crochet:
14 stitches = 4 inches (10 cm)
10 rows = 4 inches (10 cm)
Rib gauge with I-9 hook in back-loop-only slip stitch ribbing:
12 stitches = 2 inches (5 cm) relaxed
Chain 20, work 14 rows of herringbone half double crochet, block lightly, and measure the center. Adjust hook size up if your swatch runs small, down if it runs large. FYI, this step saves you from a very sad frogging session later.
Abbreviations
- blo – back loop only
- BOR – beginning of round
- ch – chain
- ch-sp – chain space
- hbhdc – herringbone half double crochet
- hdc – half double crochet
- MC – main color
- CC – contrast color
- rep – repeat
- rnd – round
- RS – right side
- sc – single crochet
- sk – skip
- sl st – slip stitch
- st(s) – stitch(es)
- WS – wrong side
- yo – yarn over
Special Stitches for This Crochet Pattern
Herringbone Half Double Crochet (hbhdc)
This stitch creates the dense diagonal texture. Here’s the exact sequence:
- Yarn over.
- Insert hook into the next stitch.
- Yarn over and pull up a loop (3 loops on hook).
- Pull the yarn through the first loop only (the one closest to the hook tip). Now 2 loops remain.
- Yarn over and pull through both remaining loops.
The stitch leans diagonally. Worked in rows with a turning chain of 1, it builds that woven herringbone look. Practice a few rows—it clicks fast.
Slip Stitch Rib
This creates all the ribbed edges. Chain the desired depth (usually 4 or 5). Slip stitch across, then work every following row in back loop only, turning each time. Work the rib perpendicular to the garment edge.
Moss Stitch (for the chest pocket)
Chain an even number. Single crochet in the second chain, then (chain 1, skip 1, single crochet) across. On the next row, single crochet into each chain space and chain 1 over each single crochet. Repeat. Clean, textured, and perfect for a small pocket.
Pattern Notes Before You Begin
The front and back work separately from the leg openings upward. They join at the crotch, then continue to the armhole shaping. Both panels share the same stitch count through the main body. The front adds bib shaping for the raised chest panel and shoulder straps; the back stays straight across the top.
For hbhdc rows, chain 1 at the start. That chain does not count as a stitch—work the first hbhdc right into the first stitch of the row. Mark the crotch join and armhole edges. Block every piece before seaming. The buttons are decorative; the straps stay fixed length. The romper goes on over the head and legs, then the straps button over the shoulders.
Step by Step Instructions
Work the front right and left leg panels first (each 16 hbhdc wide and 12 rows tall). Join them with a chain-2 bridge and continue upward in 34-stitch rows for the main body. Shape the bib by working only the center 22 stitches for several rows, leaving 6 stitches on each side for the armholes. Neaten the armhole edges with single crochet.
The back panel follows the same leg panels and joining process but continues a few rows taller with a straight top edge. Add single-crochet armhole neatening on both sides.
Make two straps, each 8 hbhdc wide and about 14 rows long. Work slip-stitch rib bands across the top of the bib and the entire top of the back panel. Create two leg ribbed cuffs after seaming. Work the small moss-stitch chest pocket in contrast color and edge the top with single crochet.
Finishing Your Baby Romper
Block every piece first—the herringbone fabric loves to curl. Seam the inseams on front and back, then join the side seams, leaving the upper armhole openings free. Attach the straps from the back shoulders over to the front bib. Sew two anchor buttons at each strap end where they meet the bib, plus two more decorative buttons higher on the straps for balance.
Center the pocket on the bib a few rows below the rib and sew the three sides, leaving the top open. Work the leg cuffs last. Weave in every end and turn the garment right-side out.
Size Customization Tips
For 3 to 6 months: Add 2 stitches to each leg panel (18 sts per leg, 38 total body width). Add 4 rows above the crotch join and 2 rows to the bib. Work 16 rows on the straps.
For 6 to 12 months: Add 4 stitches to each leg panel (20 sts per leg, 42 total). Add 8 rows above the crotch and 4 rows to the bib. Work 18 rows on the straps.
Every 2 extra stitches add roughly 0.57 inches to the width. Every 2 extra rows add about 0.8 inches to the length. Adjust gradually and re-check gauge.
Care Instructions
Acrylic versions handle machine washing on gentle in cold water and low-heat tumble drying or flat drying. Wool or wool-blend versions need hand washing in cool water with gentle wool wash—press flat in a towel, reshape, and dry flat. Never hang the finished romper; fold it to protect the shoulders.
You Might Also Like
- Sunshine Yellow Cheerful Baby Romper Free Crochet Pattern
- Berry Blossom Granny Romper Free Crochet Pattern
- Ocean Wave Baby Dress Free Crochet Pattern
- Vanilla Blush Tiered Baby Dress Free Crochet Pattern
- Oatmeal Beige Chunky Baby Romper Set Free Crochet Pattern
FAQ
How hard is the herringbone stitch really?
It feels awkward for the first dozen stitches, then it becomes automatic. The key is pulling through that first loop only before finishing the stitch. A small swatch builds muscle memory fast.
Can I skip the pocket?
Yes. The pocket is pure cuteness, but the romper looks complete without it. Save the contrast yarn for matching booties or a hat if you prefer.
Are the buttons functional or just decorative?
They secure the straps to the front bib, so they are functional. Still sew them securely with multiple passes through the shank. Check them regularly.
What if my tension is inconsistent?
The herringbone shows tension changes more than regular stitches. Slow down, keep your yarn hand relaxed, and block thoroughly. Most unevenness disappears after blocking.
Can I use a different yarn weight?
Stick close to worsted for the stated sizes. Switching weights changes the entire fit. If you must, recalculate every measurement from a new gauge swatch.
How do I keep the leg openings from stretching out?
The slip-stitch rib cuffs provide good recovery. Work them firmly and block them with the rest of the piece. Avoid hanging the romper by the legs.
Conclusion
There you have it—a romper that looks store-bought but carries the satisfaction of every stitch you put into it. The herringbone texture catches the light, the fit leaves room for real-life diapers, and those anchor buttons make people smile. Grab your navy yarn, practice that stitch a few times, and enjoy the process. You’ve got this.


Leave a Reply
You must be logged in to post a comment.