


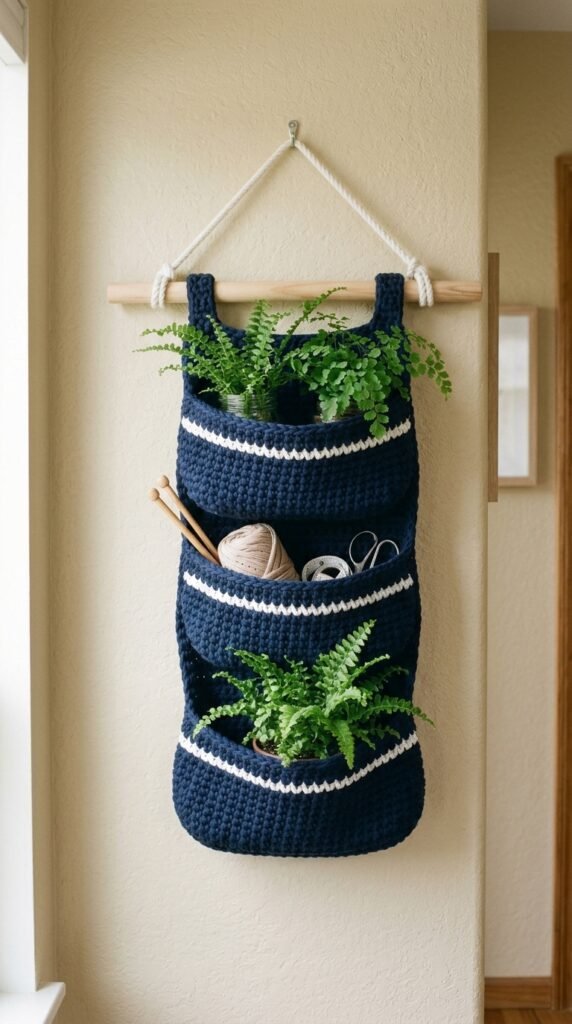
Picture this: a sleek navy hanging organizer with crisp white stripes, ready to hold your mail, yarn scraps, or even a couple of tiny plants without looking like a total mess. That’s exactly what this free crochet pattern delivers. I made mine over a weekend and now it lives by my front door, looking way more put-together than I usually am. Ready to give your wall some serious nautical vibes?
Why You Will Love This Crochet Hanging Basket Pattern
This isn’t just another pretty project that collects dust. The three deep pockets actually hold stuff, the navy-and-white combo screams coastal cool, and the whole thing hangs on a simple wooden dowel like it belongs in a beach house.
You only need single crochet and basic color changes. No fancy stitches, no complicated charts. If you’ve ever made a coaster, you can handle this. Each pocket works up fast, so the entire organizer is a weekend win instead of a month-long slog.
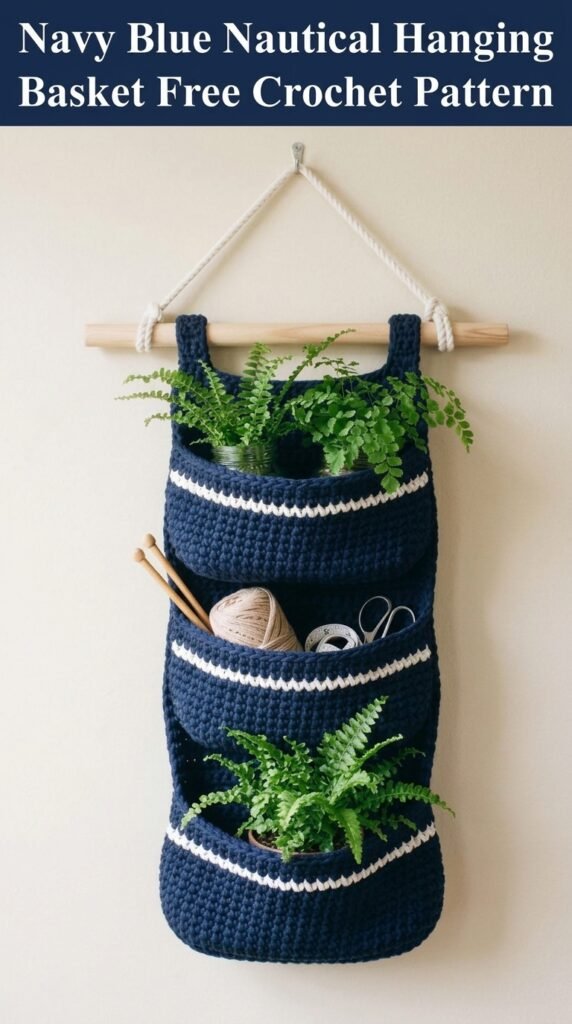
Plus, it looks expensive. People always ask where I bought it. Watching their faces when I say “I crocheted it” never gets old.
Skill Level
Confident beginner to intermediate
You should feel okay with:
- Working in continuous rounds
- Single crochet
- Changing colors cleanly
- Basic whip-stitch seaming
Never worked in the round? Make a quick coaster first. This project is forgiving though. Thick cotton yarn hides a multitude of tension sins.
Finished Measurements
Total length: About 24 inches from the top of the hanging loops to the bottom of the lowest pocket
Pocket width: Roughly 8 inches
Pocket depth: Around 6 inches front to back
Individual pocket height: About 6 inches
Your numbers might shift a little depending on how tightly you crochet and which cotton you grab. That’s normal.
Materials Needed
Yarn
Main Color (MC): About 350 yards of navy blue worsted-weight cotton
Contrast Color (CC): About 50 yards of white or cream worsted-weight cotton
Stick with 100% cotton if you can. It holds shape better when the pockets get loaded up and gives that classic matte nautical look. Lily Sugar’n Cream or Peaches & Creme work great. Acrylic will stretch more over time, so keep that in mind.
Hook
6.0 mm (US J/10)
Go down a size if your tension runs loose. Tighter fabric equals sturdier pockets.
Additional Supplies
- Yarn needle
- Scissors
- Stitch marker (scrap yarn works fine)
- Wooden dowel, about 12 inches long and ¾ inch thick
- 24 inches of rope or macramé cord for hanging
Gauge
14 single crochet stitches and 16 rows = 4 inches worked flat in single crochet
Check it. Matching pocket sizes makes the finished piece look intentional instead of slightly chaotic.
Abbreviations and Stitch Definitions
Here’s the short list you’ll actually use:
- Ch – Chain
- Sl st – Slip stitch
- Sc – Single crochet
- Inc – Increase (two single crochets in the same stitch)
- St(s) – Stitch(es)
- MC – Main Color (navy)
- CC – Contrast Color (white)
- BLO – Back loop only
That’s it. No secret handshake stitches required.
Pattern Notes Before You Begin
You’ll make three identical pockets, each with a rounded front and a flat back panel, plus two hanging loops. Then you stack and seam everything together.
The fronts work in continuous spirals (no joining). Mark the first stitch of every round so you don’t lose your place. Color changes happen on the last yarn-over of the stitch before the new color starts. Clean and simple.
Ready? Let’s crochet.
Crochet Pattern Instructions

Pocket Front (Make 3)
Start with the oval base, then build the sides.
Base
With MC, chain 15.
Round 1: Sc in 2nd chain from hook, sc in next 12 chains, 3 sc in last chain. Work along the other side of the chain: sc in next 12, 2 sc in last. Place marker. (30 sts)
Round 2: Inc, sc 12, inc in next 3, sc 12, inc in next 2. (36 sts)
Round 3: Sc, inc, sc 12, (sc, inc) 3 times, sc 12, (sc, inc) 2 times. (42 sts)
Round 4: Sc 2, inc, sc 12, (sc 2, inc) 3 times, sc 12, (sc 2, inc) 2 times. (48 sts)
Your base should measure about 6 inches long and 3 inches wide.
Sides
Round 5: BLO only, sc around. (48 sts) This creates a neat ridge so the sides stand up cleanly.
Rounds 6–10: Sc around. (48 sts)
Round 11: Switch to CC on the last yarn-over of Round 10. Sc around in white. (48 sts)
Round 12: Switch back to MC on the last yarn-over. Sc around in navy. (48 sts)
Rounds 13–18: Keep going in navy. (48 sts)
Round 19: Slip stitch in next stitch, fasten off, leave a long tail for seaming.
Front should stand about 6 inches tall.
Pocket Back Panel (Make 3)
These are worked flat and sit a bit taller so you can overlap them when stacking.
With MC, chain 25.
Row 1: Sc in 2nd chain from hook and across. Chain 1, turn. (24 sts)
Rows 2–26: Sc across, chain 1, turn. (24 sts)
Fasten off, leave a long tail.
Panel should measure roughly 7 inches wide by 6.5 inches tall.
Hanging Loops (Make 2)
With MC, chain 31.
Row 1: Sc in 2nd chain from hook and across. (30 sts)
Fasten off, leave a long tail.
Fold each strip in half so the loop is about 3 inches long.
Assembly Instructions
This is where it stops looking like random pieces and starts looking like a real organizer. Take your time.
Step 1: Attach Back Panels to Pocket Fronts
Right sides facing out, line up one back panel behind one pocket front. Whip-stitch the sides and bottom together with the long tail. Keep stitches about ¼ inch apart. Repeat for all three.
Step 2: Connect the Three Pockets
Stack them vertically, back panels facing the same way. Overlap the bottom edge of the top pocket’s back panel over the top edge of the middle one by about an inch. Whip-stitch securely. Do the same for the middle and bottom pockets. Now you have one long hanging unit.
Step 3: Attach Hanging Loops
Space the two loops about 4 inches apart on the top of the uppermost back panel. Fold each in half and stitch both ends firmly to the back. Add a few extra stitches here—these loops carry the whole weight.
Step 4: Add the Dowel and Hanging Rope
Slide the wooden dowel through both loops. Tie the 24-inch rope to each end of the dowel, about an inch in from the ends, so it forms a hanging triangle. Trim the excess and dab a little clear glue on the knots if you want extra security.
Finishing Touches
Weave in every end thoroughly. Cotton likes to work itself loose if you skimp. I usually run the needle in a few different directions for at least two inches.
If the pockets feel a little soft, lightly mist them with fabric stiffener or a 50/50 water and white glue mix. Stuff them with tissue paper while they dry so they keep their shape.
Customization Ideas
This pattern is easy to tweak.
- Move the white stripe higher or lower, or add a second stripe near the top.
- Swap navy for soft gray and white for blush pink for a nursery vibe.
- Make the pockets deeper by adding a few extra rounds of single crochet before the stripe.
- Add tiny tassels or pom-poms along the top edge of each pocket for extra personality.
IMO, the classic navy-and-white version is hard to beat, but you do you.
How to Care for Your Hanging Basket
Spot clean with a damp cloth when it gets dusty. For a deeper clean, hand wash in cool water with mild soap, reshape, and lay flat to dry. Avoid the dryer—cotton can shrink a bit.
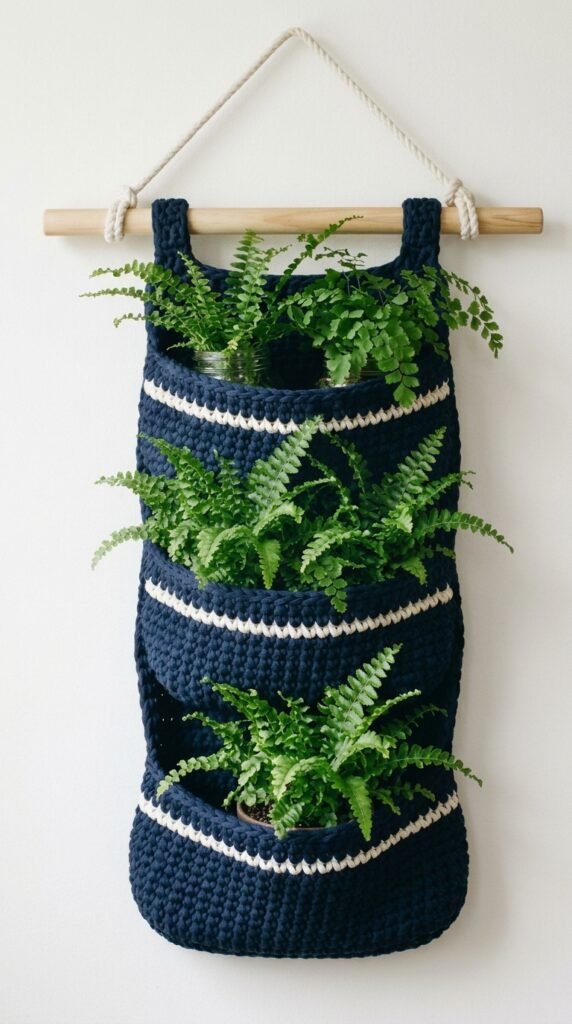
Don’t overload the pockets with heavy books or ceramic pots. Mail, craft tools, small plastic planters, and scarves are perfect. Treat it kindly and it’ll last for years.
Troubleshooting Common Issues
Pockets came out different sizes? Tension drifted. Count stitches every few rounds and try to keep the same grip the whole time.
Base edges curling? You might have worked the BLO round too tightly. Use a slightly larger hook just for that round next time.
Messy color changes? Switch colors on the final yarn-over of the last stitch of the previous round, not at the start of the new one.
Pockets sag when filled? Try a smaller hook for denser fabric, or line the inside with a bit of lightweight fabric for extra support.
Most little problems are fixable with a little patience. You’ve got this.
You Might Also Like
- Coral Peony Crochet Basket Free Crochet Pattern
- Black Monstera Crochet Plant for Modern Living Room
- Peachy Coral Jellyfish Toilet Paper Cozy Free Crochet Pattern
- Peachy Keen Candy Bolster Pillow Free Crochet Pattern
- Eucalyptus Sprig Crochet Jar Free Crochet Pattern
FAQ’s
Can I use acrylic yarn instead of cotton?
You can, but the pockets will stretch more once you put things in them. Cotton holds its shape better for this kind of project.
How long does the whole thing take?
Each pocket takes me about 90 minutes to two hours. The assembly is another hour. Most people finish it over a weekend without rushing.
Do I really need the wooden dowel?
It makes a huge difference. The loops hang straighter and the whole organizer looks more polished. A thick dowel from any craft store works fine.
Can I make just two pockets instead of three?
Absolutely. Just stop after the second pocket and attach the hanging loops to the top one. Instant shorter version.
What if I hate seaming?
Take it slow and keep the stitches even. A neat whip stitch almost disappears into the cotton fabric. You’ll be done before you know it.
Final Thoughts
There you have it—a sturdy, good-looking hanging basket that actually earns its wall space. Grab some navy cotton, put on a podcast, and get started. Once it’s hanging up and holding your everyday stuff, you’ll wonder why you didn’t make one sooner. Happy crocheting!


Leave a Reply
You must be logged in to post a comment.