

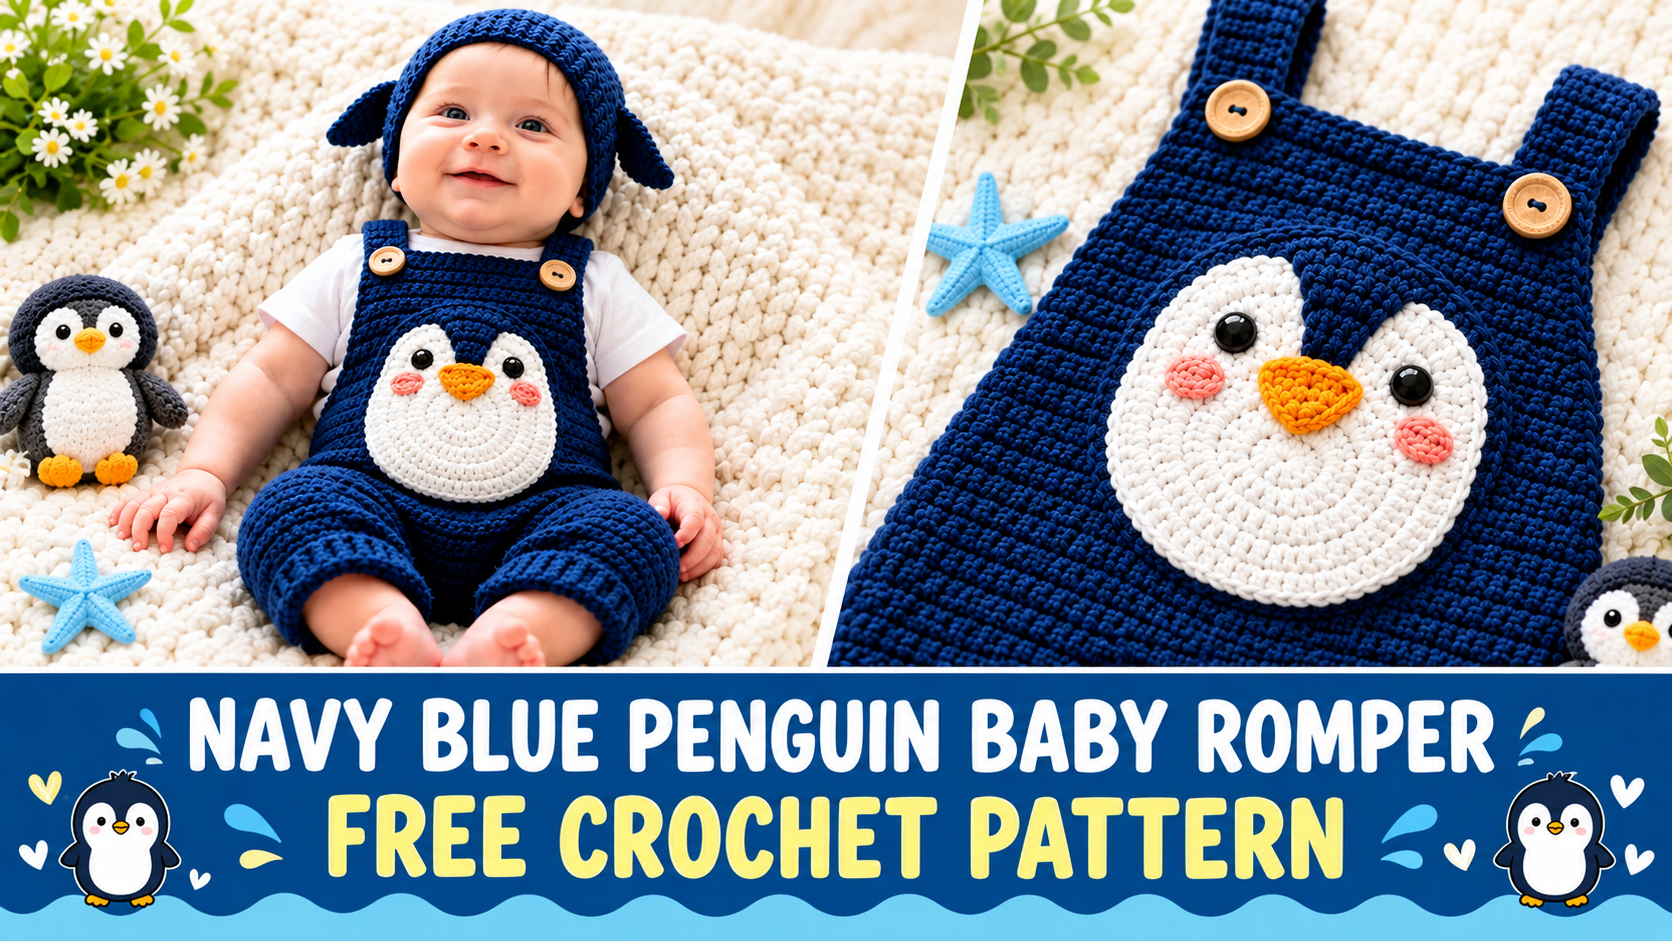
I still remember the quiet evening this romper first took shape. I was looking through a box of baby clothes that had been passed down and noticed how many of the practical pieces were plain. I wanted something that felt special without being fussy — a little penguin that a baby could actually wear for everyday adventures. Navy blue felt right: deep, soft, and classic. I sketched a rounded belly, simple flipper sleeves, and a gentle face, then started stitching. After a few adjustments for diaper changes and stretch, the Navy Blue Penguin Baby Romper was ready.
This free crochet pattern gives you a one-piece romper with a penguin-inspired design. The body is worked mainly in navy, with a white belly panel, embroidered face details, and short sleeves that suggest little flippers. The bottom has convenient snaps or buttons for easy changes, and the overall fit is soft and stretchy so it moves with a real baby. It is the kind of handmade piece that looks charming in photos and holds up to actual wear.

About This Pattern
This is an intermediate pattern. You should be comfortable working in rows and rounds, changing colors, and doing basic increases and decreases. The penguin face is created with simple embroidery, so it looks detailed without complicated colorwork.
The romper is written for three sizes:
- Newborn (0–3 months)
- 3–6 months
- 6–12 months
Finished chest circumference is approximately 16, 18, and 20 inches. The length from shoulder to crotch is about 12, 13.5, and 15 inches. The fabric has good stretch and recovery, making it comfortable over a diaper.
Materials You’ll Need
Yarn (DK weight, approximately 100g / 250–280 yards per ball)
- Color A (main body): deep navy blue – 280 yards
- Color B (belly): soft white or cream – 80 yards
- Color C (beak, eyes, and accents): golden yellow and dark charcoal – 25 yards total
Allow 15% extra for gauge variation and swatching.
Hooks
- 4.0 mm (G) for the main body
- 3.5 mm (E) for the neckline and leg openings (creates a neater edge)
Notions
- Tapestry needle
- Stitch markers
- Scissors
- 4–6 snap fasteners or small buttons for the crotch and back
- Blocking mats and pins
Abbreviations and Terminology
All instructions use US crochet terminology.
- ch – chain
- sc – single crochet (insert hook, yarn over, pull up loop, yarn over, pull through both loops)
- hdc – half double crochet (yarn over, insert hook, yarn over, pull up loop, yarn over, pull through all three loops)
- dc – double crochet
- sc2tog – single crochet two together
- hdc2tog – half double crochet two together
- sl st – slip stitch
- st(s) – stitch(es)
- RS – right side
- WS – wrong side
Turning chains do not count as a stitch unless a step explicitly says they do.
Gauge
With 4.0 mm hook and Color A:
16 sc and 19 rows = 4 inches square.
Make a 5-inch practice swatch, measure the center 4 inches, and adjust your hook size if needed. A slightly tighter gauge helps the romper hold its shape through washes.
Main Pattern Instructions
Front Body (starting at the lower edge)
With Color A and 4.0 mm hook, ch 37 (41, 45).
Row 1 (RS): Sc in 2nd ch from hook and in each ch across. (36, 40, 44 sc) Turn.
Rows 2–12: Ch 1, sc in each st across. Turn.
Place markers to center the white belly panel over the middle 14 (16, 18) stitches.
Row 13: Ch 1, sc in first 11 (12, 13) sts with Color A, change to Color B, sc in next 14 (16, 18) sts, change back to Color A, sc in remaining sts. Turn.
Rows 14–22: Continue in sc, keeping the center section in Color B.
Row 23: Ch 1, sc across in established colors, working sc2tog at each end of the white section to begin shaping the belly. (34, 38, 42 sts) Turn.
Rows 24–26: Work even in established colors.
Shape Armholes and Neckline
Row 27: Ch 1, sc in first 8 (9, 10) sts, leave remaining stitches unworked for now. Turn.
Work 4 more rows on these stitches for the left shoulder strap. Fasten off.
Skip the center 18 (20, 22) stitches for the neckline. Join Color A at the next stitch and work the right shoulder strap the same as the left. Fasten off.
Back Body
With Color A, ch 37 (41, 45).
Work the same as the Front through Row 12 (no color change for the belly).
Continue even in sc until the piece matches the Front length to the underarm.
Shape the armholes and neckline the same way as the Front, leaving a slightly higher back neck if desired. Fasten off.
Sleeves / Flippers (make 2)
With Color A, ch 18 (20, 22).
Row 1: Sc in 2nd ch from hook and across. Turn.
Rows 2–10: Ch 1, sc across.
Row 11: Ch 1, sc2tog, sc across to last 2 sts, sc2tog. Turn.
Row 12: Ch 1, sc across. Fasten off, leaving a long tail for sewing.
Sew the short edges of each sleeve into the armhole openings, positioning them so they sit slightly forward like penguin flippers.
Leg Openings and Crotch
With RS facing, join Color A at the lower edge of one leg opening.
Work 2 rounds of sc around each leg opening using the 3.5 mm hook for a neat finish.
At the crotch, leave a 3–4 inch opening. Work a small button band or snap placket on both the front and back lower edges so the romper can open fully for diaper changes.
Penguin Face Embroidery
Using Color C and a tapestry needle on the white belly panel:
- Eyes: two small French knots or satin-stitch circles placed evenly near the top of the white section.
- Beak: a small upside-down triangle in golden yellow, centered between the eyes.
- Optional: tiny cheek dots or a soft smile line for extra charm.
Keep the stitches secure but relaxed so the fabric does not pucker.
Special Techniques / Additional Elements
Clean Color Changes
When switching from navy to white, work the last stitch of the old color until two loops remain on the hook, then yarn over with the new color and complete the stitch. Carry the unused yarn loosely along the wrong side if the color block is short.
French Knot Eyes
Bring the needle up from the inside, wrap the yarn twice around the needle, and insert the needle back very close to the starting point. Pull gently to form a neat knot.
Assembly and Finishing
- Weave in all ends on the wrong side.
- Sew the shoulder seams and side seams.
- Attach the sleeves/flippers securely.
- Sew snaps or buttons to the crotch placket and, if desired, add a small button at the back neck for a closer fit.
- Lightly steam the romper so the stitches settle and the white belly lies flat.
Blocking and Care
Wet-block the finished romper by soaking it in lukewarm water with a mild wool wash, gently pressing out excess water, and pinning it flat to the finished measurements. Allow it to dry completely.
Hand wash in cool water and lay flat to dry. Do not hang the romper while wet, as the weight can stretch the shoulders and leg openings. The navy yarn holds its color well, and the piece softens beautifully with gentle washing.
Fit and Troubleshooting Tips
- Body too wide or narrow? Adjust the starting chain by 4 stitches and keep the white belly section centered.
- Leg openings too tight? Work an extra round of sc or switch to a larger hook for those rounds.
- Face looking uneven? Practice the French knots and beak on a scrap first. Fewer, well-placed stitches look cleaner.
- Crotch snaps hard to fasten? Make the placket slightly longer and reinforce the fabric behind each snap.
- Sleeves curling? Block them firmly or work the final row with a smaller hook.
Final Thoughts
There is something quietly joyful about a tiny penguin romper. The deep navy, the soft white belly, and the little face somehow make even ordinary days feel a bit more special. I hope this Navy Blue Penguin Baby Romper becomes one of those handmade pieces that gets worn until it is outgrown, then carefully saved with the best memories.
If you make one, I would love to see it. Leave a comment, share a photo, or pin it so other makers can find the pattern too. Happy crocheting, and may your little penguin have the coziest adventures.


Leave a Reply
You must be logged in to post a comment.