

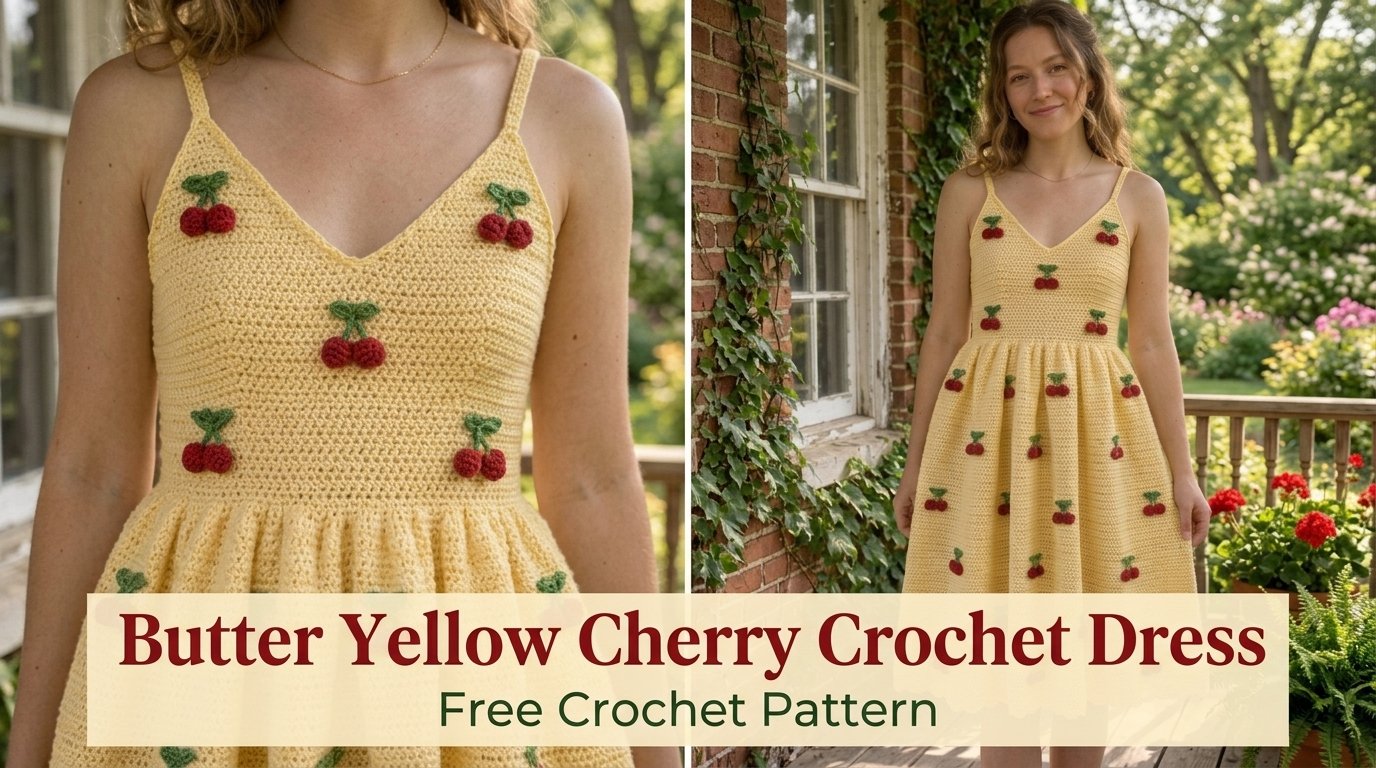
I still remember the exact afternoon the idea for this dress arrived. I was standing in my kitchen with a bowl of fresh cherries, the late-spring light pouring through the window, and a half-finished yellow swatch sitting on the counter. The cherries were so bright against the pale yellow yarn that I stopped mid-stitch. I wanted that feeling — soft, sunny, a little playful — turned into something I could wear.
What began as a simple color experiment grew into this butter yellow cherry crochet dress. It has a gentle A-line silhouette, a lightly shaped bodice, short sleeves, and a scattering of dimensional cherry motifs that look like they were just picked. The yellow is warm without being loud, the kind of shade that feels like melted butter on toast. The cherries add just enough contrast to make the whole piece feel special rather than costume-y.
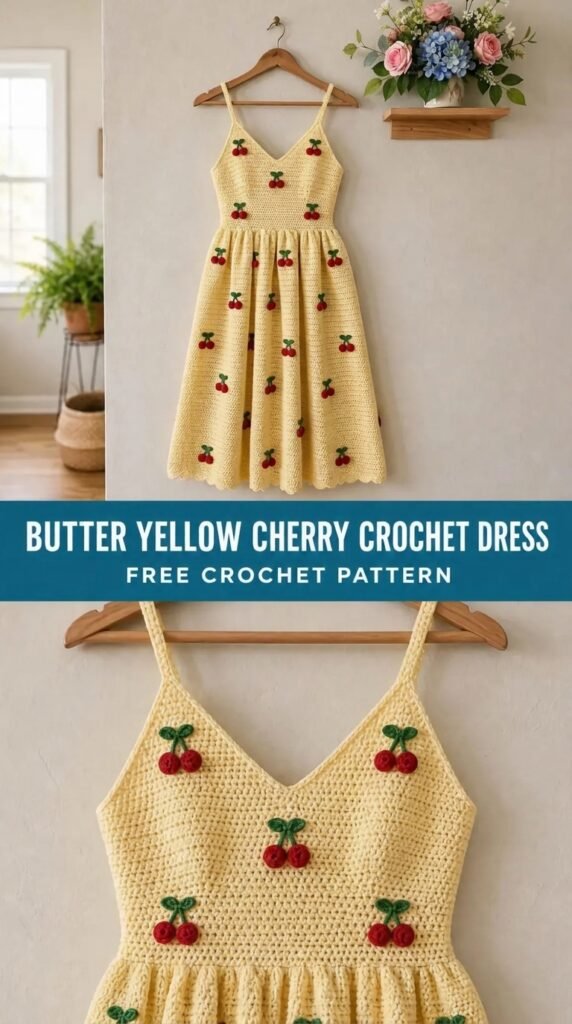
This is the free pattern for the Butter Yellow Cherry Crochet Dress. It is written for intermediate crocheters who are comfortable with basic shaping, working in rows and rounds, and sewing on small appliqués. If you can manage increases, decreases, and a little patience with placement, you can make this dress.
About This Pattern
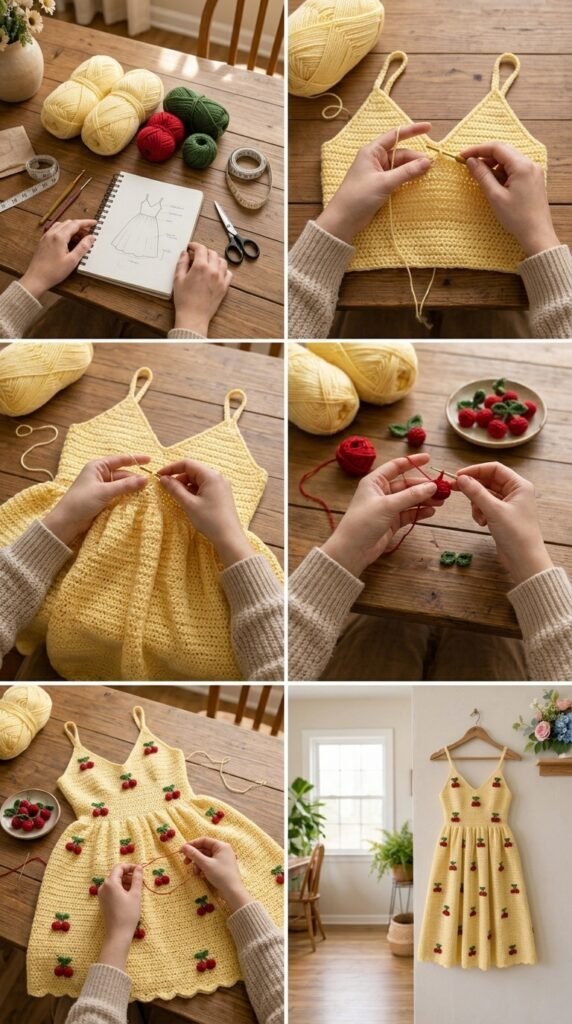
The dress is worked from the top down in one piece for the bodice and skirt, with the sleeves added later. The body uses a simple but effective combination of half double crochet and double crochet that creates soft vertical texture and nice drape. The cherry motifs are worked separately as small appliqués and sewn on after blocking so you can place them exactly where they look best.
Skill level is intermediate. You should be comfortable reading a pattern with shaping, counting stitches, and attaching motifs. The cherry pieces themselves are beginner-friendly once you settle into the sequence.
Finished sizes are given for XS through 2XL. The sample is shown in size M on a 36-inch bust. The fabric has a moderate amount of stretch and drape, so it skims rather than clings. Expected finished bust measurements (after blocking) are approximately:
- XS: 32–34 in
- S: 34–36 in
- M: 36–38 in
- L: 40–42 in
- XL: 44–46 in
- 2XL: 48–50 in
Length from shoulder to hem is adjustable; the pattern is written for a mid-thigh to just-above-knee length depending on your height and preference.
Materials You’ll Need
Yarn
I used a soft DK-weight cotton-blend yarn that holds its shape well after blocking but still has lovely drape.
- Color A (Main – Butter Yellow): approximately 1100 (1200, 1350, 1500, 1700, 1900) yards / 1005 (1100, 1235, 1370, 1555, 1740) meters
- Color B (Cherry Red): approximately 80 (90, 100, 110, 120, 130) yards / 73 (82, 91, 100, 110, 120) meters
- Color C (Leaf Green): approximately 40 (45, 50, 55, 60, 65) yards / 37 (41, 46, 50, 55, 60) meters
Allow 15 % extra for gauge variation and swatching.
Hooks
- 4.0 mm (G/6) for the main body and sleeves
- 3.5 mm (E/4) for the cherry motifs and leaf details
Notions
- Tapestry needle
- Stitch markers (at least 8)
- Scissors
- Blocking mats and pins (or rust-proof T-pins)
- Optional: small amount of fiberfill if you want the cherries slightly puffed
Abbreviations and Terminology
All instructions use US crochet terminology.
- ch – chain
- sc – single crochet (insert hook, yarn over, pull up loop, yarn over, pull through both loops)
- hdc – half double crochet (yarn over, insert hook, yarn over, pull up loop, yarn over, pull through all three loops)
- dc – double crochet (yarn over, insert hook, yarn over, pull up loop, yarn over, pull through two loops, yarn over, pull through remaining two loops)
- tr – treble crochet (yarn over twice, insert hook, yarn over, pull up loop, [yarn over, pull through two loops] three times)
- sl st – slip stitch
- st(s) – stitch(es)
- sp – space
- sk – skip
- inc – increase (work 2 stitches in the same stitch)
- dec – decrease (work two stitches together)
- BLO – back loop only
- FO – fasten off
- RS – right side
- WS – wrong side
Turning chains do not count as a stitch unless a step explicitly says they do. When the pattern says “turn,” simply turn your work and begin the next row in the first stitch.
Gauge
Work a gauge swatch in the main stitch pattern:
Chain 22.
Row 1: hdc in 2nd ch from hook and in each ch across. (21 sts)
Row 2: ch 1, turn, hdc in each st across.
Repeat Row 2 until the piece measures 4 inches tall.
Blocked gauge should be 18 hdc and 14 rows = 4 inches / 10 cm with the 4.0 mm hook.
If your swatch is smaller than 4 inches across, go up a hook size. If it is larger, go down a hook size. Take the time to get this right — the dress is designed around this gauge for both fit and drape.
Main Pattern Instructions
Bodice
The bodice is worked flat from the top down, beginning at the neckline.
Foundation
With Color A and 4.0 mm hook, ch 72 (76, 80, 88, 96, 104).
Row 1 (RS): hdc in 2nd ch from hook and in each ch across.
Count: 71 (75, 79, 87, 95, 103) hdc.
Turn.
Row 2: ch 1, hdc in each st across. Turn.
Repeat Row 2 until the piece measures 3 (3, 3.25, 3.5, 3.75, 4) inches from the foundation chain, ending with a WS row. Place a marker in the center stitch of the last row for reference.
Armhole Shaping
We now divide for the armholes and create the front and back separately.
Next Row (RS): ch 1, hdc in first 15 (16, 17, 19, 21, 23) sts, ch 8 (8, 9, 10, 11, 12) for underarm, sk next 10 (11, 12, 13, 14, 15) sts, hdc in next 21 (21, 21, 23, 25, 27) sts (this is the front neck section), ch 8 (8, 9, 10, 11, 12) for second underarm, sk next 10 (11, 12, 13, 14, 15) sts, hdc in remaining 15 (16, 17, 19, 21, 23) sts.
Turn.
You now have three sections connected by underarm chains: left back, front, and right back.
Next Row: ch 1, hdc across, working 1 hdc into each underarm chain.
Count for size M example: 15 + 8 + 21 + 8 + 15 = 67 hdc. Adjust counts according to your size.
Continue working even in hdc across all stitches for 2.5 (2.75, 3, 3.25, 3.5, 3.75) inches measured from the underarm chains. This forms the lower bodice.
Skirt Transition and A-Line Shaping
We now begin the skirt by increasing gradually to create the A-line shape.
Increase Row 1: ch 1, *hdc in next 6 sts, 2 hdc in next st; repeat from * across, ending with hdc in any remaining stitches.
Turn.
Increase Row 2: ch 1, hdc in each st across. Turn.
Increase Row 3: ch 1, *hdc in next 7 sts, 2 hdc in next st; repeat from * across. Turn.
Increase Row 4: ch 1, hdc in each st across. Turn.
Continue in this manner, adding one more stitch between increases every two rows, until the skirt measures approximately 16 (16.5, 17, 17.5, 18, 18.5) inches from the underarm, or until you reach your preferred length. End with an even row (no increases).
For a longer dress, simply continue the even rows after the last planned increase. For a shorter hem, stop earlier.
Hem Edging
Final Row: ch 1, sc in each st across. Fasten off and weave in ends.
Sleeves (Make 2)
Sleeves are worked in the round from the armhole down.
With RS facing and Color A, join yarn at the center of the underarm chain.
Round 1: ch 1, work 36 (38, 40, 44, 48, 52) hdc evenly around the armhole opening (this includes working into the skipped stitches and the underarm chains). Join with sl st to first hdc.
Rounds 2–4: ch 1, hdc in each st around. Join.
Round 5 (decrease round): ch 1, *hdc in next 7 sts, hdc2tog; repeat from * around, adjusting as needed to keep the count even. Join.
Continue working even in hdc for another 1.5–2 inches, or until the sleeve reaches your preferred length.
Final Round: ch 1, sc in each st around. Join and FO.
Repeat for second sleeve.
Special Techniques – Cherry Motifs
The cherries are worked as small appliqués and sewn on after the dress is blocked. Make 12–16 cherries depending on how densely you want them scattered.
Cherry (Make as many as desired)
With Color B and 3.5 mm hook:
Round 1: Make a magic ring, ch 1, 6 sc into ring. Join with sl st to first sc. (6 sts)
Round 2: ch 1, 2 sc in each st around. Join. (12 sts)
Round 3: ch 1, *sc in next st, 2 sc in next st; repeat from * around. Join. (18 sts)
Round 4: ch 1, sc in each st around. Join.
Round 5: ch 1, *sc in next st, sc2tog; repeat from * around. Join. (12 sts)
Stuff lightly with a tiny bit of fiberfill if you want a rounded look, or leave flat.
Round 6: ch 1, sc2tog around. Join. (6 sts)
FO, leaving a long tail for sewing. Thread the tail through the remaining stitches and pull tight to close.
Stem and Leaf (Make one for each cherry)
With Color C and 3.5 mm hook:
Ch 8.
Sc in 2nd ch from hook and in next 2 ch, ch 4, sc in 2nd ch from hook and in next 2 ch (this forms the leaf), sl st in the next ch of the original chain, sc in remaining 3 ch. FO, leaving a tail for sewing.
Sew the stem/leaf unit to the top of each cherry before attaching the cherries to the dress.
Assembly and Finishing
Block the dress and sleeves first (see Blocking section below). Once dry, decide on cherry placement. I like a loose cascade starting from one shoulder and drifting toward the opposite hip, plus a few cherries near the hem. Avoid placing them too close to the underarms or neckline where they might rub.
Using the long tails and a tapestry needle, sew each cherry firmly to the fabric, catching only the back of the stitches so the sewing does not show on the RS. Secure the stems and leaves the same way. Weave in all remaining ends carefully.
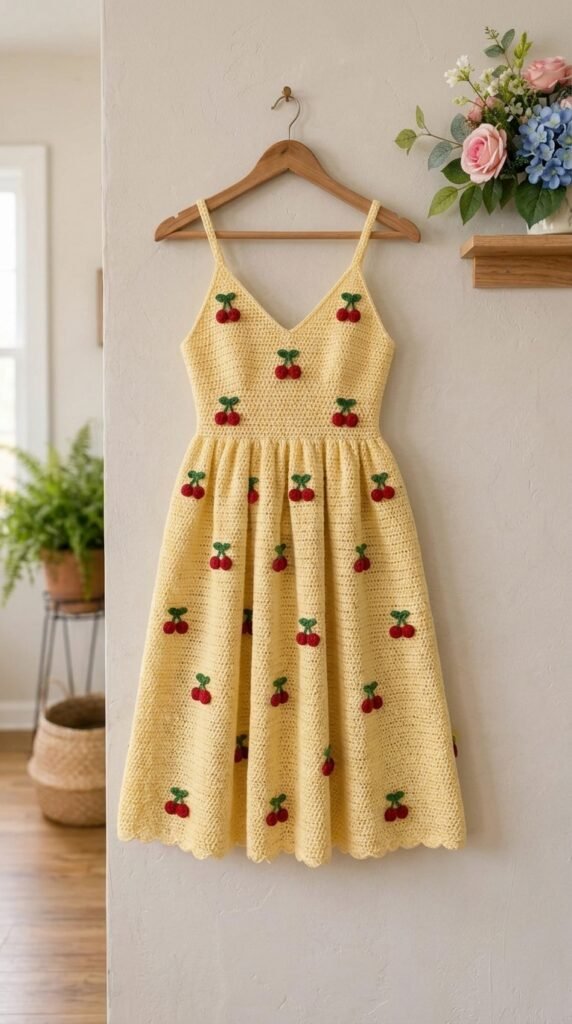
If the neckline feels a little wide, you can work a simple sc edging around it: join yarn at a shoulder, sc evenly around the entire neckline, and FO.
Blocking and Care
This cotton-blend fabric benefits from a thorough wet block.
Fill a basin with lukewarm water and a drop of mild wool wash or baby shampoo. Submerge the dress and let it soak for 15–20 minutes. Gently squeeze (do not wring) excess water. Roll the dress in a clean towel to remove more moisture.
Lay the dress flat on blocking mats. Pin the neckline, armholes, and hem to the finished measurements, paying special attention to keeping the side seams straight and the hem even. Pin the sleeves flat as well. Allow to dry completely — this can take 24–48 hours depending on humidity.
Once dry, the cherries can be sewn on.
Care notes: Hand wash in cool water, squeeze gently, and dry flat. Never hang the wet dress — the weight of the water can stretch the bodice and lengthen the skirt unevenly. Store folded rather than on a hanger when not wearing.
You Might Also Like
- Coastal Blue Striped Crochet Dress Free Pattern
- Sunset Coral Floral Lace Dress Free Crochet Pattern
- Ivory Lace Wedding Halter Dress Free Crochet Pattern
- Ocean Blue Ombre Crochet Skater Dress Free Pattern
- Lemon Citrus Summer Charm Bracelet Free Crochet Pattern
Fit and Troubleshooting Tips
- If the bodice feels tight across the bust after the first few inches, go up a hook size for the remainder of the bodice only, then return to the original hook for the skirt.
- If the A-line is not flaring enough, add one extra increase row spaced evenly through the skirt.
- Cupping at the hem usually means the final rows were worked too tightly. Steam the hem lightly or re-block with more aggressive pinning.
- If cherries look flat after sewing, you can add a tiny bit more fiberfill from the back before closing the final stitches, or work an extra round of sc before decreasing.
- For a more fitted waist, you can place a few strategic decreases in the last two inches of the bodice before beginning the skirt increases. Mark the side “seams” with stitch markers so the decreases stay balanced.
Final Thoughts
There is something quietly joyful about finishing a piece that started with a bowl of cherries and a half-finished swatch. When you slip this dress on, the butter yellow catches the light and the little red cherries sit just so against the fabric. It feels like summer distilled into stitches.
I hope you enjoy making your own version. Take your time with the motif placement — that is where the dress becomes uniquely yours. If you share photos, I would love to see how your cherries decided to grow.
Happy stitching, and may your yellow always feel like sunshine.



Leave a Reply
You must be logged in to post a comment.