Autumn Dahlia Curtain Tieback Crochet Pattern
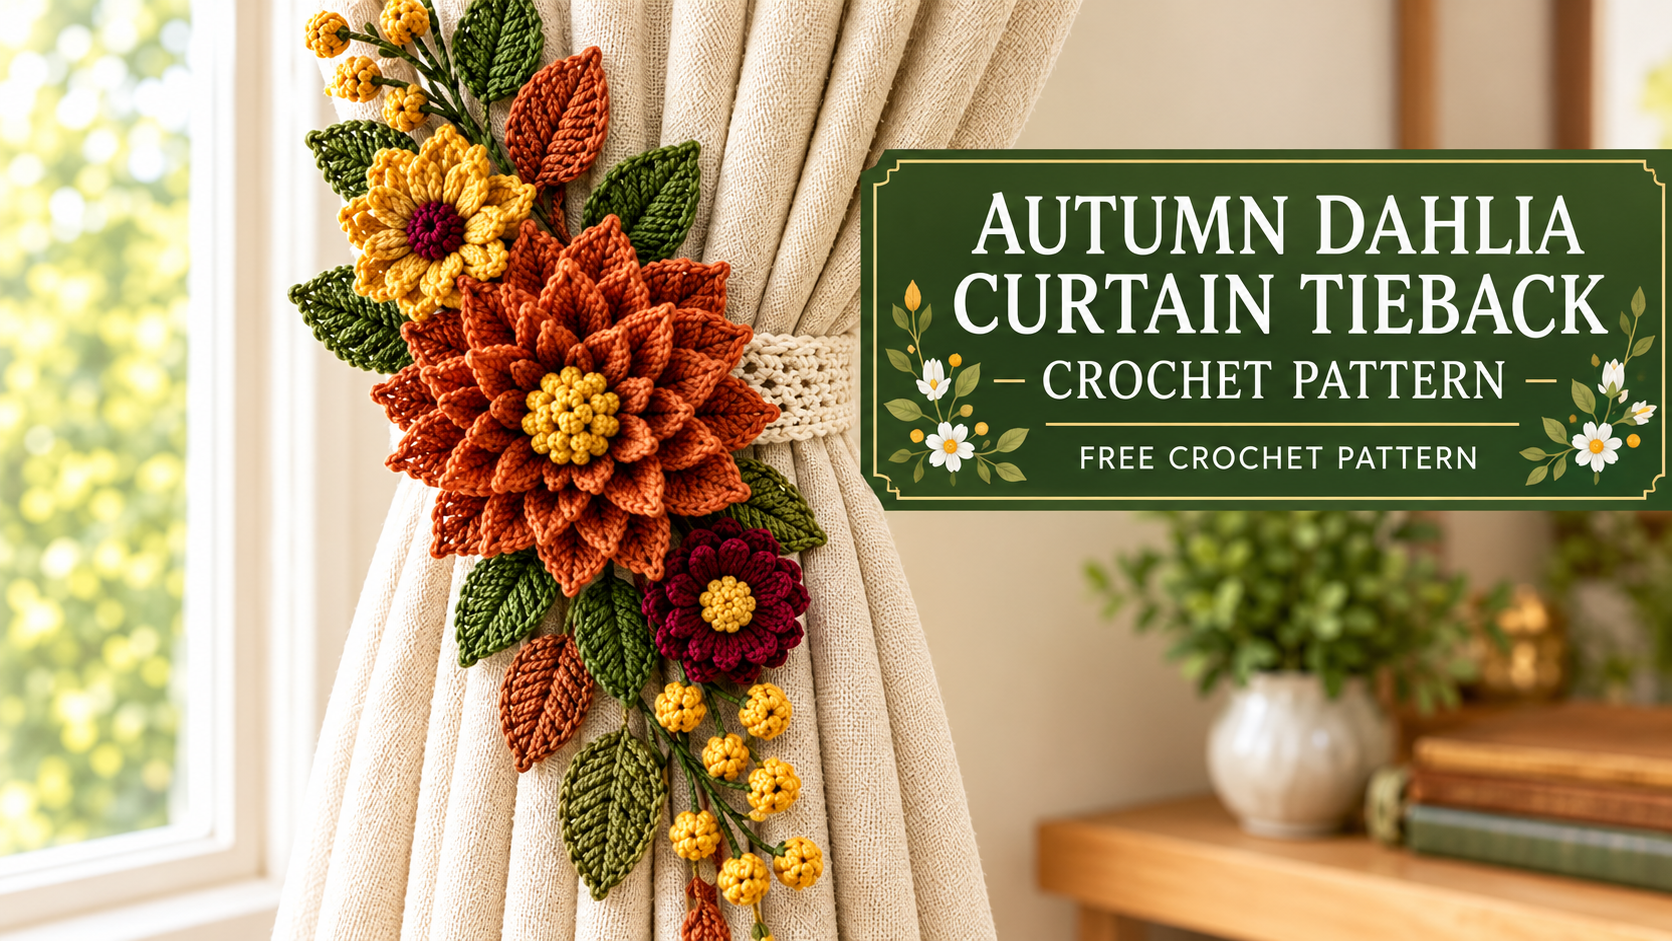
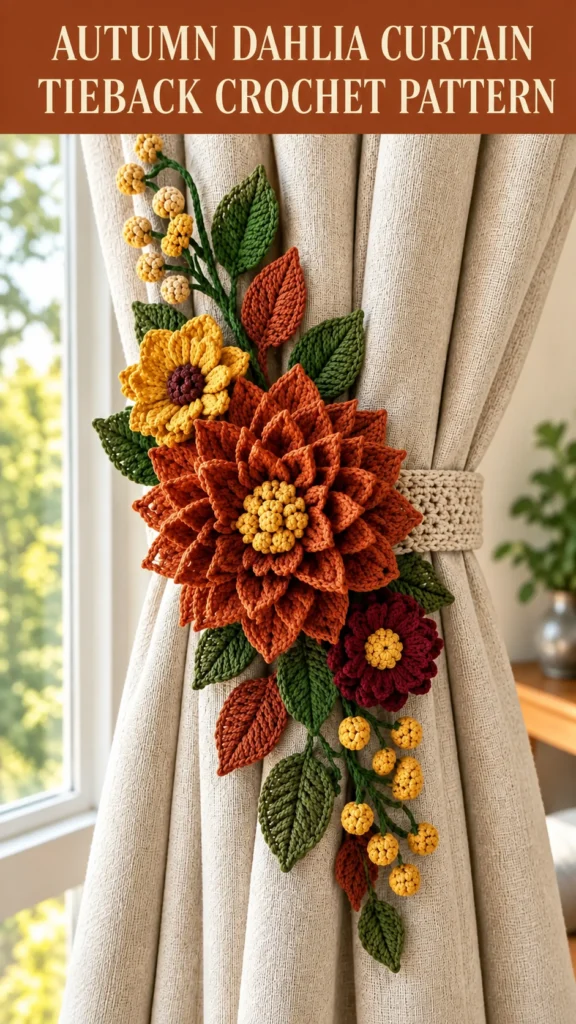
Give your curtains a little autumn makeover with a crochet tieback that looks like a tiny bouquet. This Autumn Dahlia Curtain Tieback combines a dimensional dahlia, warm seasonal flowers, leafy stems, and golden berries on a simple crochet band. The floral details look fancy, but you can build them one layer at a time without losing your sanity. Grab your hook, pick your favorite fall colors, and let’s make something seriously cozy.
Get the Ad-Free PDF Pattern
If you prefer working from a printed pattern instead of scrolling back and forth, you can turn this project into a handy reference sheet. Keep your hook, yarn, and pattern together, and you’ll spend more time crocheting and less time hunting for the next instruction.
This project works especially well when you want a decorative piece that feels handmade without requiring a huge time commitment. The original design uses a slim oatmeal-colored band and builds the floral decoration separately before you attach everything together.
What You’ll Be Making
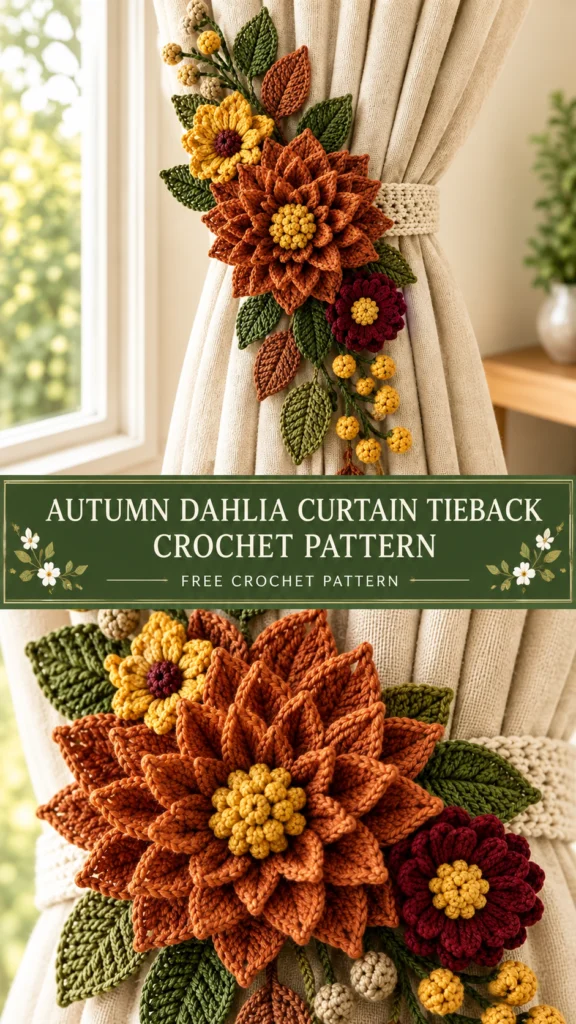
You’ll create a slim crochet curtain band decorated with a dramatic layered dahlia. Smaller mustard and wine-red flowers sit around the main bloom, while olive and muted-copper leaves fill the gaps. Tiny ochre berries add those little pops of texture that make the whole arrangement feel like an autumn bouquet.
The real magic comes from the layering. Instead of making one flat flower, you stack several petal rounds to create depth. That dimensional construction gives the dahlia its show-stopping look.
Skill Level
This pattern suits an intermediate crocheter. You’ll use familiar stitches, but the project also asks you to shape petals, build layers, make appliqué pieces, and assemble several small components.
Don’t let that label scare you, though. If you can comfortably work single crochet, half double crochet, double crochet, treble crochet, increases, chains, and slip stitches, you already have most of the toolkit.
The floral assembly takes more patience than the actual stitches. Lay your pieces out first, play around with the arrangement, and only then start sewing. Your future self will thank you.
Finished Measurements
The finished curtain band measures roughly 18 to 22 inches (46 to 56 cm), while the floral cluster measures about 7 to 9 inches (18 to 23 cm). The large dahlia reaches approximately 5 inches (13 cm) across.
Those measurements don’t need to become a crochet commandment. Curtains come in different thicknesses, so adjust the starting chain for the band until it wraps comfortably around your gathered curtain.
Materials You’ll Need
Yarn
Choose a medium-weight #4 worsted yarn with a matte finish. A matte yarn gives the flowers a softer, botanical appearance instead of making them look overly shiny.
- Rust orange: 80–100 yards for the large dahlia
- Mustard yellow: about 40 yards
- Wine red: about 35 yards
- Olive green: about 50 yards
- Muted copper: about 25 yards
- Ochre yellow: about 20 yards
- Oatmeal: about 80 yards for the curtain band
Feel free to raid your stash here. Autumn doesn’t follow a strict color chart, thankfully. Rust, burnt orange, mustard, deep plum, olive, cream, and brown can all work beautifully together.
Tools
- 3.5–4 mm crochet hook
- Yarn needle
- Scissors
- Stitch markers
- Optional fabric glue for temporary positioning
Gauge
You don’t need to obsess over gauge for this project. Firm, structured stitches matter more than an exact stitch count. The petals and leaves need enough structure to hold their shapes instead of flopping around like tired lettuce.
If your flower feels too soft or floppy, try a smaller hook. If your stitches feel extremely tight and make the petals curl aggressively, move up slightly.
Abbreviations
Here’s a quick reference before you start:
- ch: chain
- sl st: slip stitch
- sc: single crochet
- hdc: half double crochet
- dc: double crochet
- tr: treble crochet
- inc: increase
- st: stitch
- sp: space
- BO: fasten off
If one of these stitches still feels mysterious, practice it on a small scrap before starting the flowers. Five minutes of practice beats twenty minutes of unraveling.
Construction Overview
You’ll build the tieback in five broad stages:
- Crochet the oatmeal curtain band.
- Create the layered rust dahlia.
- Make the smaller supporting flowers.
- Crochet leaves, stems, and berries.
- Arrange and securely attach every piece.
That modular approach makes this project much easier to manage. Finish one component, set it aside, and move to the next. Before you know it, you’ll have a little pile of autumn crochet goodness waiting for assembly.
Part 1: Oatmeal Curtain Band
Start with the foundation. Using oatmeal yarn, chain 55, or make enough chains to comfortably wrap around your gathered curtain with a little overlap.
- Work single crochet into the second chain from the hook and continue across.
- Chain 1 and turn.
- Work single crochet across for rows 2 through 5.
- Add a neat slip-stitch border around the edges.
- Join the short ends with sewing, or create a button-loop closure if you want an easily removable tieback.
Test the band before you finish it. Wrap it around your curtain while it still sits on your hook or needle. If you need more room, add chains now rather than discovering the problem after you’ve attached an entire flower garden.
Part 2: Large Rust Dahlia Flower
Now we reach the star of the show. The dahlia gets its lush appearance from several petal layers that build outward from a textured center.
Center Bobble
Start with golden or mustard yarn and make a magic ring. Work 8 single crochet into the ring, then pull it closed.
For the raised center, create bobbles by working 5 double crochets together in selected stitches. Start each double crochet without completing it, then pull through the remaining loops together. You can also add a tiny amount of yarn scrap inside the center if you want extra dimension.
Inner Petal Layer
Attach rust yarn around the center. For each petal, work (sc, hdc, 3 dc, hdc, sc) into the same stitch. Repeat around the flower until you complete the first ring.
Keep these petals fairly compact. They should hug the center rather than spreading dramatically.
Middle Folded Petals
Attach the yarn behind the first petal layer. For each new petal, work ch 3, 3 dc, 1 tr, 3 dc, ch 3, sl st back to the base.
Shape each petal inward slightly as you work. That small adjustment creates the folded, pointed texture that makes a dahlia look so much fuller than a basic crochet flower.
Outer Dahlia Petals
Work another round behind the previous layer. Create longer pointed petals with (sc, hdc, dc, 2 tr, dc, hdc, sc).
Repeat around the flower, then gently curve the petals forward. Add a few discreet stitches underneath if you need to hold the shape.
FYI, your first dahlia may look slightly chaotic. That’s normal. Give the flower a gentle steam block later, shape the petals with your fingers, and watch it transform.
Part 3: Mustard Blossom
The mustard flower brings a cheerful contrast beside the large rust dahlia. Make a small center with a magic ring and a few single crochets.
For the petals, work (sc, 2 hdc, dc, 2 hdc, sc) around the center. Add a contrasting raised center with bobbles or a small circle of another color.
You don’t need this flower to compete with the dahlia. Keep it smaller and let it support the main bloom.
Part 4: Wine-Red Blossom
Repeat the mustard blossom in wine-red yarn, but make the petals slightly smaller. The darker color adds depth and stops the arrangement from looking too cheerful.
IMO, this is where autumn color palettes get fun. A little wine red can make rust orange and mustard look richer without overwhelming the whole piece.
Part 5: Leaves
Leaves give the flowers breathing room and help the whole arrangement resemble a natural bouquet.
- Chain 10.
- Work along one side with sc, hdc, dc, tr, dc, hdc, sc.
- Work around the tip.
- Continue down the opposite side using the same stitch sequence.
- Add a central slip-stitch vein for extra definition.
Make leaves in olive green and muted copper. Aim for at least 6 to 8 leaves so you have enough pieces to fill empty spaces during assembly.
Part 6: Curved Stems
Stems don’t need complicated stitches. Chain thin cords with green yarn and add occasional slip stitches for texture.
Before you sew them down, curve each stem naturally. Straight lines can make a handmade bouquet look stiff, while gentle bends create movement.
Part 7: Ochre Berries
These tiny berries add texture without stealing attention from the flowers. Make small puff-like balls with a magic ring, single crochets, increases, a few rounds, and decreases. Add a tiny amount of stuffing before closing if you want a rounder shape.
Make around 5 to 8 berries and attach them to the stems in little clusters. Uneven groupings usually look more natural than perfectly spaced berries.
Assembly
Now comes the satisfying part. Spread the band, flowers, leaves, stems, and berries across your work surface and experiment before you stitch anything permanently.
- Place the large dahlia slightly left of center.
- Position the mustard and wine-red flowers around it.
- Arrange the stems so they flow upward and downward.
- Tuck leaves between the flowers and along the stems.
- Add berry clusters wherever the arrangement needs small pops of color.
- Sew every component securely from the back.
- Hide the attachment stitches so the front looks clean.
Try temporary fabric glue if pieces keep sliding while you work. Use it only as a positioning aid, then rely on secure stitching for the final attachment.
Finishing
A little finishing work can turn a homemade-looking project into something polished.
- Steam the piece gently from a distance.
- Shape the petals with your fingers while the yarn feels warm and flexible.
- Let the tieback dry completely before placing it on your curtain.
- Check every attachment point and weave in any loose ends.
Never press a hot iron directly onto the crochet. Heat can flatten your carefully built texture in seconds.
Care Instructions
Give your finished tieback gentle treatment. Hand wash it in cool water when necessary, then lay it flat on a towel to dry.
Avoid high heat and prolonged direct sunlight. Strong heat can distort the fibers, while sunlight can gradually fade those gorgeous autumn colors.
Troubleshooting
My petals curl too much. What should I do?
Loosen your tension slightly or gently steam-block the flower. You can also reshape the petals with your fingers while the yarn remains warm.
My flowers look flat. How can I add more dimension?
Add another petal layer or lightly stuff the center. You can also stitch the lower parts of selected petals together to encourage them to fold forward.
My curtain band stretches. Is that normal?
A little stretch can happen with regular use. If the band feels too loose, sew matching thread along the inside length of the band to give it extra support.
Pattern Notes
The original pattern describes the design as a personal-use crochet pattern and asks makers not to resell, redistribute, or reproduce the pattern itself. It also notes that finished handmade items may be sold in small quantities with credit to the designer.
If you plan to publish your own version, always check the designer’s current permissions before copying instructions, photographs, or substantial pattern text.
You Might Also Like
- Monochrome Gray Drawstring Bucket Bag Free Crochet Pattern
- Sage Green Botanical Lace Bucket Bag Free Crochet Pattern
- Dusty Rose Romantic Crochet Bell Top Free Pattern
- Peach Blossom Diary Cover Free Crochet Pattern
- Lavender Dream Granny Square Tote Free Crochet Pattern
Final Thought
Look at that floral cluster! You started with a simple strip of yarn and ended up with a tiny autumn bouquet hanging beside your curtains.
That’s one of my favorite things about crochet home décor. You don’t need to replace an entire room to change its mood. Sometimes one handmade detail does the job.
Try experimenting with the arrangement, too. Move the dahlia farther to one side, swap the wine-red flower for deep plum, or add a few extra leaves. The best version will probably be the one that reflects your own stash and style.