


Peacock feathers do something no other motif manages — they look exotic, expensive, and slightly mystical all at once. The Peacock Feather Placemat captures that drama in cotton thread, one teardrop “eye” at a time. Fair warning: these are the placemats guests refuse to put plates on.
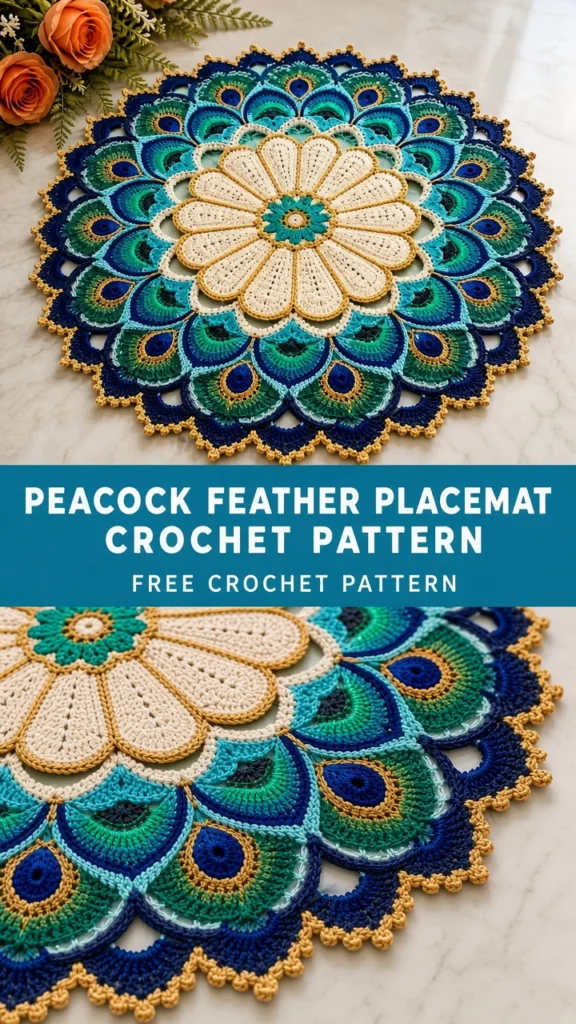
Why the Peacock Feather Placemat Steals Every Table
This pattern turns a practical table staple into a conversation piece. You’re not making another boring square mat — you’re making wearable art for your dining room.
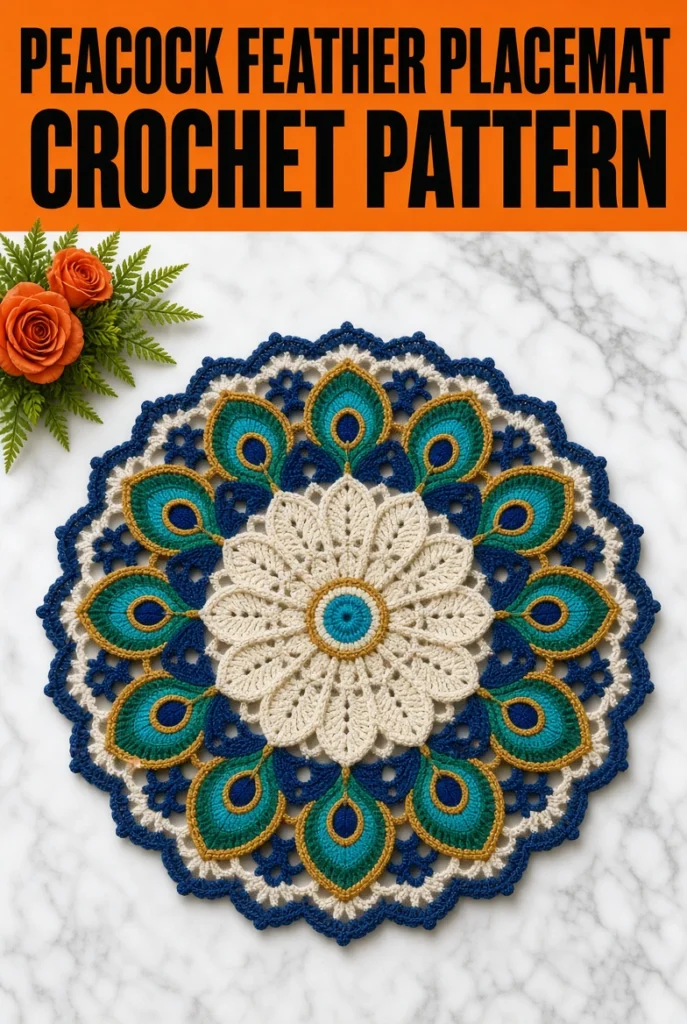
The feather motif draws from real peacock plumage. Each repeat builds a teardrop “eye” surrounded by fanning strands, and the layering creates genuine depth without any colorwork skills.
IMO, jewel tones belong here. Deep teal, emerald, sapphire, and violet make the pattern sing. Pastels? They wash out the drama that makes this design worth the effort.
The real question: do you make a set of four, or do you make one and hang it on the wall like a tapestry?
Choosing Thread That Does the Feather Justice
Lace patterns demand the right materials. Peacock feathers need crisp stitch definition or the whole motif turns to mush.
Best Fiber Options
- Size 3 cotton thread: The sweet spot for placemats — sturdy, defined, and pleasant on the hands.
- Mercerized cotton: Adds subtle sheen that mimics real feather iridescence.
- Size 10 crochet thread: For heirloom-quality mats, though your hands will feel it.
- Cotton-linen blends: Earthier texture with excellent body and durability.
Skip acrylic thread. Peacock feathers need structure, and acrylic goes limp the moment a warm plate touches it.
Hook Size and Tension
Pair size 3 thread with a D or E hook for placemats that lie flat and hold their shape. Go smaller and you’ll be crocheting until next spring.
Tension matters more here than in most patterns. Loose tension makes saggy feathers; tight tension makes curling mats. Aim for consistent, moderate tension.
Color Palettes That Actually Work
The signature peacock palette runs deep and rich. Try these combinations:
- Teal + emerald + gold: The classic peacock trio, dramatic and timeless.
- Sapphire + violet + silver: Cool, elegant, slightly icy.
- Emerald + navy + copper: Earthy with metallic warmth.
- Plum + teal + cream: Softer contrast, still striking.
Use one shade as the base and let the others form the feather eyes. The color changes create the iridescent effect without any complicated techniques.
Stitches and Techniques for Realistic Feathers
Here’s the good news: peacock feathers look complicated but use beginner-friendly stitches. The magic comes from how you arrange them.
- Chain (ch): Foundation and the gaps between feather strands.
- Slip stitch (sl st): Joining rounds and shaping the eye.
- Single crochet (sc): Dense base rounds that anchor everything.
- Double crochet (dc): The main feather strands.
- Treble crochet (tr): Tall strands that create the fan effect.
- Picot: Tiny bumps that mimic feather barbs along the edges.
If you can chain and double crochet, you can build this placemat. The feather motif repeats, so your hands learn the rhythm fast.
Step-by-Step: Crocheting the Peacock Feather Placemat
Step 1 — Establish the Center
Every peacock feather starts at the eye. Begin with a magic ring, or chain four and join with a slip stitch if magic rings annoy you.
Work six to eight single crochets into the ring, then join. This tiny circle becomes the heart of your first feather eye.
Pull the ring tight. Loose centers create visible holes that ruin the feather illusion immediately.
Step 2 — Build the Feather Eye
Round two expands the center into the signature teardrop shape. Work two double crochets into each stitch, then join with a slip stitch.
Round three introduces the color shift. Switch to your accent shade and work clusters of double crochets separated by chain spaces around the eye.
The eye should look like a rounded oval by the end of round three. If it looks lopsided, your increases ran uneven — frog back and recount.
Step 3 — Fan Out the Feather Strands
Here’s where the peacock magic happens. Each chain space from the previous round becomes the base for a fanning strand.
Work treble crochets into each space, varying the height slightly to create a natural fan. Chain one or two between strands to keep them separated.
The strands should radiate outward like a real feather. Count your chain spaces before you begin so you know exactly how many strands the round needs.
Step 4 — Layer the Feathers Around the Mat
Once your first feather eye is complete, you build outward. Each new round adds another layer of feathers, overlapping slightly for that dense plumage look.
Space the feather motifs evenly around the growing circle. A good rule: one feather eye every six to eight stitches along the perimeter.
Stagger the eyes between rounds. Aligned rows look mechanical; staggered rows look organic and alive.
Step 5 — Work the Outer Border
The final rounds create the placemat’s outer edge. Switch to a firm single crochet border to stop the lace from curling.
For a decorative finish, add a picot edge: single crochet, chain three, slip stitch into the same stitch, repeat around. The tiny bumps echo the feather barbs.
Weave in every end as you go. Peacock placemats have a lot of color changes, and a pile of loose ends will haunt you.
Step 6 — Block It Like You Mean It
Blocking separates homemade from heirloom. Pin the finished placemat to a blocking mat, stretching it into a perfect circle or oval.
Spritz with water or use a steamer, then let it dry completely. Cotton holds the blocked shape beautifully.
Make your full set and block them together. Consistent blocking makes mismatched tension disappear.
Customizing Shape, Size, and Style
Round Versus Oval
The round version works for square tables and casual settings. An oval version suits rectangular tables and feels slightly more formal.
For an oval, start with a foundation chain instead of a ring. Work the feather motifs along both sides and around the ends.
Sizing Up or Down
Adjust size by adding or removing feather rounds, not by changing your hook. The stitch multiple stays consistent.
Coasters use the first three rounds. Placemats use six to eight. A table runner? Work in a long oval and keep building.
Coordinating a Full Set
A matching set looks intentional and polished. Use the same base color across all mats and rotate which accent shade forms the feather eyes.
Teal base with gold eyes. Teal base with violet eyes. Same family, different personalities.
Troubleshooting Common Problems
The placemat ripples and won’t lie flat. Too many increases. Reduce the fanning strands per round or space the feather motifs farther apart.
The feather eyes look squished. Your stitch height varies. Practice the treble crochets on a swatch until they measure consistently.
The edges curl upward. Add a round of single crochet before the final border. Curling usually means the outer rounds lack density.
The colors bleed together at joins. Join new shades at the end of a round, never the middle. Clean joins create crisp color transitions.
The finished mat feels floppy. Your thread is too fine for the hook. Drop a hook size or switch to a heavier thread weight.
You Might Also Like
- Candy Stripe Snake Amigurumi Free Crochet Pattern
- Coral Citrus Lace Placemat Crochet Pattern
- Classic Cream Highland Cow Amigurumi Free Crochet Pattern
- Teal Fern Corset Top Crochet Pattern
- Cherry Blossom Spring Mermaid Free Crochet Pattern
FAQ’s
How long does one placemat take to make?
Plan on three to five hours per placemat once you learn the feather repeat. The first one takes longer while your hands figure out the rhythm.
Can I use regular yarn instead of crochet thread?
Yes, but size up your hook. Worsted weight with an H or I hook makes chunky, casual placemats. The feather detail softens but still reads clearly.
Is this pattern suitable for beginners?
Confident beginners handle this fine. You need solid chain, single crochet, double crochet, and treble crochet skills before tackling the feather motif.
Are these placemats machine washable?
Cotton thread survives gentle cold washing. Lay them flat to dry and re-block — the dryer will destroy the lace and shrink the mat.
How many placemats make a good set?
Four is standard, six is generous, eight covers a dinner party. Make them in batches so your tension stays consistent across the set.
How do I store crochet placemats without crushing them?
Roll them loosely or stack them flat. Never fold lace tightly — creases settle in and take forever to relax, even after blocking.
Placemats That Deserve a Standing Ovation
The Peacock Feather Placemat rewards every hour you put into it. It uses simple stitches, builds through easy repeats, and delivers a finished piece that looks like it belongs in a gallery.
Pick your jewel tones, block them properly, and stack them proudly. Then set the table and watch your guests hesitate to cover them with plates.
FYI, these make ridiculously good gifts. Just be prepared for everyone you know to request a set.


Leave a Reply
You must be logged in to post a comment.